Brake System Inspection - Drum Brake Assemblies
PROCEDURE
1. When inspecting the rear drum brake assemblies, make sure the parking brake is released, then tap the outside of the drum with a soft-faced hammer to loosen it.
2. Remove the brake drums.
3. Thoroughly clean the brake assemblies using a special cleaning solution.
Never blow brake dust off components with compressed air and never inhale it. Brake dust may contain asbestos, which is harmful to your health!

4. Measure the remaining thickness of the brake shoe friction linings (front and rear). Lining thickness is measured from the outer surface down to the metal backing plate (bonded linings) or down to the rivet heads (riveted linings). The minimum permissible value is 3 mm for bonded linings and 1.6 mm for riveted linings. Replace the shoes as a set if necessary. Shoes must also be replaced if cracks, glazed areas or brake fluid contamination are found on the linings.
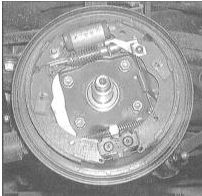
5. Make sure all brake assembly springs are correctly installed and in good condition.
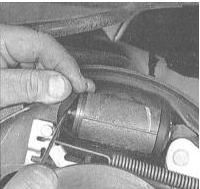
6. Check the assemblies for brake fluid leaks. Carefully lift the rubber boots off the wheel cylinder at the top of the shoes using a fingertip or a small screwdriver. Any sign of leakage at these points requires immediate repair of the wheel cylinder assembly (see Brakes chapter). Also check all brake hoses and their fittings for leaks.
7. Thoroughly wipe the inside surfaces of the drum with a clean rag soaked in methyl alcohol. Avoid inhaling asbestos-containing brake dust.
8. Inspect the friction surface of the drum for cracks, scoring, signs of overheating and other damage. If defects cannot be removed by polishing the surface with fine-grit sandpaper, have the drum machined at an automotive service shop.
9. Repeat the procedure for the components of the opposite brake assembly. Reinstall the drums, install the wheels and lower the vehicle to the ground.
Test yourself
A quick Honda Accord quiz: every answer comes with an explanation and a link to the manual page.