Inspection and Replacement of Spark Plug Wires, Distributor Cap and Rotor
(every 48,000 km [30,000 miles] or every 24 months)
PROCEDURE
1. Spark plug wire inspection must be performed each time the spark plugs are replaced.
2. The inspection begins with a visual check of the wire insulation with the engine running. Drive the vehicle into a dark area, start the engine and check for absence of sparking on the wires. Sparking indicates insulation breakdown. Avoid touching moving components in the engine compartment. Mark the defective wires for replacement, then allow the engine to cool and proceed to inspect the distributor cap and rotor.
3. Inspect the spark plug wires one at a time to avoid mixing up their firing order during installation. Manufacturer's wires usually have markings on the insulation. If there are none, mark them yourself using tape and a marker.
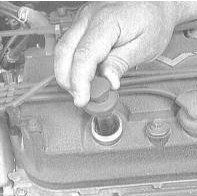
4. Disconnect the spark plug wire from the spark plug (preferably using a special tool). Never pull on the wire itself, only on its boot.
5. Inspect the inside of the boot. Corrosion usually appears as a brittle, crusty white deposit.
6. Push the boot back onto the spark plug terminal and make sure it is fully seated. If necessary, remove the boot again and bend the terminals inside the rubber cover.
7. Wipe the wire along its entire length with a clean rag, completely removing dirt and grease from the insulation. Inspect the insulation for cracks, burn marks and other damage. Avoid sharp bends in the wire to prevent damage to the conductor strands inside the insulation.
8. Disconnect the wire from the distributor (again, pull only on the boot, not the wire). Check the boot for signs of corrosion and check how tightly it fits on the terminal. Reconnect the wire to the distributor.
9. In the same manner, check the condition of all remaining spark plug wires in turn. Make sure they are securely connected to the spark plugs and distributor terminals.
10. If the spark plug wires need to be replaced, make sure the replacement wires match the specifications for your vehicle's engine. Ready-to-install spark plug wire sets, cut to length and fitted with boots, are available from Honda accessory dealers and service centers. Remove and replace the wires one at a time to avoid changing the firing order.
11. Remove the mounting screws and remove the distributor cap. Carefully inspect the cap both outside and inside for cracks, carbon tracks, burn marks, loose contacts and other damage.
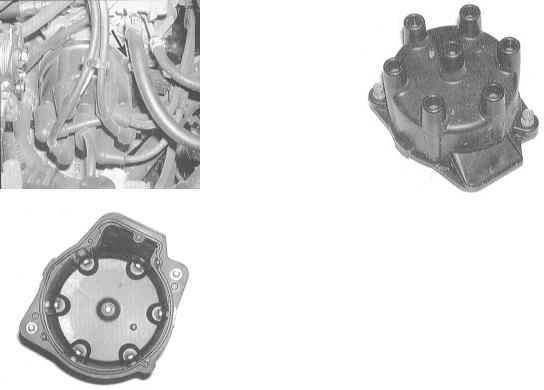
12. Loosen the mounting screw and remove the rotor from the distributor shaft. Inspect it for cracks and carbon tracks. Replace any defective components.
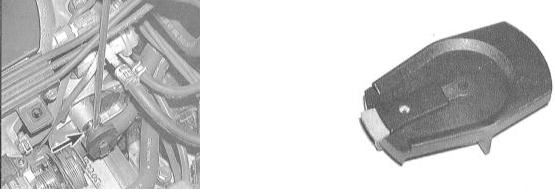
13. As good practice, replace the distributor cap and rotor regardless of their condition each time new spark plug wires are installed. If the old components are reused, thoroughly clean the contact surfaces of their terminals and measure the resistance of the wires and cap (see Specifications at the beginning of this Section).
14. When installing a new distributor cap, transfer the spark plug wires from the old cap, connecting them strictly in their original order. Avoid disconnecting all wires at once; transfer them one at a time.
The firing order is given in the Specifications at the beginning of this Section. On most models, the tower for the No. 1 cylinder spark plug wire on the distributor cap is marked accordingly.
Test yourself
A quick Honda Accord quiz: every answer comes with an explanation and a link to the manual page.