What to do after the tire has been sealed. Removing the sealant container from the kit. Installing the sealant container on the kit
After the tire on the Ford Mustang has been successfully sealed, the sealant container must be replaced. This section describes the exact procedure for safely removing the old container and correctly installing a new one. It also explains environmentally correct disposal, particularly when residual liquid remains in the container.
What to do after the tire has been sealed
After using the kit to seal your tire, you must replace the sealant container. You can obtain sealant containers and replacement parts from a Ford dealer. Empty sealant containers can be disposed of with household waste. However, containers that still contain liquid sealant must be disposed of through your Ford dealer or local tire dealer, or in accordance with local waste disposal regulations.
Note: After applying sealant, the maximum permitted vehicle speed is 80 km/h and the maximum distance that can be driven is 200 km. You must have the sealed tire checked immediately.
You can check the tire pressure at any time within the 200 km by carrying out the steps listed earlier in the procedure "Second Step: Checking the Tire Pressure".
Removing the sealant container from the kit
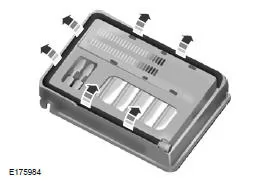
1. Unpack the dual-purpose hose (black tube) located on the compressor housing.
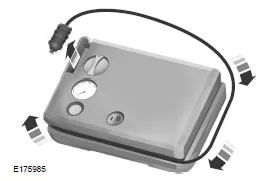
2. Unpack the power cable.
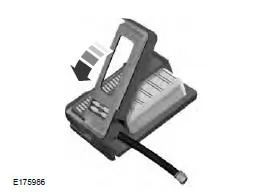
3. Remove the rear cover.
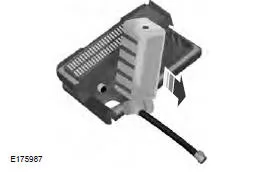
4. Turn the sealant container 90 degrees upward and pull it off the housing to remove it.
Installing the sealant container on the kit
- Hold the container perpendicular to the housing, insert the container nozzle into the connection, and press the container firmly until it is seated correctly.
- Turn the container 90 degrees downward into the housing.
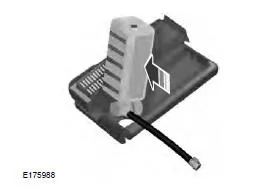
3. Refit the rear cover so that it snaps into place.
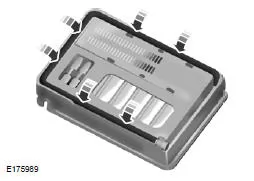
4. Wrap the dual-purpose hose (black tube) around the connector at the bottom of the housing.
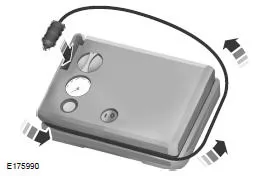
5. Wrap the power cable around the housing and store the accessory power plug in its storage compartment.
Note: If you have problems removing or installing the sealant container, contact a Ford dealer.
Always check the expiry date of the sealant regularly.
The expiry date is printed on a label on the sealant container, which you can see through the rectangular viewing window at the bottom of the kit. Replace the container if it has not been used for four years.
The instructions for replacing the sealant container on the Ford Mustang (VI Gen, 2014–2023) help the driver maintain the tire repair kit correctly. The 2014–2023 Ford Mustang provides clear guidance on safely removing and installing the container to ensure the kit is ready for use in an emergency.
Particular emphasis is placed on the proper disposal of empty or expired sealant containers and on the importance of checking the expiry date regularly. The Ford Mustang VI Generation reflects high standards of safety, environmental responsibility and engineering.
Frequently Asked Questions
How often should the sealant expiry date be checked?
The expiry date should be checked at least once a year or before long journeys.
May a partially filled sealant container be disposed of with household waste?
No. It must be disposed of through a dealer or in accordance with local regulations.
Test yourself
A quick Ford Mustang quiz: every answer comes with an explanation and a link to the manual page.