Ambient Temperature Sensor(for 2gr-fks)
Components
COMPONENTS
ILLUSTRATION
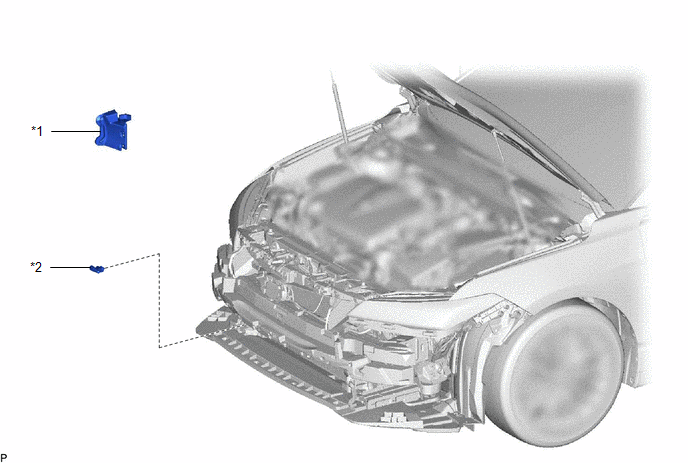
*1 |
FRONT RADIATOR SIDE AIR GUIDE PLATE RH |
*2 |
THERMISTOR ASSEMBLY |
Inspection
INSPECTION
PROCEDURE
1. INSPECT THERMISTOR ASSEMBLY
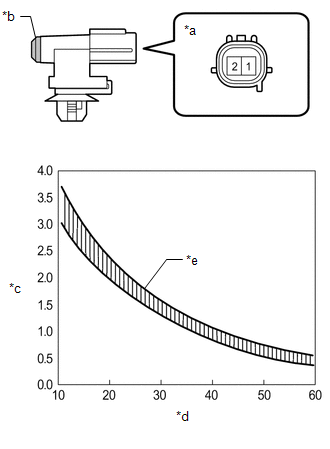
(a) Measure the resistance according to the value(s) in the table below. Standard Resistance:
NOTICE:
HINT: As the temperature increases, the resistance decreases (see the graph). If the result is not as specified, replace the thermistor assembly. |
|
Installation
INSTALLATION
PROCEDURE
1. INSTALL THERMISTOR ASSEMBLY
(a) Connect the connector.
(b) Engage the clamp to install the thermistor assembly.
2. INSTALL FRONT RADIATOR SIDE AIR GUIDE PLATE RH
(a) Engage the 2 claws to install the front radiator side air guide plate RH.
3. INSTALL FRONT BUMPER ASSEMBLY
Click here 
Removal
REMOVAL
The necessary procedures (adjustment, calibration, initialization, or registration) that must be performed after parts are removed and installed, or replaced during thermistor assembly removal/installation are shown below.
Necessary Procedure After Parts Removed/Installed/ReplacedReplaced Part or Performed Procedure | Necessary Procedure | Effect/Inoperative Function when Necessary Procedure not Performed | Link |
|---|---|---|---|
| *: Applies only for when removing and installing or replacing the television camera assembly. | |||
Front television camera assembly, front bumper assembly or radiator grille |
|
Panoramic View Monitor System |
|
Front bumper assembly |
|
|
 |
PROCEDURE
1. REMOVE FRONT BUMPER ASSEMBLY
Click here
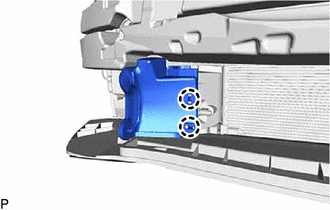
2. REMOVE FRONT RADIATOR SIDE AIR GUIDE PLATE RH
(a) Disengage the 2 claws to remove the front radiator side air guide plate RH. |
 |
3. REMOVE THERMISTOR ASSEMBLY
(a) Disengage the clamp. |
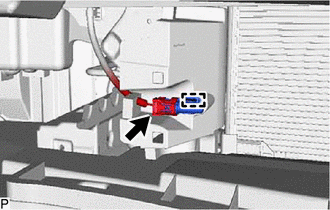 |
(b) Disconnect the connector to remove the thermistor assembly.