Occupant Classification Ecu
Components
COMPONENTS
ILLUSTRATION
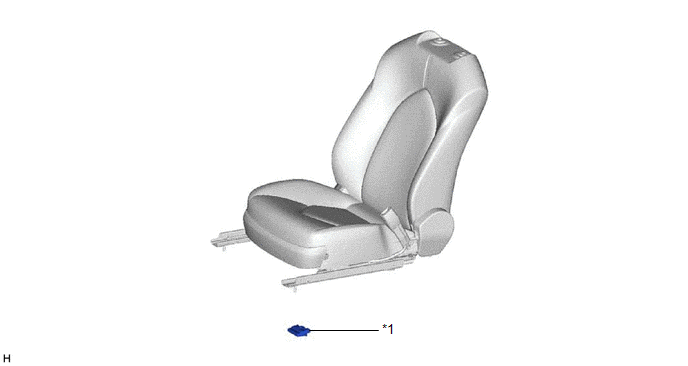
*1 |
OCCUPANT DETECTION ECU |
- |
- |
Installation
INSTALLATION
PROCEDURE
1. INSTALL OCCUPANT DETECTION ECU
(a) Engage the claw to install the occupant detection ECU. NOTICE: If the occupant detection ECU has been dropped, or there are any cracks, dents or other defects in the case or connector, replace the occupant detection ECU with a new one. |
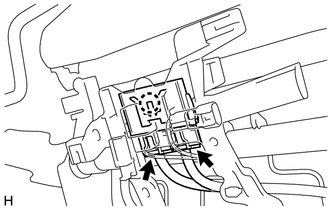 |
(b) Connect the 2 connectors.
NOTICE:
When installing the occupant detection ECU, be careful that the SRS wiring does not interfere with or is not pinched between other parts.
2. INSTALL FRONT SEAT ASSEMBLY RH
HINT:
Use the same procedure as for the LH side.
Click here 
3. PERFORM DIAGNOSTIC SYSTEM CHECK
for Gasoline Model: Click here
for HV Model: Click here
4. PERFORM ZERO POINT CALIBRATION AND SENSITIVITY CHECK
for Gasoline Model: Click here
for HV Model: Click here
On-vehicle Inspection
ON-VEHICLE INSPECTION
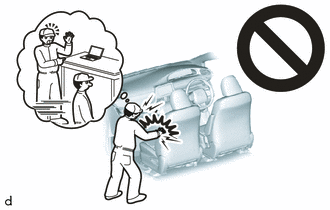
CAUTION:
Be sure to correctly follow the removal and installation procedures for the occupant detection ECU.
PROCEDURE
1. INSPECT OCCUPANT DETECTION ECU (for Vehicle not Involved in Collision)
(a) Perform a diagnostic system check.
for Gasoline Model: Click here 
for HV Model: Click here
2. INSPECT OCCUPANT DETECTION ECU (for Vehicle Involved in Collision)
(a) Perform a diagnostic system check.
for Gasoline Model: Click here
for HV Model: Click here
(b) Visually check for defects with the occupant detection ECU.
HINT:
The defects are as follows:
- Cracks in the ECU housing
- Dents in the ECU housing
- Chips in the ECU housing
- Cracks or other damage to the connector
- Damage to the serial number
OK:
No defects are found.
If any defects are found, replace the occupant detection ECU with a new one.
Removal
REMOVAL
The necessary procedures (adjustment, calibration, initialization or registration) that must be performed after parts are removed and installed, or replaced during occupant detection ECU removal/installation are shown below.
Necessary Procedures After Parts Removed/Installed/Replaced (for Gasoline Model)Replaced Part or Performed Procedure | Necessary Procedure | Effect/Inoperative Function when Necessary Procedure not Performed | Link |
|---|---|---|---|
| *: When performing learning using the Techstream. Click here |
|||
|
Zero point calibration (Occupant Classification System) |
|
 |
Disconnect cable from negative auxiliary battery terminal |
Perform steering sensor zero point calibration |
Lane Departure Alert System (w/ Steering Control) |
|
Pre-collision System |
|||
Intelligent Clearance Sonar System* |
|||
Lighting System (for Gasoline Model with Cornering Light) |
|||
Memorize steering angle neutral point |
Parking Assist Monitor System |
|
|
Panoramic View Monitor System |
|
||
Replaced Part or Performed Procedure | Necessary Procedure | Effect/Inoperative Function when Necessary Procedure not Performed | Link |
|---|---|---|---|
| *: When performing learning using the Techstream. Click here |
|||
|
Zero point calibration (Occupant classification system) |
|
|
Disconnect cable from negative auxiliary battery terminal |
Perform steering sensor zero point calibration |
Lane Departure Alert System (w/ Steering Control) |
|
Pre-collision System |
|||
Intelligent Clearance Sonar System* |
|||
Lighting System (for HV Model with Cornering Light) |
|||
Memorize steering angle neutral point |
Parking Assist Monitor System |
|
|
Panoramic View Monitor System |
|
||
PROCEDURE
1. REMOVE FRONT SEAT ASSEMBLY RH
HINT:
Use the same procedure as for the LH side.
Click here
2. REMOVE OCCUPANT DETECTION ECU
(a) Disconnect the 2 connectors. |
|
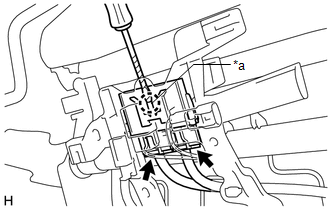
(b) Using a screwdriver with its tip wrapped with protective tape, disengage the claw and remove the occupant detection ECU.