Security Horn Assembly
Components
COMPONENTS
ILLUSTRATION
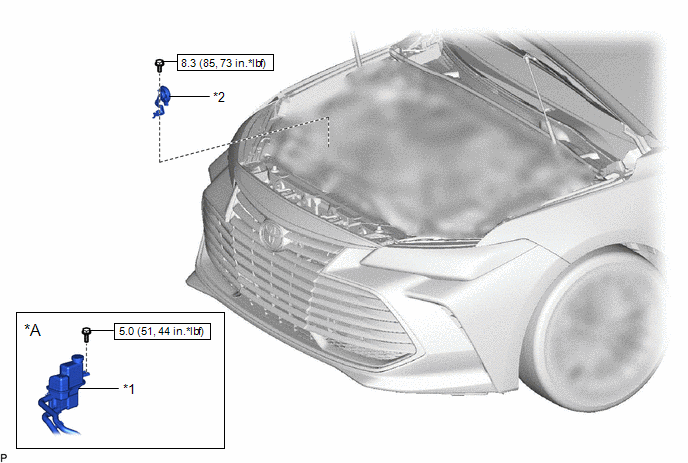
*A |
for HV Model |
- |
- |
*1 |
INVERTER RESERVE TANK SUB-ASSEMBLY |
*2 |
SECURITY HORN ASSEMBLY |
 |
N*m (kgf*cm, ft.*lbf): Specified torque |
- |
- |
Inspection
INSPECTION
PROCEDURE
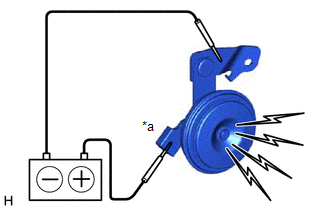
1. INSPECT SECURITY HORN ASSEMBLY
(a) Check the operation of the security horn assembly. OK:
If the result is not as specified, replace the security horn assembly. |
|
Installation
INSTALLATION
PROCEDURE
1. INSTALL SECURITY HORN ASSEMBLY
(a) Engage the 2 guides and install the security horn assembly with the bolt.
Torque:
8,3 N·m {85 kgf·cm, 73 in·lbf}
(b) Connect the connector.
(c) Engage the clamp.
2. INSTALL INVERTER RESERVE TANK SUB-ASSEMBLY (for HV Model)
(a) Engage the pin as shown in the illustration.
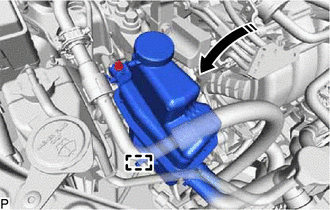
 |
Install in this Direction |
(b) Install the inverter reserve tank assembly with the bolt.
Torque:
5 N·m {51 kgf·cm, 44 in·lbf}
Removal
REMOVAL
PROCEDURE
1. SEPARATE INVERTER RESERVE TANK SUB-ASSEMBLY (for HV Model)
(a) Remove the bolt. |
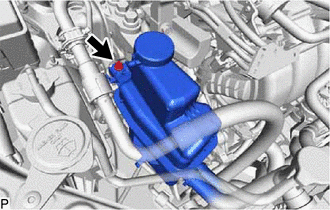 |
(b) Disengage the pin to separate the inverter reserve tank assembly from the engine mounting insulator sub-assembly RH as shown in the illustration.
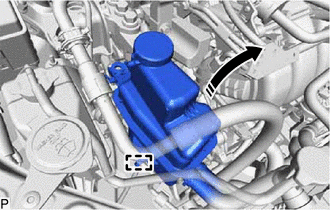
 |
Disconnect in this Direction |
NOTICE:
- Use wire or an equivalent tool to hang the inverter reserve tank assembly.
2. REMOVE SECURITY HORN ASSEMBLY
(a) Disengage the clamp. |
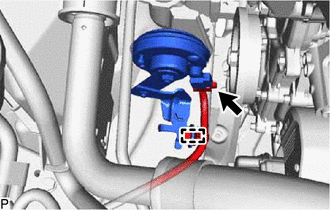 |
(b) Disconnect the connector.
(c) Remove the bolt. |
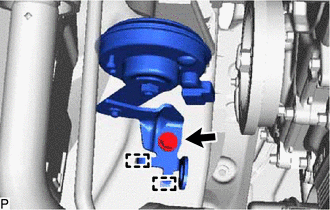 |
(d) Disengage the 2 guides to remove the security horn assembly.