Side Airbag Sensor(for Center Pillar)
Components
COMPONENTS
ILLUSTRATION
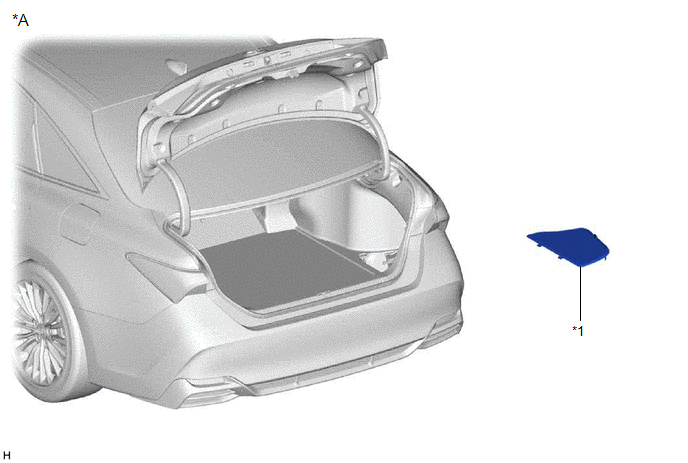
*A |
for HV Model |
- |
- |
*1 |
LUGGAGE TRIM SERVICE HOLE COVER |
- |
- |
ILLUSTRATION
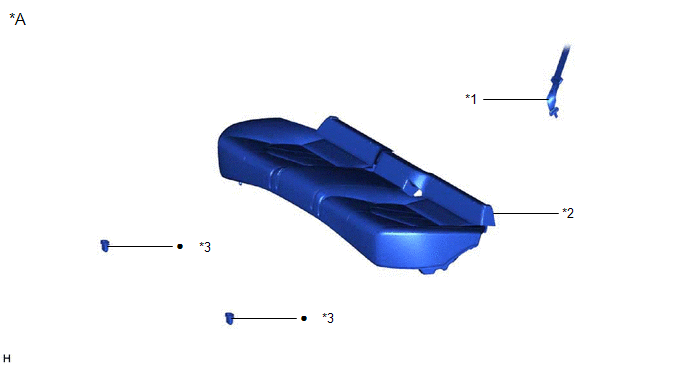
*A |
for Gasoline Model |
- |
- |
*1 |
REAR CENTER SEAT OUTER BELT ASSEMBLY |
*2 |
REAR SEAT CUSHION ASSEMBLY |
*3 |
REAR SEAT CUSHION LOCK HOOK |
- |
- |
● |
Non-reusable part |
- |
- |
ILLUSTRATION
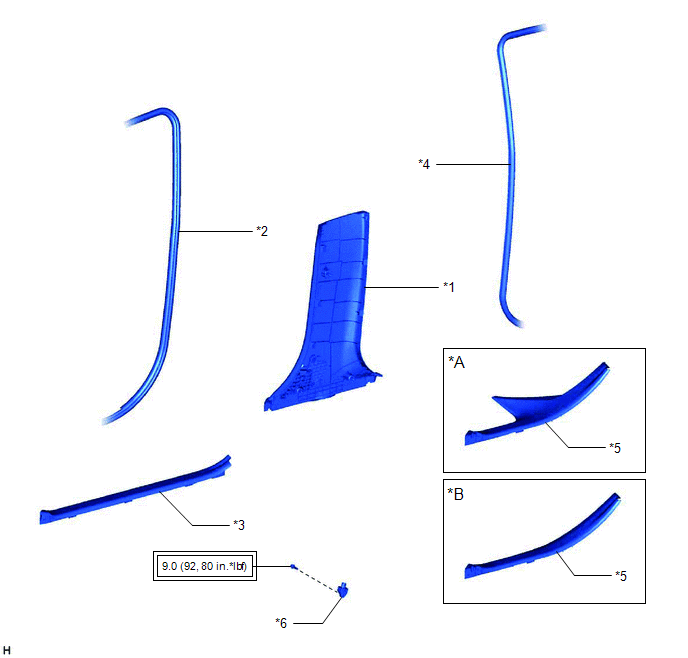
*A |
for Gasoline Model |
*B |
for HV Model |
*1 |
CENTER PILLAR LOWER GARNISH |
*2 |
FRONT DOOR OPENING TRIM WEATHERSTRIP |
*3 |
FRONT DOOR SCUFF PLATE |
*4 |
REAR DOOR OPENING TRIM WEATHERSTRIP |
*5 |
REAR DOOR SCUFF PLATE |
*6 |
SIDE NO. 1 AIRBAG SENSOR |
 |
Tightening torque for "Major areas involving basic vehicle performance such as moving/turning/stopping": N*m (kgf*cm, ft.*lbf) |
- |
- |
Installation
INSTALLATION
HINT:
- Use the same procedure for the RH side and LH side.
- The following procedure is for the LH side.
PROCEDURE
1. INSTALL SIDE NO. 1 AIRBAG SENSOR
(a) Check that the engine switch (for Gasoline Model) or power switch (for HV Model) is off.
(b) Check that the cable is disconnected from the negative (-) auxiliary battery terminal.
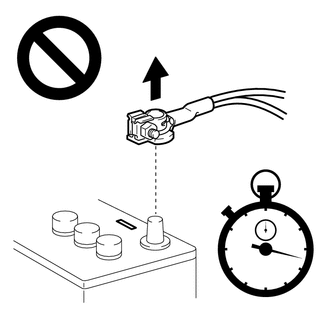
CAUTION:
Wait at least 90 seconds after disconnecting the cable from the negative (-) auxiliary battery terminal to disable the SRS system.
(c) Before connecting the connector, check that the position of the white housing lock is as shown in the illustration.
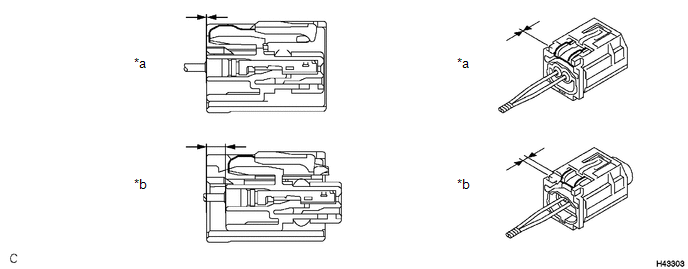
*a |
Incorrect |
*b |
Correct |
(d) Engage the claw and install the side No. 1 airbag sensor with the bolt.
Torque:
9 N·m {92 kgf·cm, 80 in·lbf}
NOTICE:
- If the side No. 1 airbag sensor has been dropped, or there are any cracks, dents or other defects in the case or connector, replace it with a new one.
- When installing the side No. 1 airbag sensor, make sure that the wire harness does not interfere with other parts and is not pinched.
- Make sure that the side No. 1 airbag sensor claw is securely inserted into the body hole.
(e) Connect the connector to the side No. 1 airbag sensor.
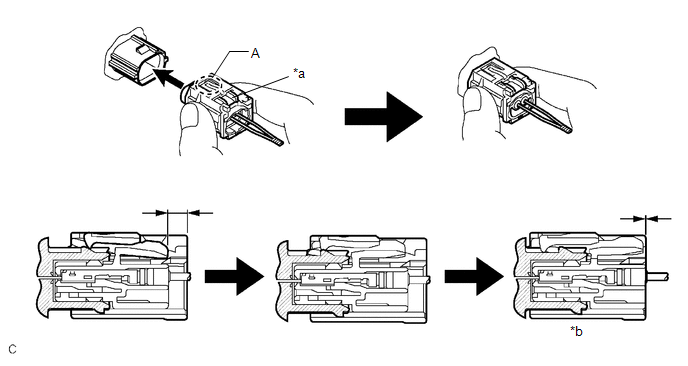
*a |
White Housing Lock |
*b |
Connection is completed |
NOTICE:
When connecting any airbag connector, take care not to damage the airbag wire harness.
HINT:
- Be sure to connect the connector until it is locked (when locking, make sure that a click sound can be heard).
- When the connector is locked, the white housing lock will slide. Do not hold the white housing lock or the part (A) as it may result in an insecure connection.
(f) Check that there is no looseness in the installed parts of the side No. 1 airbag sensor.
2. INSTALL CENTER PILLAR LOWER GARNISH
Click here 
3. CONNECT REAR DOOR OPENING TRIM WEATHERSTRIP
4. INSTALL REAR DOOR SCUFF PLATE (for Gasoline Model)
Click here
5. INSTALL REAR DOOR SCUFF PLATE (for HV Model)
Click here
6. CONNECT FRONT DOOR OPENING TRIM WEATHERSTRIP
7. INSTALL FRONT DOOR SCUFF PLATE
Click here
8. INSTALL REAR SEAT CUSHION LOCK HOOK (for Gasoline Model)
Click here
9. INSTALL REAR SEAT CUSHION ASSEMBLY (for Gasoline Model)
Click here
10. CONNECT REAR CENTER SEAT OUTER BELT ASSEMBLY (for Gasoline Model)
Click here
11. CONNECT CABLE TO NEGATIVE AUXILIARY BATTERY TERMINAL
for Gasoline Model: Click here
for HV Model: Click here
NOTICE:
When disconnecting the cable, some systems need to be initialized after the cable is reconnected.
Click here
12. INSTALL LUGGAGE TRIM SERVICE HOLE COVER (for HV Model)
Click here
13. PERFORM DIAGNOSTIC SYSTEM CHECK
for Gasoline Model: Click here
for HV Model: Click here
14. INSPECT SRS WARNING LIGHT
for Gasoline Model: Click here
for HV Model: Click here
On-vehicle Inspection
ON-VEHICLE INSPECTION
CAUTION:
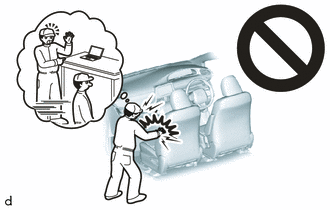
Be sure to correctly follow the removal and installation procedures for the side No. 1 airbag sensors.
PROCEDURE
1. INSPECT SIDE NO. 1 AIRBAG SENSOR (for Vehicle not Involved in Collision)
(a) Perform a diagnostic system check.
for Gasoline Model: Click here 
for HV Model: Click here
2. INSPECT SIDE NO. 1 AIRBAG SENSOR (for Vehicle Involved in Collision and Airbag not Deployed)
(a) Perform a diagnostic system check.
for Gasoline Model: Click here
for HV Model: Click here
(b) Visually check the side No. 1 airbag sensors for defects if a center pillar of the vehicle or the area around a center pillar is damaged.
HINT:
The defects are as follows:
- Cracks in the sensor housing
- Dents in the sensor housing
- Chips in the sensor housing
- Cracks or other damage to the connector
- Damage to the serial number
OK:
No defects are found.
If any defects are found, replace the side No. 1 airbag sensor with a new one.
3. INSPECT SIDE NO. 1 AIRBAG SENSOR (for Vehicle Involved in Collision and Airbag is Deployed)
(a) When airbags have deployed as the result of a collision, be sure to replace all side No. 1 airbag sensors in the damaged areas (anywhere in need of repair).
(b) Visually check the side No. 1 airbag sensors in undamaged areas for defects.
HINT:
The defects are as follows:
- Cracks in the sensor housing
- Dents in the sensor housing
- Chips in the sensor housing
- Cracks or other damage to the connector
- Damage to the serial number
OK:
No defects are found.
If any defects are found or a side No. 1 airbag sensor has detected a major collision, replace the side No. 1 airbag sensor with a new one.
Removal
REMOVAL
The necessary procedures (adjustment, calibration, initialization or registration) that must be performed after parts are removed and installed, or replaced during side No. 1 airbag sensor removal/installation are shown below.
Necessary Procedures After Parts Removed/Installed/Replaced (for Gasoline Model)Replaced Part or Performed Procedure | Necessary Procedure | Effect/Inoperative Function when Necessary Procedure not Performed | Link |
|---|---|---|---|
| *: When performing learning using the Techstream. Click here |
|||
Disconnect cable from negative auxiliary battery terminal |
Perform steering sensor zero point calibration |
Lane Departure Alert System (w/ Steering Control) |
 |
Pre-collision System |
|||
Intelligent Clearance Sonar System* |
|||
Lighting System (for Gasoline Model with Cornering Light) |
|||
Memorize steering angle neutral point |
Parking Assist Monitor System |
|
|
Panoramic View Monitor System |
|
||
Replaced Part or Performed Procedure | Necessary Procedure | Effect/Inoperative Function when Necessary Procedure not Performed | Link |
|---|---|---|---|
| *: When performing learning using the Techstream. Click here |
|||
Disconnect cable from negative auxiliary battery terminal |
Perform steering sensor zero point calibration |
Lane Departure Alert System (w/ Steering Control) |
|
Pre-collision System |
|||
Intelligent Clearance Sonar System* |
|||
Lighting System (for HV Model with Cornering Light) |
|||
Memorize steering angle neutral point |
Parking Assist Monitor System |
|
|
Panoramic View Monitor System |
|
||
HINT:
- Use the same procedure for the RH side and LH side.
- The following procedure is for the LH side.
PROCEDURE
1. PRECAUTION
CAUTION:
Be sure to read Precaution thoroughly before servicing.
for Gasoline Model: Click here
for HV Model: Click here
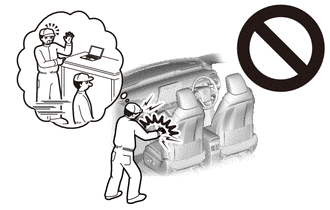
NOTICE:
After turning the engine switch (for Gasoline Model) or power switch (for HV Model) off, waiting time may be required before disconnecting the cable from the negative (-) auxiliary battery terminal. Therefore, make sure to read the disconnecting the cable from the negative (-) auxiliary battery terminal notices before proceeding with work.
Click here
2. REMOVE LUGGAGE TRIM SERVICE HOLE COVER (for HV Model)
Click here
3. DISCONNECT CABLE FROM NEGATIVE AUXILIARY BATTERY TERMINAL
for Gasoline Model: Click here
for HV Model: Click here
CAUTION:
Wait at least 90 seconds after disconnecting the cable from the negative (-) auxiliary battery terminal to disable the SRS system.
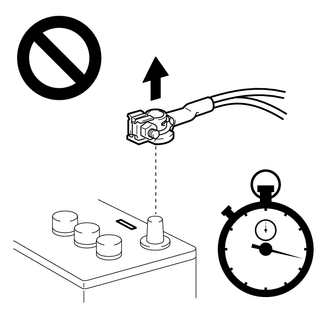
NOTICE:
When disconnecting the cable, some systems need to be initialized after the cable is reconnected.
Click here
4. DISCONNECT REAR CENTER SEAT OUTER BELT ASSEMBLY (for Gasoline Model)
Click here
5. REMOVE REAR SEAT CUSHION ASSEMBLY (for Gasoline Model)
Click here
6. REMOVE REAR SEAT CUSHION LOCK HOOK (for Gasoline Model)
Click here
7. REMOVE FRONT DOOR SCUFF PLATE
Click here
8. DISCONNECT FRONT DOOR OPENING TRIM WEATHERSTRIP
HINT:
Disconnect the front door opening trim weatherstrip to the extent that allows the removal of the center pillar lower garnish.
9. REMOVE REAR DOOR SCUFF PLATE (for Gasoline Model)
Click here
10. REMOVE REAR DOOR SCUFF PLATE (for HV Model)
Click here
11. DISCONNECT REAR DOOR OPENING TRIM WEATHERSTRIP
HINT:
Disconnect the rear door opening trim weatherstrip to the extent that allows the removal of the center pillar lower garnish.
12. REMOVE CENTER PILLAR LOWER GARNISH
Click here
13. REMOVE SIDE NO. 1 AIRBAG SENSOR
(a) Check that the engine switch (for Gasoline Model) or power switch (for HV Model) is off.
(b) Check that the cable is disconnected from the negative (-) auxiliary battery terminal.
CAUTION:
Wait at least 90 seconds after disconnecting the cable from the negative (-) auxiliary battery terminal to disable the SRS system.
(c) Disconnect the connector from the side No. 1 airbag sensor.
NOTICE:
When disconnecting any airbag connector, take care not to damage the airbag wire harness.
(1) Push down the white housing lock and slide the yellow CPA. (At this time, the connector cannot be disconnected yet.)
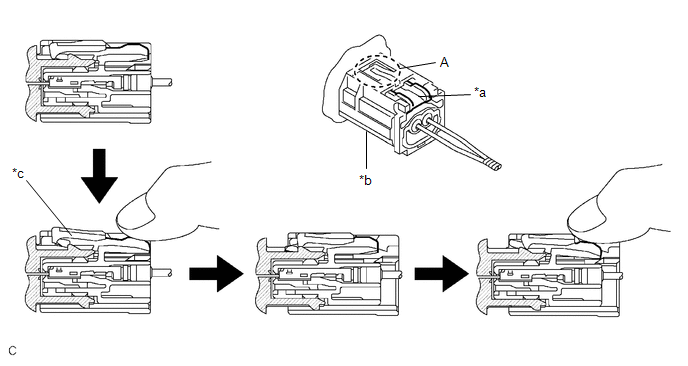
*a |
White Housing Lock |
*b |
Yellow CPA |
*c |
Connector lock is released |
- |
- |
(2) Push down the white housing lock again and disconnect the connector.
NOTICE:
Do not push down the part (A) shown in the illustration when disconnecting the connector.
(d) Remove the bolt and disengage the claw to remove the side No. 1 airbag sensor. |
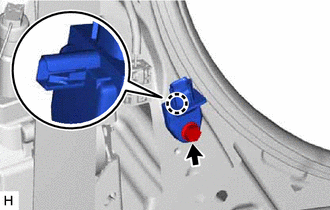 |
(e) Check that the position of the white housing lock is as shown in the illustration.
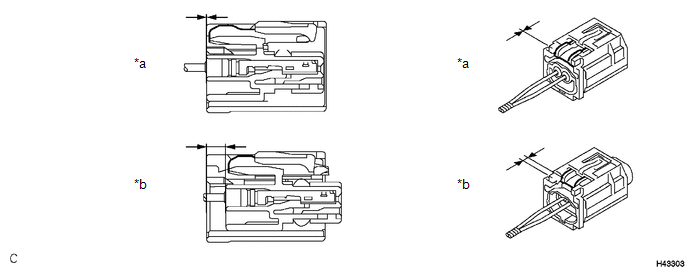
*a |
Incorrect |
*b |
Correct |