Steering Pad
Components
COMPONENTS
ILLUSTRATION
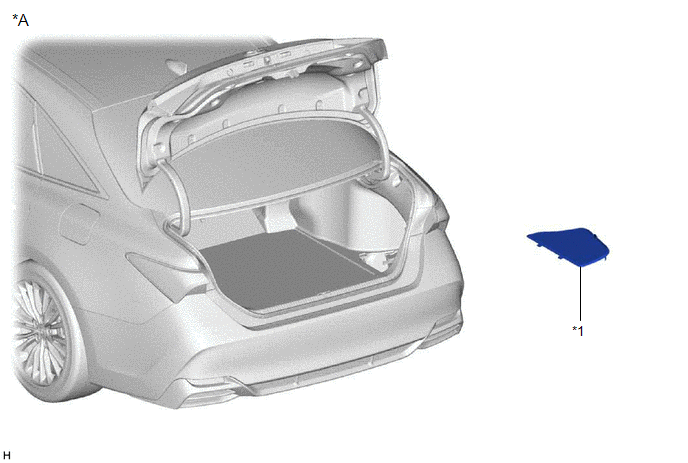
*A |
for HV Model |
- |
- |
*1 |
LUGGAGE TRIM SERVICE HOLE COVER |
- |
- |
ILLUSTRATION
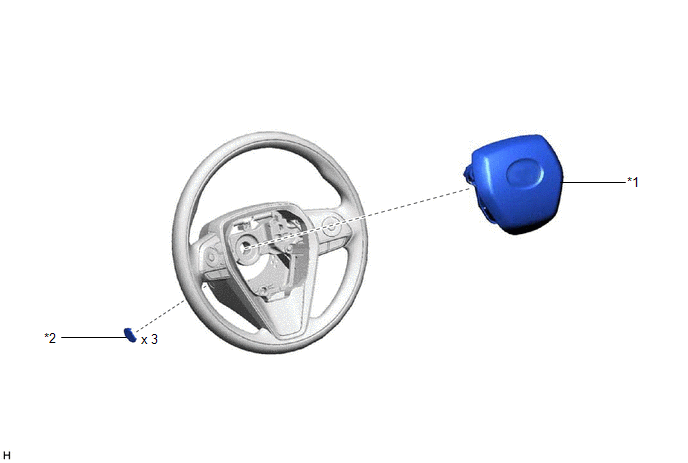
*1 |
HORN BUTTON ASSEMBLY |
*2 |
LOWER NO. 2 STEERING WHEEL COVER |
Installation
INSTALLATION
PROCEDURE
1. INSTALL HORN BUTTON ASSEMBLY
(a) Check that the engine switch (for Gasoline Model) or power switch (for HV Model) is off.
(b) Check that the cable is disconnected from the negative (-) auxiliary battery terminal.
CAUTION:
Wait at least 90 seconds after disconnecting the cable from the negative (-) auxiliary battery terminal to disable the SRS system.
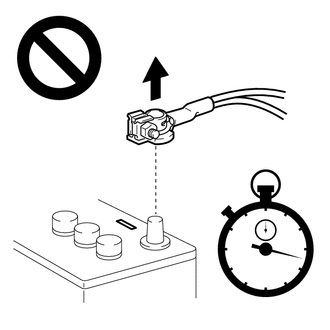
(c) When using a new spiral cable sub-assembly:
(1) Engage the wire harness clamp and disconnect the airbag connector as shown in the illustration.
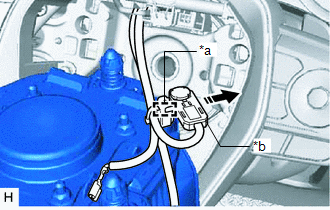
*a |
Wire Harness Clamp |
*b |
Airbag Connector |
 |
Remove in this Direction |
HINT:
Be sure to engage the wire harness clamp until it is locked.
(d) When reusing a spiral cable sub-assembly or spiral cable with sensor sub-assembly:
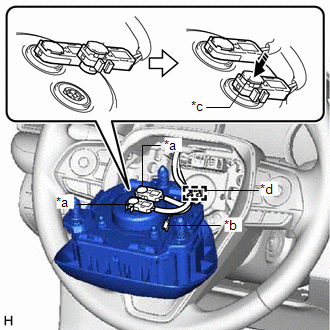
*a |
Airbag Connector |
*b |
Horn Connector |
*c |
Airbag Connector Locking Button |
*d |
Wire Harness Clamp |
|
Push in this Direction |
(1) Engage the wire harness clamp.
HINT:
Be sure to engage the wire harness clamp until it is locked.
(e) Connect the 2 airbag connectors to the horn button assembly.
NOTICE:
- When connecting any airbag connector, take care not to damage the airbag wire harness.
- Be sure to connect the connectors to each corresponding color.
(f) Push in the 2 airbag connector locking buttons as shown in the illustration to install the 2 airbag connectors.
(g) Connect the horn connector to the horn button assembly.
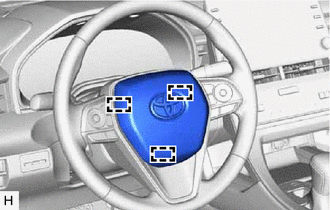
(h) Push the horn button assembly to engage the 3 pins carefully and install the horn button assembly. NOTICE:
|
 |
2. INSTALL LOWER NO. 2 STEERING WHEEL COVER
(a) Engage each claw to install the 3 lower No. 2 steering wheel covers.
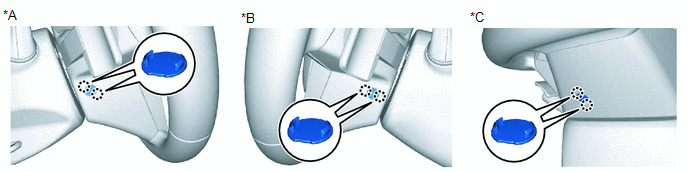
*A |
for LH Side |
*B |
for RH Side |
*C |
for Under Side |
- |
- |
3. CONNECT CABLE TO NEGATIVE AUXILIARY BATTERY TERMINAL
for Gasoline Model: Click here 
for HV Model: Click here
NOTICE:
When disconnecting the cable, some systems need to be initialized after the cable is reconnected.
Click here
4. INSTALL LUGGAGE TRIM SERVICE HOLE COVER (for HV Model)
Click here
5. INSPECT HORN BUTTON ASSEMBLY
(a) Make sure that the horn sounds.
If the horn does not sound, inspect the horn system.
Click here
6. PERFORM DIAGNOSTIC SYSTEM CHECK
for Gasoline Model: Click here
for HV Model: Click here
7. INSPECT SRS WARNING LIGHT
for Gasoline Model: Click here
for HV Model: Click here
On-vehicle Inspection
ON-VEHICLE INSPECTION
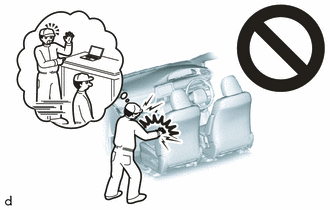
CAUTION:
Be sure to correctly follow the removal and installation procedures for the horn button assembly.
PROCEDURE
1. INSPECT HORN BUTTON ASSEMBLY (for Vehicle not Involved in Collision)
(a) Perform a diagnostic system check.
for Gasoline Model: Click here 
for HV Model: Click here
(b) Visually check for defects with the horn button assembly installed to the vehicle.
HINT:
The defects are as follows:
- Cuts on the surface or in the grooves
- Small cracks on the surface or in the grooves
- Significant discoloration on the surface or in the grooves
OK:
No defects are found.
If any defects are found, replace the horn button assembly with a new one.
2. INSPECT HORN BUTTON ASSEMBLY (for Vehicle Involved in Collision and Airbag not Deployed)
(a) Perform a diagnostic system check.
for Gasoline Model: Click here
for HV Model: Click here
(b) Visually check for defects with the horn button assembly removed from the vehicle.
HINT:
The defects are as follows:
- Cuts on the surface or in the grooves
- Small cracks on the surface or in the grooves
- Significant discoloration on the surface or in the grooves
- Cracks or other damage to the connector
- Deformation of the steering wheel assembly
- Deformation of the installation surface of the horn button assembly
- Interference or uneven clearance between the horn button assembly and steering wheel assembly when a new horn button assembly is installed to the steering wheel assembly
OK:
No defects are found.
If any defects are found, replace the horn button assembly or steering wheel assembly with a new one.
Removal
REMOVAL
The necessary procedures (adjustment, calibration, initialization or registration) that must be performed after parts are removed and installed, or replaced during horn button assembly removal/installation are shown below.
Necessary Procedures After Parts Removed/Installed/Replaced (for Gasoline Model)Replaced Part or Performed Procedure | Necessary Procedure | Effect/Inoperative Function when Necessary Procedure not Performed | Link |
|---|---|---|---|
| *: When performing learning using the Techstream. Click here |
|||
Disconnect cable from negative auxiliary battery terminal |
Perform steering sensor zero point calibration |
Lane Departure Alert System (w/ Steering Control) |
 |
Pre-collision System |
|||
Intelligent Clearance Sonar System* |
|||
Lighting System (for Gasoline Model with Cornering Light) |
|||
Memorize steering angle neutral point |
Parking Assist Monitor System |
|
|
Panoramic View Monitor System |
|
||
Replaced Part or Performed Procedure | Necessary Procedure | Effect/Inoperative Function when Necessary Procedure not Performed | Link |
|---|---|---|---|
| *: When performing learning using the Techstream. Click here |
|||
Disconnect cable from negative auxiliary battery terminal |
Perform steering sensor zero point calibration |
Lane Departure Alert System (w/ Steering Control) |
|
Pre-collision System |
|||
Intelligent Clearance Sonar System* |
|||
Lighting System (for HV Model with Cornering Light) |
|||
Memorize steering angle neutral point |
Parking Assist Monitor System |
|
|
Panoramic View Monitor System |
|
||
PROCEDURE
1. PRECAUTION
CAUTION:
Be sure to read Precaution thoroughly before servicing.
for Gasoline Model: Click here
for HV Model: Click here
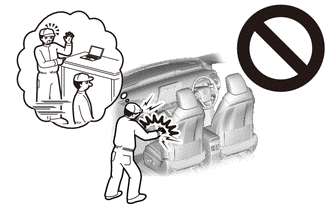
NOTICE:
After turning the engine switch (for Gasoline Model) or power switch (for HV Model) off, waiting time may be required before disconnecting the cable from the negative (-) auxiliary battery terminal. Therefore, make sure to read the disconnecting the cable from the negative (-) auxiliary battery terminal notices before proceeding with work.
Click here
2. REMOVE LUGGAGE TRIM SERVICE HOLE COVER (for HV Model)
Click here
3. DISCONNECT CABLE FROM NEGATIVE AUXILIARY BATTERY TERMINAL
for Gasoline Model: Click here
for HV Model: Click here
CAUTION:
Wait at least 90 seconds after disconnecting the cable from the negative (-) auxiliary battery terminal to disable the SRS system.
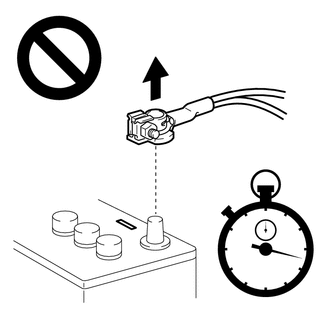
NOTICE:
When disconnecting the cable, some systems need to be initialized after the cable is reconnected.
Click here
4. REMOVE LOWER NO. 2 STEERING WHEEL COVER
(a) Using a screwdriver with its tip wrapped with protective tape, disengage each claw to remove the 3 lower No. 2 steering wheel covers.
HINT:
Be careful when disengaging the claws, as the lower No. 2 steering wheel cover may fly off.
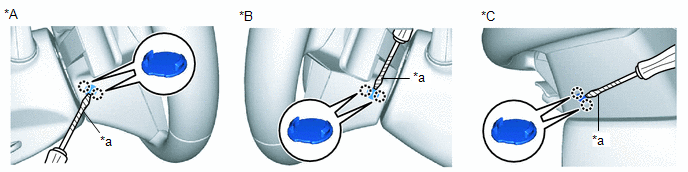
*A |
for LH Side |
*B |
for RH Side |
*C |
for Under Side |
- |
- |
*a |
Protective Tape |
- |
- |
5. REMOVE HORN BUTTON ASSEMBLY
CAUTION:
When storing the horn button assembly, keep the airbag deployment side facing upward.
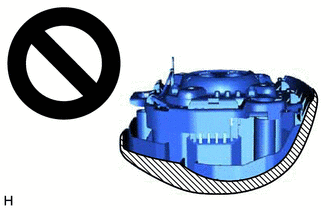
 |
Deployment Side |
(a) Check that the engine switch (for Gasoline Model) or power switch (for HV Model) is off.
(b) Check that the cable is disconnected from the negative (-) auxiliary battery terminal.
CAUTION:
Wait at least 90 seconds after disconnecting the cable from the negative (-) auxiliary battery terminal to disable the SRS system.
(c) Using a screwdriver, push in the 3 torsion springs to disengage the 3 pins as shown in the illustration.
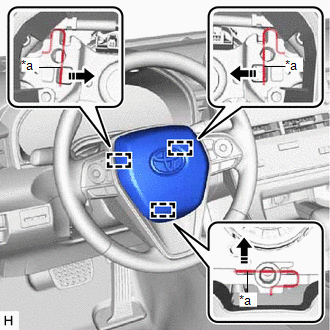
*a |
Torsion Spring |
 |
Push in this Direction |
NOTICE:
Lightly hold the horn button assembly so that it does not fall.
HINT:
Insert the screwdriver from the installation holes for the 3 lower No. 2 steering wheel covers.
(d) Pull out the horn button assembly from the steering wheel assembly and hold the horn button assembly with one hand.
NOTICE:
When separating the horn button assembly, do not pull the airbag wire harness.
(e) Disconnect the horn connector from the horn button assembly.
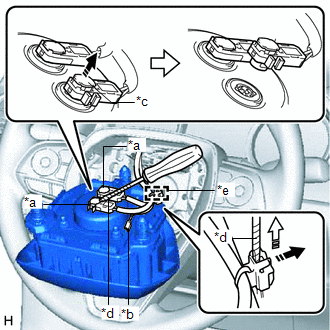
*a |
Airbag Connector |
*b |
Horn Connector |
*c |
Airbag Connector Locking Button |
*d |
Protective Tape |
*e |
Wire Harness Clamp |
|
Release in this Direction |
 |
Remove in this Direction |
(f) Using a screwdriver with its tip wrapped with protective tape, release the 2 airbag connector locking buttons.
(g) Disconnect the 2 airbag connectors.
NOTICE:
When disconnecting any airbag connector, take care not to damage the airbag wire harness.
(h) Using a screwdriver with its tip wrapped with protective tape, release the lock and remove the wire harness clamp to remove the horn button assembly.