Certification Ecu
Components
COMPONENTS
ILLUSTRATION
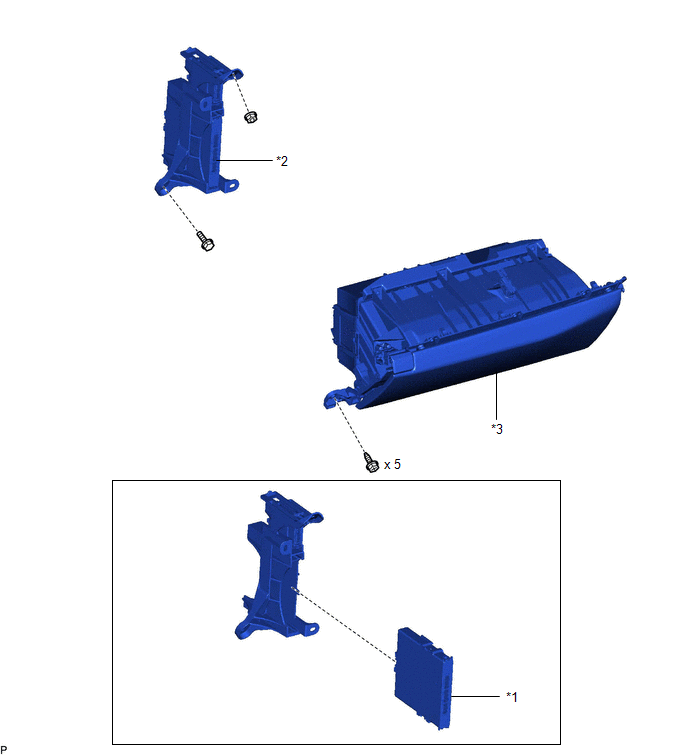
*1 |
CERTIFICATION ECU (SMART KEY ECU ASSEMBLY) |
*2 |
ECU INTEGRATION BOX RH |
*3 |
LOWER INSTRUMENT PANEL SUB-ASSEMBLY |
- |
- |
Installation
INSTALLATION
NOTICE:
Before replacing the certification ECU (smart key ECU assembly), refer to Registration.
for Gasoline Model:
Click here 
for HV Model:
Click here
PROCEDURE
1. INSTALL CERTIFICATION ECU (SMART KEY ECU ASSEMBLY)
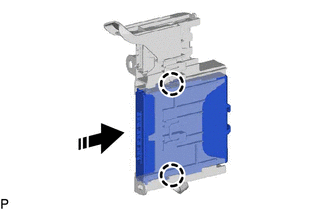
(a) Engage the 2 claws to install the certification ECU (smart key ECU assembly) as shown in the illustration.
 |
Install in this Direction |
NOTICE:
Make sure that the certification ECU (smart key ECU assembly) is securely installed.
2. INSTALL ECU INTEGRATION BOX RH
Click here
3. INSTALL LOWER INSTRUMENT PANEL SUB-ASSEMBLY
Click here
4. INSTALL LOWER NO. 2 INSTRUMENT PANEL AIRBAG ASSEMBLY
Click here
Removal
REMOVAL
The necessary procedures (adjustment, calibration, initialization, or registration) that must be performed after parts are removed and installed, or replaced during certification ECU (smart key ECU assembly) removal/installation are shown below.
Necessary Procedure After Parts Removed/Installed/Replaced (for Gasoline Model)Replaced Part or Performed Procedure | Necessary Procedure | Effect/Inoperative Function when Necessary Procedure not Performed | Link |
|---|---|---|---|
| *: When performing learning using the Techstream. Click here |
|||
Disconnect cable from negative battery terminal |
Perform steering sensor zero point calibration |
Lane departure alert system (w/ Steering Control) |
 |
Pre-collision system |
|||
Intelligent clearance sonar system* |
|||
Lighting system (for Gasoline Model with Cornering Light) |
|||
Memorize steering angle neutral point |
Parking assist monitor system |
|
|
Panoramic view monitor system |
|
||
Replacement of certification ECU (smart key ECU assembly) |
Code registration (Smart key System (for Start Function) |
|
|
Replaced Part or Performed Procedure | Necessary Procedure | Effect/Inoperative Function When Necessary Procedures are not Performed | Link |
|---|---|---|---|
| *: When performing learning using the Techstream. Click here |
|||
Disconnect cable from negative auxiliary battery terminal |
Perform steering sensor zero point calibration |
Lane departure alert system (w/ Steering Control) |
|
Pre-collision system |
|||
Intelligent clearance sonar system* |
|||
Lighting system (for HV Model with Cornering Light) |
|||
Memorize steering angle neutral point |
Parking assist monitor system |
|
|
Panoramic view monitor system |
|
||
Replacement of certification ECU (smart key ECU assembly) |
Code registration (Smart key System (for Start Function) |
|
|
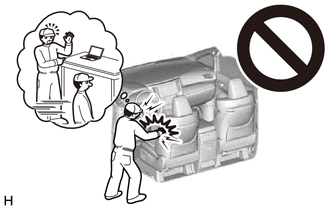
CAUTION:
Some of these service operations affect the SRS airbag system. Read the precautionary notices concerning the SRS airbag system before servicing.
for Gasoline Model:
Click here
for HV Model:
Click here
PROCEDURE
1. REMOVE LOWER NO. 2 INSTRUMENT PANEL AIRBAG ASSEMBLY
Click here
2. REMOVE LOWER INSTRUMENT PANEL SUB-ASSEMBLY
Click here
3. REMOVE ECU INTEGRATION BOX RH
Click here
4. REMOVE CERTIFICATION ECU (SMART KEY ECU ASSEMBLY)
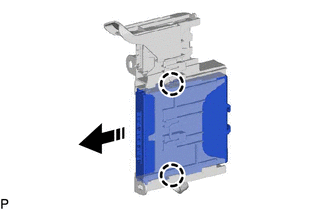
(a) Disengage the 2 claws and remove the certification ECU (smart key ECU assembly) as shown in the illustration.
 |
Remove in this Direction |
NOTICE:
- If the ECU integration box RH is deformed or damaged, replace it.
- Do not bend the 2 claws more than necessary.