DC/DC Converter Enable Circuit Short to Battery (P0A1112,P0A1114). Drive Motor "A" Inverter Actuator Stuck Open (P0A7872). Drive Motor "A" Inverter Actuator Stuck Closed (P0A7873)
DC/DC Converter Enable Circuit Short to Battery (P0A1112,P0A1114)
DESCRIPTION
Refer to the description for DTC P1CCC96.
Click here 
The motor generator control ECU sends a signal to the DC/DC converter to prohibit its control and receives signals indicating a normal or abnormal (below 11 V) condition of the 12 V charging system from the DC/DC converter via the NODD signal line.
If the vehicle is being driven with an inoperative DC/DC converter, the voltage of the auxiliary battery will drop, which will prevent the continued operation of the vehicle. Therefore, the motor generator control ECU monitors the operation of the DC/DC converter and alerts the driver if it detects a malfunction.
DTC No. | Detection Item | DTC Detection Condition | Trouble Area | MIL | Warning Indicate |
|---|---|---|---|---|---|
P0A1112 |
DC/DC Converter Enable Circuit Short to Battery |
Short to +B detected in DC/DC converter NODD signal line (1 trip detection logic) |
|
Does not come on |
Master Warning Light: Comes on |
P0A1114 |
DC/DC Converter Enable Circuit Short to Ground or Open |
Open or short to ground detected in DC/DC converter NODD signal line (1 trip detection logic) |
|
Does not come on |
Master Warning Light: Comes on |
CONFIRMATION DRIVING PATTERN
HINT:
After repair has been completed, clear the DTC and then check that the vehicle has returned to normal by performing the following All Readiness check procedure.
Click here
- Connect the Techstream to the DLC3.
- Turn the power switch on (IG) and turn the Techstream on.
- Clear the DTCs (even if no DTCs are stored, perform the clear DTC procedure).
- Turn the power switch off and wait for 2 minutes or more.
- Turn the power switch on (IG) and turn the Techstream on.
- With power switch on (IG) and wait for 10 seconds or more.
- Enter the following menus: Powertrain / Motor Generator / Utility / All Readiness.
- Check the DTC judgment result.
HINT:
- If the judgment result shows NORMAL, the system is normal.
- If the judgment result shows ABNORMAL, the system has a malfunction.
- If the judgment result shows INCOMPLETE or N/A, perform driving pattern again.
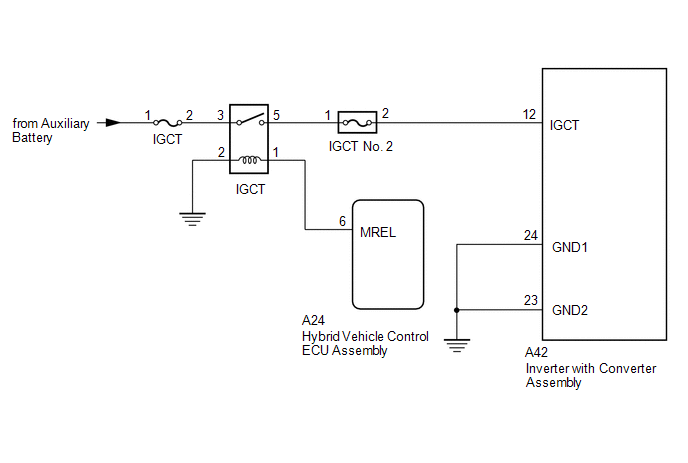
WIRING DIAGRAM
CAUTION:
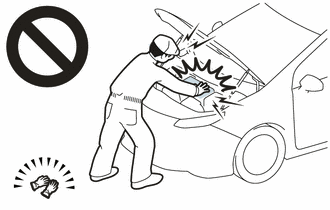
- Before the following operations are conducted, take precautions to prevent electric shock by turning the power switch off, wearing insulated gloves, and removing the service plug grip from HV battery.
- Inspecting the high-voltage system
- Disconnecting the low voltage connector of the inverter with converter assembly
- Disconnecting the low voltage connector of the HV battery
- To prevent electric shock, make sure to remove the service plug grip to cut off the high voltage circuit before servicing the vehicle.
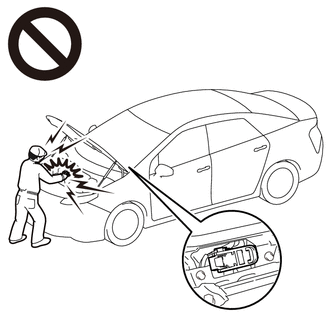
- After removing the service plug grip from the HV battery, put it in your pocket to prevent other technicians from accidentally reconnecting it while you are working on the high-voltage system.
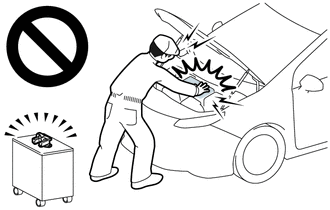
- After removing the service plug grip, wait for at least 10 minutes before touching any of the high-voltage connectors or terminals. After waiting for 10 minutes, check the voltage at the terminals in the inspection point in the inverter with converter assembly. The voltage should be 0 V before beginning work.
Click here
HINT:
Waiting for at least 10 minutes is required to discharge the high-voltage capacitor inside the inverter with converter assembly.
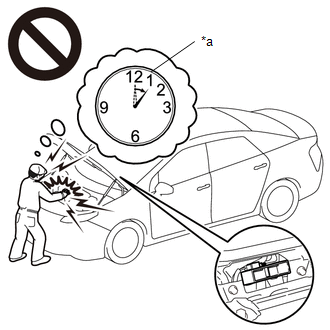
*a
Without waiting for 10 minutes
NOTICE:
After turning the power switch off, waiting time may be required before disconnecting the cable from the negative (-) auxiliary battery terminal. Therefore, make sure to read the disconnecting the cable from the negative (-) auxiliary battery terminal notices before proceeding with work.
HINT:
If the NODD signal line is open, DC/DC converter control will be prohibited and the auxiliary battery voltage will be approximately 12 V or less.
Click here
PROCEDURE
CHECK CONNECTOR CONNECTION CONDITION (INVERTER WITH CONVERTER ASSEMBLY CONNECTOR)
Click here
Result | Proceed to |
|---|---|
OK |
A |
NG (The connector is not connected securely.) |
B |
NG (The terminals are not making secure contact or are deformed, or water or foreign matter exists in the connector.) |
C |
| B |  |
CONNECT SECURELY |
| C | |
REPAIR OR REPLACE HARNESS OR CONNECTOR |
|

CHECK HARNESS AND CONNECTOR (INVERTER WITH CONVERTER ASSEMBLY - IGCT RELAY)
CAUTION:
Be sure to wear insulated gloves.
(a) Check that the service plug grip is not installed.
NOTICE:
After removing the service plug grip, do not turn the power switch on (READY), unless instructed by the repair manual because this may cause a malfunction.
(b) Disconnect the A42 inverter with converter assembly connector.
(c) Remove the IGCT relay from the instrument panel relay block.
(d) Measure the resistance according to the value(s) in the table below.
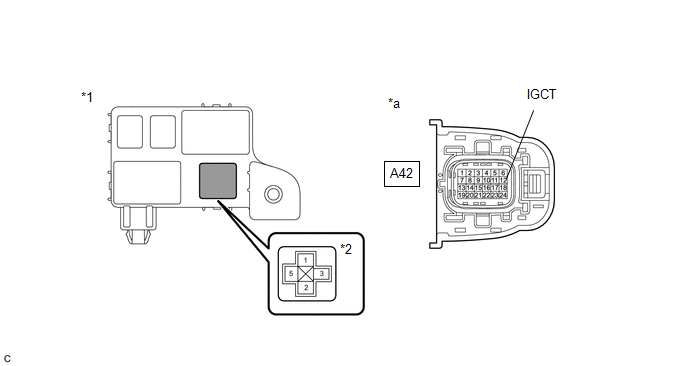
*1 |
Instrument Panel Relay Block |
*2 |
IGCT Relay |
*a |
Front view of wire harness connector (to Inverter with Converter Assembly) |
- |
- |
Standard Resistance:
Tester Connection | Condition | Specified Condition |
|---|---|---|
A42-12 (IGCT) - 5 (IGCT relay) |
Power switch off |
Below 1 Ω |
(e) Install the IGCT relay.
(f) Reconnect the A42 inverter with converter assembly connector.
| OK | |
REPLACE INVERTER WITH CONVERTER ASSEMBLY |
| NG | |
REPAIR OR REPLACE HARNESS OR CONNECTOR |
Drive Motor "A" Inverter Actuator Stuck Open (P0A7872)
DTC SUMMARY
MALFUNCTION DESCRIPTION
This DTC is stored when the motor generator control system is malfunctioning and current does not flow as commanded. The cause of this malfunction may be one of the following:
Internal inverter malfunction- Inverter with converter assembly internal circuit malfunction
- The connectors are not connected properly
DESCRIPTION
DTC No. | Detection Item | DTC Detection Condition | Trouble Area | MIL | Warning Indicate |
|---|---|---|---|---|---|
P0A7872 |
Drive Motor "A" Inverter Actuator Stuck Open |
Malfunction is detected when offset component occurs in current flowing through motor with one phase open malfunction (1 trip detection logic) |
|
Comes on |
Master Warning Light: Comes on |
MONITOR DESCRIPTION
The motor generator control ECU monitors the motor circuit. If the motor generator control ECU detects a malfunction of the motor (MG2), the ECU will illuminate the MIL and store a DTC.
MONITOR STRATEGY
Related DTCs |
P0A78 (INF:P0A7872) : Drive Motor "A" Inverter Performance |
Required sensors/components |
Motor inverter |
Frequency of operation |
Continuous |
Duration |
TMC's intellectual property |
MIL operation |
1 driving cycle |
Sequence of operation |
None |
TYPICAL ENABLING CONDITIONS
The monitor will run whenever the following DTCs are not stored |
TMC's intellectual property |
Other conditions belong to TMC's intellectual property |
- |
TYPICAL MALFUNCTION THRESHOLDS
TMC's intellectual property |
- |
COMPONENT OPERATING RANGE
Motor generator control ECU |
DTC P0A78 (INF P0A7872) is not detected |
CONFIRMATION DRIVING PATTERN
HINT:
- After repair has been completed, clear the DTC and then check that the vehicle has returned to normal by performing the following All Readiness check procedure.
Click here

- When clearing the permanent DTCs, refer to the "CLEAR PERMANENT DTC" procedure.
Click here
- Connect the Techstream to the DLC3.
- Turn the power switch on (IG) and turn the Techstream on.
- Clear the DTCs (even if no DTCs are stored, perform the clear DTC procedure).
- Turn the power switch off and wait for 2 minutes or more.
- Turn the power switch on (IG) and turn the Techstream on.
- Turn the power switch on (READY). [*1]
- Move the shift lever to D, and then accelerate until the vehicle speed is 40 km/h and the accelerator position is approximately 30%. [*2]
HINT:
[*1] to [*2]: Normal judgment procedure.
The normal judgment procedure is used to complete DTC judgment and also used when clearing permanent DTCs.
- Enter the following menus: Powertrain / Motor Generator / Utility / All Readiness.
- Check the DTC judgment result.
HINT:
- If the judgment result shows NORMAL, the system is normal.
- If the judgment result shows ABNORMAL, the system has a malfunction.
- If the judgment result shows INCOMPLETE or N/A, perform the normal judgment procedure again.
WIRING DIAGRAM
Refer to the wiring diagram for the Motor High-voltage Circuit.
Click here
CAUTION:
- Before the following operations are conducted, take precautions to prevent electric shock by turning the power switch off, wearing insulated gloves, and removing the service plug grip from HV battery.
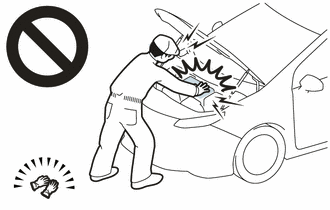
- Inspecting the high-voltage system
- Disconnecting the low voltage connector of the inverter with converter assembly
- Disconnecting the low voltage connector of the HV battery
- To prevent electric shock, make sure to remove the service plug grip to cut off the high voltage circuit before servicing the vehicle.
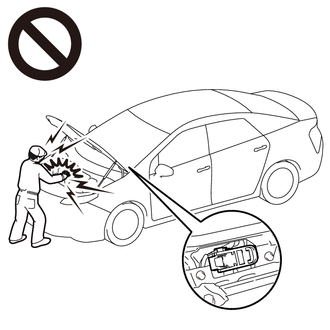
- After removing the service plug grip from the HV battery, put it in your pocket to prevent other technicians from accidentally reconnecting it while you are working on the high-voltage system.
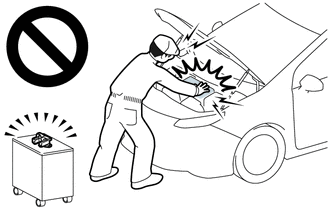
- After removing the service plug grip, wait for at least 10 minutes before touching any of the high-voltage connectors or terminals. After waiting for 10 minutes, check the voltage at the terminals in the inspection point in the inverter with converter assembly. The voltage should be 0 V before beginning work.
Click here
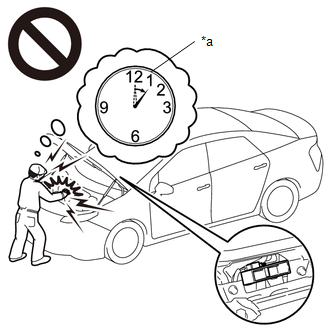
*a
Without waiting for 10 minutes
HINT:
Waiting for at least 10 minutes is required to discharge the high-voltage capacitor inside the inverter with converter assembly.
NOTICE:
After turning the power switch off, waiting time may be required before disconnecting the cable from the negative (-) auxiliary battery terminal. Therefore, make sure to read the disconnecting the cable from the negative (-) auxiliary battery terminal notices before proceeding with work.
Click here
PROCEDURE
CHECK DTC OUTPUT
(a) Connect the Techstream to the DLC3.
(b) Turn the power switch on (IG).
(c) Enter the following menus: Powertrain / Hybrid Control and Motor Generator / Trouble Codes.
(d) Check for DTCs.
Powertrain > Hybrid Control > Trouble Codes Powertrain > Motor Generator > Trouble CodesResult | Proceed to |
|---|---|
P0A7872 only is output, or DTCs except the ones in the table below are also output. |
A |
DTCs of hybrid control system in the tables below are output. |
B |
DTCs of motor generator control system in the tables below are output. |
C |
Malfunction Content | System | Relevant DTC |
|
|---|---|---|---|
Insulation Malfunction |
Hybrid control system |
P1C7C49 |
Hybrid/EV Battery Voltage System Isolation (A/C Area) Internal Electronic Failure |
P1C7D49 |
Hybrid/EV Battery Voltage System Isolation (Hybrid/EV Battery Area) Internal Electronic Failure |
||
P1C7E49 |
Hybrid/EV Battery Voltage System Isolation (Transaxle Area) Internal Electronic Failure |
||
P1C7F49 |
Hybrid/EV Battery Voltage System Isolation (Direct Current Area) Internal Electronic Failure |
||
System Main Relay or High Voltage Circuit Malfunction |
Hybrid control system |
P0AD911 |
Hybrid/EV Battery Positive Contactor Circuit Short to Ground |
P0AD915 |
Hybrid/EV Battery Positive Contactor Circuit Short to Auxiliary Battery or Open |
||
P0ADD11 |
Hybrid/EV Battery Negative Contactor Circuit Short to Ground |
||
P0ADD15 |
Hybrid/EV Battery Negative Contactor Circuit Short to Auxiliary Battery or Open |
||
P1C8449 |
High Voltage Power Resource Circuit Short during Ready ON |
||
Malfunction Content | System | Relevant DTC |
|
|---|---|---|---|
Microcomputer malfunction |
Motor generator control system |
P0A1A47 |
Generator Control Module Watchdog / Safety μC Failure |
P0A1A49 |
Generator Control Module Internal Electronic Failure |
||
P0A1B1F |
Generator Control Module Circuit Intermittent |
||
P1C2A1C |
Generator A/D Converter Circuit Circuit Voltage Out of Range |
||
P1C2A49 |
Generator A/D Converter Circuit Internal Electronic Failure |
||
P1C2B1C |
Drive Motor "A" Control Module A/D Converter Circuit Voltage Out of Range |
||
P1C2B49 |
Drive Motor "A" Control Module A/D Converter Circuit Internal Electronic Failure |
||
P313383 |
Communication Error from Generator to Drive Motor "A" Value of Signal Protection Calculation Incorrect |
||
P313386 |
Communication Error from Generator to Drive Motor "A" Signal Invalid |
||
P313387 |
Communication Error from Generator to Drive Motor "A" Missing Message |
||
P313483 |
Communication Error from Drive Motor "A" to Generator Value of Signal Protection Calculation Incorrect |
||
P313486 |
Communication Error from Drive Motor "A" to Generator Signal Invalid |
||
P313487 |
Communication Error from Drive Motor "A" to Generator Missing Message |
||
Hybrid control system |
P0A1B49 |
Drive Motor "A" Control Module Internal Electronic Failure |
|
Power source circuit malfunction |
Motor generator control system |
P06B01C |
Generator Control Module Position Sensor REF Power Source Circuit Voltage Out of Range |
P06D61C |
Generator Control Module Offset Power Circuit Voltage Out of Range |
||
Sensor and actuator circuit malfunction |
Motor generator control system |
P0A3F16 |
Drive Motor "A" Position Sensor Circuit Voltage Below Threshold |
P0A3F21 |
Drive Motor "A" Position Sensor Signal Amplitude < Minimum |
||
P0A3F22 |
Drive Motor "A" Position Sensor Signal Amplitude > Maximum |
||
P0A4B16 |
Generator Position Sensor Circuit Voltage Below Threshold |
||
P0A4B21 |
Generator Position Sensor Signal Amplitude < Minimum |
||
P0A4B22 |
Generator Position Sensor Signal Amplitude > Maximum |
||
P0A6012 |
Drive Motor "A" Phase V Current (High Resolution) Circuit Short to Battery |
||
P0A6014 |
Drive Motor "A" Phase V Current (High Resolution) Circuit Short to Ground or Open |
||
P0A601C |
Drive Motor "A" Phase V Current (High Resolution) Circuit Voltage Out of Range |
||
P0A6312 |
Drive Motor "A" Phase W Current (High Resolution) Circuit Short to Battery |
||
P0A6314 |
Drive Motor "A" Phase W Current (High Resolution) Circuit Short to Ground or Open |
||
P0A631C |
Drive Motor "A" Phase W Current (High Resolution) Circuit Voltage Out of Range |
||
P0BE512 |
Drive Motor "A" Phase U Current Sensor Circuit Short to Battery |
||
P0BE514 |
Drive Motor "A" Phase U Current Sensor Circuit Short to Ground or Open |
||
P0BE528 |
Drive Motor "A" Phase U Current Sensor Signal Bias Level Out of Range / Zero Adjustment Failure |
||
P0BE912 |
Drive Motor "A" Phase V Current Sensor Circuit Short to Battery |
||
P0BE914 |
Drive Motor "A" Phase V Current Sensor Circuit Short to Ground or Open |
||
P0BE928 |
Drive Motor "A" Phase V Current Sensor Signal Bias Level Out of Range / Zero Adjustment Failure |
||
P0BED12 |
Drive Motor "A" Phase W Current Sensor Circuit Short to Battery |
||
P0BED14 |
Drive Motor "A" Phase W Current Sensor Circuit Short to Ground or Open |
||
P0BED28 |
Drive Motor "A" Phase W Current Sensor Signal Bias Level Out of Range / Zero Adjustment Failure |
||
P0BFD62 |
Drive Motor "A" Phase U-V-W Current Sensor Signal Compare Failure |
||
P0C5013 |
Drive Motor "A" Position Sensor Circuit "A" Circuit Open |
||
P0C5016 |
Drive Motor "A" Position Sensor Circuit "A" Circuit Voltage Below Threshold |
||
P0C5017 |
Drive Motor "A" Position Sensor Circuit "A" Circuit Voltage Above Threshold |
||
P0C5A13 |
Drive Motor "A" Position Sensor Circuit "B" Circuit Open |
||
P0C5A16 |
Drive Motor "A" Position Sensor Circuit "B" Circuit Voltage Below Threshold |
||
P0C5A17 |
Drive Motor "A" Position Sensor Circuit "B" Circuit Voltage Above Threshold |
||
P0C6413 |
Generator Position Sensor Circuit "A" Circuit Open |
||
P0C6416 |
Generator Position Sensor Circuit "A" Circuit Voltage Below Threshold |
||
P0C6417 |
Generator Position Sensor Circuit "A" Circuit Voltage Above Threshold |
||
P0C6913 |
Generator Position Sensor Circuit "B" Circuit Open |
||
P0C6916 |
Generator Position Sensor Circuit "B" Circuit Voltage Below Threshold |
||
P0C6917 |
Generator Position Sensor Circuit "B" Circuit Voltage Above Threshold |
||
P0D2D16 |
Drive Motor "A" Inverter Voltage Sensor (VH) Circuit Voltage Below Threshold |
||
P0D2D17 |
Drive Motor "A" Inverter Voltage Sensor (VH) Circuit Voltage Above Threshold |
||
P0DFA62 |
Generator Phase U-V-W Current Sensor Signal Compare Failure |
||
P0E0012 |
Generator Phase U Current Sensor Circuit Short to Battery |
||
P0E0014 |
Generator Phase U Current Sensor Circuit Short to Ground or Open |
||
P0E0028 |
Generator Phase U Current Sensor Signal Bias Level Out of Range / Zero Adjustment Failure |
||
P0E0412 |
Generator Phase V Current Sensor Circuit Short to Battery |
||
P0E0414 |
Generator Phase V Current Sensor Circuit Short to Ground or Open |
||
P0E0428 |
Generator Phase V Current Sensor Signal Bias Level Out of Range / Zero Adjustment Failure |
||
P0E0812 |
Generator Phase W Current Sensor Circuit Short to Battery |
||
P0E0814 |
Generator Phase W Current Sensor Circuit Short to Ground or Open |
||
P0E0828 |
Generator Phase W Current Sensor Signal Bias Level Out of Range / Zero Adjustment Failure |
||
P0E3116 |
DC/DC Converter Voltage Sensor "A" (VL) Circuit Voltage Below Threshold |
||
P0E3117 |
DC/DC Converter Voltage Sensor "A" (VL) Circuit Voltage Above Threshold |
||
P0E5111 |
DC/DC Converter Current Sensor Circuit Short to Ground |
||
P0E5115 |
DC/DC Converter Current Sensor Circuit Short to Battery or Open |
||
P0E512A |
DC/DC Converter Current Sensor Signal Stuck In Range |
||
P1CAC49 |
Generator Position Sensor Internal Electronic Failure |
||
P1CAD49 |
Drive Motor "A" Position Sensor Internal Electronic Failure |
||
P1CAF38 |
Generator Position Sensor REF Signal Cycle Malfunction Signal Frequency Incorrect |
||
P1CB038 |
Drive Motor "A" Position Sensor REF Signal Frequency Incorrect |
||
Hybrid control system |
P0C7600 |
Hybrid/EV Battery System Discharge Time Too Long |
|
P0D2D1C |
Drive Motor "A" Inverter Voltage Sensor Voltage Out of Range |
||
P0E311C |
Boosting Converter Voltage Sensor "A" Voltage Out of Range |
||
P1C2D62 |
Hybrid/EV Battery "A" Voltage Sensor/Boosting Converter Voltage Sensor "A" Signal Compare Failure |
||
HINT:
- P0A7872 may be output as a result of the malfunctions indicated by the DTCs above.
- The chart above is listed in inspection order of priority.
- Check DTCs that are output at the same time by following the listed order. (The main cause of the malfunction can be determined without performing unnecessary inspections.)
(e) Turn the power switch off.
| B |  |
GO TO DTC CHART (HYBRID CONTROL SYSTEM) |
| C | |
GO TO DTC CHART (MOTOR GENERATOR CONTROL SYSTEM) |
|

CHECK CONNECTOR CONNECTION CONDITION (INVERTER WITH CONVERTER ASSEMBLY CONNECTOR)
Click here
Result | Proceed to |
|---|---|
OK |
A |
NG (The connector is not connected securely.) |
B |
NG (The terminals are not making secure contact or are deformed, or water or foreign matter exists in the connector.) |
C |
| B | |
CONNECT SECURELY |
| C | |
REPAIR OR REPLACE HARNESS OR CONNECTOR |
|
CHECK MOTOR HIGH-VOLTAGE CIRCUIT
Click here
HINT:
If the "Motor High-voltage Circuit" inspection results are normal, perform the next step.
| NEXT | |
REPLACE INVERTER WITH CONVERTER ASSEMBLY |
Drive Motor "A" Inverter Actuator Stuck Closed (P0A7873)
DTC SUMMARY
MALFUNCTION DESCRIPTION
This DTC is stored when a short is detected in the inverter with converter assembly (motor inverter) or the hybrid vehicle transaxle assembly (motor (MG2)). The cause of this malfunction may be one of the following:
Internal inverter malfunction- Motor inverter internal circuit malfunction
- Open or short circuit
- Iron particles or damage from foreign objects
DESCRIPTION
For a description of the inverter.
Click here 
DTC No. | Detection Item | DTC Detection Condition | Trouble Area | MIL | Warning Indicate |
|---|---|---|---|---|---|
P0A7873 |
Drive Motor "A" Inverter Actuator Stuck Closed |
Current flow to any phase of the motor (MG2) exceeds the threshold after the motor inverter is shut down due to a DTC indicating a motor inverter malfunction (overheating, overcurrent or circuit malfunction) being stored. (1 trip detection logic) |
|
Comes on |
Master Warning Light: Comes on |
MONITOR DESCRIPTION
The motor generator control ECU monitors the motor inverter electric current. If the current exceeds the threshold for a specified period of time, the motor generator control ECU will illuminate the MIL and set a DTC.
MONITOR STRATEGY
Related DTCs |
P0A78 (INF P0A7873): MFIV detection (Short circuit malfunction) |
Required sensors/components |
Motor inverter |
Frequency of operation |
Continuous |
Duration |
TMC's intellectual property |
MIL operation |
1 driving cycle |
Sequence of operation |
None |
TYPICAL ENABLING CONDITIONS
The monitor will run whenever the following DTCs are not stored |
TMC's intellectual property |
Other conditions belong to TMC's intellectual property |
- |
TYPICAL MALFUNCTION THRESHOLDS
TMC's intellectual property |
- |
COMPONENT OPERATING RANGE
Motor generator control ECU |
DTC P0A78 (INF P0A7873) is not detected |
CONFIRMATION DRIVING PATTERN
HINT:
- After repair has been completed, clear the DTC and then check that the vehicle has returned to normal by performing the following All Readiness check procedure.
Click here
- When clearing the permanent DTCs, refer to the "CLEAR PERMANENT DTC" procedure.
Click here
- Connect the Techstream to the DLC3.
- Turn the power switch on (IG) and turn the Techstream on.
- Clear the DTCs (even if no DTCs are stored, perform the clear DTC procedure).
- Turn the power switch off and wait for 2 minutes or more.
- Turn the power switch on (IG) and turn the Techstream on.
- With power switch on (IG) and wait for 5 seconds or more. [*1]
- Turn the power switch on (READY) and wait for 5 seconds or more. [*2]
- Drive the vehicle for approximately 10 minutes mainly using the engine. During the road test, check the Data List item "Motor Inverter Temperature" to prevent the motor inverter from overheating. [*3]
NOTICE:
As the state of charge of the HV battery may be low after driving in fail-safe mode, it will automatically be charged for 5 to 10 minutes with power switch on (READY) after repairs have been performed.
HINT:
[*1] to [*3]: Normal judgment procedure.
The normal judgment procedure is used to complete DTC judgment and also used when clearing permanent DTCs.
- Enter the following menus: Powertrain / Motor Generator / Utility / All Readiness.
- Check the DTC judgment result.
HINT:
- If the judgment result shows NORMAL, the system is normal.
- If the judgment result shows ABNORMAL, the system has a malfunction.
- If the judgment result shows INCOMPLETE or N/A, perform the normal judgment procedure again.
WIRING DIAGRAM
Refer to the wiring diagram for the Motor High-voltage Circuit.
Click here
CAUTION:
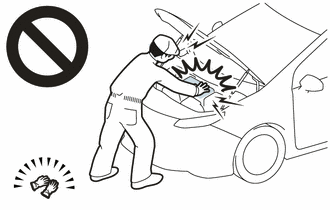
- Before the following operations are conducted, take precautions to prevent electric shock by turning the power switch off, wearing insulated gloves, and removing the service plug grip from HV battery.
- Inspecting the high-voltage system
- Disconnecting the low voltage connector of the inverter with converter assembly
- Disconnecting the low voltage connector of the HV battery
- To prevent electric shock, make sure to remove the service plug grip to cut off the high voltage circuit before servicing the vehicle.
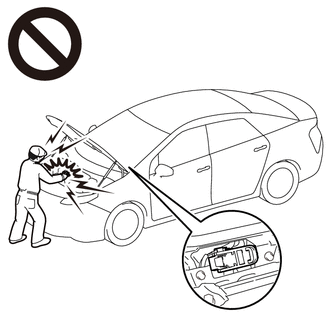
- After removing the service plug grip from the HV battery, put it in your pocket to prevent other technicians from accidentally reconnecting it while you are working on the high-voltage system.
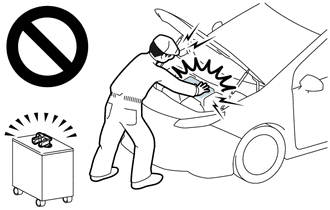
- After removing the service plug grip, wait for at least 10 minutes before touching any of the high-voltage connectors or terminals. After waiting for 10 minutes, check the voltage at the terminals in the inspection point in the inverter with converter assembly. The voltage should be 0 V before beginning work.
Click here
HINT:
Waiting for at least 10 minutes is required to discharge the high-voltage capacitor inside the inverter with converter assembly.
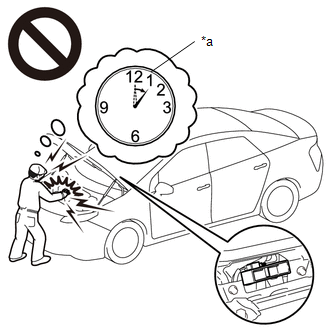
*a
Without waiting for 10 minutes
NOTICE:
- After turning the power switch off, waiting time may be required before disconnecting the cable from the negative (-) auxiliary battery terminal. Therefore, make sure to read the disconnecting the cable from the negative (-) auxiliary battery terminal notices before proceeding with work.
Click here
- DTC P0A7873 is stored after DTCs P0A789E and/or P1C5D19 are stored. After troubleshooting and repairing the malfunction which caused DTC P0A7873 to be stored, be sure to troubleshoot the other DTCs.
- Depending on the conditions in which the vehicle is being operated when a short circuit occurs in the inverter with converter assembly, the hybrid vehicle transaxle assembly may be affected. As this DTC is stored if a short circuit occurs in the inverter with converter assembly, it is necessary to perform a road test to check the hybrid vehicle transaxle assembly. If problems are found, replace the malfunctioning parts.
- After completing the repair, including the repair of previously output DTCs, drive the vehicle at a speed of approximately 40 km/h for 1 minute and check that DTC P0A9000 is not output. If DTC P0A9000 is output, replace the hybrid vehicle transaxle assembly.
PROCEDURE
CHECK DTC OUTPUT (HYBRID CONTROL)
(a) Connect the Techstream to the DLC3.
(b) Turn the power switch on (IG).
(c) Enter the following menus: Powertrain / Hybrid Control / Trouble Codes.
(d) Check for DTCs.
Powertrain > Hybrid Control > Trouble CodesResult | Proceed to |
|---|---|
P0A7873 only is output, or DTCs except the ones in the table below are also output. |
A |
Any of the following DTCs are also output. |
B |
Malfunction Content | Relevant DTC |
|
|---|---|---|
Insulation Malfunction |
P1C7C49 |
Hybrid/EV Battery Voltage System Isolation (A/C Area) Internal Electronic Failure |
P1C7D49 |
Hybrid/EV Battery Voltage System (Hybrid/EV Battery Area) Insulation Resistance Decreased |
|
P1C7E49 |
Hybrid/EV Battery Voltage System Isolation (Transaxle Area) Internal Electronic Failure |
|
P1C7F49 |
Hybrid/EV Battery Voltage System Isolation (Direct Current Area) Internal Electronic Failure |
|
HINT:
- P0A7873 may be output as a result of the malfunctions indicated by the DTCs above.
- The chart above is listed in inspection order of priority.
- Check DTCs that are output at the same time by following the listed order. (The main cause of the malfunction can be determined without performing unnecessary inspections.)
(e) Turn the power switch off.
| B |  |
GO TO DTC CHART (HYBRID CONTROL SYSTEM) |
|

CHECK HYBRID VEHICLE TRANSAXLE ASSEMBLY (MOTOR (MG2))
CAUTION:
Be sure to wear insulated gloves.
(a) Check that the service plug grip is not installed.
NOTICE:
After removing the service plug grip, do not turn the power switch on (READY), unless instructed by the repair manual because this may cause a malfunction.
(b) Disconnect the motor cable from the hybrid vehicle transaxle assembly.
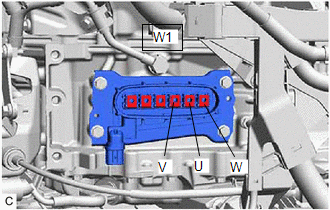
(c) Check the motor (MG2) for an interphase short using a milliohmmeter. (1) Using a milliohmmeter, measure the resistance according to the value(s) in the table below. HINT: If the motor (MG2) temperature is high, the resistance will vary greatly from the specification. Therefore, measure the resistance at least 8 hours after the vehicle has been stopped. Standard Resistance:
HINT: To correct the variation of the measured resistance due to temperature, use the following formula to calculate the resistance at 20 °C.
The calculation is based on the following:
|
 |
(d) Using a megohmmeter set to 500 V, measure the resistance according to the value(s) in the table below.
NOTICE:
Be sure to set the megohmmeter to 500 V when performing this test. Using a setting higher than 500 V can result in damage to the component being inspected.
Standard Resistance:
Tester Connection | Condition | Specified Condition |
|---|---|---|
W1-1 (W) - Body ground and shield ground |
Power switch off |
100 MΩ or higher |
W1-2 (U) - Body ground and shield ground |
Power switch off |
100 MΩ or higher |
W1-3 (V) - Body ground and shield ground |
Power switch off |
100 MΩ or higher |
(e) Connect the motor cable.
| NG | |
GO TO STEP 5 |
|
REPLACE INVERTER WITH CONVERTER ASSEMBLY
Click here
|
REPLACE MOTOR CABLE
Click here
| NEXT | |
GO TO STEP 8 |
REPLACE HYBRID VEHICLE TRANSAXLE ASSEMBLY
Click here
|
REPLACE INVERTER WITH CONVERTER ASSEMBLY
Click here
|
REPLACE MOTOR CABLE
Click here
|
CHECK DTC OUTPUT (HYBRID CONTROL)
(a) Check the other DTCs that were output together with DTC P0A7873.
Powertrain > Motor Generator > Trouble CodesRelevant DTC |
|
|---|---|
P0A789E |
Drive Motor "A" Inverter Stuck On |
P1C5D19 |
Drive Motor "A" Inverter Circuit Current Above Threshold |
NOTICE:
DTC P0A7873 is stored after DTCs P0A789E and/or P1C5D19 are stored. After troubleshooting and repairing the malfunction which caused P0A7873 to be stored, be sure to troubleshoot the other DTCs.
| NEXT | |
GO TO DTC CHART (MOTOR GENERATOR CONTROL SYSTEM) |