Fuel Tank Pressure Sensor
Components
COMPONENTS
ILLUSTRATION
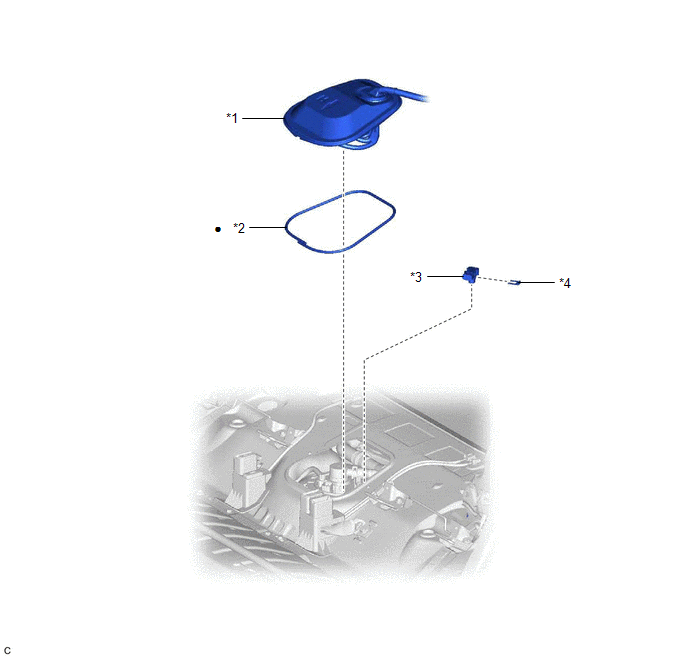
*1 |
REAR FLOOR SERVICE HOLE COVER |
*2 |
BUTYL TAPE |
*3 |
FUEL TANK PRESSURE SENSOR (VAPOR PRESSURE SENSOR ASSEMBLY) |
*4 |
TUBE JOINT CLIP |
● |
Non-reusable part |
- |
- |
Installation
INSTALLATION
PROCEDURE
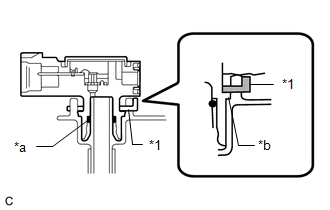
1. INSTALL FUEL TANK PRESSURE SENSOR (VAPOR PRESSURE SENSOR ASSEMBLY)
(a) Push the fuel tank pressure sensor (vapor pressure sensor assembly) onto the fuel tank assembly, then install the tube joint clip. NOTICE:
|
|
2. INSTALL REAR FLOOR SERVICE HOLE COVER
Click here 
3. INSTALL REAR SEAT ASSEMBLY
Click here
Removal
REMOVAL
The necessary procedures (adjustment, calibration, initialization or registration) that must be performed after parts are removed and installed, or replaced during fuel tank pressure sensor (vapor pressure sensor assembly) removal/installation are shown below.
Necessary Procedures After Parts Removed/Installed/ReplacedReplaced Part or Performed Procedure | Necessary Procedure | Effect/Inoperative Function when Necessary Procedure not Performed | Link |
|---|---|---|---|
| *: When performing learning using the Techstream. Click here |
|||
Disconnect cable from negative (-) auxiliary battery terminal |
Perform steering sensor zero point calibration |
Lane departure alert system (w/ Steering Control) |
 |
Pre-collision system |
|||
Intelligent clearance sonar system* |
|||
Lighting system (w/ AFS)(EXT) |
|||
Memorize steering angle neutral point |
Parking assist monitor system |
|
|
Panoramic view monitor system |
|
||
PROCEDURE
1. REMOVE REAR SEAT ASSEMBLY
Click here
2. REMOVE REAR FLOOR SERVICE HOLE COVER
Click here
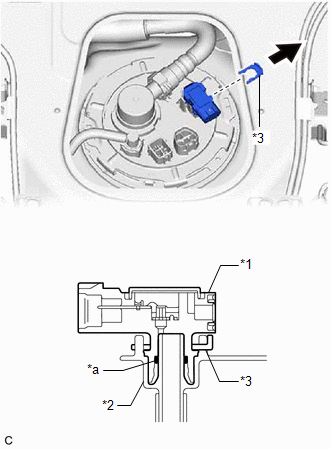
3. REMOVE FUEL TANK PRESSURE SENSOR (VAPOR PRESSURE SENSOR ASSEMBLY)
(a) Remove the tube joint clip and pull off the fuel tank pressure sensor (vapor pressure sensor assembly) from the fuel tank assembly. NOTICE:
|
|