Oil Pressure Switch
Components
COMPONENTS
ILLUSTRATION
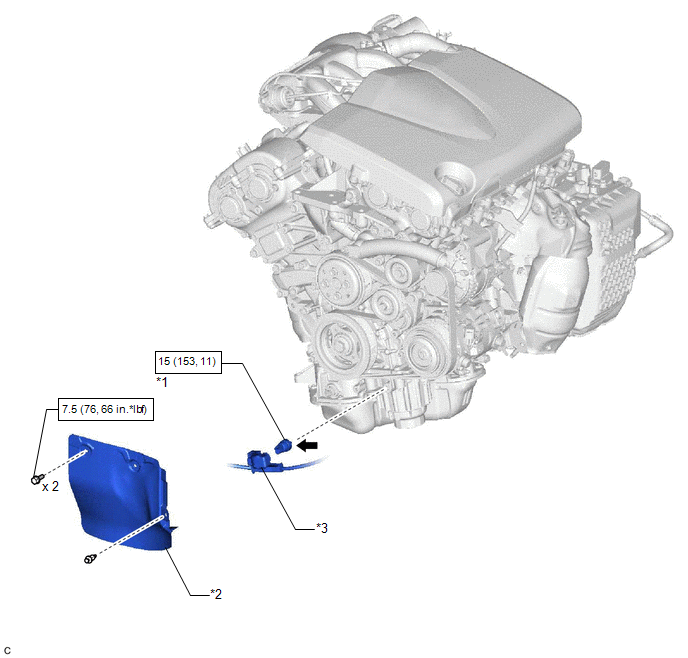
*1 |
ENGINE OIL PRESSURE SWITCH ASSEMBLY |
*2 |
FRONT FENDER APRON SEAL RH |
*3 |
WIRE HARNESS PROTECTOR |
- |
- |
 |
N*m (kgf*cm, ft.*lbf): Specified torque |
 |
Adhesive 1344 |
★ |
Precoated part |
- |
- |
Inspection
INSPECTION
PROCEDURE
1. INSPECT ENGINE OIL PRESSURE SWITCH ASSEMBLY
(a) Disengage the clamp to disconnect the wire harness protector. |
|
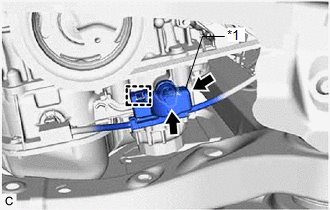
(b) Disconnect the engine oil pressure switch assembly connector.
(c) Start the engine.
(d) Measure the resistance according to the value(s) in the table below. Standard Resistance:
If the result is not as specified, replace the engine oil pressure switch assembly. |
|
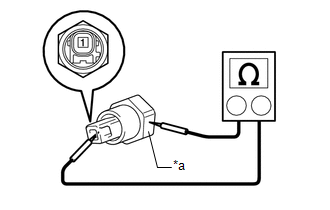
(e) Connect the engine oil pressure switch assembly connector.
(f) Engage the clamp to connect the wire harness protector.
Installation
INSTALLATION
PROCEDURE
1. INSTALL ENGINE OIL PRESSURE SWITCH ASSEMBLY
(a) Apply adhesive to 2 or 3 threads of the engine oil pressure switch assembly. Adhesive: Toyota Genuine Adhesive 1344, Three Bond 1344 or equivalent NOTICE:
|
|
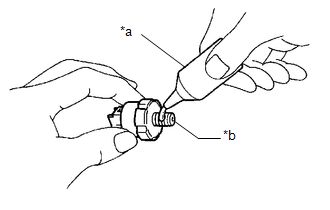
(b) Using a 24 mm deep socket wrench, install the engine oil pressure switch assembly.
Torque:
15 N·m {153 kgf·cm, 11 ft·lbf}
NOTICE:
Do not start the engine for at least 1 hour after installation.
(c) Connect the engine oil pressure switch assembly connector.
(d) Engage the clamp to connect the wire harness protector.
2. ADD ENGINE OIL
Click here 
3. CHECK ENGINE OIL LEVEL
Click here
4. INSPECT FOR OIL LEAK
Click here
5. INSTALL FRONT FENDER APRON SEAL RH
Click here
Removal
REMOVAL
PROCEDURE
1. REMOVE FRONT FENDER APRON SEAL RH
Click here 
2. DRAIN ENGINE OIL
Click here
3. REMOVE ENGINE OIL PRESSURE SWITCH ASSEMBLY
(a) Disengage the clamp to disconnect the wire harness protector. |
|
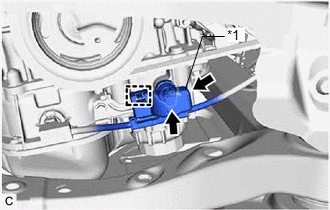
(b) Disconnect the engine oil pressure switch assembly connector.
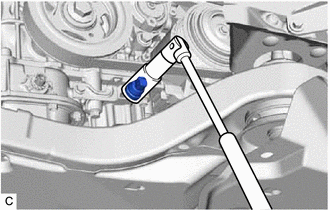
(c) Using a 24 mm deep socket wrench, remove the engine oil pressure switch assembly. |
 |