Hv Battery Thermistor
Components
COMPONENTS
ILLUSTRATION
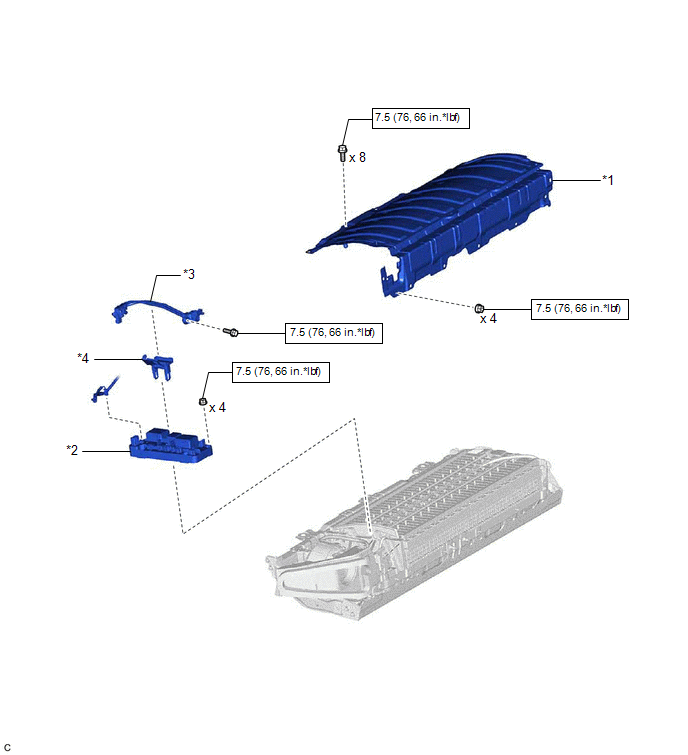
*1 |
UPPER HV BATTERY COVER SUB-ASSEMBLY |
*2 |
HV BATTERY JUNCTION BLOCK ASSEMBLY |
*3 |
ELECTRIC VEHICLE BATTERY PLUG ASSEMBLY |
*4 |
WIRING HARNESS PROTECTOR |
 |
N*m (kgf*cm, ft.*lbf): Specified torque |
- |
- |
ILLUSTRATION
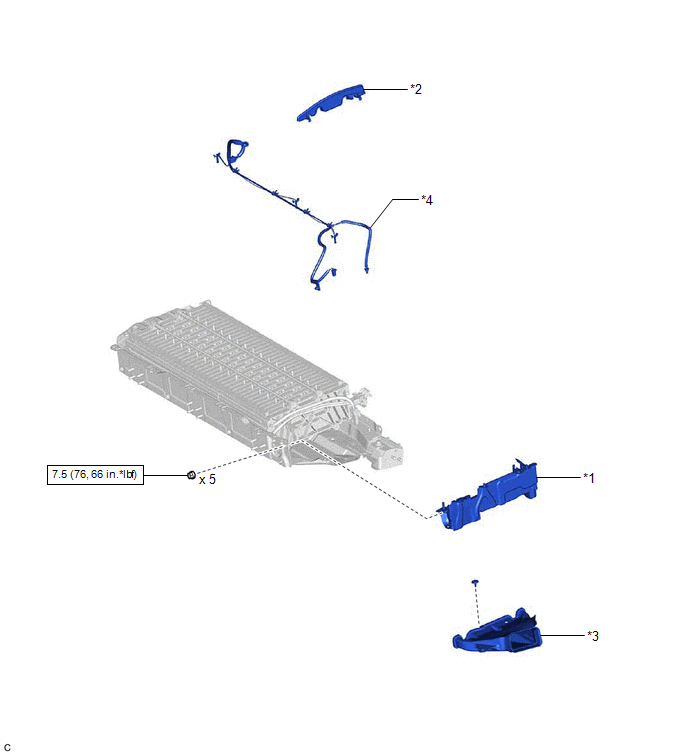
*1 |
NO. 2 HYBRID BATTERY SHIELD SUB-ASSEMBLY |
*2 |
NO. 1 HYBRID BATTERY PACKING |
*3 |
NO. 1 HV BATTERY INTAKE DUCT LH |
*4 |
HYBRID BATTERY THERMISTOR |
|
N*m (kgf*cm, ft.*lbf): Specified torque |
- |
- |
Installation
INSTALLATION
PROCEDURE
1. INSTALL HYBRID BATTERY THERMISTOR
CAUTION:
Be sure to wear insulated gloves and protective goggles.
(a) Engage the 3 claws of the hybrid battery thermistor (sensor portions) to install the hybrid battery thermistor to the HV battery. HINT: Install each hybrid battery thermistor (sensor portion) to the appropriate location shown in the illustration. |
|
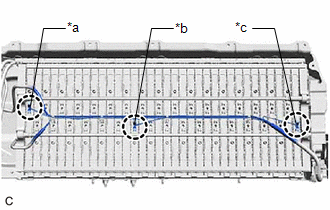
(b) Engage the 4 clamps in the locations shown in the illustration. |
|
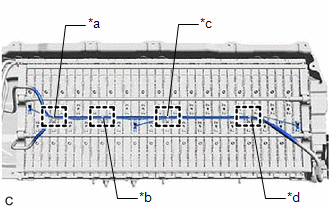
(c) Connect the battery voltage sensor connector.
(d) Engage the clamp.
(e) Engage the 2 claws to install the No. 1 hybrid battery packing to the HV battery. NOTICE: Align each piece of tape on the wire harness of the hybrid battery thermistor with the edge of the No. 1 hybrid battery packing as shown in the illustration and then engage the 2 claws to install the No. 1 hybrid battery packing to the HV battery. |
|
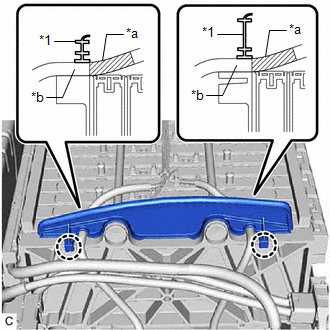
(f) Engage the clamp.
2. INSTALL NO. 1 HV BATTERY INTAKE DUCT LH
CAUTION:
Be sure to wear insulated gloves and protective goggles.
(a) Install the No. 1 HV battery intake duct LH to the HV battery with the clip.
(b) Engage the claw of hybrid battery thermistor (sensor portion) to connect the hybrid battery thermistor to the No. 1 HV battery intake duct LH.
3. INSTALL NO. 2 HYBRID BATTERY SHIELD SUB-ASSEMBLY
CAUTION:
Be sure to wear insulated gloves and protective goggles.
(a) Pull back the rear No. 1 HV battery shield and install the No. 2 hybrid battery shield sub-assembly to the HV battery.
HINT:
Pull back the rear No. 1 HV battery shield until there is sufficient clearance for the stud bolt of the No. 2 hybrid battery shield sub-assembly.
(b) Install the 5 nuts.
Torque:
7,5 N·m {76 kgf·cm, 66 in·lbf}
4. INSTALL HV BATTERY JUNCTION BLOCK ASSEMBLY
Click here 
5. INSTALL UPPER HV BATTERY COVER SUB-ASSEMBLY
Click here
6. INSTALL HV BATTERY
Click here
Removal
REMOVAL
The necessary procedures (adjustment, calibration, initialization or registration) that must be performed after parts are removed and installed, or replaced during hybrid battery thermistor removal/installation are shown below.
Necessary Procedures After Parts Removed/Installed/ReplacedReplaced Part or Performed Procedure | Necessary Procedure | Effect/Inoperative Function when Necessary Procedure not Performed | Link |
|---|---|---|---|
| *: When performing learning using the Techstream. Click here |
|||
Auxiliary battery terminal is disconnected/reconnected |
Perform steering sensor zero point calibration |
Lane departure alert system (w/ Steering Control) |
 |
Pre-collision system |
|||
Intelligent clearance sonar system* |
|||
Lighting System (for HV Model with Cornering Light) |
|||
Memorize steering angle neutral point |
Parking assist monitor system |
|
|
Panoramic view monitor system |
|
||
Replacement of HV battery |
Battery status info update |
HV battery status information cannot be updated |
|
CAUTION:
- Orange wire harnesses and connectors indicate high-voltage circuits. To prevent electric shock, always follow the procedure described in the repair manual.
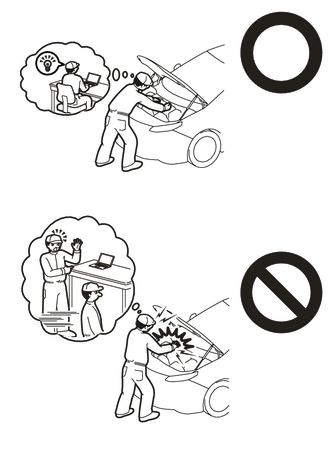
Click here
- To prevent electric shock, wear insulated gloves when working on wire harnesses and components of the high voltage system.
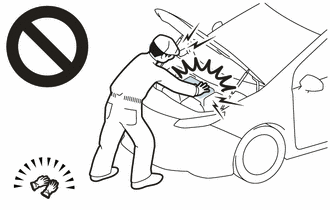
NOTICE:
After turning the power switch off, waiting time may be required before disconnecting the cable from the negative (-) auxiliary battery terminal. Therefore, make sure to read the disconnecting the cable from the negative (-) auxiliary battery terminal notices before proceeding with work.
Click here
PROCEDURE
1. REMOVE HV BATTERY
Click here
2. REMOVE UPPER HV BATTERY COVER SUB-ASSEMBLY
Click here
3. REMOVE HV BATTERY JUNCTION BLOCK ASSEMBLY
Click here
4. REMOVE NO. 2 HYBRID BATTERY SHIELD SUB-ASSEMBLY
CAUTION:
Be sure to wear insulated gloves and protective goggles.
(a) Remove the 5 nuts. |
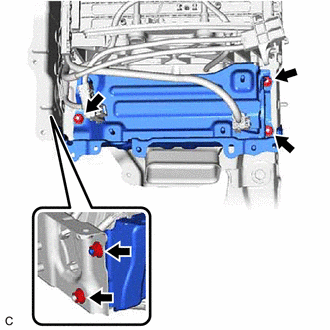 |
(b) Pull back the rear No. 1 HV battery shield and remove the No. 2 hybrid battery shield sub-assembly from the HV battery.
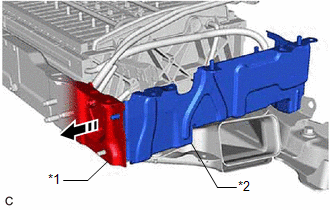
*1 |
Rear No. 1 HV Battery Shield |
*2 |
No. 2 Hybrid Battery Shield Sub-assembly |
 |
Pull Back |
HINT:
Pull back the rear No. 1 HV battery shield until it is separated from the stud bolt of the No. 2 hybrid battery shield sub-assembly.
5. REMOVE NO. 1 HV BATTERY INTAKE DUCT LH
CAUTION:
Be sure to wear insulated gloves and protective goggles.
(a) Remove the clip to disconnect the No. 1 HV battery intake duct LH from the HV battery. |
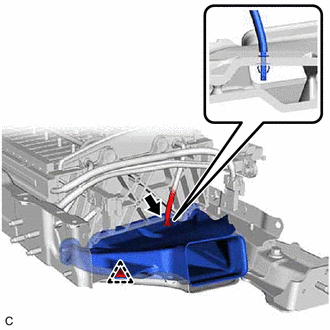 |
(b) Disengage the claw of hybrid battery thermistor (sensor portion) and remove the No. 1 HV battery intake duct LH.
6. REMOVE HYBRID BATTERY THERMISTOR
CAUTION:
Be sure to wear insulated gloves and protective goggles.
(a) Disengage the clamp. |
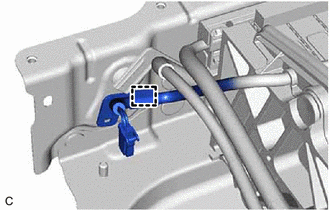 |
(b) Disengage the 2 claws and remove the No. 1 hybrid battery packing from the HV battery. |
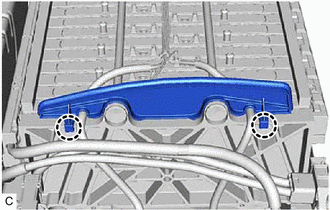 |
(c) Disengage the clamp. |
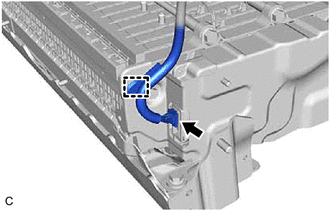 |
(d) Disconnect the battery voltage sensor connector.
(e) Disengage the 4 clamps. |
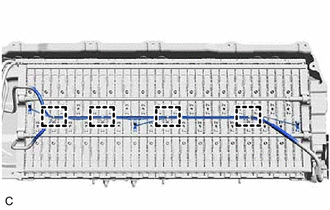 |
(f) Disengage the 3 claws of the hybrid battery thermistor (sensor portions) and remove the hybrid battery thermistor from the HV battery. |
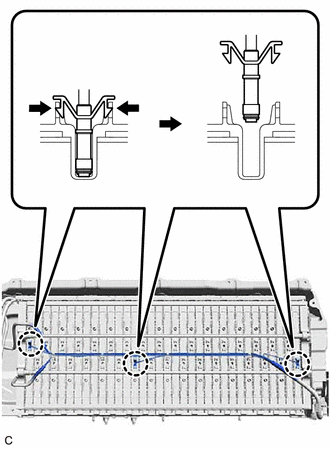 |