Thermostat
Components
COMPONENTS
ILLUSTRATION
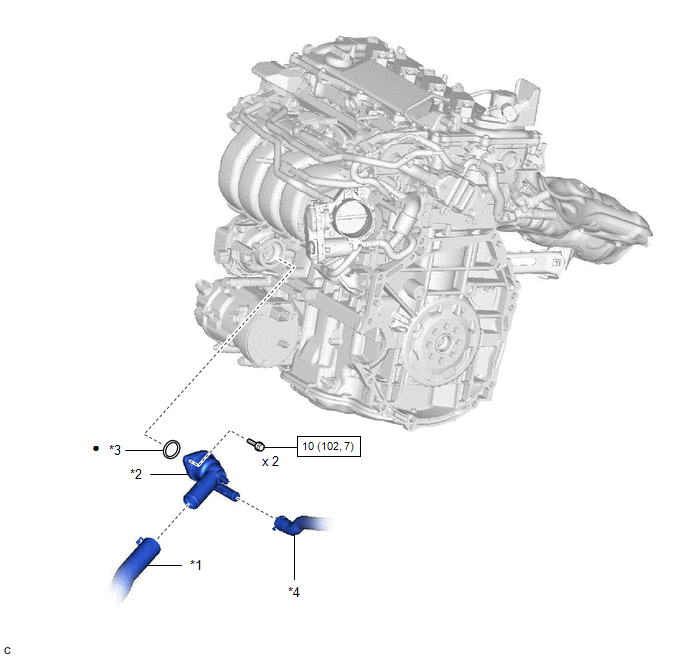
*1 |
NO. 2 RADIATOR HOSE |
*2 |
WATER INLET WITH THERMOSTAT SUB-ASSEMBLY |
*3 |
GASKET |
*4 |
NO. 7 WATER BY-PASS HOSE |
 |
N*m (kgf*cm, ft.*lbf): Specified torque |
● |
Non-reusable part |
Inspection
INSPECTION
PROCEDURE
1. INSPECT WATER INLET WITH THERMOSTAT SUB-ASSEMBLY
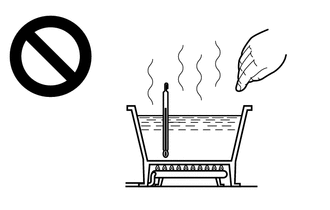
CAUTION:
- Do not put your hands into the water that has been heated for the inspection.
- Touching the heated water could result in burns.
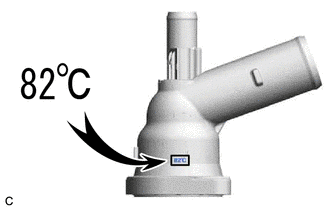
HINT:
The valve opening temperature is inscribed on the water inlet with thermostat sub-assembly.
(a) Immerse the water inlet with thermostat sub-assembly in water and then gradually heat the water.
NOTICE:
Do not allow any water to come into contact with the connector of the water inlet with thermostat sub-assembly.
(b) Check that the valve of the water inlet with thermostat sub-assembly opens at the specified temperature.
Standard Valve Opening Temperature:
80 to 84 °C
If the result is not as specified, replace the water inlet with thermostat sub-assembly.
(c) Check the valve lift. Standard Valve Lift: 8.0 mm (0.315 in.) or more at 95 °C If the result is not as specified, replace the water inlet with thermostat sub-assembly. |
|
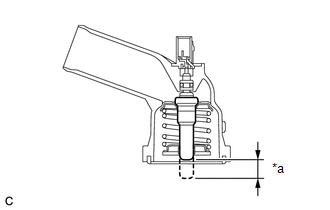
(d) Check that the valve is fully closed when the water inlet with thermostat sub-assembly is at low temperatures (below 72 °C).
If it is not fully closed, replace the water inlet with thermostat sub-assembly.
(e) Measure the resistance according to the value(s) in the table below.
Standard Resistance:
Tester Connection | Condition | Specified Condition |
|---|---|---|
1 - 2 |
Always |
10.6 to 14.2 Ω |
If the result is not as specified, replace the water inlet with thermostat sub-assembly.
Installation
INSTALLATION
NOTICE:
This procedure includes the installation of small-head bolts. Refer to Small-Head Bolts of Basic Repair Hint to identify the small-head bolts.
Click here 
PROCEDURE
1. INSTALL WATER INLET WITH THERMOSTAT SUB-ASSEMBLY
(a) Install a new gasket to the water inlet with thermostat sub-assembly.
HINT:
Be sure to clean the contact surfaces.
(b) Using an 8 mm socket wrench, install the water inlet with thermostat sub-assembly with the 2 bolts.
Torque:
10 N·m {102 kgf·cm, 7 ft·lbf}
(c) Connect the No. 7 water by-pass hose to the water inlet with thermostat sub-assembly and slide the clip to secure it.
(d) Connect the water inlet with thermostat sub-assembly connector.
2. CONNECT NO. 2 RADIATOR HOSE
Click here
3. ADD ENGINE COOLANT (for Engine)
Click here
4. INSPECT FOR COOLANT LEAK (for Engine)
Click here
Removal
REMOVAL
NOTICE:
This procedure includes the removal of small-head bolts. Refer to Small-Head Bolts of Basic Repair Hint to identify the small-head bolts.
Click here 
PROCEDURE
1. DRAIN ENGINE COOLANT (for Engine)
Click here
2. DISCONNECT NO. 2 RADIATOR HOSE
Click here
3. REMOVE WATER INLET WITH THERMOSTAT SUB-ASSEMBLY
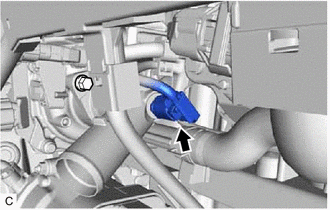
(a) Disconnect the water inlet with thermostat sub-assembly connector. |
 |
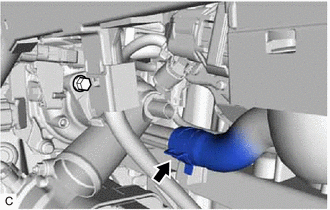
(b) Slide the clip and disconnect the No. 7 water by-pass hose from the water inlet with thermostat sub-assembly. NOTICE:
HINT: When disconnecting the No. 7 water by-pass hose, slide the clip, rotate the hose and pull it straight off the pipe. |
 |
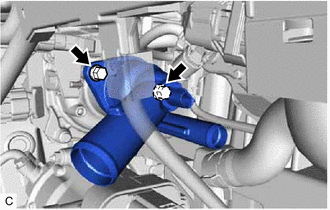
(c) Using an 8 mm socket wrench, remove the 2 bolts and water inlet with thermostat sub-assembly. |
 |
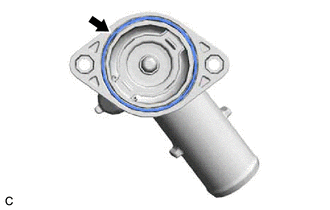
(d) Remove the gasket from the water inlet with thermostat sub-assembly. |
 |