Vacuum Switching Valve(for Engine Mounting)
Components
COMPONENTS
ILLUSTRATION
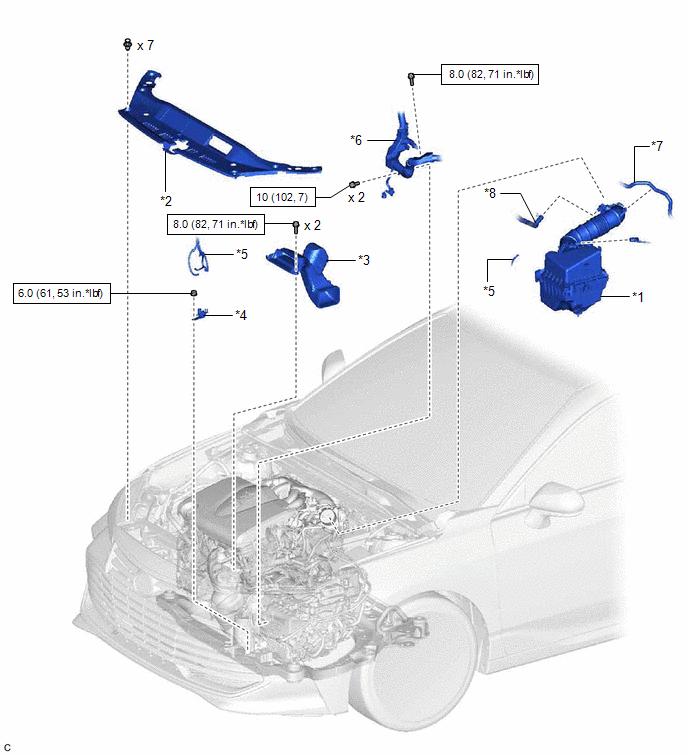
*1 |
AIR CLEANER ASSEMBLY WITH AIR CLEANER HOSE |
*2 |
COOL AIR INTAKE DUCT SEAL |
*3 |
INLET AIR CLEANER ASSEMBLY |
*4 |
VACUUM SWITCHING VALVE (for Active Control Engine Mount System) |
*5 |
VACUUM HOSE |
*6 |
ENGINE WIRE |
*7 |
NO. 1 FUEL VAPOR FEED HOSE |
*8 |
NO. 2 VENTILATION HOSE |
 |
N*m (kgf*cm, ft.*lbf): Specified torque |
- |
- |
Inspection
INSPECTION
PROCEDURE
1. INSPECT VACUUM SWITCHING VALVE (for Active Control Engine Mount System)
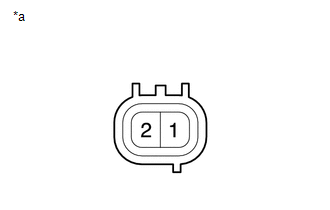
(a) Measure the resistance.
(1) Measure the resistance according to the value(s) in the table below. Standard Resistance:
If the result is not as specified, replace the vacuum switching valve (for active control engine mount system). |
|
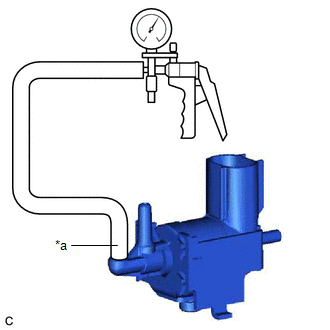
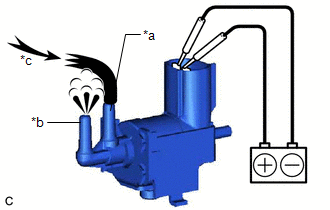
(b) Check the operation of the vacuum switching valve (for active control engine mount system).
(1) Using a vacuum pump, apply a vacuum of 67 kPa (503 mmHg, 19.8 in. Hg) to port (F) and check that the vacuum is maintained. OK: Vacuum pressure holds. If the result is not as specified, replace the vacuum switching valve (for active control engine mount system). |
|
(2) Check that air flows from port (E) to port (G). Standard: Air flows from port (E) to port (G). If the result is not as specified, replace the vacuum switching valve (for active control engine mount system). |
|
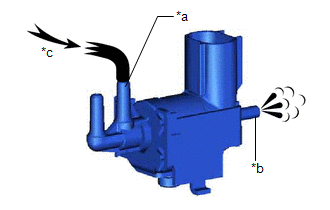
(3) Apply battery voltage to the terminals and check that air flows from port (E) to port (F). Standard: Air flows from port (E) to port (F). If the result is not as specified, replace the vacuum switching valve (for active control engine mount system). |
|
Installation
INSTALLATION
PROCEDURE
1. INSTALL VACUUM SWITCHING VALVE (for Active Control Engine Mount System)
(a) Install the vacuum switching valve (for active control engine mount system) to the front engine mounting insulator with the nut.
Torque:
6 N·m {61 kgf·cm, 53 in·lbf}
(b) Connect the 3 vacuum hoses to the vacuum switching valve (for active control engine mount system).
(c) Engage the wire harness clamp and connect the vacuum switching valve (for active control engine mount system) connector.
(d) Install the 2 bolts.
Torque:
10 N·m {102 kgf·cm, 7 ft·lbf}
(e) Engage the wire harness clamp and install the engine wire with the bolt.
Torque:
8 N·m {82 kgf·cm, 71 in·lbf}
2. INSTALL AIR CLEANER ASSEMBLY WITH AIR CLEANER HOSE
Click here 
3. INSTALL INLET AIR CLEANER ASSEMBLY
Click here
4. INSTALL COOL AIR INTAKE DUCT SEAL
Click here
Removal
REMOVAL
PROCEDURE
1. REMOVE COOL AIR INTAKE DUCT SEAL
Click here 
2. REMOVE INLET AIR CLEANER ASSEMBLY
Click here
3. REMOVE AIR CLEANER ASSEMBLY WITH AIR CLEANER HOSE
Click here
4. REMOVE VACUUM SWITCHING VALVE (for Active Control Engine Mount System)
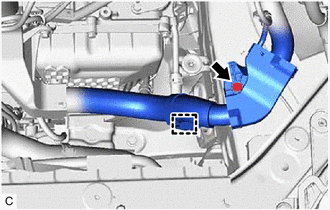
(a) Remove the bolt and disengage the wire harness clamp to separate the engine wire. |
 |
(b) Remove the 2 bolts. |
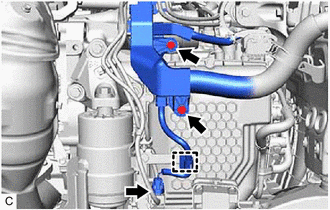 |
(c) Disengage the wire harness clamp and disconnect the vacuum switching valve (for active control engine mount system) connector.
(d) Disconnect the 3 vacuum hoses from the vacuum switching valve (for active control engine mount system). |
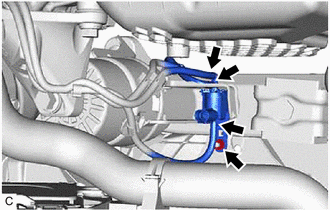 |
(e) Remove the nut and vacuum switching valve (for active control engine mount system) from the front engine mounting insulator.