Emission Control System
CARBURETOR ENGINE MODELS Inspection
PROCEDURE
1. Adjust the idle mixture (CO level) (see subsection 2.2.2).
2. Remove the fuse box cover to access the diagnostic connector located on the underside of the fuse box.
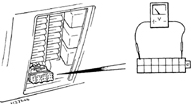
3. Set the tester to measure voltage and connect its probes to the check connector of the fuse box as shown in the illustration.
4. Start the engine, raise engine speed to approximately 2000 rpm and hold it at this speed for about 2 minutes, watching the tester scale. If the exhaust gas sensor is working correctly, the tester reading should change from 0 V to approximately 12 V at least 5 times every 10 seconds. If not, the sensor is probably faulty. For a more detailed check of the sensor and catalytic converter, consult a specialist.
FUEL INJECTION ENGINE MODELS Inspection If the CO level in the exhaust gas is too high, check the exhaust gas sensor operation by putting the engine control module into self-diagnosis mode (see subsection 6.2.11).
For a more detailed check of the sensor and catalytic converter, consult a specialist.
EXHAUST GAS SENSOR Warning The exhaust gas sensor is very fragile and will be damaged if dropped or struck, if its power supply is disconnected during operation, or if any cleaning agents come into contact with it.
Replacement
PROCEDURE
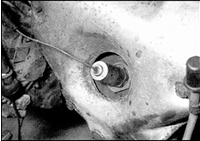
1. On models with a 1.6 liter engine, follow the wiring from the exhaust gas sensor screwed into the exhaust manifold. Disconnect the connector and release the wiring from all retaining clips.
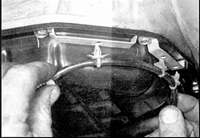
2. On models with a 2.0 liter engine, apply the parking brake, raise the front of the vehicle and support it on stands. Follow the wiring from the exhaust gas sensor (screwed into the exhaust pipe), releasing the wiring from all retaining clips.
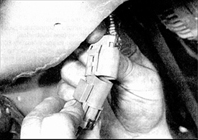
3. Disconnect the connector.
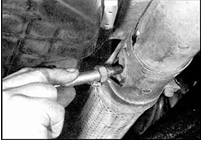
4. Unscrew the sensor and remove it together with the sealing washer.
5. Install in the reverse order of removal. When installing, use a new sealing washer. Before installing the sensor, apply high-temperature grease to the sensor threads. Tighten the sensor securely. Check that the wiring is routed correctly and does not contact the exhaust pipes or engine.
Test yourself
A quick Nissan Sunny quiz: every answer comes with an explanation and a link to the manual page.