System Description - Component Parts ++

In this manual: System Description - Component Parts ++
General Information — 8Engine :: Engine Mechanical — 19Engine Lubrication System - Precautions. Preparation — 1Engine Lubrication System - Lubrication System (System Description). Engine Oil Pressure (Basic Inspection). Service Data and Specifications (SDS) — 1Engine Cooling System - Precautions. Preparation. Service Data and Specifications (SDS) — 1Engine Cooling System - Engine Coolant — 1Engine Control System - System Description — 1System Description - Component Parts ++ — 1System Description - System ++ — 1Engine Control System - Ecu Diagnosis Information — 1Ecu Diagnosis Information - Ecm ++ — 1Engine Control System - Basic Inspection — 1Basic Inspection - Diagnosis and Repair Workflow ++ — 1Basic Inspection - Basic Inspection ++ — 1Basic Inspection - Additional Service When Replacing Ecm ++ — 1Basic Inspection - Fuel Pressure Check ++ — 1Basic Inspection - How to Set Srt Code ++ — 1Basic Inspection - How to Erase Permanent Dtc ++ — 1Engine Control System - Dtc/circuit Diagnosis — 1Engine Control System - Symptom Diagnosis — 1Engine Control System - Periodic Maintenance — 1Engine Control System - Removal and Installation — 1Fuel System - Precautions. Preparation. Service Data and Specifications (SDS) — 1Fuel System - Fuel System (Periodic Maintenance). Fuel Level Sensor Unit (Disassembly and Assembly) — 1Exhaust System - Precautions. Preparation — 1Exhaust System - Exhaust System (Periodic Maintenance). Exhaust System (Removal and Installation) — 1Starting System - Precautions. Preparation. Starter Motor (Service Data and Specifications (sds)) — 1Starting System - Diagnosis and Repair Work Flow — 1Starting System - Starting System (Symptom Diagnosis). Starter Motor (Removal and Installation) — 1Accelerator Control System - Precautions. Service Data and Specifications (SDS) — 1Accelerator Control System - Accelerator Pedal Assembly — 1Transmission & Driveline :: Transaxle & Transmission — 21Driveline - System Description — 1Transfer: Ty92b - Ecu Diagnosis Information. Awd Control Unit ++ — 1Driveline - Basic Inspection — 1Driveline - Dtc/circuit Diagnosis — 1Driveline - Symptom Diagnosis — 1Driveline - Removal and Installation — 1Transfer: Ty92b - Unit Removal and Installation. Transfer Assembly ++ — 1Driveline - Unit Disassembly and Assembly — 1Driveline - Basic Inspection — 1Driveline - Removal and Installation — 1Driveline - Unit Disassembly and Assembly — 1Front Axle - Precautions. Preparation — 1Front Axle - Noise, Vibration and Harshness (nvh) Troubleshooting (Symptom Diagnosis). Service Data and Specifications (SDS) — 1Front Axle - Front Drive Shaft Boot — 1Front Axle - Front Drive Shaft — 1Rear Axle - Precautions. Preparation. Service Data and Specifications (SDS) — 1Rear Axle - Noise, Vibration and Harshness (nvh) Troubleshooting — 1Rear Axle - Rear Drive Shaft — 1Suspension :: Front Suspension — 7Rear Suspension - Precautions. Preparation — 1Rear Suspension - Noise, Vibration and Harshness (nvh) Troubleshooting (Symptom Diagnosis). Service Data and Specifications (SDS) — 1Rear Suspension - Rear Suspension Assembly — 1Road Wheels & Tires - Precautions — 1Road Wheels & Tires - Preparation. Bcm (Ecu Diagnosis Information). Service Data and Specifications (SDS) — 1Road Wheels & Tires - System — 1Brakes :: Brake System — 9Parking Brake System - Precautions. Preparation — 1Parking Brake System - System — 1Vdc/tcs/abs - Precautions ++ — 1Brake Control System - System Description — 1System Description - Component Parts ++ — 1System Description - System ++ — 1Brake Control System - Basic Inspection — 1Brake Control System - Symptom Diagnosis — 1Brake Control System - Removal and Installation — 1Brake Control System - System Description — 1Brake Control System - Dtc/circuit Diagnosis — 1Brake Control System - Removal and Installation — 1Brake Control System - System Description — 1Brake Control System - Basic Inspection — 1Brake Control System - Symptom Diagnosis — 1Brake Control System - System Description — 1Brake Control System - Basic Inspection — 1Brake Control System - Symptom Diagnosis — 1Steering :: Steering System — 9Steering Control System - Precautions — 1Steering Control System - System — 1Steering Control System - Eps Control Unit (Ecu Diagnosis Information. Removal and Installation) — 1Restraints :: Seat Belt — 7Srs Air Bag - Precautions. Preparation — 1Srs Air Bag - Collision Diagnosis — 1Srs Air Bag - Occupant Classification System — 1Srs Air Bag Control System - Precautions — 1Srs Air Bag Control System - System — 1Srs Air Bag Control System - Diagnosis Sensor Unit — 1Srs Air Bag Control System - Inspection and Adjustment — 1Ventilation, Heater & Air Conditioner :: Ventilation System — 6Heater & Air Conditioning System - Precautions — 1Heater & Air Conditioning System - Preparation — 1Heater & Air Conditioning System - Component Parts — 1Heater & Air Conditioning System - Diagnosis and Repair Work Flow — 1Heater & Air Conditioning System - Compressor — 1Heater & Air Conditioning System - Cooler Pipe and Hose — 1Heater & Air Conditioning System - Condenser. Condenser — 1Heater & Air Conditioning System - Heating and Cooling Unit Assembly — 1Heater & Air Conditioning System - Service Data and Specifications (SDS) — 1Heater & Air Conditioning Control System - System Description — 1System Description - Component Parts ++ — 1System Description - System ++ — 1System Description - Operation ++ — 1Heater & Air Conditioning Control System - Ecu Diagnosis Information — 1Heater & Air Conditioning Control System - Basic Inspection — 1Heater & Air Conditioning Control System - Dtc/circuit Diagnosis — 1Heater & Air Conditioning Control System - Symptom Diagnosis — 1Heater & Air Conditioning Control System - Removal and Installation — 1Body Interior :: Interior — 8Instrument Panel - Precautions. Preparation. Clip List — 1Instrument Panel - Squeak and Rattle Trouble Diagnoses — 1Instrument Panel - Cluster Lid C — 1Seat - Precautions — 1Seat - Preparation. Clip List — 1Seat - Component Parts — 1Seat - System — 1Seat - Diagnosis and Repair Work Flow — 1Seat - Front Seat — 1Seat - Second Row Seats — 1Seat - Third Row Seats — 1Seat - Front Seat — 1Seat - Second Row Seat — 1Seat - Third Row Seat — 1Automatic Drive Positioner - Precautions. Preparation — 1Automatic Drive Positioner - System — 1Automatic Drive Positioner - Diagnosis and Repair Work Flow — 1Automatic Drive Positioner - Inspection and Adjustment — 1Body Exterior, Doors, Roof & Vehicle Security :: Door & Lock — 38Security Control System - Precautions — 1Security Control System - System — 1Security Control System - Ecm, Bcm, Intelligent Key Unit, Ipdm E/r — 1Security Control System - Vehicle Security System Cannot Be Set — 1Glass & Window System - Precautions. Preparation — 1Glass & Window System - Squeak and Rattle Trouble Diagnoses — 1Power Window Control System - Precautions. Preparation — 1Power Window Control System - Power Supply and Ground Circuit — 1Power Window Control System - Power Window Motor Circuit — 1Power Window Control System - Front Power Window Rh Alone Does Not Operate — 1Power Window Control System - Rear Lh Side Power Window Alone Does Not Operate — 1Power Window Control System - Rear Rh Side Power Window Alone Does Not Operate — 1Roof - Precautions. Preparation — 1Roof - Power Supply and Ground Circuit — 1Roof - Moonroof Switch Assembly — 1Roof - Lin Communication Circuit — 1Roof - Auto Operation Does Not Operate — 1Roof - Anti-Pinch Function Does Not Operate — 1Exterior - Precautions. Preparation. Clip List (Preparation) — 1Exterior - Squeak and Rattle Trouble Diagnoses — 1Exterior - Fender Protector — 1Exterior - Over Fender — 1Exterior - Under Cover — 1Exterior - Roof Side Rail — 1Body Repair - Service Information — 1Service Information - Sheet Metal Work ++ — 1Service Information - Body Welding and Precautions ++ — 1Service Information - Safety and Health ++ — 1Service Information - Repairing Procedures and Precautions ++ — 1Body Repair - Precaution — 1Body Repair - Preparation — 1Body Repair - Removal and Installation — 1Driver Controls :: Mirrors — 8Exterior Lighting System - System Description — 1System Description - Component Parts ++ — 1Exterior Lighting System - Basic Inspection — 1Exterior Lighting System - Dtc/circuit Diagnosis — 1Exterior Lighting System - Symptom Diagnosis — 1Exterior Lighting System - Periodic Maintenance — 1Exterior Lighting System - Removal and Installation — 1Interior Lighting System - Precautions. Preparation — 1Interior Lighting System - Component Parts. Interior Lighting System — 1Interior Lighting System - System — 1Interior Lighting System - Diagnosis and Repair Work Flow — 1Interior Lighting System - Interior Lighting System Symptoms (Symptom Diagnosis). Bcm (Ecu Diagnosis Information). Service Data and Specifications (SDS) — 1Interior Lighting System - Foot Lamp — 1Wiper & Washer - Precautions — 1Wiper & Washer - Preparation. Bcm, Ipdm E/r (Ecu Diagnosis Information). Service Data and Specifications (SDS) — 1Wiper & Washer - System — 1Wiper & Washer - Diagnosis and Repair Work Flow — 1Defogger - Precautions. Bcm, A/c Auto Amp. (Ecu Diagnosis Information) — 1Defogger - Diagnosis and Repair Work Flow — 1Horn - Precautions — 1Electrical & Power Control :: Power Outlet — 13Body Control System - Precautions. Preparation — 1Body Control System - Component Parts — 1Body Control System - System — 1Body Control System - Diagnosis System (bcm) — 1Body Control System - Bcm — 1Lan System - System Description — 1Lan System - System Description — 1Lan System - Dtc/circuit Diagnosis — 1Lan System - System Description — 1Lan System - Dtc/circuit Diagnosis — 1Power Control System - System Description — 1Power Control System - Basic Inspection — 1Power Control System - Dtc/circuit Diagnosis — 1Power Control System - System Description — 1Power Control System - Basic Inspection — 1Power Control System - Dtc/circuit Diagnosis — 1Power Control System - Removal and Installation — 1Charging System - Precautions. Preparation. Ecm, Ipdm E/r (Ecu Diagnosis Information) — 1Charging System - Diagnosis and Repair Work Flow — 1Charging System - Charging System (Symptom Diagnosis). Generator (Removal and Installation). Service Data and Specifications (SDS) — 1Power Supply, Ground & Circuit Elements - Precautions. Preparation. Service Data and Specifications (SDS) — 1Driver Information & Multimedia :: Meter, Warning Lamp & Indicator — 25Warning Chime System - Application Notice (How to Use This Manual). Precautions — 1Warning Chime System - System — 1Warning Chime System - Diagnosis System (combination Meter) — 1Warning Chime System - Bcm, Combination Meter (Ecu Diagnosis Information). Diagnosis and Repair Work Flow (Basic Inspection) — 1Sonar System - Precautions. Preparation — 1Sonar System - Sonar Control Unit — 1Dtc/circuit Diagnosis - B2720 Corner Sensor [rl] ++ — 1Audio, Visual & Navigation System - System Description — 1System Description - Component Parts ++ — 1System Description - System ++ — 1Audio, Visual & Navigation System - Ecu Diagnosis Information — 1Audio, Visual & Navigation System - Basic Inspection — 1Audio, Visual & Navigation System - Dtc/circuit Diagnosis — 1Dtc/circuit Diagnosis - Multi Av (av Control Unit) ++ — 1Audio, Visual & Navigation System - Symptom Diagnosis — 1Symptom Diagnosis - Multi Av System ++ — 1Audio, Visual & Navigation System - Removal and Installation — 1Audio, Visual & Navigation System - System Description — 1Audio, Visual & Navigation System - Ecu Diagnosis Information — 1Audio, Visual & Navigation System - Basic Inspection — 1Audio, Visual & Navigation System - Dtc/circuit Diagnosis — 1Audio, Visual & Navigation System - Symptom Diagnosis — 1Audio, Visual & Navigation System - Removal and Installation — 1Audio, Visual & Navigation System - System Description — 1Audio, Visual & Navigation System - Basic Inspection — 1Audio, Visual & Navigation System - Dtc/circuit Diagnosis — 1Audio, Visual & Navigation System - Symptom Diagnosis — 1Audio, Visual & Navigation System - Removal and Installation — 1Audio, Visual & Navigation System - System Description — 1Audio, Visual & Navigation System - Basic Inspection — 1Audio, Visual & Navigation System - Dtc/circuit Diagnosis — 1Audio, Visual & Navigation System - Symptom Diagnosis — 1Audio, Visual & Navigation System - Removal and Installation — 1Cruise Control & Driver Assistance :: Cruise Control System — 17Driver Assistance System - System Description — 1Driver Assistance System - Basic Inspection — 1Driver Assistance System - Dtc/circuit Diagnosis — 1Driver Assistance System - System Description — 1System Description - Component Parts ++ — 1System Description - System ++ — 1System Description - Operation ++ — 1System Description - Handling Precaution ++ — 1Driver Assistance System - Ecu Diagnosis Information — 1Driver Assistance System - Basic Inspection — 1Basic Inspection - Distance Sensor Alignment ++ — 1Basic Inspection - Camera Aiming Adjustment ++ — 1Basic Inspection - Action Test ++ — 1Driver Assistance System - Dtc/circuit Diagnosis — 1Dtc/circuit Diagnosis - Laser/radar (distance Sensor) ++ — 1Dtc/circuit Diagnosis - Lane Camera (front Camera Unit) ++ — 1Driver Assistance System - Symptom Diagnosis — 1Driver Assistance System - Removal and Installation — 1Driver Assistance System - System Description — 1System Description - System ++ — 1Driver Assistance System - Basic Inspection — 1Driver Assistance System - Dtc/circuit Diagnosis — 1Drive Mode System - Precautions — 1Drive Mode System - Component Parts. Drive Mode System — 1Drive Mode System - System — 1Drive Mode System - Diagnosis and Repair Work Flow — 1Drive Mode System - Drive Mode Select Switch Circuit — 1Maintenance - Precautions. Preparation — 1Maintenance - General Maintenance — 1Maintenance - Periodic Maintenance — 1Maintenance - Recommended Fluids and Lubricants — 1Maintenance - Engine Maintenance — 1Maintenance - Chassis and Body Maintenance — 1Engine Lubrication System - Periodic Maintenance — 1Engine Lubrication System - Removal and Installation — 1Engine Cooling System - System Description — 1Engine Cooling System - Removal and Installation — 1Engine Control System - Vq35dd — 1Fuel System - Removal and Installation — 1Starting System - System Description — 1Starting System - Dtc/circuit Diagnosis — 1Driveline - Transfer: Ty92b — 1Driveline - Rear Propeller Shaft: 3fcj-Cvj — 1Driveline - Rear Final Drive: R145 — 1Front Axle - Periodic Maintenance — 1Front Axle - Removal and Installation — 1Rear Axle - Periodic Maintenance — 1Rear Axle - Removal and Installation — 1Rear Suspension - Removal and Installation — 1Road Wheels & Tires - System Description — 1Road Wheels & Tires - Basic Inspection — 1Road Wheels & Tires - Dtc/circuit Diagnosis — 1Road Wheels & Tires - Symptom Diagnosis — 1Road Wheels & Tires - Periodic Maintenance — 1Road Wheels & Tires - Removal and Installation — 1Parking Brake System - System Description — 1Parking Brake System - Basic Inspection — 1Parking Brake System - Dtc/circuit Diagnosis — 1Parking Brake System - Symptom Diagnosis — 1Parking Brake System - Removal and Installation — 1Brake Control System - Vdc/tcs/abs — 1Brake Control System - Automatic Brake Hold — 1Brake Control System - Automatic Emergency Braking — 1Brake Control System - Rear Automatic Braking — 1Steering Control System - System Description — 1Steering Control System - Basic Inspection — 1Steering Control System - Dtc/circuit Diagnosis — 1Steering Control System - Symptom Diagnosis — 1Srs Air Bag - Removal and Installation — 1Srs Air Bag Control System - System Description — 1Srs Air Bag Control System - Basic Inspection — 1Srs Air Bag Control System - Symptom Diagnosis — 1Heater & Air Conditioning System - Symptom Diagnosis — 1Heater & Air Conditioning System - Periodic Maintenance — 1Heater & Air Conditioning Control System - Automatic Air Conditioning — 1Instrument Panel - Removal and Installation — 1Instrument Panel - Unit Disassembly and Assembly — 1Seat - Ecu Diagnosis Information — 1Seat - Dtc/circuit Diagnosis — 1Seat - Symptom Diagnosis — 1Automatic Drive Positioner - System Description — 1Automatic Drive Positioner - Ecu Diagnosis Information — 1Automatic Drive Positioner - Dtc/circuit Diagnosis — 1Automatic Drive Positioner - Symptom Diagnosis — 1Automatic Drive Positioner - Removal and Installation — 1Security Control System - System Description — 1Security Control System - Basic Inspection — 1Security Control System - Dtc/circuit Diagnosis — 1Security Control System - Symptom Diagnosis — 1Security Control System - Removal and Installation — 1Glass & Window System - Removal and Installation — 1Power Window Control System - System Description — 1Power Window Control System - Ecu Diagnosis Information — 1Power Window Control System - Basic Inspection — 1Power Window Control System - Dtc/circuit Diagnosis — 1Power Window Control System - Symptom Diagnosis — 1Power Window Control System - Removal and Installation — 1Roof - System Description — 1Roof - Ecu Diagnosis Information — 1Roof - Basic Inspection — 1Roof - Dtc/circuit Diagnosis — 1Roof - Symptom Diagnosis — 1Roof - Removal and Installation — 1Exterior - System Description — 1Exterior - Removal and Installation — 1Body Repair - Repair Information — 1Exterior Lighting System - Led Headlamp — 1Interior Lighting System - Dtc/circuit Diagnosis — 1Interior Lighting System - Removal and Installation — 1Wiper & Washer - System Description — 1Wiper & Washer - Dtc/circuit Diagnosis — 1Wiper & Washer - Symptom Diagnosis — 1Wiper & Washer - Removal and Installation — 1Defogger - System Description — 1Defogger - Dtc/circuit Diagnosis — 1Defogger - Symptom Diagnosis — 1Defogger - Removal and Installation — 1Horn - Removal and Installation — 1Body Control System - Basic Inspection — 1Body Control System - Dtc/circuit Diagnosis — 1Body Control System - Symptom Diagnosis — 1Body Control System - Removal and Installation — 1Lan System - Can Fundamental — 1Lan System - Can — 1Lan System - Can Gateway — 1Power Control System - Ipdm E/r — 1Power Control System - Power Distribution System — 1Charging System - System Description — 1Charging System - Dtc/circuit Diagnosis — 1Power Supply, Ground & Circuit Elements - System Description — 1Power Supply, Ground & Circuit Elements - Basic Inspection — 1Power Supply, Ground & Circuit Elements - Removal and Installation — 1Warning Chime System - System Description — 1Warning Chime System - Dtc/circuit Diagnosis — 1Warning Chime System - Symptom Diagnosis — 1Sonar System - System Description — 1Sonar System - Basic Inspection — 1Sonar System - Dtc/circuit Diagnosis — 1Sonar System - Symptom Diagnosis — 1Sonar System - Removal and Installation — 1Audio, Visual & Navigation System - Nissanconnect — 1Audio, Visual & Navigation System - Intelligent Around View Monitor System — 1Audio, Visual & Navigation System - Rear View Monitor System — 1Audio, Visual & Navigation System - Telematics System — 1Driver Assistance System - Adas Control Unit 2 — 1Driver Assistance System - Driver Assistance System — 1Driver Assistance System - Chassis Control — 1Drive Mode System - Removal and Installation — 1Dtc/circuit Diagnosis (C053c Wheel Speed Sensor ... U2141 Can Comm Circuit) — 1Dtc/circuit Diagnosis (P0011 Intake Valve Timing Control ... P0111 Iat Sensor) — 1Dtc/circuit Diagnosis (P0116 Engine Coolant Temperature Sensor ... P025b Fuel Pump Module a) — 1Dtc/circuit Diagnosis (P026b Injection Timing ... P0420 Three Way Catalyst Function) — 1Dtc/circuit Diagnosis (P0441 Evap Control System ... P0524 Engine Oil Pressure) — 1Dtc/circuit Diagnosis (P0532 A/c Refrigerant Pressure Sensor ... P064d Ecm) — 1Dtc/circuit Diagnosis (P06da Engine Oil Pressure Control Solenoid Valve ... P1217 Engine Over Temperature) — 1Dtc/circuit Diagnosis (P1220 Fuel Pump Control Module (fpcm) ... P1574 Ascd Vehicle Speed Sensor) — 1Dtc/circuit Diagnosis (P1575 Brake Switch ... P2101 Electric Throttle Control Function) — 1Dtc/circuit Diagnosis (P2118 Throttle Control Motor ... P34ac Electric Intake Valve Timing Control Actuator) — 1Dtc/circuit Diagnosis (Active Grille Shutter ... High Pressure Fuel Pump) — 1Dtc/circuit Diagnosis (Ignition Signal ... Variable Induction Air System) — 14012 C1040 Emergency Brake — 14013 C106a Wheel Sensor — 14014 C1078-55 Not Configuration — 14015 C10b4-98 Overheat — 14016 B1001 Lap Pre-Tensioner Lh — 14017 B0001 Driver Air Bag Module — 14018 B100e Knee Air Bag Module Rh — 14019 B142x Collision Detection — 1Dtc/circuit Diagnosis (B20c7-11 A/c Clutch ... B24a6-11 in-Vehicle Sensor) — 1Dtc/circuit Diagnosis (B24a6-15 in-Vehicle Sensor ... U2140-87 Can Comm Err (ecm)) — 1Dtc/circuit Diagnosis (C1f00-1c Control Unit ... C1f04-61 Brake Sw/stop Lamp Sw) — 1Dtc/circuit Diagnosis (C1f05-49 Front Camera Unit ... C1f70-87 Ethernet Circuit) — 1
~15min read

Automatic Air Conditioning System

Component Parts Location
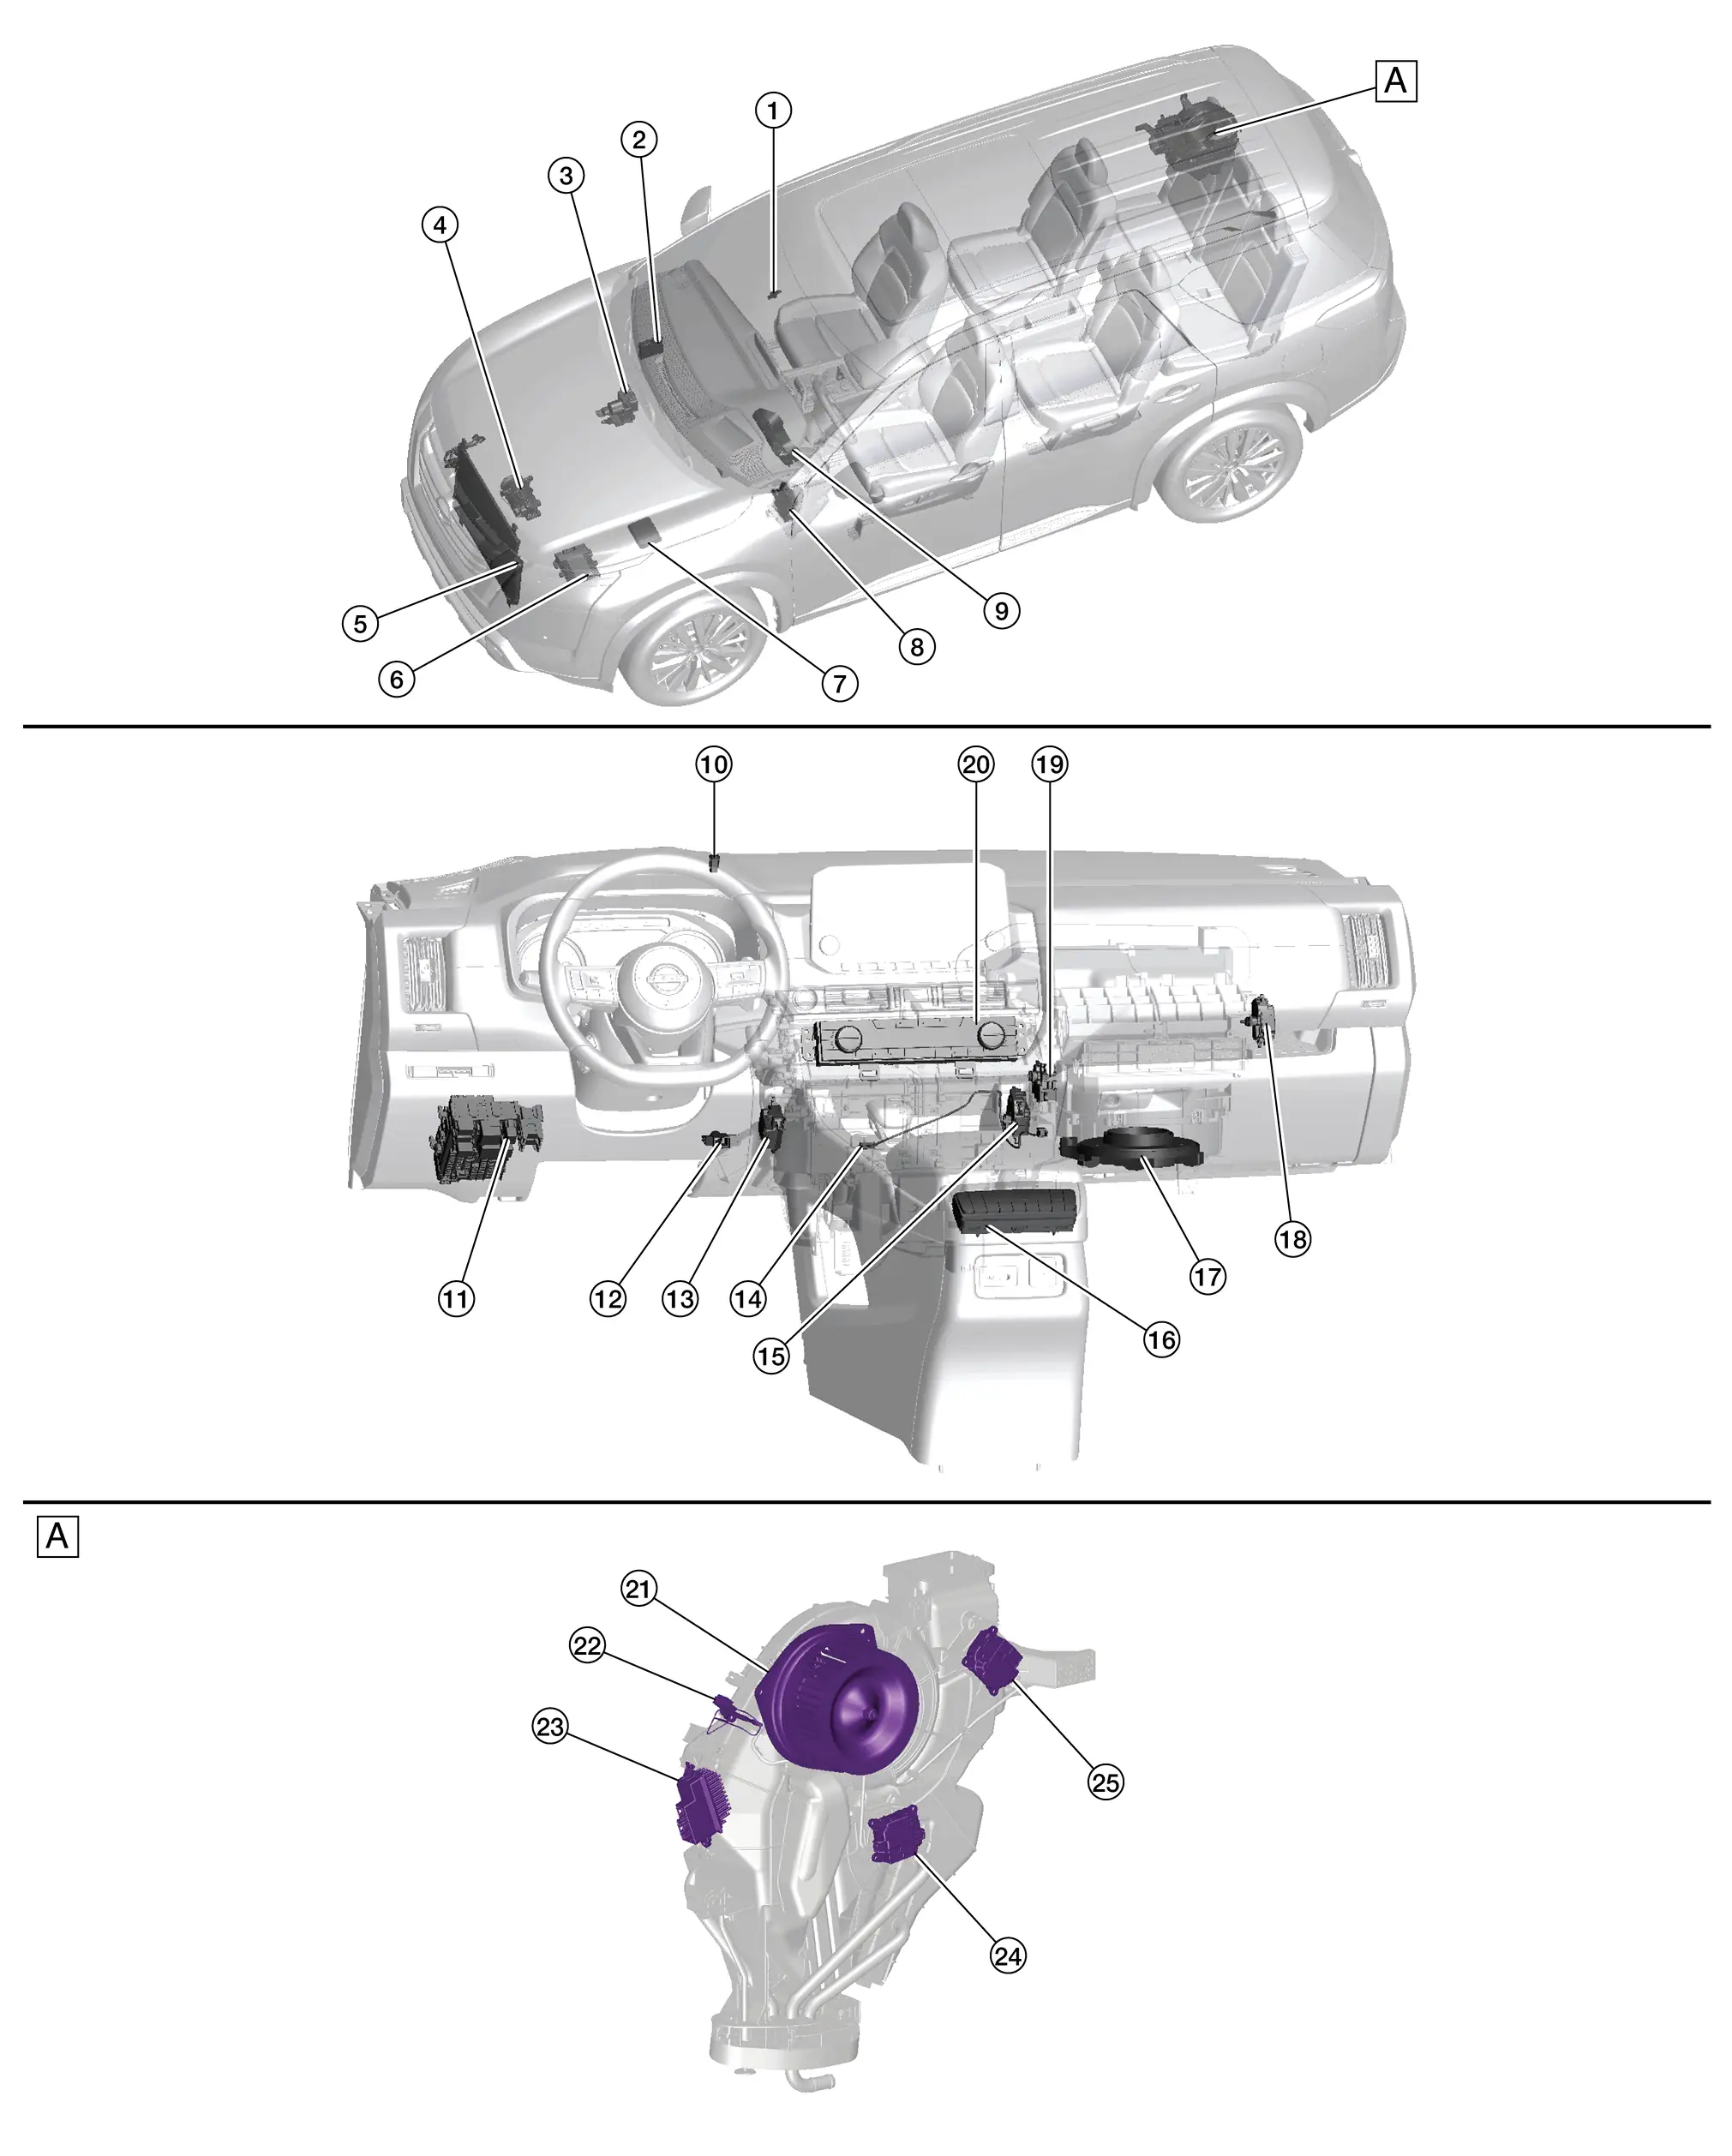
A. Right rear of vehicle (view with rear A/C and heater removed)
No. Component Function
1. Rain sensor (humidity sensor) Refer to Rain Sensor (Humidity Sensor).
2. A/C auto amp. Refer to A/C Auto Amp..
3. ABS (Anti-lock Braking System) actuator and electric unit (control unit)

Transmits Nissan Pathfinder vehicle speed signal to A/C auto amp. via CAN communication.

Refer to Component Parts Location for detailed component location.
4. A/C compressor Refer to A/C Compressor.
5. Refrigerant pressure sensor Refer to Refrigerant Pressure Sensor.
6. ECM (Engine Control Module)

Sends an A/C compressor ON request to the IPDM E/R based on the status of engine operation and load as well as refrigerant pressure information. If all the conditions are met for A/C operation, the ECM transmits the A/C compressor ON request to the IPDM E/R. The ECM shares the refrigerant pressure sensor signal, engine RPM, and engine coolant temperature with the A/C auto amp. via CAN communication.

Refer to Component Parts Location for detailed component location.
7. IPDM E/R (Intelligent Power Distribution Module Engine Room)

Supply power to A/C compressor when A/C compressor request signal is received from ECM via CAN communication.

Refer to System Description.
8. BCM (Body Control Module)

Transmits remote engine start status signal to A/C auto amp. via CAN communication.

Refer to System Description.
9. Combination meter

Transmits ambient temperature signal to A/C auto amp. via CAN communication.

Refer to Component Parts Location (Full TFT Meter) or Component Parts Location (7 Inch Information Display Meter) for detailed component location.
10. Sunload sensor Refer to Sunload Sensor.
11. Fuse block (J/B) (heated steering wheel relay and back-up lamp relay) (if so equipped) Supply the power to heated steering wheel.
12. Front in-Nissan Pathfinder vehicle sensor Refer to Front In-Vehicle Sensor.
13. Air mix door motor LH Refer to Air Mix Door Motor LH.
14. Intake sensor Refer to Intake Sensor.
15. Air mix door motor RH Refer to Air Mix Door Motor RH.
16. Rear A/C switch assembly (if so equipped) Refer to Rear A/C Switch Assembly.
17. Front blower motor Refer to Front Blower Motor.
18. Intake door motor Refer to Intake Door Motor.
19. Mode door motor (front) Refer to Mode Door Motor (Front).
20. Front A/C switch assembly Refer to Front A/C Switch Assembly.
21. Rearblower motor Refer to Rear Blower Motor.
22. Rear in-Nissan Pathfinder vehicle sensor Refer to Rear In-Vehicle Sensor.
23. Rear blower motor resistor Refer to Rear Blower Motor Resistor.
24. Air mix door motor (rear) (if so equipped) Refer to Air Mix Door Motor (Rear).
25. Mode door motor (rear) (if so equipped) Refer to Mode Door Motor (Rear).

A/C Auto Amp.

  • The A/C auto amp. is installed to the blower unit assembly.
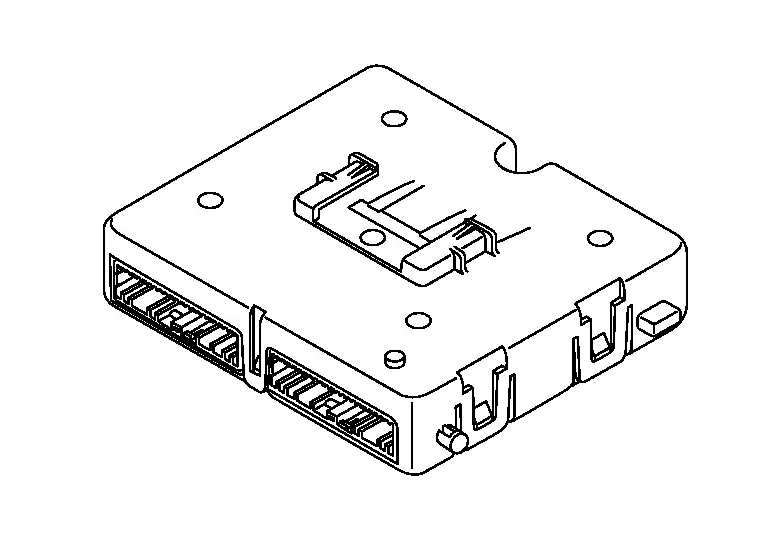
  • A/C auto amp. controls the automatic air conditioning system by inputting and calculating signals from each sensor and each switch.

  • The A/C auto amp. consists of a microcomputer and input/output connectors for signals and power supply.

  • It has a CAN communications function, and it transmits and receives the necessary signals from each control module via CAN communication.

  • It has a LIN communications function, and transmits and receives signals to/from the A/C switch assembly, each door motor, rear air control and each seat heater.

  • A/C auto amp. has self-diagnosis function. Diagnosis of automatic air conditioning system can be performed quickly.

Front A/C Switch Assembly

  • The front A/C switch assembly is installed to the center ventilator finisher.

  • Front A/C switch assembly transmits setting status to A/C auto amp. via LIN communication. A/C auto amp. controls automatic air conditioning system.

  • Front A/C switch assembly has switches and display that can set and indicate the operation of automatic air conditioning system.

  • The conditions that are set for the automatic air conditioning system that is operated by each control switch are transmitted to the A/C auto amp. via LIN communication.

  • The operating status of the automatic air conditioner is transmitted from the A/C auto amp. via LIN communication.

Rear A/C Switch Assembly

  • The rear A/C switch assembly is installed to the console rear finisher.
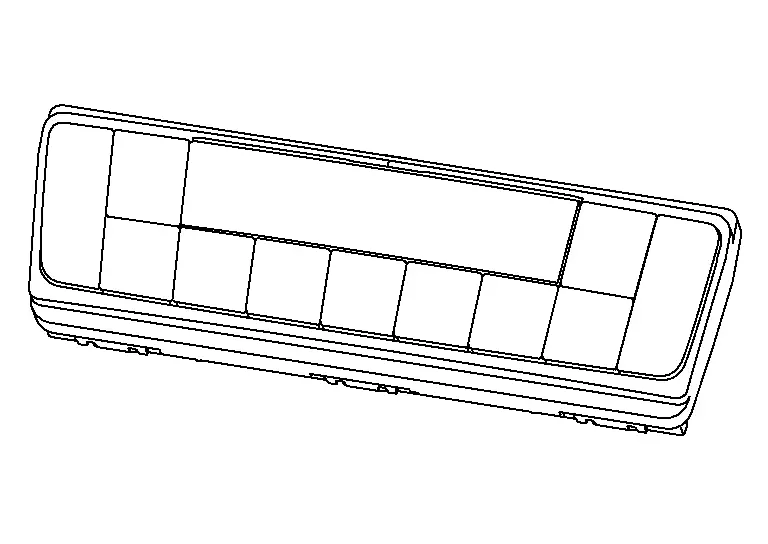
  • The rear A/C switch assembly is activated via LIN communication with the A/C auto amp., and can set the rear temperature.

  • The rear air conditioning operating status is indicated on the display located on the control.

  • The conditions that are set for the rear A/C switch assembly that is operated by temperature switch are transmitted to the A/C auto amp. via LIN communication.

  • The operating status of the air conditioner is transmitted from the A/C auto amp. via LIN communication.

  • The operation status of each switch is detected by the control and is transmitted as an operation signal to the A/C auto amp. via LIN communication.

Ambient Sensor

  • The ambient sensor is installed to the active grille shutter.
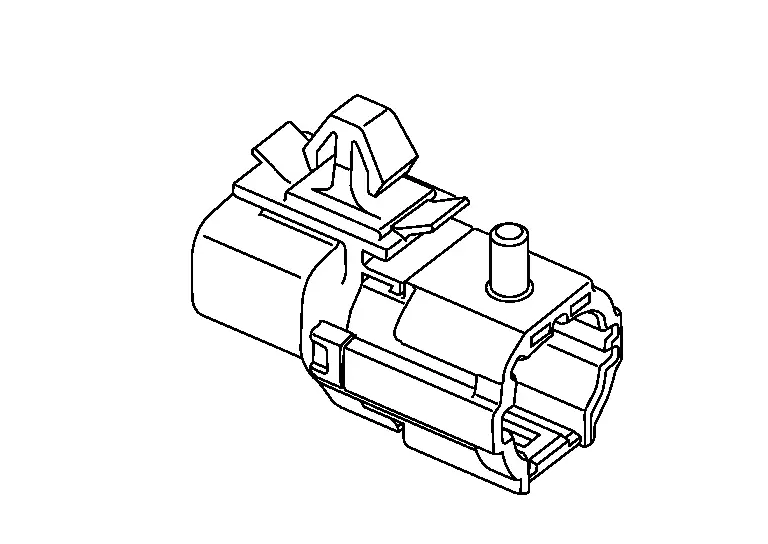
  • The ambient sensor detects the temperature of the ambient air, and transmits the ambient sensor signal to the combination meter.

  • This signal is transmitted from the combination meter to the A/C auto amp. via CAN communication and is used in air conditioning system.

  • The ambient sensor measures the ambient air temperature.

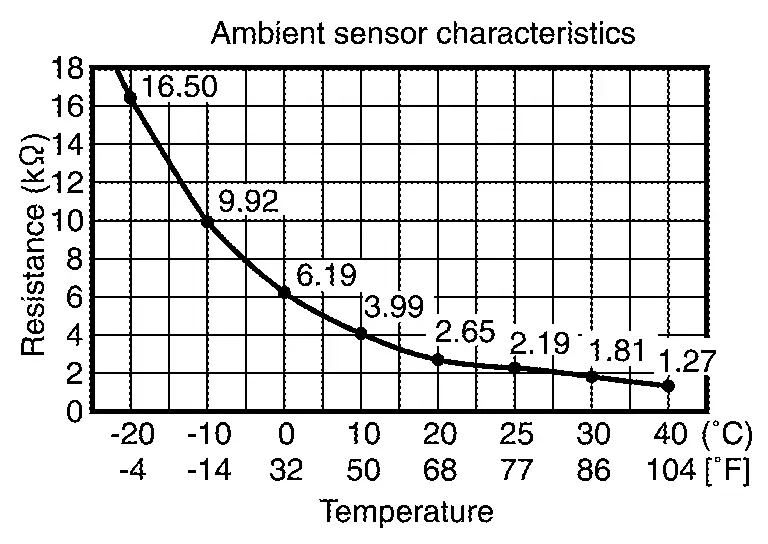
  • The ambient sensor measures the ambient air temperature, and transmits the ambient sensor signal to the combination meter. This sensor uses a thermistor with electrical resistance that decreases as the temperature increases.
Intake Sensor

  • Intake sensor is located on the evaporator.

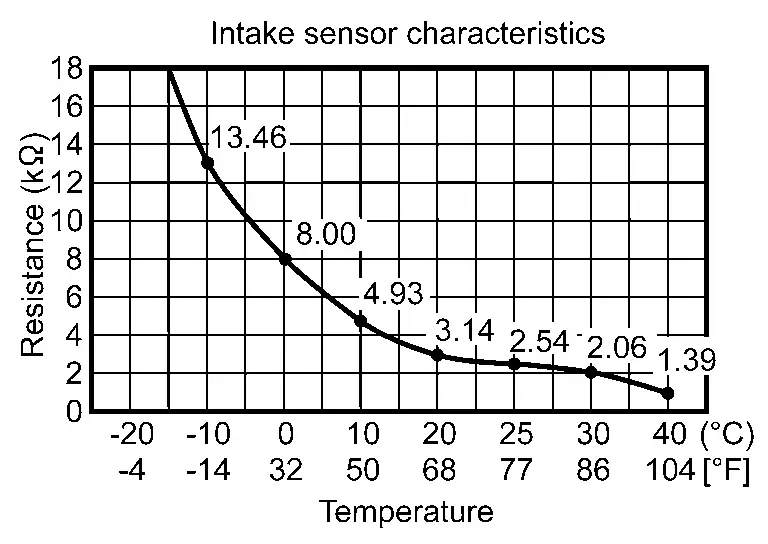
  • The intake sensor converts the evaporator surface temperature detected with thermistor into the voltage, and the A/C auto amp. inputs this voltage.

  • Intake sensor measures evaporator temperature (through air temperature).

  • The sensor uses a thermistor which is sensitive to the change in temperature. The electrical resistance of the thermistor decreases as temperature increases.
Front In-Vehicle Sensor

  • The front in-vehicle sensor is installed to the instrument lower panel LH.
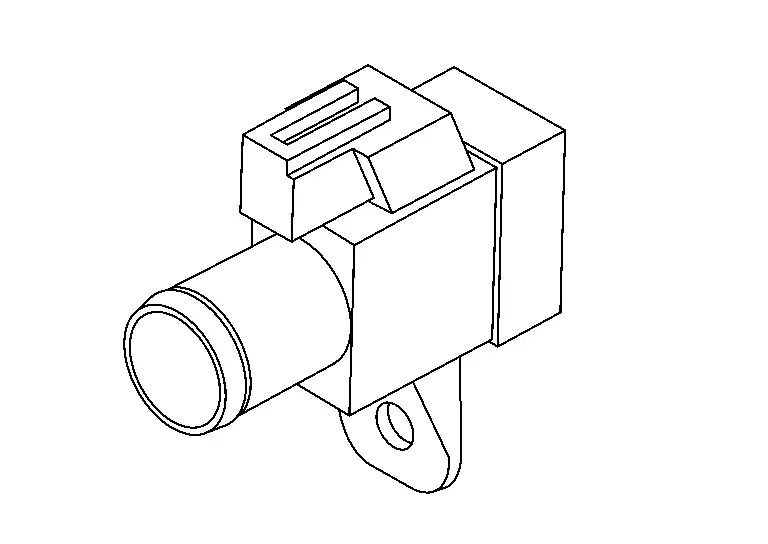
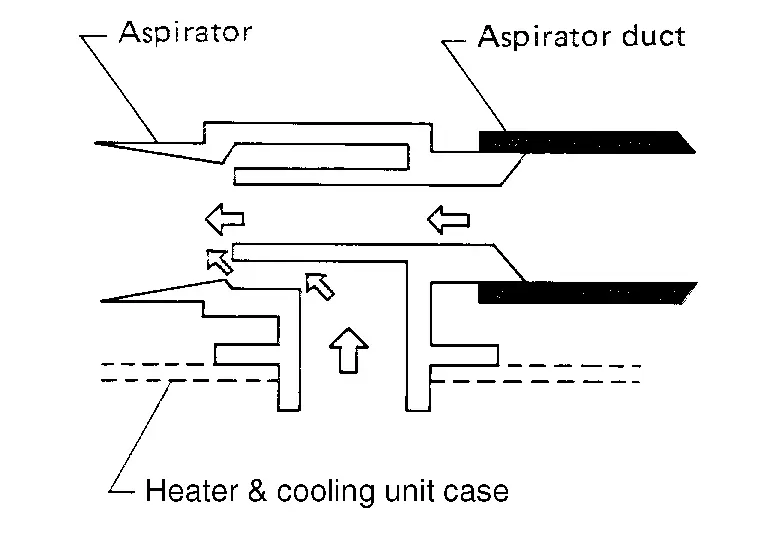
  • The front in-Nissan Pathfinder vehicle sensor detects the temperature of the in-vehicle air that is taken in by the aspirator, and transmits the in-Nissan Pathfinder vehicle sensor signal to the A/C auto amp.

  • The front in-vehicle sensor measures the temperature of the in-Nissan Pathfinder vehicle air taken in by the front blower motor.

  • The front in-vehicle sensor measures the temperature of the in-Nissan Pathfinder vehicle air that is taken in by the aspirator, and transmits the in-vehicle sensor signal to the A/C auto amp. This sensor uses a thermistor with electrical resistance that decreases as the temperature increases.
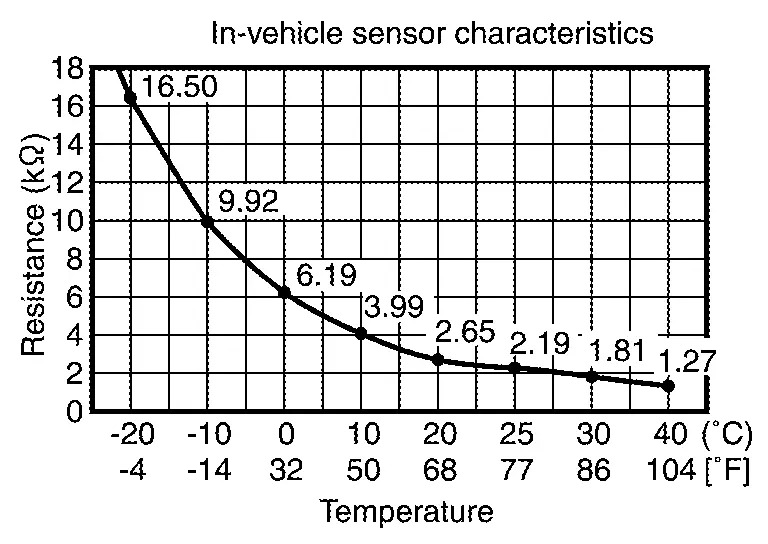
Rear In-Vehicle Sensor

  • The rear in-vehicle sensor is installed to the RH rear of the vehicle interior.

  • The rear in-Nissan Pathfinder vehicle sensor detects the temperature of the in-vehicle air that is taken in by the aspirator, and transmits the in-Nissan Pathfinder vehicle sensor signal to the A/C auto amp.

  • The rear in-vehicle sensor measures the temperature of the in-Nissan Pathfinder vehicle air taken in by the rear blower motor.

Refrigerant Pressure Sensor

  • The refrigerant pressure sensor is installed to the high pressure pipe.

  • The refrigerant pressure sensor converts high-pressure side refrigerant pressure into voltage and outputs it to ECM.

  • This value is transmitted from the ECM to the A/C auto amp. via CAN communication and is used in A/C compressor control and cooling fan operation request control.

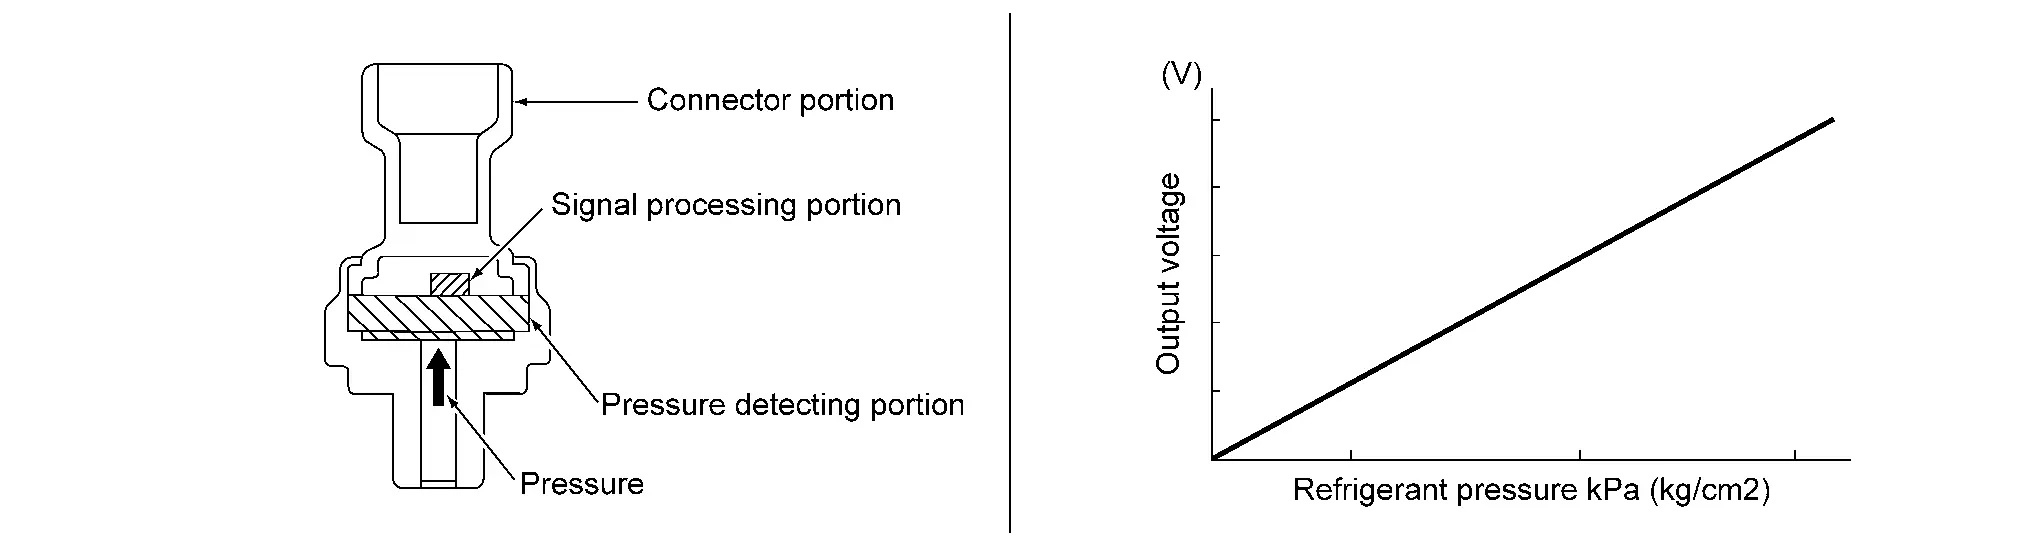
  • The refrigerant pressure sensor converts refrigerant pressure into voltage.

  • The refrigerant pressure sensor is a capacitance type sensor. It consists of a pressure detection area and a signal processing area.

  • The pressure detection area, which is a variable capacity condenser, changes internal static capacitance according to pressure force.

  • The signal processing area detects the static capacitance of the pressure detection area, converts the static capacitance into a voltage value, and transmits the voltage value to ECM.

  • The output voltage increases as the refrigerant pressure rises.
Sunlod Sensor

  • The sunload sensor is installed to the instrument garnish.
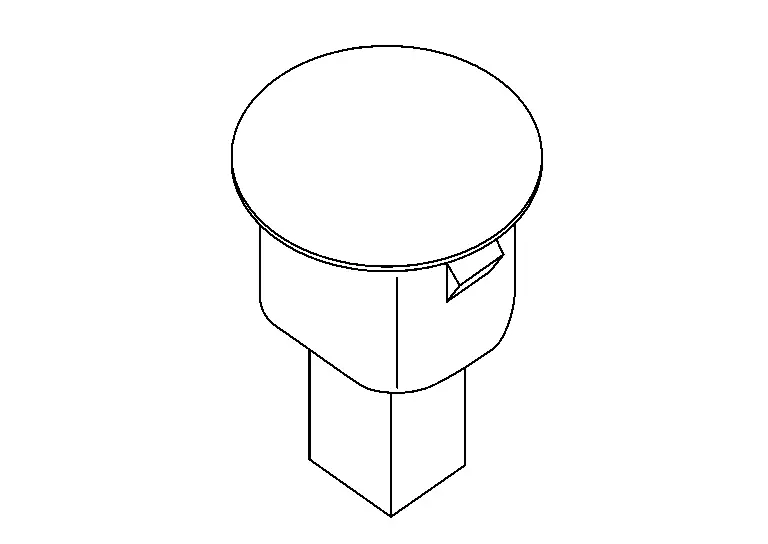
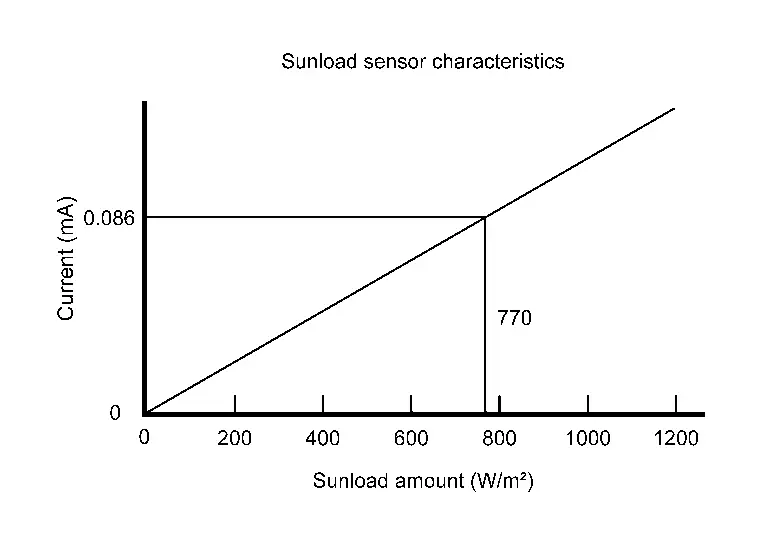
  • Sunload sensor converts sunload amount to voltage signal by photodiode and transmits to A/C auto amp.

  • Sunload sensor measures sunload amount.

  • The sunload sensor measures the sunload and outputs the sunload sensor signal to the A/C auto amp. This sensor uses a photodiode with an electrical current that increases as the sunload increases.
Air Mix Door Motor LH

  • The air mix door motor LH is installed to the heating & cooling unit assembly.
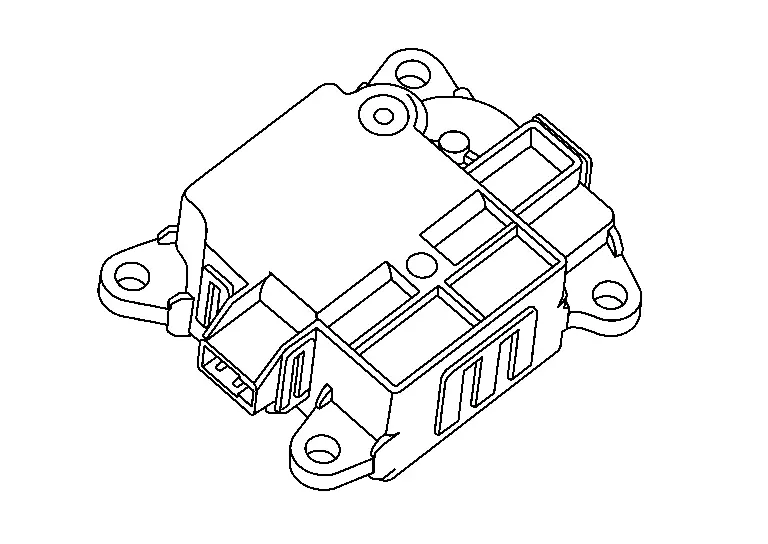
  • Air mix door motor LH consists of motor that drives door, PBR (Potentio Balance Register) that detects door position and LCU (Local Control Unit) that perform multiplex communication control (LIN) with A/C auto amp.

  • Rotation of motor is transmitted to front air mix door LH. Air flow temperature is switched.

  • LCU is built into air mix door motor LH. And detects door position by PBR.

  • A/C auto amp. communicates with each LCU via communication line. And receives air mix door LH position feedback signal from LCU.

  • LCU transmits the signal of door movement completion to A/C auto amp., when the door movement is completed.

Air Mix Door Motor RH

  • The air mix door motor RH is installed to the heating & cooling unit assembly.

  • Air mix door motor RH consists of motor that drives door, PBR (Potentio Balance Register) that detects door position and LCU (Local Control Unit) that perform multiplex communication control (LIN) with A/C auto amp.

  • Rotation of motor is transmitted to front air mix door RH. Air flow temperature is switched.

  • LCU is built into air mix door motor RH. And detects door position by PBR.

  • A/C auto amp. communicates with each LCU via communication line. And receives air mix door RH position feedback signal from LCU.

  • LCU transmits the signal of door movement completion to A/C auto amp., when the door movement is completed.

Air Mix Door Motor (Rear)

  • The air mix door motor (rear) is installed to the rear heating & cooling unit assembly.
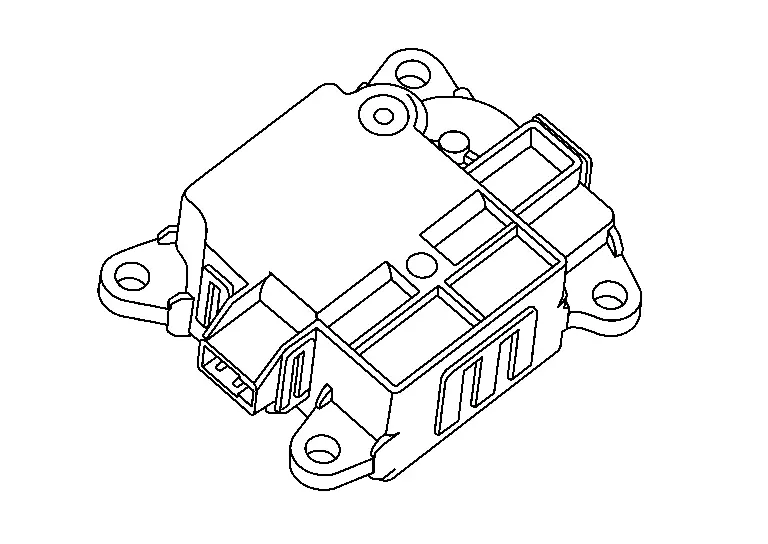
  • Air mix door motor (rear) consists of motor that drives door, PBR (Potentio Balance Register) that detects door position and LCU (Local Control Unit) that perform multiplex communication control (LIN) with A/C auto amp.

  • Rotation of motor is transmitted to rear air mix door. Air flow temperature is switched.

  • LCU is built into air mix door motor (rear). And detects door position by PBR.

  • A/C auto amp. communicates with each LCU via communication line. And receives air mix door (rear) position feedback signal from LCU.

  • LCU transmits the signal of door movement completion to A/C auto amp., when the door movement is completed.

Front Blower Motor

  • The front blower motor is installed to the blower unit assembly.

  • The rotation speed is changed according to the voltage controlled by the A/C auto amp. and the air flow rate is controlled.

  • The front blower motor adopts the brush-less.

Rear Blower Motor

  • The rear blower motor is installed to the rear blower unit assembly.
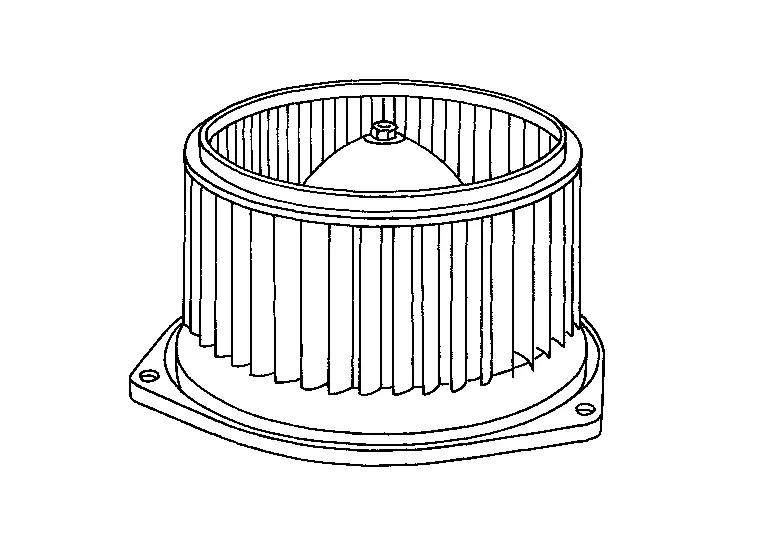
  • The rotation speed is changed according to the voltage controlled by the A/C auto amp. and the air flow rate is controlled.

  • The rear blower motor adopts brushless technology.

Intake Door Motor

  • The intake door motor is installed to the blower unit assembly.
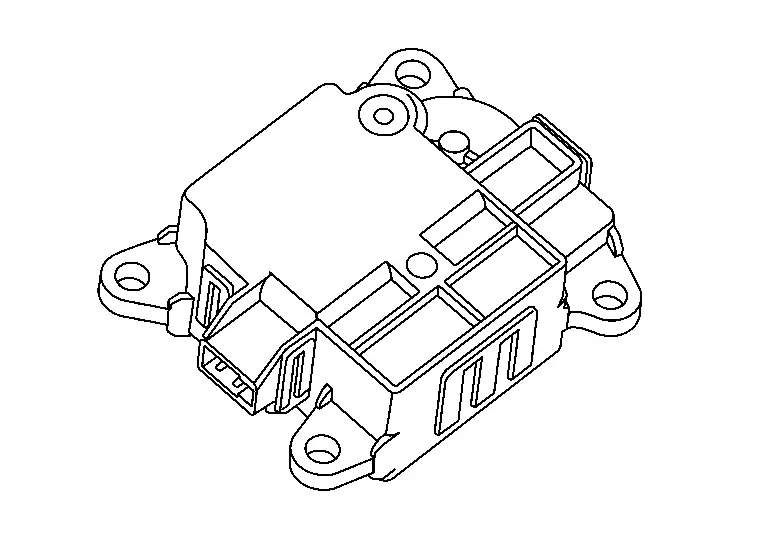
  • Intake door motor consists of motor that drives door, PBR (Potentio Balance Register) that detects door position and LCU (Local Control Unit) that perform multiplex communication control (LIN) with A/C auto amp.

  • Rotation of motor is transmitted to intake door. Air inlet is switched.

  • LCU is built into intake door motor. And detects door position by PBR.

  • A/C auto amp. communicates with each LCU via communication line. And receives intake door position feedback signal from LCU.

  • LCU transmits the signal of door movement completion to A/C auto amp., when the door movement is completed.

Mode Door Motor (Front)

  • The mode door motor is installed to the heating & cooling unit assembly.

  • Mode door motor (front) consists of motor that drives door, PBR (Potentio Balance Register) that detects door position and LCU (Local Control Unit) that perform multiplex communication control (LIN) with A/C auto amp.

  • Rotation of motor is transmitted to each mode door. Air outlet is switched.

  • LCU is built into mode door motor (front). And detects door position by PBR.

  • A/C auto amp. communicates with each LCU via communication line. And receives each mode door position feedback signal from LCU.

  • LCU transmits the signal of door movement completion to A/C auto amp., when the door movement is completed.

Mode Door Motor (Rear)

  • The mode door motor is installed to the rear heating & cooling unit assembly.
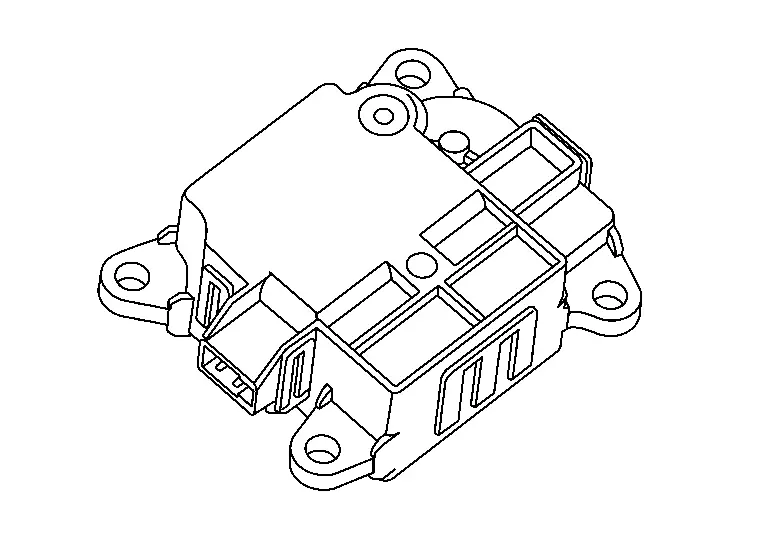
  • Mode door motor (rear) consists of motor that drives door, PBR (Potentio Balance Register) that detects door position and LCU (Local Control Unit) that perform multiplex communication control (LIN) with A/C auto amp.

  • Rotation of motor is transmitted to each mode door. Air outlet is switched.

  • LCU is built into mode door motor (rear). And detects door position by PBR.

  • A/C auto amp. communicates with each LCU via communication line. And receives each mode door position feedback signal from LCU.

  • LCU transmits the signal of door movement completion to A/C auto amp., when the door movement is completed.

A/C Compressor

  • The A/C compressor is installed to the engine.
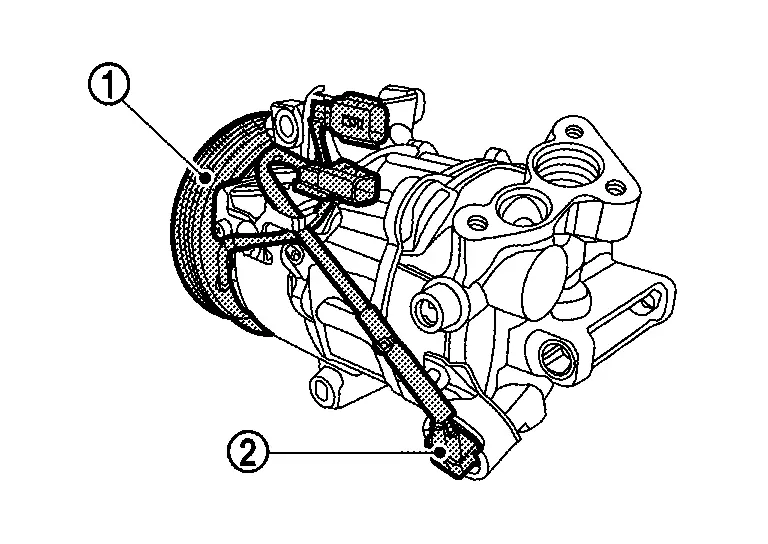
  • IPDM E/R controls the magnetic clutch and ECV (Electrical Control Valve) according to the requests from the A/C auto amp. and ECM, and changes the A/C compressor drive and refrigerant discharge amount.

  • For controlling the A/C compressor, a magnetic clutch that drives the A/C compressor is used, together with an ECV that changes the refrigerant discharge amount.

  • Magnetic clutch consists of pulley, clutch disc, and field coil.
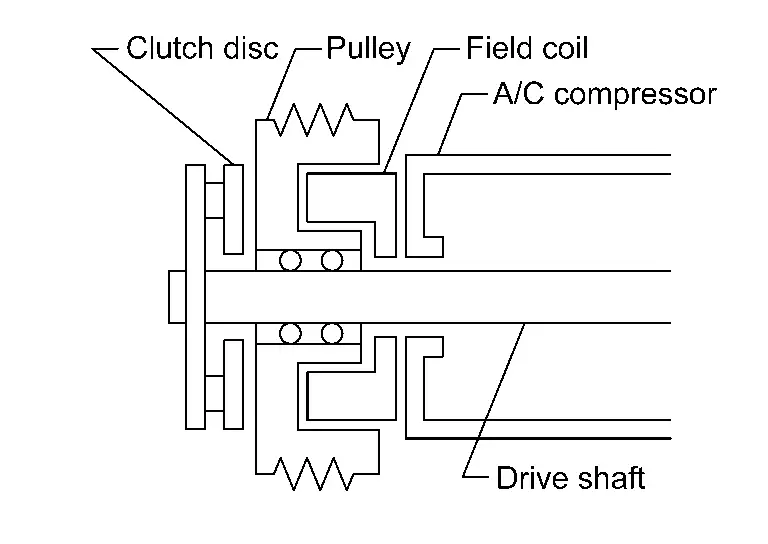
    • Pulley is connected with crankshaft pulley of engine via drive belt and is always rotated while engine is running.

    • Clutch disc is connected with drive shaft of A/C compressor.

    • Field coil, which becomes a strong electric magnet when electricity is supplied, strongly pulls clutch disc and presses it to pulley.

COMPONENT OPERATION

Magnetic Clutch

  • When smart FET (Field-Effect Transistor) integrated in IPDM E/R turns ON, electricity is supplied to field coil, clutch disc is presses to pulley, and engine rotational movement is transmitted from crankshaft pulley ⇒ drive belt ⇒ pulley ⇒ clutch disc ⇒ drive shaft. A/C compressor is operated. When smart FET turns OFF, electricity is not supplied to field coil, and clutch disc is released from pulley. A/C compressor is not operated.

ECV (Electrical Control Valve)

  • ECV (Electrical Control Valve) is integrated in the A/C compressor. IPDM E/R receives the ECV control signal from A/C auto amp. via CAN communication, and ECV is controlled according to the control signal transmitted from IPDM E/R.
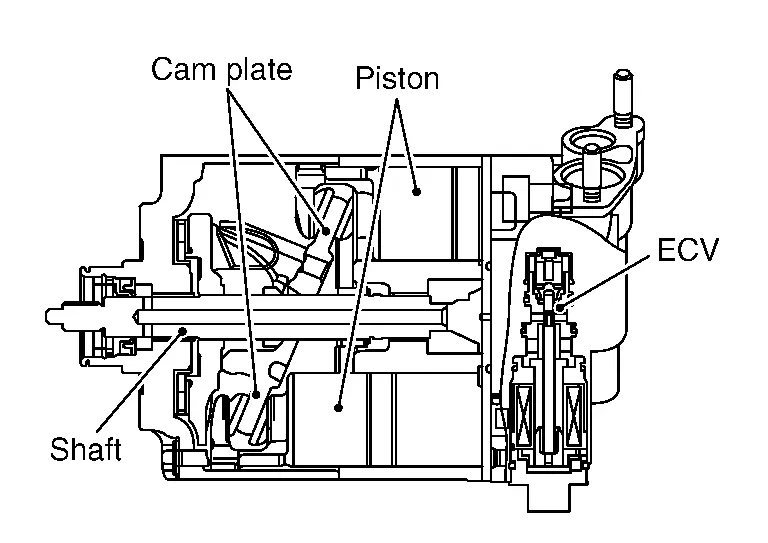
  • ECV is controlled according to the control signal transmitted from IPDM E/R.

    The control signal transmitted by IPDM E/R is controlled according to the ECV control signal transmitted from A/C auto amp. via CAN communication.

  • ECV varies the refrigerant pressure balance in the left and right refrigerant spaces that are divided by the cam plate in order to change the angle of the cam plate inside the A/C compressor.

    By changing the cam plate angle, it changes the piston stroke and controls the refrigerant discharge amount.

Rear Blower Motor Resistor

  • Rear blower motor resistor is installed on the rear blower unit assembly.
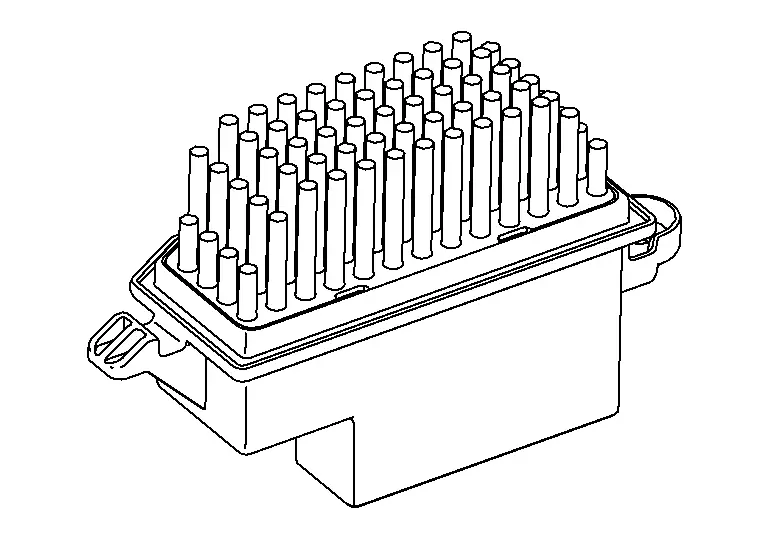
  • Rear blower motor resistor, that uses MOS field effect transistor, is adopted for rear blower motor speed control.

  • Rear blower motor resistor continuously controls voltage to rear blower motor, according to gate voltage from A/C auto amp.

  • This rear blower motor resistor does not require a HI relay even when the maximum voltage is applied to rear blower motor at HI status, because voltage drop is nominal.

Rain Sensor (Humidity Sensor)

  • The rain sensor (humidity sensor) is installed on the windshield.
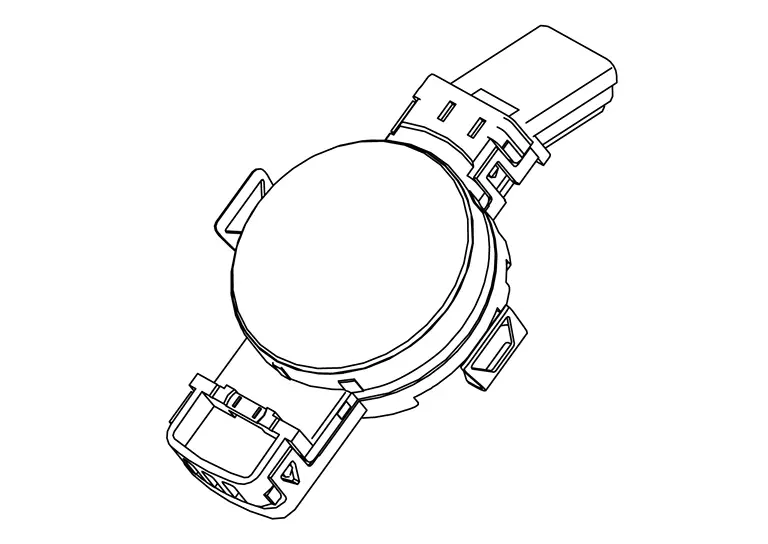
  • Detects and transmits the humidity level signal to the BCM.