Maintenance - Engine Maintenance
- Drive Belt
- Engine Coolant
- Fuel Lines
- Air Cleaner Filter
- Engine Oil
- Oil Filter
- Spark Plug
- Evap Vapor Lines
Drive Belt Nissan Pathfinder
Exploded View
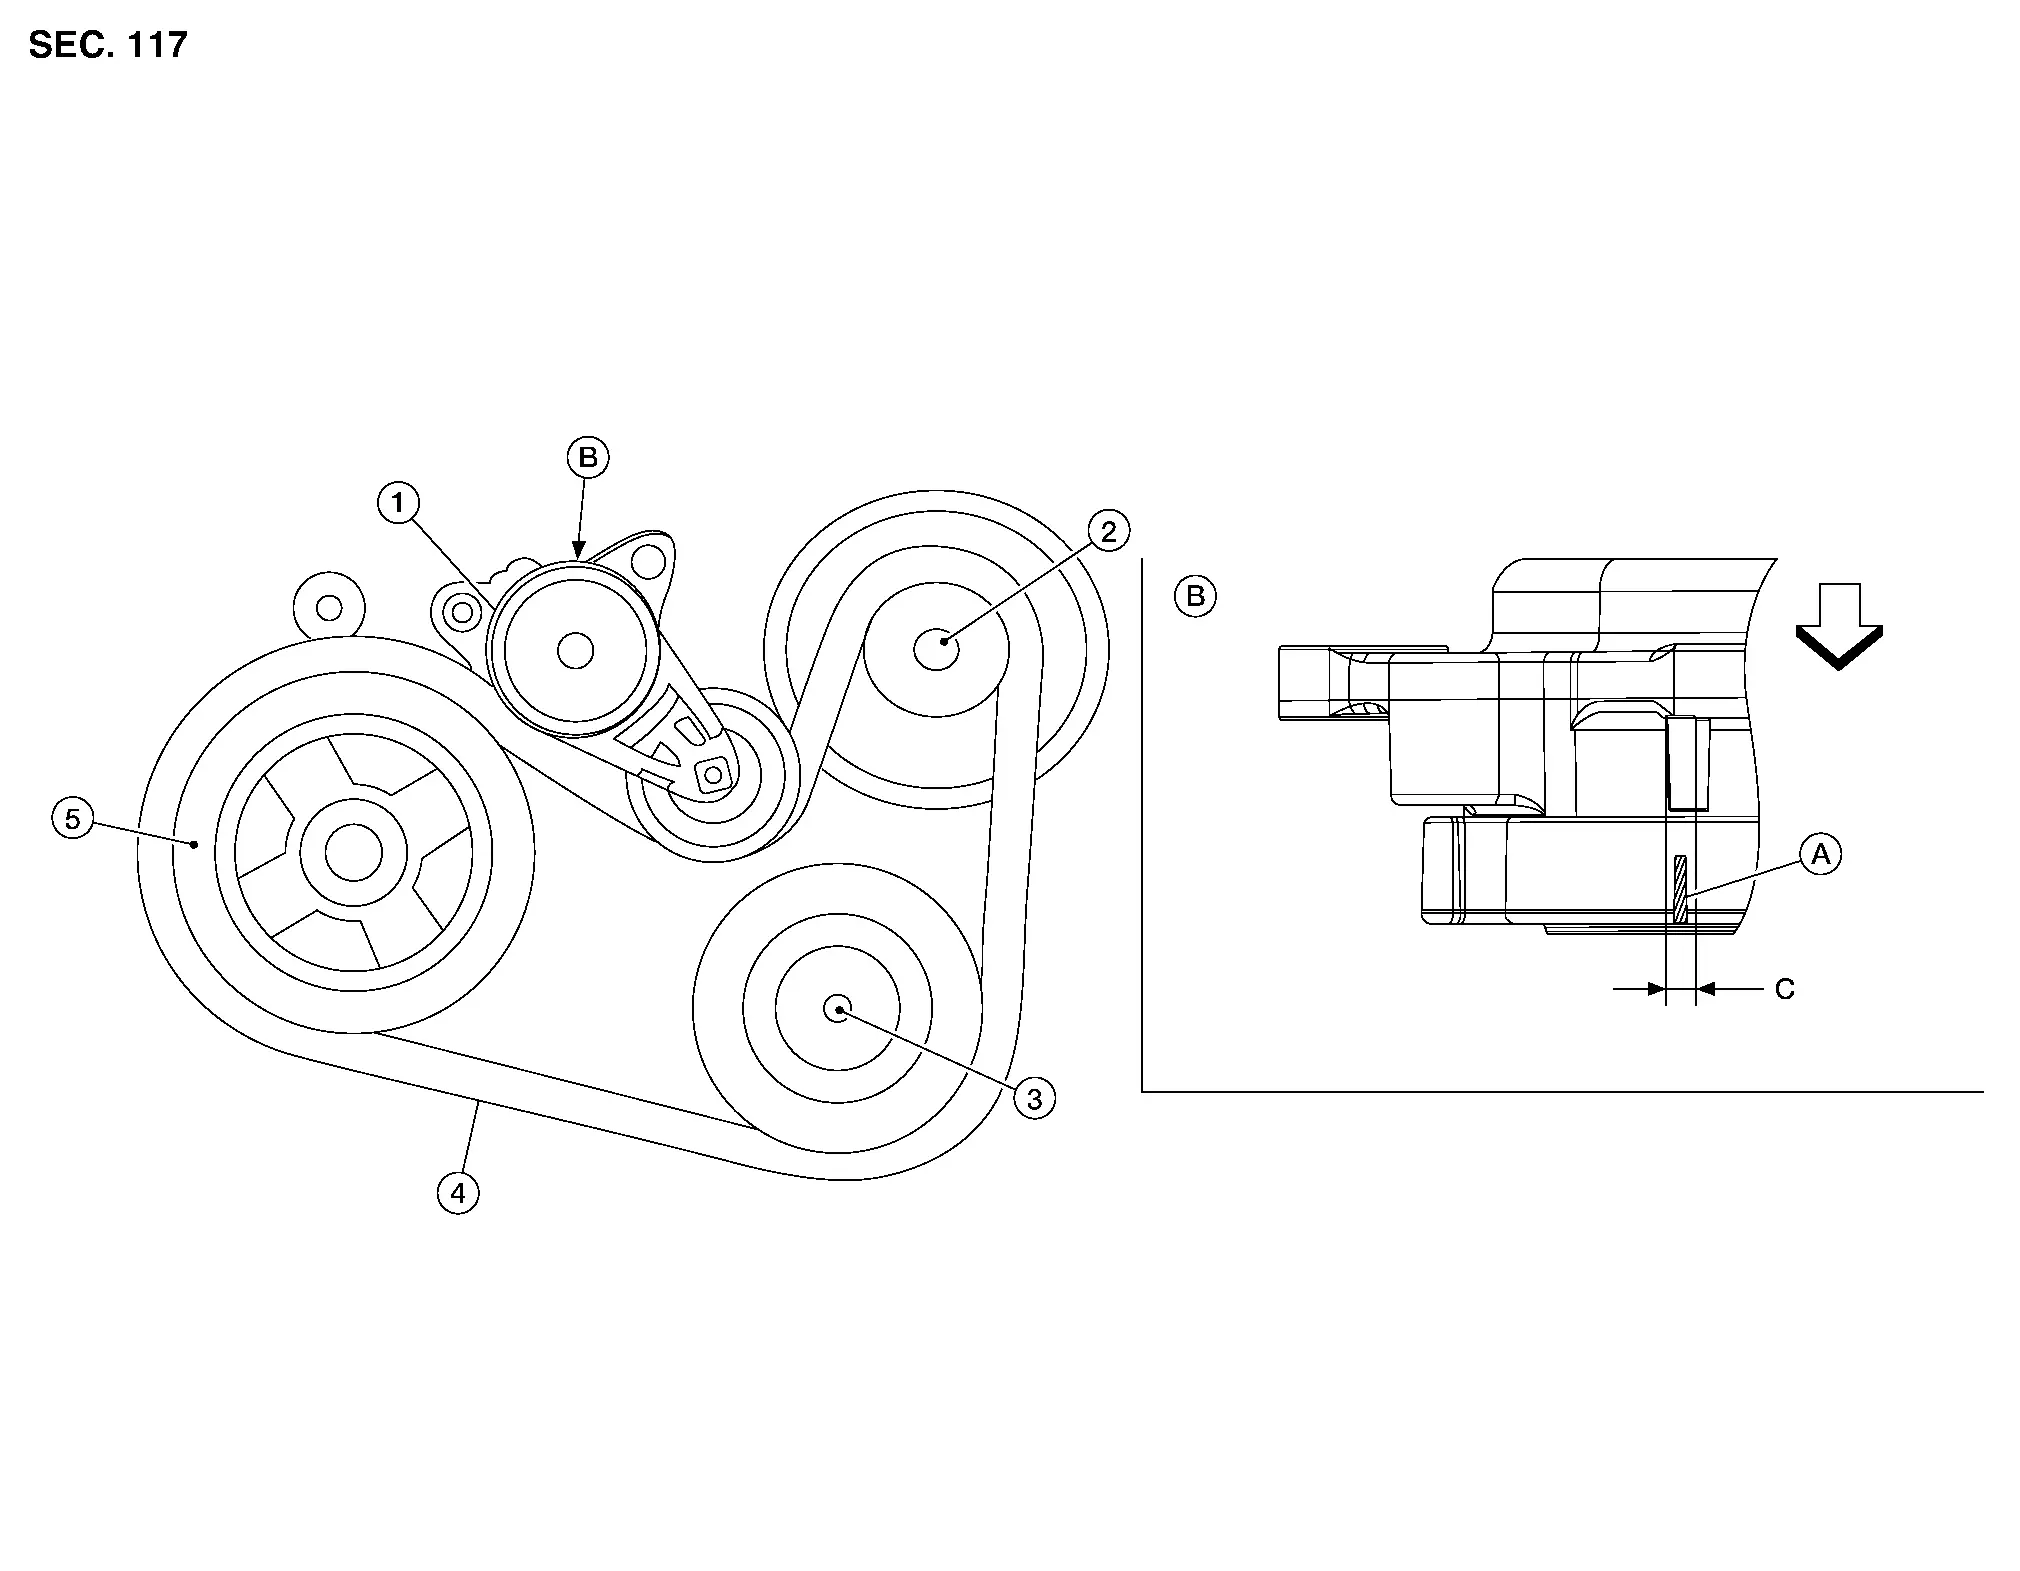
| 1. | Drive belt auto-tensioner | 2. | Generator | 3. | Compressor |
| 4. | Drive belt | 5. | Crankshaft pulley | A. | Drive belt auto-tensioner indicator |
| B. | View B | C. | Possible use range |  |
Engine front |
Checking Drive Belt
Visually check entire drive belt for wear, damage or cracks.
Check that the drive belt auto-tensioner indicator is within the possible use range.
If the drive belt auto-tensioner indicator is out of the possible use range or drive belt is damaged, replace drive belt.
Tension Adjustment
Drive belt tension is automatically adjusted by the drive belt auto-tensioner
.
Drive belt tension is not manually adjustable.
Removal and Installation
REMOVAL
Remove the front wheel and tire (RH) using power tool. Refer to Removal and Installation.
Remove the front fender protector side cover (RH). Refer to Exploded View.
While securely holding the hexagonal part in pulley center of drive belt auto-tensioner, move in the direction of arrow (loosening direction of drive belt auto-tensioner) using suitable tool.
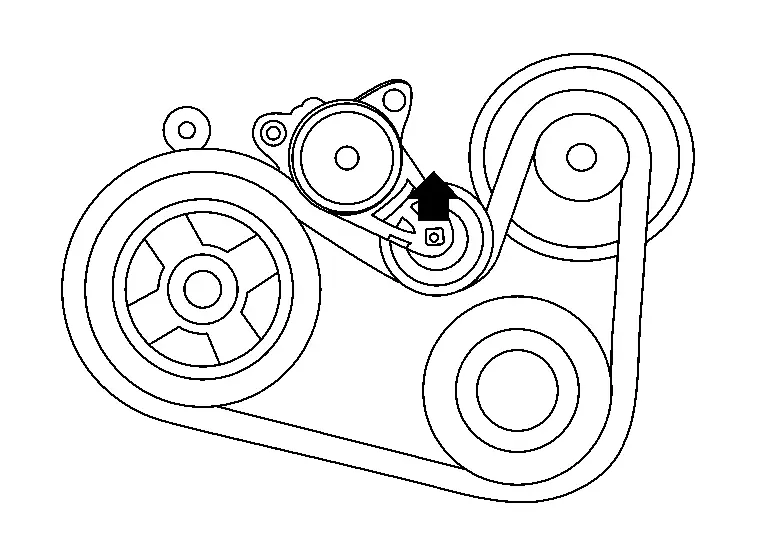
Insert a rod approximately 6 mm (0.24 in) in diameter through the rear of drive belt auto-tensioner into retaining boss to lock drive belt auto-tensioner pulley.
Remove drive belt from crankshaft pulley and then remove it from the other pulleys.
INSTALLATION
Install the drive belt onto all of the pulleys.
Release drive belt auto-tensioner, and apply tension to drive belt.
Turn crankshaft pulley clockwise several times to equalize tension between each pulley.
Confirm drive belt auto-tensioner indicator is within the possible use range. Refer to Checking Drive Belt.
Install the front fender protector side cover (RH). Refer to Exploded View.
Install the front wheel and tire (RH) using power tool. Refer to Removal and Installation.
Engine Coolant Nissan Pathfinder R53
System Inspection
CHECKING COOLING SYSTEM HOSES
Check hoses for the following:
Improper attachment
Leaks
Cracks
Dents
Bulges
Internal obstruction
Damage
Loose connections
Chafing
Deterioration
CHECKING RESERVOIR LEVEL
Check if the reservoir tank coolant level is within MIN to MAX when the engine is cool.
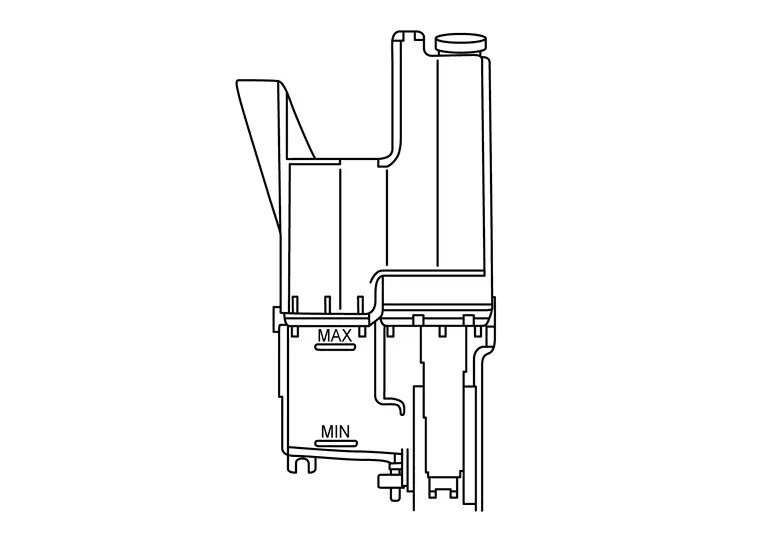
Adjust coolant level (if necessary), to ensure that the engine coolant level is within the MIN to MAX range.
CHECKING COOLING SYSTEM FOR LEAKS
To check the cooling system for leaks, apply pressure to the cooling system using Tools (A), (B), (C) and (D).
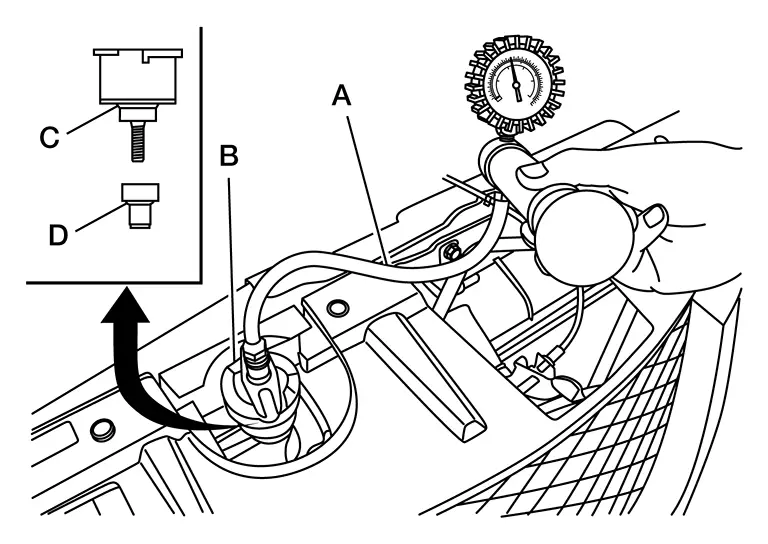
| Tool number (A) | : — (NI-51771-5) |
| Tool number (B) | : — (NI-51771-9) |
| Tool number (C) | : — (NI-51771-1) |
| Tool number (D) | : — (NI-51771-4) |
| Leakage test pressure | : Refer to Radiator. |
CHECKING RADIATOR CAP
Check the pressure valve of the radiator cap.
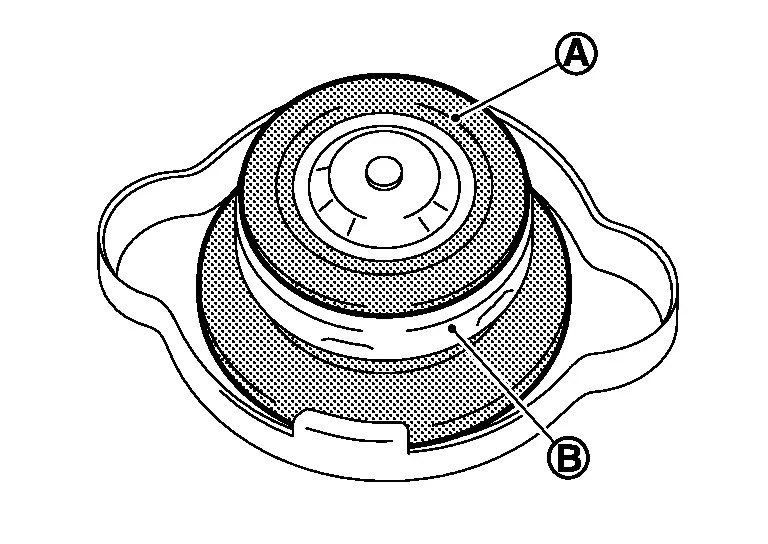
Replace the radiator cap if the metal plunger (B) on the pressure valve cannot be seen around the edge of the rubber gasket (A).
Replace the radiator cap if there is damage or deposits of foreign material on the rubber gasket or pressure valve.
Check the negative-pressure valve of the radiator cap.
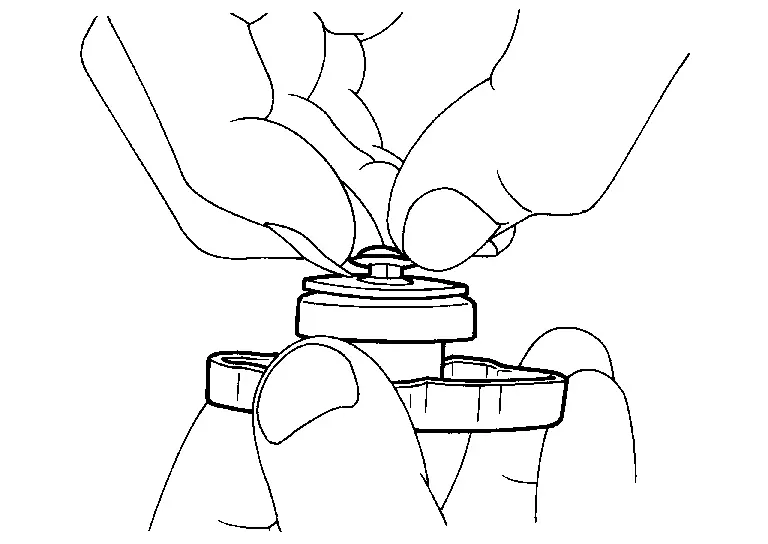
Replace the radiator cap if the negative-pressure valve does not close completely when pulled open and released.
Replace the radiator cap if there is damage or deposits of foreign material on the valve seat of the negative-pressure valve.
Replace the radiator cap if there is an abnormality in the operation of the negative-pressure valve.
Check radiator cap relief pressure.
Check the radiator cap relief pressure using Tools (A) and (B), and suitable Tool (C).
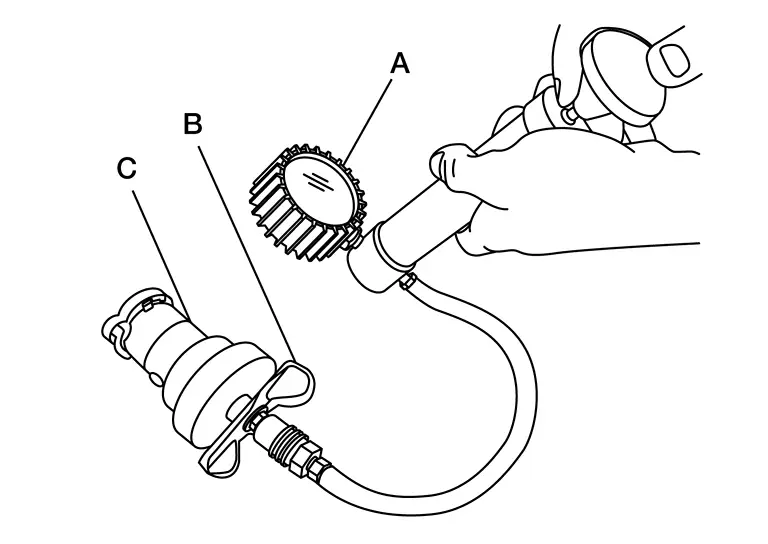
Tool number (A) : — (NI-51771-5) Tool number (B) : — (NI-51771-9) Tool number (C)
(commercially available): — (NI-33984-A or equivalent) Radiator cap relief
pressure: Refer to Radiator. When connecting the radiator cap to suitable Tool (C), apply water or coolant to the radiator cap seal surface.
Replace the radiator cap if the radiator cap relief pressure is outside of specification.
CHECKING RADIATOR
Check radiator for mud or clogging. If necessary, clean radiator as follows.
Spray water to the back side of the radiator core using a side to side motion from the top down.
Stop spraying when debris no longer flows from radiator core.
Blow air into the back side of radiator core using a side to side motion from the top down.
Use compressed air lower than 490 kPa (4.9 bar, 5 kg/cm2, 71 psi) and keep distance more than 30 cm (11.8 in).
Continue to blow air until no water sprays out.
Check for engine coolant leaks. Repair as necessary.
Draining
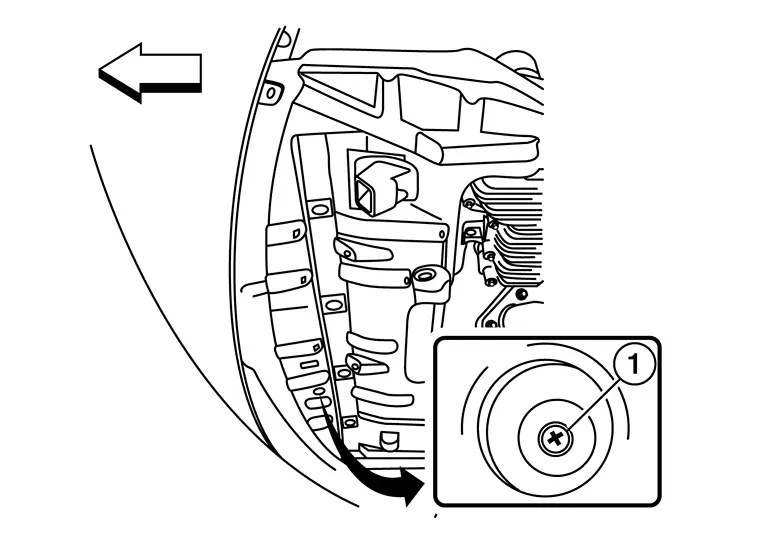
Open radiator drain plug (1) at the bottom of radiator and remove the radiator filler cap.
 |
: Front |
For a complete cooling system drain, remove the reservoir tank and drain the engine coolant, and then clean the reservoir tank before installation.
When performing a complete cooling system drain, remove the water drain plug (B), connector bolt (C), and copper sealing washer (A) on the cylinder block.
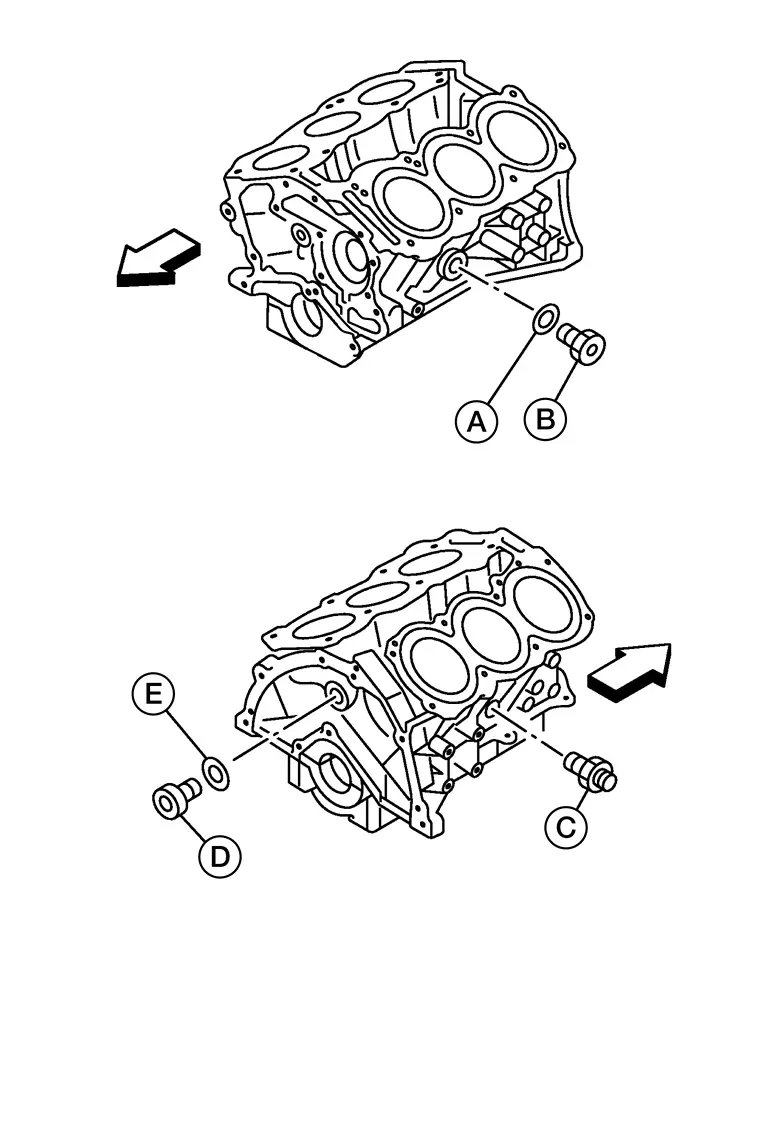
 |
: Engine front |
Check the drained engine coolant for contaminants such as rust, corrosion or discoloration.
If contaminated, flush the engine cooling system. Refer to Flushing.
Refilling
Install the following, if removed:
Cylinder block drain plugs, refer to Exploded View.
Reservoir tank, refer to Exploded View.
Cooling system hoses, refer to Exploded View.
Radiator drain plug, refer to Exploded View.
Set the Nissan Pathfinder vehicle heater controls to the full HOT and heater ON positions. Place the vehicle ignition in the "ON" position with the engine OFF as necessary to activate the heater mode.
Fill the cooling system with engine coolant using Tool (A), following the manufacturer’s instructions included with the tool.

| Tool number (A) | : KV991J0070 (NI-45695-A) |
| Engine Coolant | : Refer to Fluids and Lubricants (United States and Canada) or Fluids and Lubricants (Mexico). |
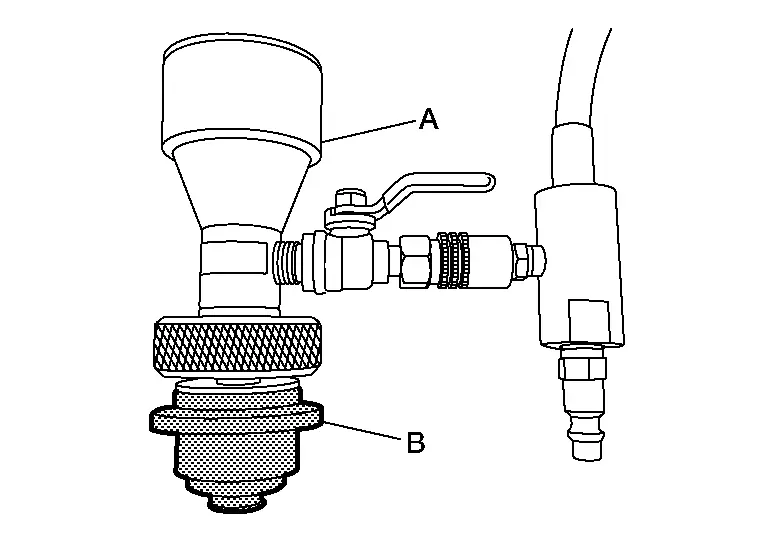
Remove the Tool (A) and top off the cooling system with engine coolant as necessary.
Install the radiator cap and reservoir tank cap.
Run the engine until it reaches normal operating temperature.
Stop the engine and allow it to cool.
Check the engine coolant level and adjust if necessary.
Flushing
Fill the radiator from the filler neck above the radiator upper hose and reservoir tank with clean water and reinstall radiator filler cap.
Run the engine until it is at normal operating temperature.
Rev the engine two or three times under no-load.
Stop the engine and wait until it cools down.
Drain the water from the system.
Repeat steps 1 through 5 until clear water begins to drain from the radiator.
Fuel Lines Nissan Pathfinder 5th Gen
Inspection
Inspect fuel lines, fuel filler cap, and fuel tank for improper attachment, leaks, cracks, damage, loose connections, chafing or deterioration.
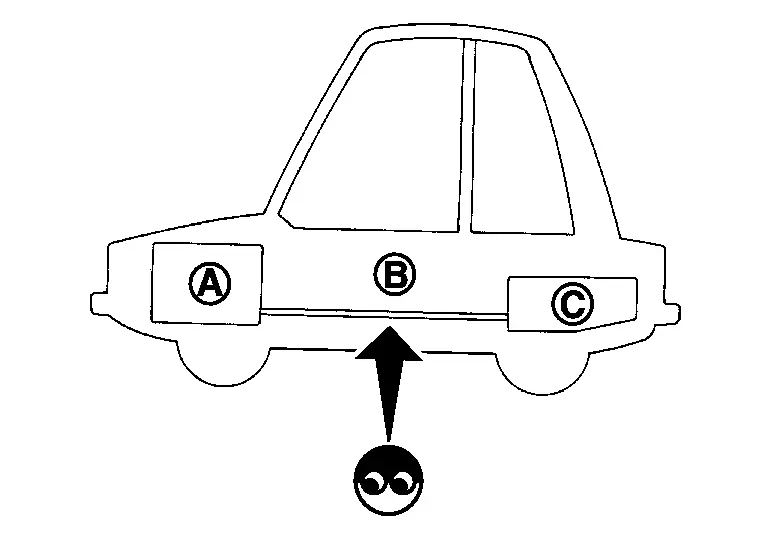
| (A) | : Engine |
| (B) | : Fuel line |
| (C) | : Fuel tank |
If necessary, repair or replace damaged parts.
Air Cleaner Filter Nissan Pathfinder R53
Exploded View
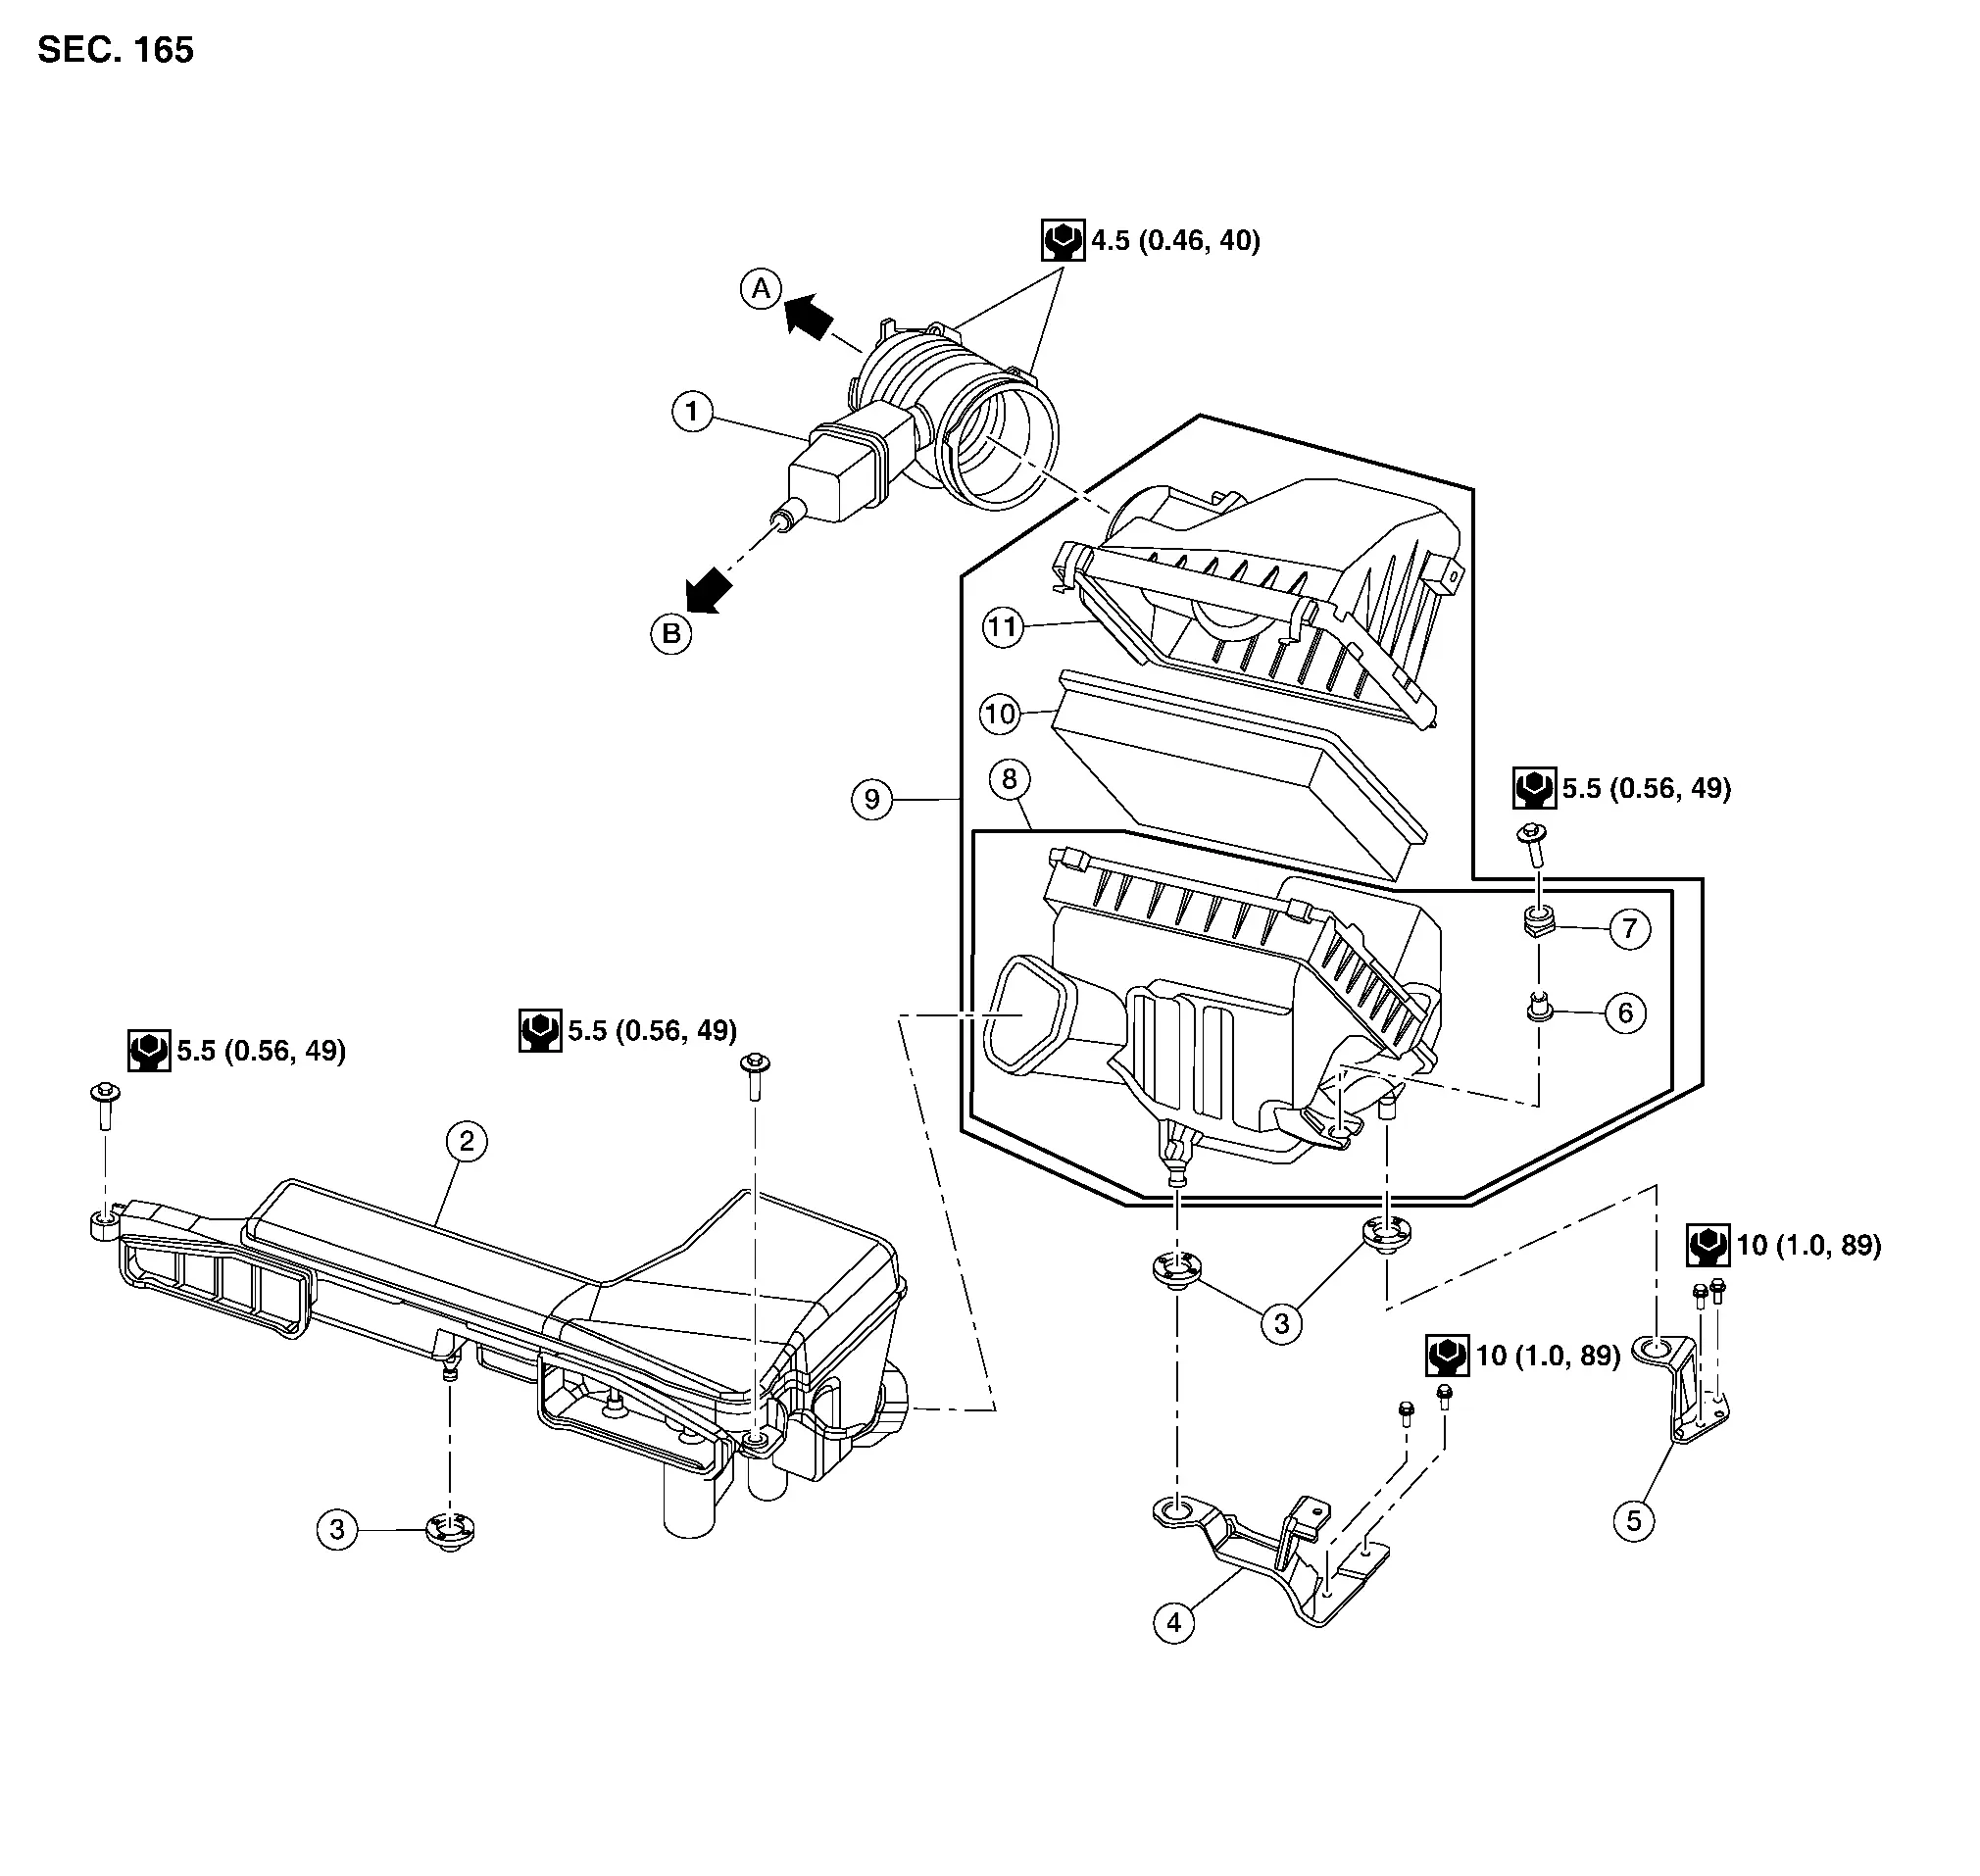
| 1. | Air duct hose and resonator assembly | 2. | Front air duct | 3. | Grommet |
| 4. | Air cleaner case mounting bracket | 5. | Bracket | 6. | Retainer |
| 7. | Mounting rubber | 8. | Air cleaner case (lower) | 9. | Air cleaner assembly |
| 10. | Air cleaner filter | 11. | Air cleaner case (upper) | A. | To electric throttle control actuator. Refer to Exploded View. |
| B. | To rocker cover (bank 1). Refer to Exploded View. |
Removal and Installation
REMOVAL
Unhook air cleaner case side clips and lift air cleaner case (upper).
Remove the air cleaner filter.
INSTALLATION
Installation is in the reverse order of removal.
Engine Oil Nissan Pathfinder SUV
Inspection
ENGINE OIL LEVEL
Remove oil level gauge and wipe it clean.
Insert oil level gauge and check that the engine oil level is within the range (A) shown.
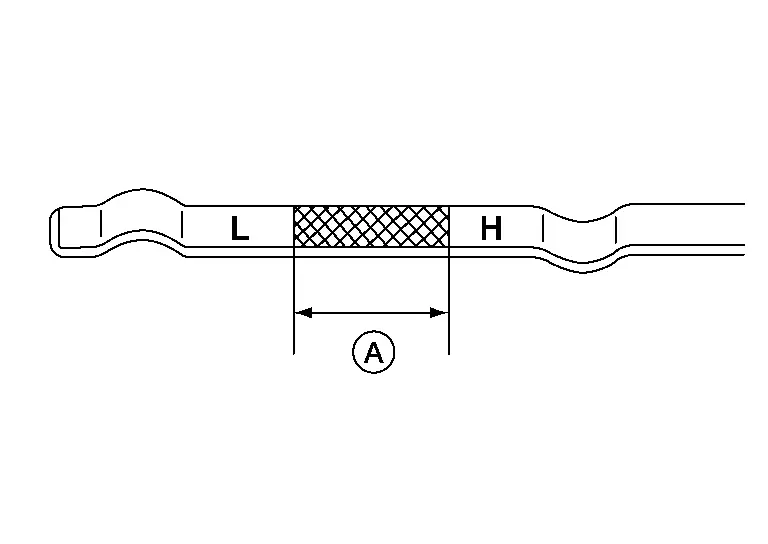
If engine oil level is out of range, add oil as necessary until oil level gauge indicates the correct level.
ENGINE OIL APPEARANCE
Check engine oil for white milky appearance or excessive contamination.
If engine oil becomes milky, it is highly probable that it is contaminated with engine coolant. Repair or replace damaged parts.
ENGINE OIL LEAKS
Check for engine oil leaks around the following areas:
Oil pan (upper)
Oil pan (lower)
Oil pan drain plug
Engine oil pressure sensor
Engine oil temperature sensor
Oil filter
Oil cooler
Valve timing control cover
Exhaust valve timing control solenoid valve
Front timing chain case
Mating surface between rear timing chain case and cylinder head
Mating surface between rear timing chain case and cylinder block
Mating surface between rear timing chain case and oil pan (upper)
Mating surface between rear timing chain case and front timing chain case
Mating surface between cylinder block and cylinder head
Mating surface between cylinder head and rocker cover
Crank oil seal (front and rear)
Engine oil pressure control solenoid valve
Camshaft position sensor
Exhaust camshaft position sensor
Intake camshaft position sensor
High pressure fuel pump
Draining
Prolonged and repeated contact with used engine oil may cause skin cancer; try to avoid direct skin contact with used engine oil. If skin contact is made, wash thoroughly with soap or hand cleaner as soon as possible.
Position the vehicle so it is level on the hoist.
Warm up the engine and check for engine oil leaks. Refer to Inspection.
Stop engine and wait for 10 minutes.
Remove the front under cover. Refer to Removal and Installation.
Loosen oil filler cap.
Remove the oil pan drain plug and drain the engine oil.
Refilling
Install drain plug with new drain plug washer.
| Tightening torque | : Refer to Exploded View. |
Refill with new engine oil.
| Engine oil specification and capacity | : Refer to Fluids and Lubricants. |
Warm up engine and check area around drain plug and oil filter for engine oil leaks.
Install front under cover. Refer to Removal and Installation.
Stop engine and wait 10 minutes.
Check engine oil level. Refer to Inspection.
Oil Filter Nissan Pathfinder
Removal and Installation
REMOVAL
Drain engine oil. Refer to Draining.
Remove front fender protector side cover (RH). Refer to Exploded View.
Remove the oil filter using suitable tool.
INSTALLATION
Remove foreign materials adhering to the oil filter installation surface.
Apply clean engine oil to the oil seal contact surface of the new oil filter.
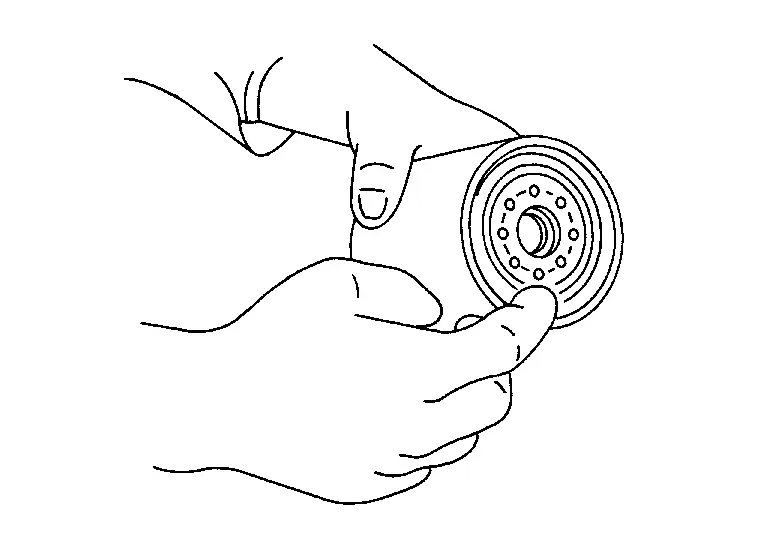
Screw the oil filter manually until it touches the installation surface, then tighten it by turning another 2/3 turn (A), or tighten to specification using a suitable tool.
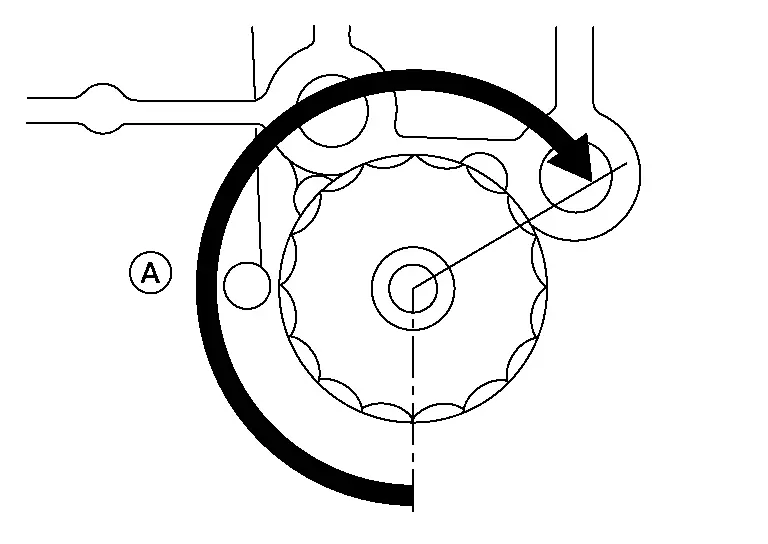
| Oil filter | : 18 N·m |
Refill the engine with new engine oil. Refer to Refilling.
Check the oil level and add engine oil as necessary. Refer to Inspection.
After warming up the engine, check for engine oil leaks.
Install front fender protector side cover (RH). Refer to Exploded View.
Spark Plug Nissan Pathfinder
Exploded View
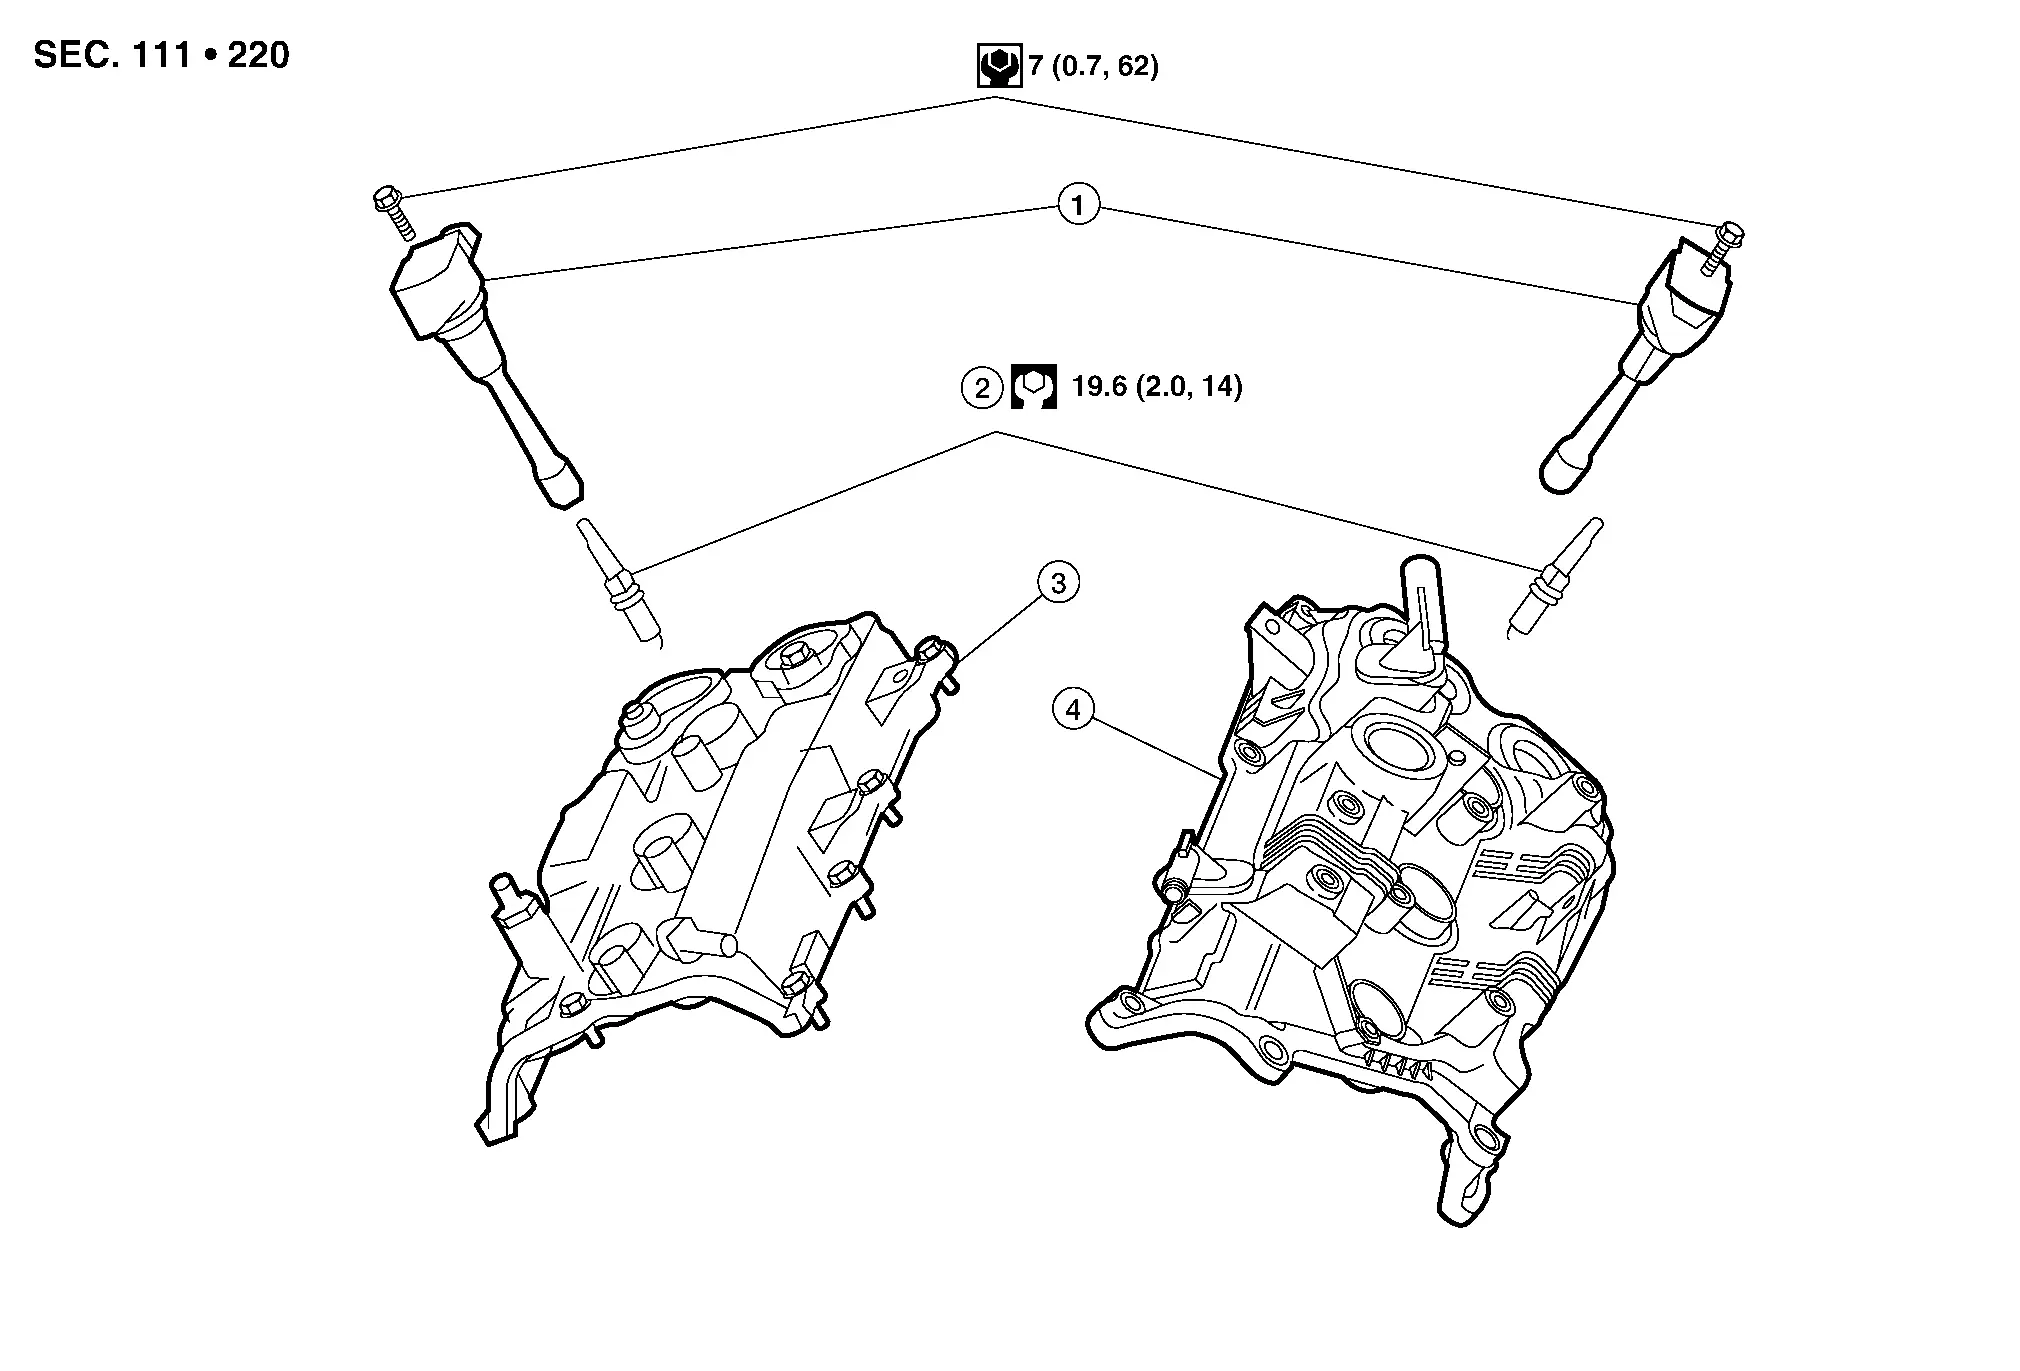
| 1. | Ignition coil | 2. | Spark plug | 3. | Rocker cover (Bank 1) |
| 4. | Rocker cover (Bank 2) |
Removal and Installation
REMOVAL
Remove the ignition coil. Refer to Removal and Installation (Bank 2) (Bank 2) and Removal and Installation (Bank 1) (Bank 1).
Remove the spark plug using Tool.
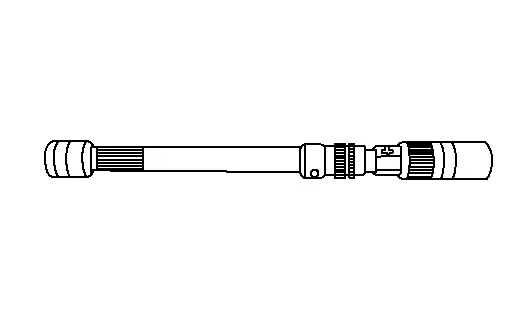
| Tool number | : — (NI-48891) |
INSPECTION AFTER REMOVAL
Use the standard type spark plug for normal condition.
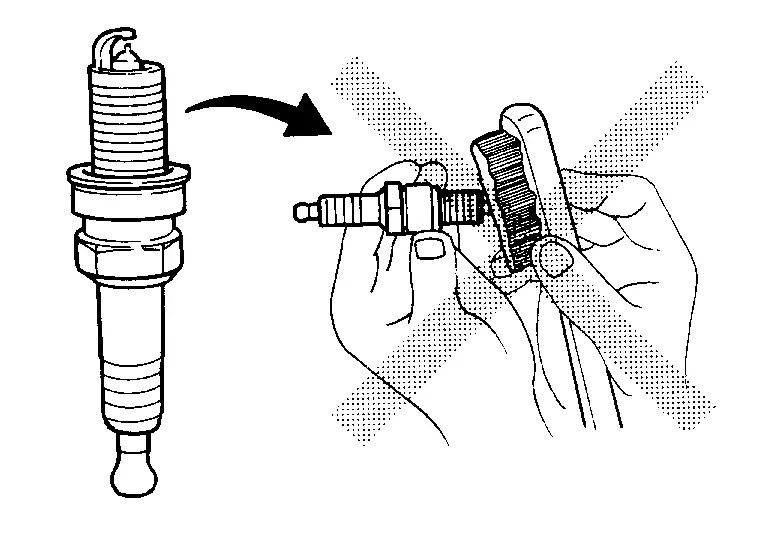
| Spark plug | : Refer to Spark Plug. |
| Cleaner air pressure | : less than 588 kPa (5.88 bar, 6 kg/cm2, 85 psi) |
| Cleaning time | : less than 20 seconds |
Spark plug gap adjustment is not required between replacement intervals.
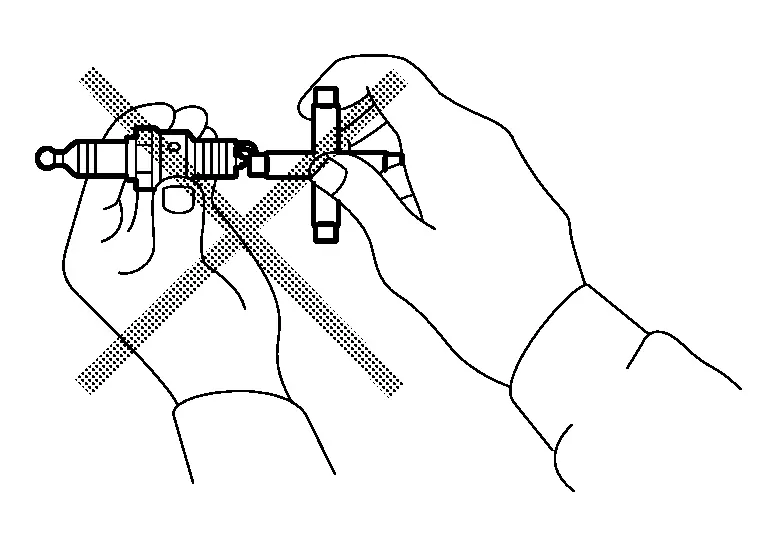
Measure spark plug gap. When it exceeds the limit, replace spark plug even if it is within the specified replacement mileage. Refer to Spark Plug.
INSTALLATION
Installation is in the reverse order of removal.
| Make | DENSO |
| Standard type* | FXE22HR11 |
| Gap (nominal) | 1.1 mm (0.043 in) |
*: Always check with the Parts Department for the latest parts information.
Evap Vapor Lines Nissan Pathfinder 2026
Inspection
Visually inspect EVAP vapor lines for improper attachment and for cracks, damage, loose connections, chafing and deterioration.
Inspect fuel tank filler cap vacuum relief valve for clogging, sticking, etc.