Driveline - Unit Disassembly and Assembly
- Electro-Hydraulic Coupling
- Differential Assembly
Electro-Hydraulic Coupling Nissan Pathfinder Fifth generation
Exploded View
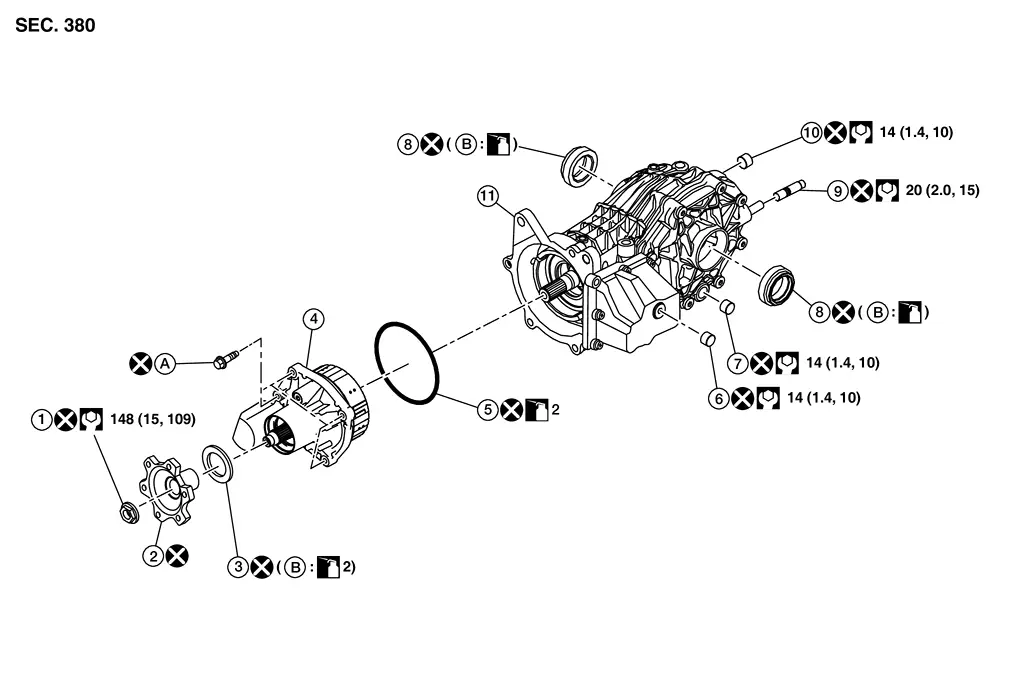
| 1. | Companion flange lock nut | 2. | Companion flange | 3. | Electro-hydraulic coupling oil seal |
| 4. | Electro-hydraulic coupling assembly | 5. | O-ring | 6. | Filler plug |
| 7. | Drain plug | 8. | Side oil seal | 9. | Stud |
| 10. | Filler plug | 11. | Final drive assembly | A. | Refer to Removal and Installation. |
| B. | Oil seal lip |
Disassembly
DISASSEMBLY
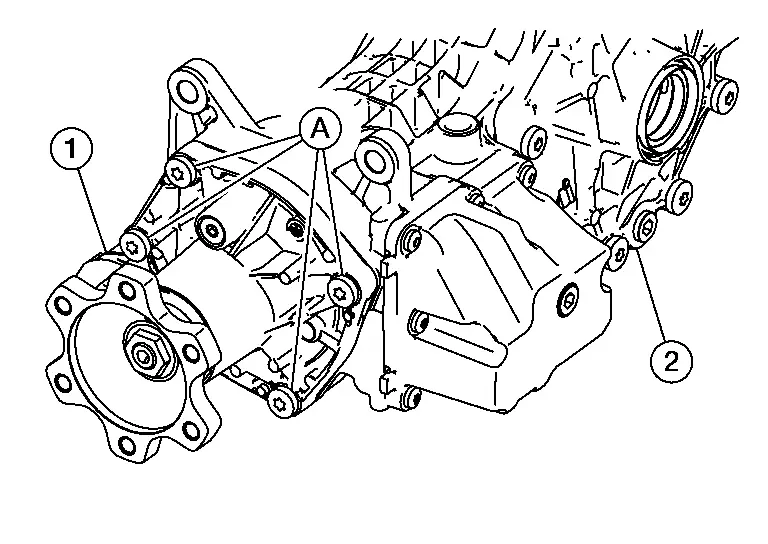
Remove electro-hydraulic coupling assembly bolts (A) and remove electro-hydraulic coupling assembly (1) from final drive assembly (2).
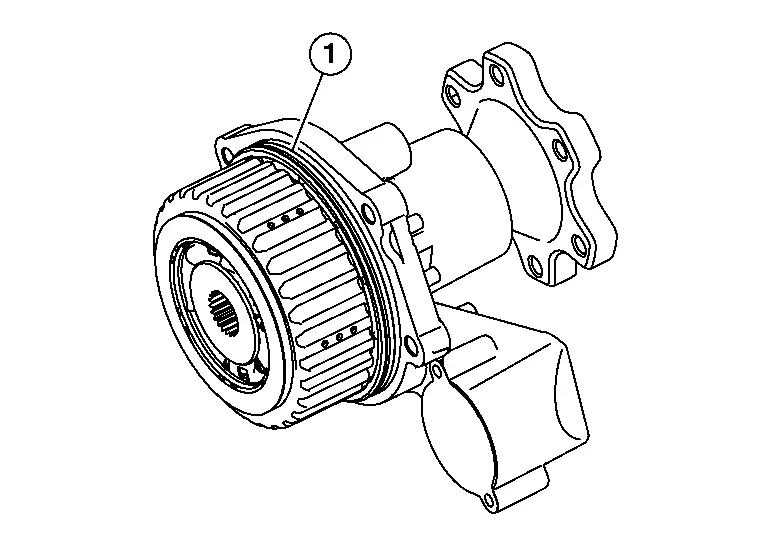
Remove O-ring (1) from electro-hydraulic coupling assembly.
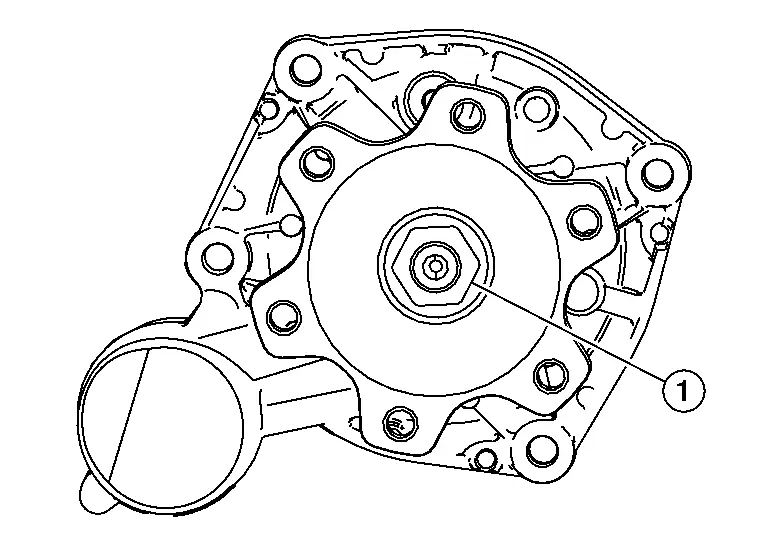
Loosen companion flange lock nut (1) and remove it.
Remove companion flange.
Remove electro-hydraulic coupling oil seal (1) using oil seal remover [commercial service tool (A)].

Perform inspection after disassembly. Refer to Inspection.
Assembly
ASSEMBLY
Using the drift [commercial service tool (A)], install electro-hydraulic coupling oil seal (1) as shown in the figure.
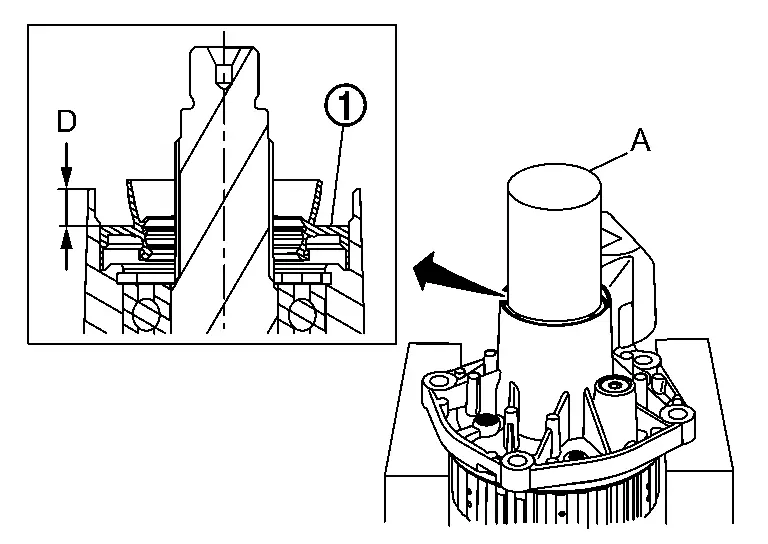
| Installation dimension | |
| D | : 7.15 ±0.1 mm (0.2815 ±0.004 in) |
Install companion flange.
Tighten companion flange lock nut (1) to the specified torque.
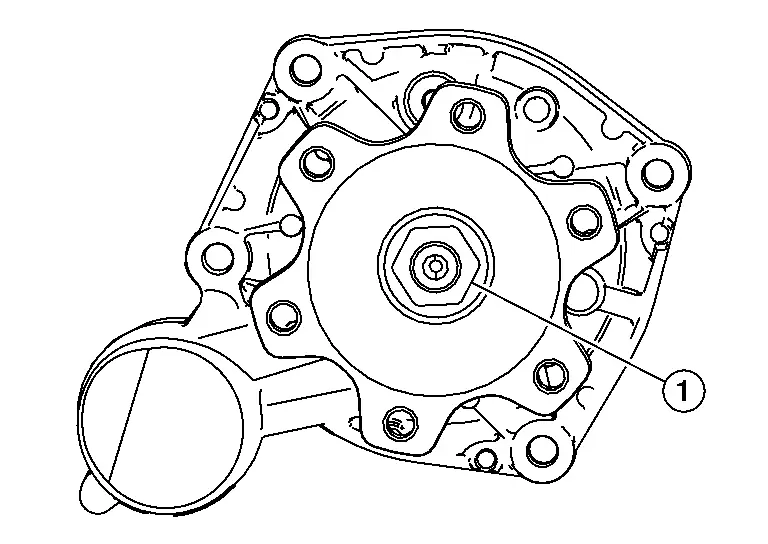
For tightening torque, refer to Exploded View.
Install O-ring (1) to electro-hydraulic coupling assembly.
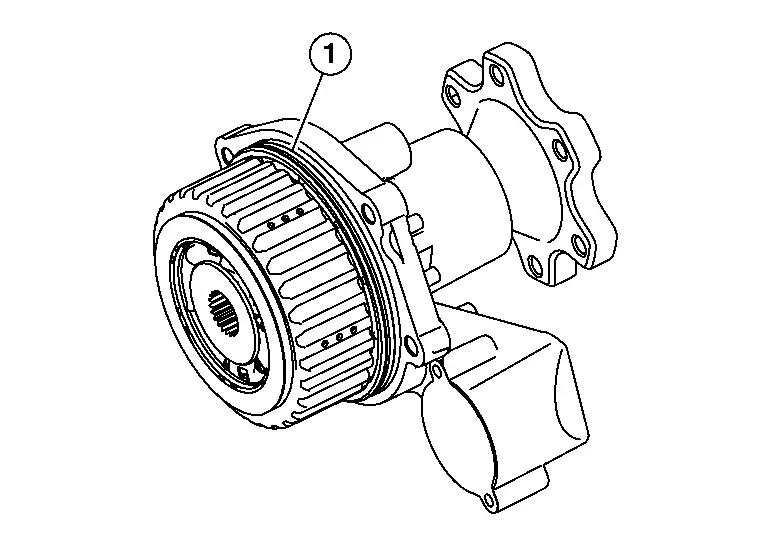
Tighten electro-hydraulic coupling assembly bolts to the specified torque diagonally.

For tightening torque, refer to Exploded View.
Inspection
INSPECTION AFTER DISASSEMBLY
Bearing
If unusual noise from the bearing is observed, replace electro-hydraulic coupling assembly.
Oil Seal
Whenever disassembled, replace.
If wear, deterioration of adherence (sealing force lips), or damage is detected on the lips, replace them.
Companion Flange
Whenever disassembled, replace.
If any chipped mark [about 0.1 mm, (0.004 in)] or other damage on the contact sides of the lips of the companion flange is found, replace.
Differential Assembly Nissan Pathfinder SUV
Exploded View
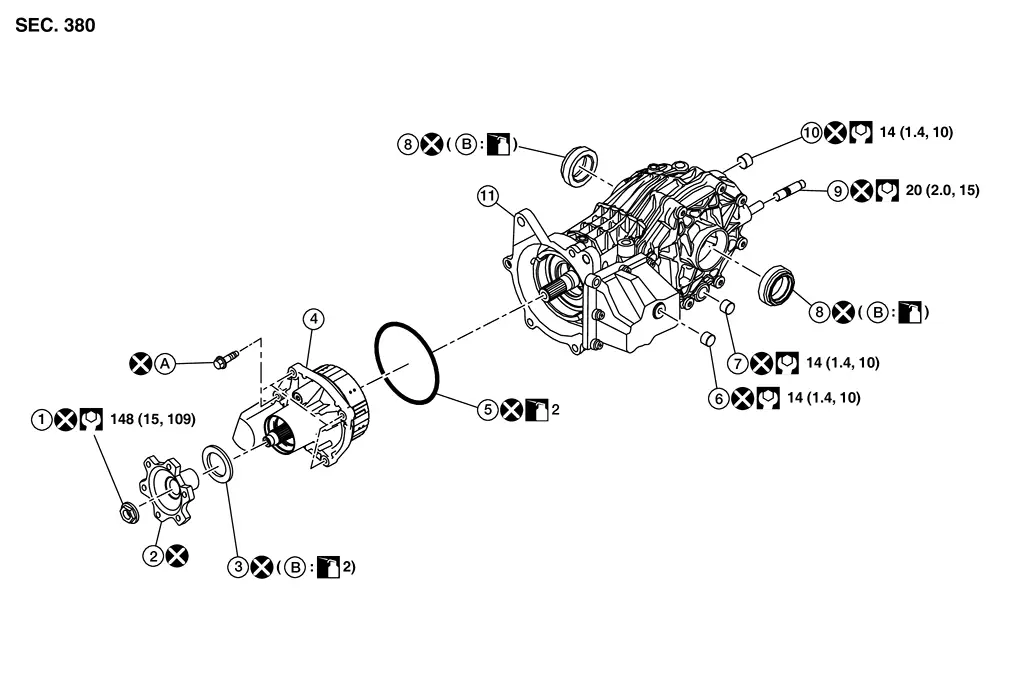
| 1. | Companion flange lock nut | 2. | Companion flange | 3. | Electro-hydraulic coupling oil seal |
| 4. | Electro-hydraulic coupling assembly | 5. | O-ring | 6. | Filler plug |
| 7. | Drain plug | 8. | Side oil seal | 9. | Stud |
| 10. | Filler plug | 11. | Final drive assembly | A. | Refer to Removal and Installation. |
| B. | Oil seal lip |
Disassembly
DISASSEMBLY
Remove drain plug and drain gear oil. Refer to Exploded View.
Remove filler plug from final drive assembly. Refer to Exploded View.
Remove the side oil seal (1), using oil seal remover (commercial service tool).
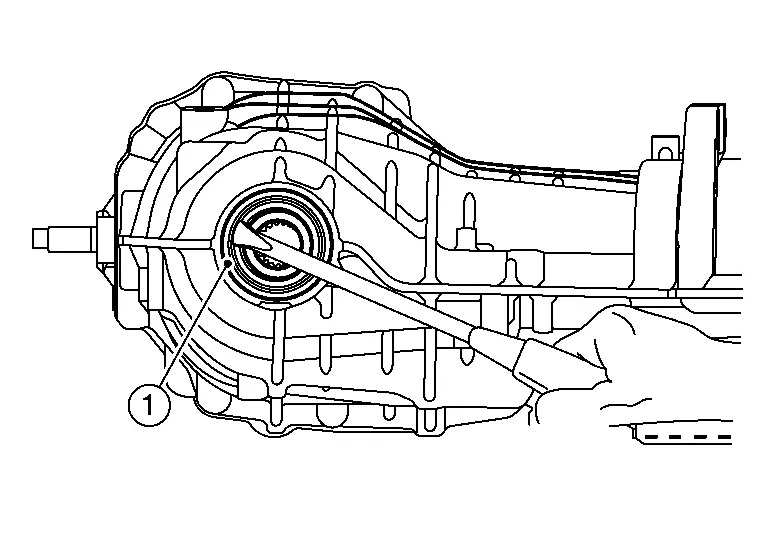
Remove stud bolt from final drive assembly. Refer to Exploded View.
Perform inspection after disassembly. Refer to Inspection.
Assembly
ASSEMBLY
Install stud bolt to final drive assembly.
For tightening torque, refer to Exploded View.
Install side oil seal (cover side) until it becomes flush with the carrier end, using the drift (A) [SST: KV40105740 ( — )].
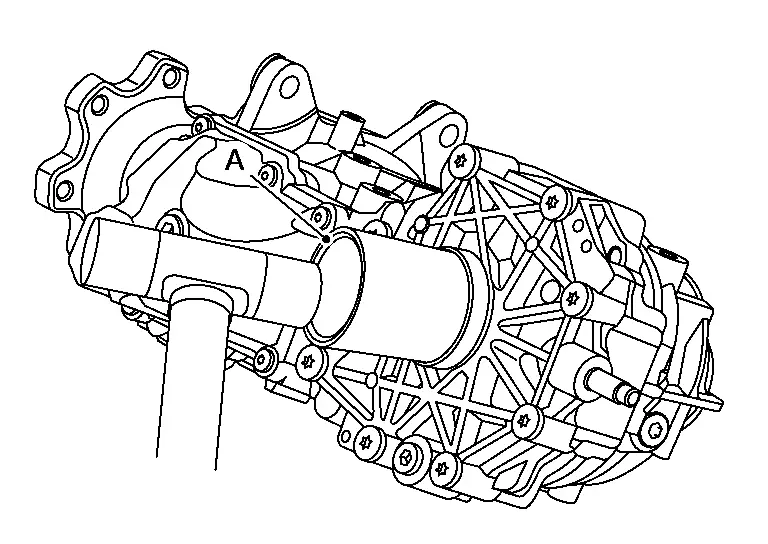
Install side oil seal (carrier side) until it becomes flush with the carrier end, using the drift (A) and drift bar (B).
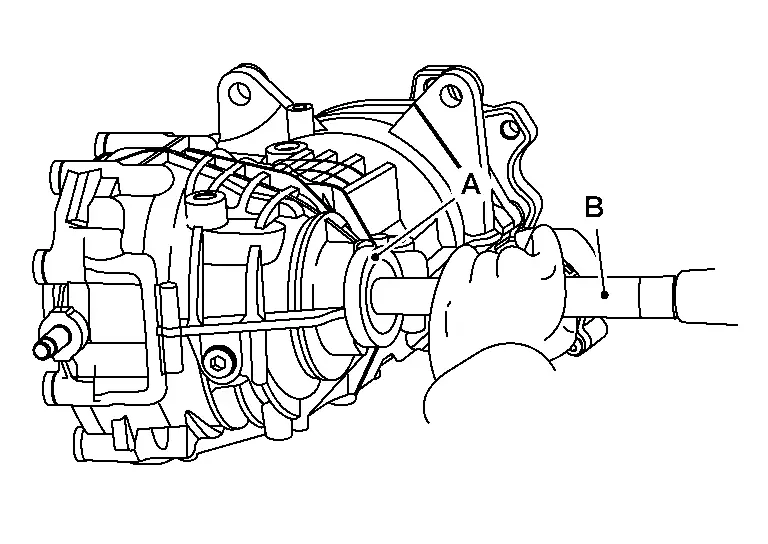
| A | : Drift [SST: KV31103000 (NI-38982)] |
| B | : Drift bar [SST: ST35325000 ( — )] |
Install drain plug to final drive assembly. Refer to Exploded View.
Install filler plug to final drive assembly. Refer to Exploded View.
Inspection
INSPECTION AFTER DISASSEMBLY
Oil Seal
Whenever disassembled, replace.
If wear, deterioration of adherence (sealing force lips), or damage is detected on the lips, replace them.