General Information

Basic Inspection :: Service Information for Electrical Incident

In this manual: General Information
General Information — 8Engine :: Engine Mechanical — 19Engine Lubrication System - Precautions. Preparation — 1Engine Lubrication System - Lubrication System (System Description). Engine Oil Pressure (Basic Inspection). Service Data and Specifications (SDS) — 1Engine Cooling System - Precautions. Preparation. Service Data and Specifications (SDS) — 1Engine Cooling System - Engine Coolant — 1Engine Control System - System Description — 1System Description - Component Parts ++ — 1System Description - System ++ — 1Engine Control System - Ecu Diagnosis Information — 1Ecu Diagnosis Information - Ecm ++ — 1Engine Control System - Basic Inspection — 1Basic Inspection - Diagnosis and Repair Workflow ++ — 1Basic Inspection - Basic Inspection ++ — 1Basic Inspection - Additional Service When Replacing Ecm ++ — 1Basic Inspection - Fuel Pressure Check ++ — 1Basic Inspection - How to Set Srt Code ++ — 1Basic Inspection - How to Erase Permanent Dtc ++ — 1Engine Control System - Dtc/circuit Diagnosis — 1Engine Control System - Symptom Diagnosis — 1Engine Control System - Periodic Maintenance — 1Engine Control System - Removal and Installation — 1Fuel System - Precautions. Preparation. Service Data and Specifications (SDS) — 1Fuel System - Fuel System (Periodic Maintenance). Fuel Level Sensor Unit (Disassembly and Assembly) — 1Exhaust System - Precautions. Preparation — 1Exhaust System - Exhaust System (Periodic Maintenance). Exhaust System (Removal and Installation) — 1Starting System - Precautions. Preparation. Starter Motor (Service Data and Specifications (sds)) — 1Starting System - Diagnosis and Repair Work Flow — 1Starting System - Starting System (Symptom Diagnosis). Starter Motor (Removal and Installation) — 1Accelerator Control System - Precautions. Service Data and Specifications (SDS) — 1Accelerator Control System - Accelerator Pedal Assembly — 1Transmission & Driveline :: Transaxle & Transmission — 21Driveline - System Description — 1Transfer: Ty92b - Ecu Diagnosis Information. Awd Control Unit ++ — 1Driveline - Basic Inspection — 1Driveline - Dtc/circuit Diagnosis — 1Driveline - Symptom Diagnosis — 1Driveline - Removal and Installation — 1Transfer: Ty92b - Unit Removal and Installation. Transfer Assembly ++ — 1Driveline - Unit Disassembly and Assembly — 1Driveline - Basic Inspection — 1Driveline - Removal and Installation — 1Driveline - Unit Disassembly and Assembly — 1Front Axle - Precautions. Preparation — 1Front Axle - Noise, Vibration and Harshness (nvh) Troubleshooting (Symptom Diagnosis). Service Data and Specifications (SDS) — 1Front Axle - Front Drive Shaft Boot — 1Front Axle - Front Drive Shaft — 1Rear Axle - Precautions. Preparation. Service Data and Specifications (SDS) — 1Rear Axle - Noise, Vibration and Harshness (nvh) Troubleshooting — 1Rear Axle - Rear Drive Shaft — 1Suspension :: Front Suspension — 7Rear Suspension - Precautions. Preparation — 1Rear Suspension - Noise, Vibration and Harshness (nvh) Troubleshooting (Symptom Diagnosis). Service Data and Specifications (SDS) — 1Rear Suspension - Rear Suspension Assembly — 1Road Wheels & Tires - Precautions — 1Road Wheels & Tires - Preparation. Bcm (Ecu Diagnosis Information). Service Data and Specifications (SDS) — 1Road Wheels & Tires - System — 1Brakes :: Brake System — 9Parking Brake System - Precautions. Preparation — 1Parking Brake System - System — 1Vdc/tcs/abs - Precautions ++ — 1Brake Control System - System Description — 1System Description - Component Parts ++ — 1System Description - System ++ — 1Brake Control System - Basic Inspection — 1Brake Control System - Symptom Diagnosis — 1Brake Control System - Removal and Installation — 1Brake Control System - System Description — 1Brake Control System - Dtc/circuit Diagnosis — 1Brake Control System - Removal and Installation — 1Brake Control System - System Description — 1Brake Control System - Basic Inspection — 1Brake Control System - Symptom Diagnosis — 1Brake Control System - System Description — 1Brake Control System - Basic Inspection — 1Brake Control System - Symptom Diagnosis — 1Steering :: Steering System — 9Steering Control System - Precautions — 1Steering Control System - System — 1Steering Control System - Eps Control Unit (Ecu Diagnosis Information. Removal and Installation) — 1Restraints :: Seat Belt — 7Srs Air Bag - Precautions. Preparation — 1Srs Air Bag - Collision Diagnosis — 1Srs Air Bag - Occupant Classification System — 1Srs Air Bag Control System - Precautions — 1Srs Air Bag Control System - System — 1Srs Air Bag Control System - Diagnosis Sensor Unit — 1Srs Air Bag Control System - Inspection and Adjustment — 1Ventilation, Heater & Air Conditioner :: Ventilation System — 6Heater & Air Conditioning System - Precautions — 1Heater & Air Conditioning System - Preparation — 1Heater & Air Conditioning System - Component Parts — 1Heater & Air Conditioning System - Diagnosis and Repair Work Flow — 1Heater & Air Conditioning System - Compressor — 1Heater & Air Conditioning System - Cooler Pipe and Hose — 1Heater & Air Conditioning System - Condenser. Condenser — 1Heater & Air Conditioning System - Heating and Cooling Unit Assembly — 1Heater & Air Conditioning System - Service Data and Specifications (SDS) — 1Heater & Air Conditioning Control System - System Description — 1System Description - Component Parts ++ — 1System Description - System ++ — 1System Description - Operation ++ — 1Heater & Air Conditioning Control System - Ecu Diagnosis Information — 1Heater & Air Conditioning Control System - Basic Inspection — 1Heater & Air Conditioning Control System - Dtc/circuit Diagnosis — 1Heater & Air Conditioning Control System - Symptom Diagnosis — 1Heater & Air Conditioning Control System - Removal and Installation — 1Body Interior :: Interior — 8Instrument Panel - Precautions. Preparation. Clip List — 1Instrument Panel - Squeak and Rattle Trouble Diagnoses — 1Instrument Panel - Cluster Lid C — 1Seat - Precautions — 1Seat - Preparation. Clip List — 1Seat - Component Parts — 1Seat - System — 1Seat - Diagnosis and Repair Work Flow — 1Seat - Front Seat — 1Seat - Second Row Seats — 1Seat - Third Row Seats — 1Seat - Front Seat — 1Seat - Second Row Seat — 1Seat - Third Row Seat — 1Automatic Drive Positioner - Precautions. Preparation — 1Automatic Drive Positioner - System — 1Automatic Drive Positioner - Diagnosis and Repair Work Flow — 1Automatic Drive Positioner - Inspection and Adjustment — 1Body Exterior, Doors, Roof & Vehicle Security :: Door & Lock — 38Security Control System - Precautions — 1Security Control System - System — 1Security Control System - Ecm, Bcm, Intelligent Key Unit, Ipdm E/r — 1Security Control System - Vehicle Security System Cannot Be Set — 1Glass & Window System - Precautions. Preparation — 1Glass & Window System - Squeak and Rattle Trouble Diagnoses — 1Power Window Control System - Precautions. Preparation — 1Power Window Control System - Power Supply and Ground Circuit — 1Power Window Control System - Power Window Motor Circuit — 1Power Window Control System - Front Power Window Rh Alone Does Not Operate — 1Power Window Control System - Rear Lh Side Power Window Alone Does Not Operate — 1Power Window Control System - Rear Rh Side Power Window Alone Does Not Operate — 1Roof - Precautions. Preparation — 1Roof - Power Supply and Ground Circuit — 1Roof - Moonroof Switch Assembly — 1Roof - Lin Communication Circuit — 1Roof - Auto Operation Does Not Operate — 1Roof - Anti-Pinch Function Does Not Operate — 1Exterior - Precautions. Preparation. Clip List (Preparation) — 1Exterior - Squeak and Rattle Trouble Diagnoses — 1Exterior - Fender Protector — 1Exterior - Over Fender — 1Exterior - Under Cover — 1Exterior - Roof Side Rail — 1Body Repair - Service Information — 1Service Information - Sheet Metal Work ++ — 1Service Information - Body Welding and Precautions ++ — 1Service Information - Safety and Health ++ — 1Service Information - Repairing Procedures and Precautions ++ — 1Body Repair - Precaution — 1Body Repair - Preparation — 1Body Repair - Removal and Installation — 1Driver Controls :: Mirrors — 8Exterior Lighting System - System Description — 1System Description - Component Parts ++ — 1Exterior Lighting System - Basic Inspection — 1Exterior Lighting System - Dtc/circuit Diagnosis — 1Exterior Lighting System - Symptom Diagnosis — 1Exterior Lighting System - Periodic Maintenance — 1Exterior Lighting System - Removal and Installation — 1Interior Lighting System - Precautions. Preparation — 1Interior Lighting System - Component Parts. Interior Lighting System — 1Interior Lighting System - System — 1Interior Lighting System - Diagnosis and Repair Work Flow — 1Interior Lighting System - Interior Lighting System Symptoms (Symptom Diagnosis). Bcm (Ecu Diagnosis Information). Service Data and Specifications (SDS) — 1Interior Lighting System - Foot Lamp — 1Wiper & Washer - Precautions — 1Wiper & Washer - Preparation. Bcm, Ipdm E/r (Ecu Diagnosis Information). Service Data and Specifications (SDS) — 1Wiper & Washer - System — 1Wiper & Washer - Diagnosis and Repair Work Flow — 1Defogger - Precautions. Bcm, A/c Auto Amp. (Ecu Diagnosis Information) — 1Defogger - Diagnosis and Repair Work Flow — 1Horn - Precautions — 1Electrical & Power Control :: Power Outlet — 13Body Control System - Precautions. Preparation — 1Body Control System - Component Parts — 1Body Control System - System — 1Body Control System - Diagnosis System (bcm) — 1Body Control System - Bcm — 1Lan System - System Description — 1Lan System - System Description — 1Lan System - Dtc/circuit Diagnosis — 1Lan System - System Description — 1Lan System - Dtc/circuit Diagnosis — 1Power Control System - System Description — 1Power Control System - Basic Inspection — 1Power Control System - Dtc/circuit Diagnosis — 1Power Control System - System Description — 1Power Control System - Basic Inspection — 1Power Control System - Dtc/circuit Diagnosis — 1Power Control System - Removal and Installation — 1Charging System - Precautions. Preparation. Ecm, Ipdm E/r (Ecu Diagnosis Information) — 1Charging System - Diagnosis and Repair Work Flow — 1Charging System - Charging System (Symptom Diagnosis). Generator (Removal and Installation). Service Data and Specifications (SDS) — 1Power Supply, Ground & Circuit Elements - Precautions. Preparation. Service Data and Specifications (SDS) — 1Driver Information & Multimedia :: Meter, Warning Lamp & Indicator — 25Warning Chime System - Application Notice (How to Use This Manual). Precautions — 1Warning Chime System - System — 1Warning Chime System - Diagnosis System (combination Meter) — 1Warning Chime System - Bcm, Combination Meter (Ecu Diagnosis Information). Diagnosis and Repair Work Flow (Basic Inspection) — 1Sonar System - Precautions. Preparation — 1Sonar System - Sonar Control Unit — 1Dtc/circuit Diagnosis - B2720 Corner Sensor [rl] ++ — 1Audio, Visual & Navigation System - System Description — 1System Description - Component Parts ++ — 1System Description - System ++ — 1Audio, Visual & Navigation System - Ecu Diagnosis Information — 1Audio, Visual & Navigation System - Basic Inspection — 1Audio, Visual & Navigation System - Dtc/circuit Diagnosis — 1Dtc/circuit Diagnosis - Multi Av (av Control Unit) ++ — 1Audio, Visual & Navigation System - Symptom Diagnosis — 1Symptom Diagnosis - Multi Av System ++ — 1Audio, Visual & Navigation System - Removal and Installation — 1Audio, Visual & Navigation System - System Description — 1Audio, Visual & Navigation System - Ecu Diagnosis Information — 1Audio, Visual & Navigation System - Basic Inspection — 1Audio, Visual & Navigation System - Dtc/circuit Diagnosis — 1Audio, Visual & Navigation System - Symptom Diagnosis — 1Audio, Visual & Navigation System - Removal and Installation — 1Audio, Visual & Navigation System - System Description — 1Audio, Visual & Navigation System - Basic Inspection — 1Audio, Visual & Navigation System - Dtc/circuit Diagnosis — 1Audio, Visual & Navigation System - Symptom Diagnosis — 1Audio, Visual & Navigation System - Removal and Installation — 1Audio, Visual & Navigation System - System Description — 1Audio, Visual & Navigation System - Basic Inspection — 1Audio, Visual & Navigation System - Dtc/circuit Diagnosis — 1Audio, Visual & Navigation System - Symptom Diagnosis — 1Audio, Visual & Navigation System - Removal and Installation — 1Cruise Control & Driver Assistance :: Cruise Control System — 17Driver Assistance System - System Description — 1Driver Assistance System - Basic Inspection — 1Driver Assistance System - Dtc/circuit Diagnosis — 1Driver Assistance System - System Description — 1System Description - Component Parts ++ — 1System Description - System ++ — 1System Description - Operation ++ — 1System Description - Handling Precaution ++ — 1Driver Assistance System - Ecu Diagnosis Information — 1Driver Assistance System - Basic Inspection — 1Basic Inspection - Distance Sensor Alignment ++ — 1Basic Inspection - Camera Aiming Adjustment ++ — 1Basic Inspection - Action Test ++ — 1Driver Assistance System - Dtc/circuit Diagnosis — 1Dtc/circuit Diagnosis - Laser/radar (distance Sensor) ++ — 1Dtc/circuit Diagnosis - Lane Camera (front Camera Unit) ++ — 1Driver Assistance System - Symptom Diagnosis — 1Driver Assistance System - Removal and Installation — 1Driver Assistance System - System Description — 1System Description - System ++ — 1Driver Assistance System - Basic Inspection — 1Driver Assistance System - Dtc/circuit Diagnosis — 1Drive Mode System - Precautions — 1Drive Mode System - Component Parts. Drive Mode System — 1Drive Mode System - System — 1Drive Mode System - Diagnosis and Repair Work Flow — 1Drive Mode System - Drive Mode Select Switch Circuit — 1Maintenance - Precautions. Preparation — 1Maintenance - General Maintenance — 1Maintenance - Periodic Maintenance — 1Maintenance - Recommended Fluids and Lubricants — 1Maintenance - Engine Maintenance — 1Maintenance - Chassis and Body Maintenance — 1Engine Lubrication System - Periodic Maintenance — 1Engine Lubrication System - Removal and Installation — 1Engine Cooling System - System Description — 1Engine Cooling System - Removal and Installation — 1Engine Control System - Vq35dd — 1Fuel System - Removal and Installation — 1Starting System - System Description — 1Starting System - Dtc/circuit Diagnosis — 1Driveline - Transfer: Ty92b — 1Driveline - Rear Propeller Shaft: 3fcj-Cvj — 1Driveline - Rear Final Drive: R145 — 1Front Axle - Periodic Maintenance — 1Front Axle - Removal and Installation — 1Rear Axle - Periodic Maintenance — 1Rear Axle - Removal and Installation — 1Rear Suspension - Removal and Installation — 1Road Wheels & Tires - System Description — 1Road Wheels & Tires - Basic Inspection — 1Road Wheels & Tires - Dtc/circuit Diagnosis — 1Road Wheels & Tires - Symptom Diagnosis — 1Road Wheels & Tires - Periodic Maintenance — 1Road Wheels & Tires - Removal and Installation — 1Parking Brake System - System Description — 1Parking Brake System - Basic Inspection — 1Parking Brake System - Dtc/circuit Diagnosis — 1Parking Brake System - Symptom Diagnosis — 1Parking Brake System - Removal and Installation — 1Brake Control System - Vdc/tcs/abs — 1Brake Control System - Automatic Brake Hold — 1Brake Control System - Automatic Emergency Braking — 1Brake Control System - Rear Automatic Braking — 1Steering Control System - System Description — 1Steering Control System - Basic Inspection — 1Steering Control System - Dtc/circuit Diagnosis — 1Steering Control System - Symptom Diagnosis — 1Srs Air Bag - Removal and Installation — 1Srs Air Bag Control System - System Description — 1Srs Air Bag Control System - Basic Inspection — 1Srs Air Bag Control System - Symptom Diagnosis — 1Heater & Air Conditioning System - Symptom Diagnosis — 1Heater & Air Conditioning System - Periodic Maintenance — 1Heater & Air Conditioning Control System - Automatic Air Conditioning — 1Instrument Panel - Removal and Installation — 1Instrument Panel - Unit Disassembly and Assembly — 1Seat - Ecu Diagnosis Information — 1Seat - Dtc/circuit Diagnosis — 1Seat - Symptom Diagnosis — 1Automatic Drive Positioner - System Description — 1Automatic Drive Positioner - Ecu Diagnosis Information — 1Automatic Drive Positioner - Dtc/circuit Diagnosis — 1Automatic Drive Positioner - Symptom Diagnosis — 1Automatic Drive Positioner - Removal and Installation — 1Security Control System - System Description — 1Security Control System - Basic Inspection — 1Security Control System - Dtc/circuit Diagnosis — 1Security Control System - Symptom Diagnosis — 1Security Control System - Removal and Installation — 1Glass & Window System - Removal and Installation — 1Power Window Control System - System Description — 1Power Window Control System - Ecu Diagnosis Information — 1Power Window Control System - Basic Inspection — 1Power Window Control System - Dtc/circuit Diagnosis — 1Power Window Control System - Symptom Diagnosis — 1Power Window Control System - Removal and Installation — 1Roof - System Description — 1Roof - Ecu Diagnosis Information — 1Roof - Basic Inspection — 1Roof - Dtc/circuit Diagnosis — 1Roof - Symptom Diagnosis — 1Roof - Removal and Installation — 1Exterior - System Description — 1Exterior - Removal and Installation — 1Body Repair - Repair Information — 1Exterior Lighting System - Led Headlamp — 1Interior Lighting System - Dtc/circuit Diagnosis — 1Interior Lighting System - Removal and Installation — 1Wiper & Washer - System Description — 1Wiper & Washer - Dtc/circuit Diagnosis — 1Wiper & Washer - Symptom Diagnosis — 1Wiper & Washer - Removal and Installation — 1Defogger - System Description — 1Defogger - Dtc/circuit Diagnosis — 1Defogger - Symptom Diagnosis — 1Defogger - Removal and Installation — 1Horn - Removal and Installation — 1Body Control System - Basic Inspection — 1Body Control System - Dtc/circuit Diagnosis — 1Body Control System - Symptom Diagnosis — 1Body Control System - Removal and Installation — 1Lan System - Can Fundamental — 1Lan System - Can — 1Lan System - Can Gateway — 1Power Control System - Ipdm E/r — 1Power Control System - Power Distribution System — 1Charging System - System Description — 1Charging System - Dtc/circuit Diagnosis — 1Power Supply, Ground & Circuit Elements - System Description — 1Power Supply, Ground & Circuit Elements - Basic Inspection — 1Power Supply, Ground & Circuit Elements - Removal and Installation — 1Warning Chime System - System Description — 1Warning Chime System - Dtc/circuit Diagnosis — 1Warning Chime System - Symptom Diagnosis — 1Sonar System - System Description — 1Sonar System - Basic Inspection — 1Sonar System - Dtc/circuit Diagnosis — 1Sonar System - Symptom Diagnosis — 1Sonar System - Removal and Installation — 1Audio, Visual & Navigation System - Nissanconnect — 1Audio, Visual & Navigation System - Intelligent Around View Monitor System — 1Audio, Visual & Navigation System - Rear View Monitor System — 1Audio, Visual & Navigation System - Telematics System — 1Driver Assistance System - Adas Control Unit 2 — 1Driver Assistance System - Driver Assistance System — 1Driver Assistance System - Chassis Control — 1Drive Mode System - Removal and Installation — 1Dtc/circuit Diagnosis (C053c Wheel Speed Sensor ... U2141 Can Comm Circuit) — 1Dtc/circuit Diagnosis (P0011 Intake Valve Timing Control ... P0111 Iat Sensor) — 1Dtc/circuit Diagnosis (P0116 Engine Coolant Temperature Sensor ... P025b Fuel Pump Module a) — 1Dtc/circuit Diagnosis (P026b Injection Timing ... P0420 Three Way Catalyst Function) — 1Dtc/circuit Diagnosis (P0441 Evap Control System ... P0524 Engine Oil Pressure) — 1Dtc/circuit Diagnosis (P0532 A/c Refrigerant Pressure Sensor ... P064d Ecm) — 1Dtc/circuit Diagnosis (P06da Engine Oil Pressure Control Solenoid Valve ... P1217 Engine Over Temperature) — 1Dtc/circuit Diagnosis (P1220 Fuel Pump Control Module (fpcm) ... P1574 Ascd Vehicle Speed Sensor) — 1Dtc/circuit Diagnosis (P1575 Brake Switch ... P2101 Electric Throttle Control Function) — 1Dtc/circuit Diagnosis (P2118 Throttle Control Motor ... P34ac Electric Intake Valve Timing Control Actuator) — 1Dtc/circuit Diagnosis (Active Grille Shutter ... High Pressure Fuel Pump) — 1Dtc/circuit Diagnosis (Ignition Signal ... Variable Induction Air System) — 14012 C1040 Emergency Brake — 14013 C106a Wheel Sensor — 14014 C1078-55 Not Configuration — 14015 C10b4-98 Overheat — 14016 B1001 Lap Pre-Tensioner Lh — 14017 B0001 Driver Air Bag Module — 14018 B100e Knee Air Bag Module Rh — 14019 B142x Collision Detection — 1Dtc/circuit Diagnosis (B20c7-11 A/c Clutch ... B24a6-11 in-Vehicle Sensor) — 1Dtc/circuit Diagnosis (B24a6-15 in-Vehicle Sensor ... U2140-87 Can Comm Err (ecm)) — 1Dtc/circuit Diagnosis (C1f00-1c Control Unit ... C1f04-61 Brake Sw/stop Lamp Sw) — 1Dtc/circuit Diagnosis (C1f05-49 Front Camera Unit ... C1f70-87 Ethernet Circuit) — 1
20steps
~120min
5/5difficulty
Done 0 of 20

Electrical Incident Inspection ➤ Nissan Pathfinder

Intermittent Incident ➤ Nissan Pathfinder R53

Harness Repair Procedure Nissan Pathfinder SUV

Inspection

Harness Repair Website and Resources

Wiring Harness and connector repair information including disassembly videos are located on the Harness Repair website. Links are found in ASIST and in the eWD. The website contains the following information:

  • Picture of connector with color, cavity quantity and connector family.

  • Part number of connector and part number of crimped terminal wire, if available.

  • Wire gauge and applicable solder sleeve.

  • Tool(s) required for procedure

  • Animation of removal procedure: Terminal locking tab location, removal of the retainer, and removal of the terminal

Connector Information
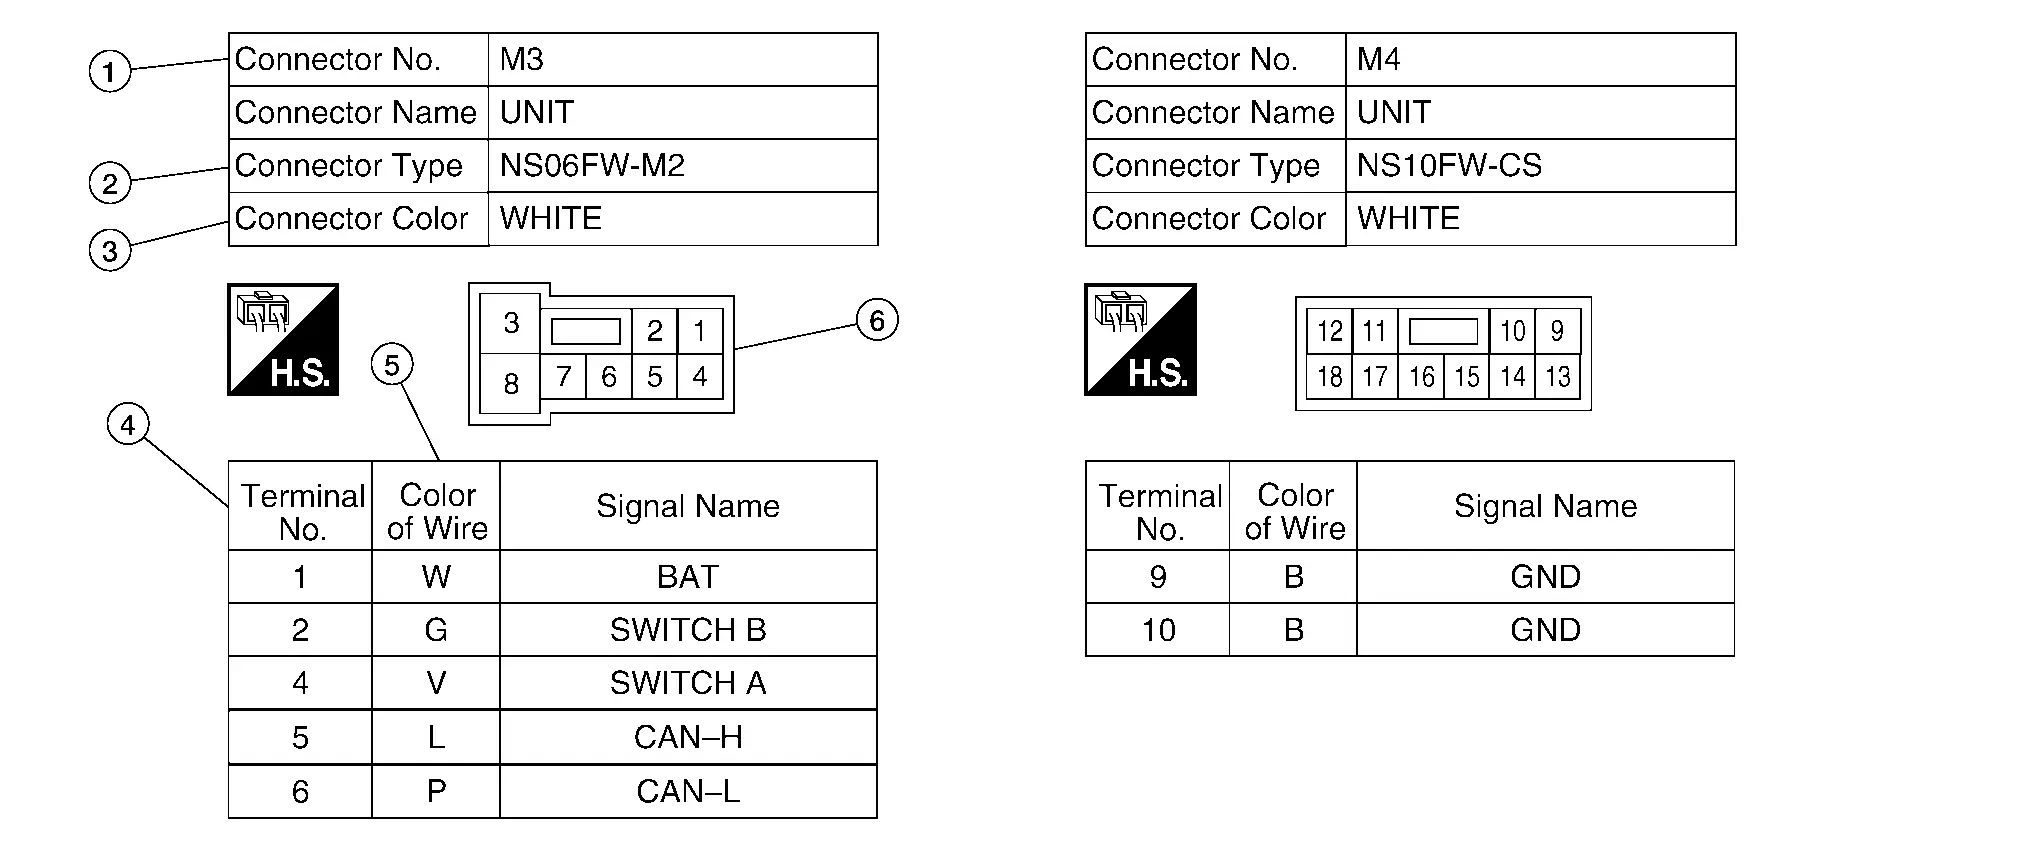
Description
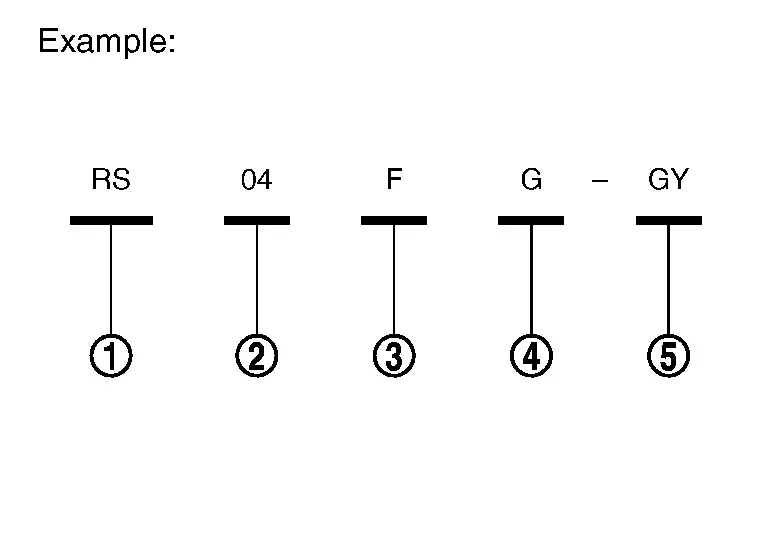
No.ItemDescription
1 Connector number
  • Alphabetic characters show to which harness the connector is placed.

  • Numeric characters show the identification number of connectors.

2 Connector type

: Connector model

: Cavity

: Male (M) and female (F) terminals

: Connector color

: Special type
3 Connector color
  • This means the color of a connector.

4 Terminal number
  • This means the terminal number of a connector.

5 Wire color
  • This shows a code for the color of the wire.

B = Black

W = White

R = Red

G = Green

L = Blue

Y = Yellow

LG = Light Green

BG or BE = Beige

BR = Brown

LA = Lavender

OR or O = Orange

P = Pink

PU or V (Violet) = Purple

GY or GR = Gray

SB = Sky Blue

CH = Dark Brown

DG = Dark Green
  • When the wire color is striped, the base color is given first followed by the stripe color as shown below:

    Example: L/W = Blue with White Stripe

6 Connector
  • This means the connector information.

  • This unit-side is described by the connector symbols.

Using the Retainer/Terminal Removal Tool

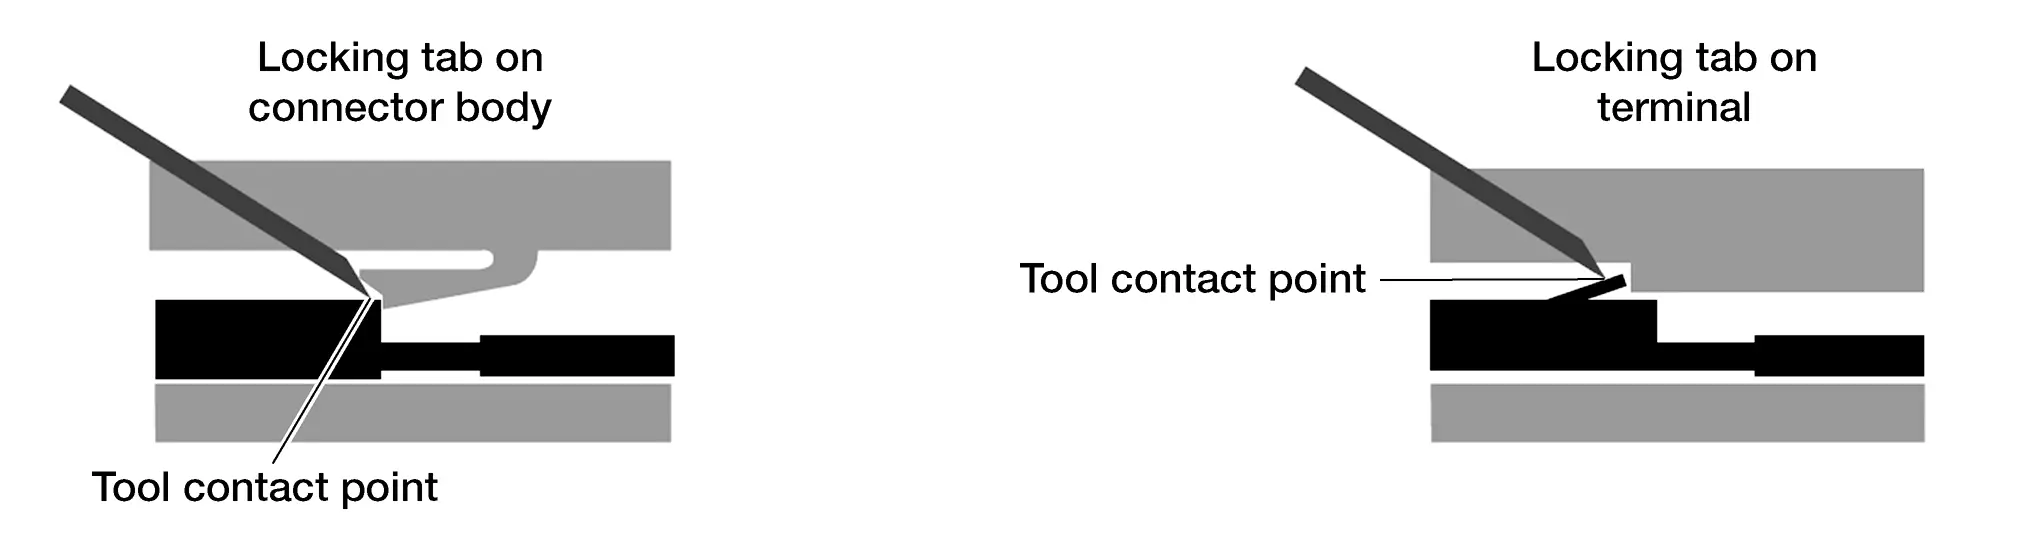
Retainer/terminal removal tool use varies depending on which connector type is being serviced. Read all of the notes provided above prior to beginning a repair.

  • Performing terminal removal and installation should be easy. Watch the video and Read each step before beginning the procedure. Not reading each step may cause damage to connector retainer or locking tabs. Determine whether the terminal locking tab is integral into the connector or the terminal - this will affect the direction of the motion required to release the terminal.

  • Perform tool selection carefully – though a tool may appear to be the right shape, it may not be the correct tool for the connector.

  • Use of two blades (with spacer between them) will be required to release some terminals.

  • Unless otherwise directed, position the blade so the long side is against the connector.

  • In some cases, the wire must be pushed into the connector slightly to relieve pressure applied to the locking tab by the terminal. Not relieving this pressure may prevent the terminal from becoming unlocked.
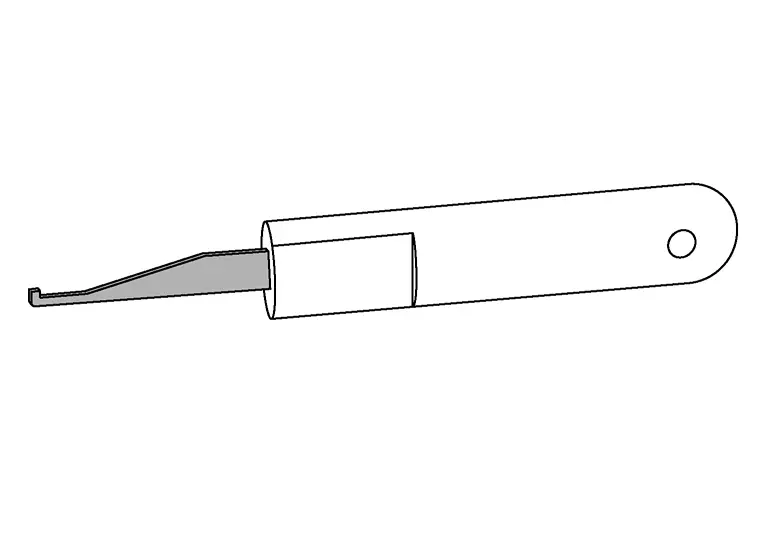
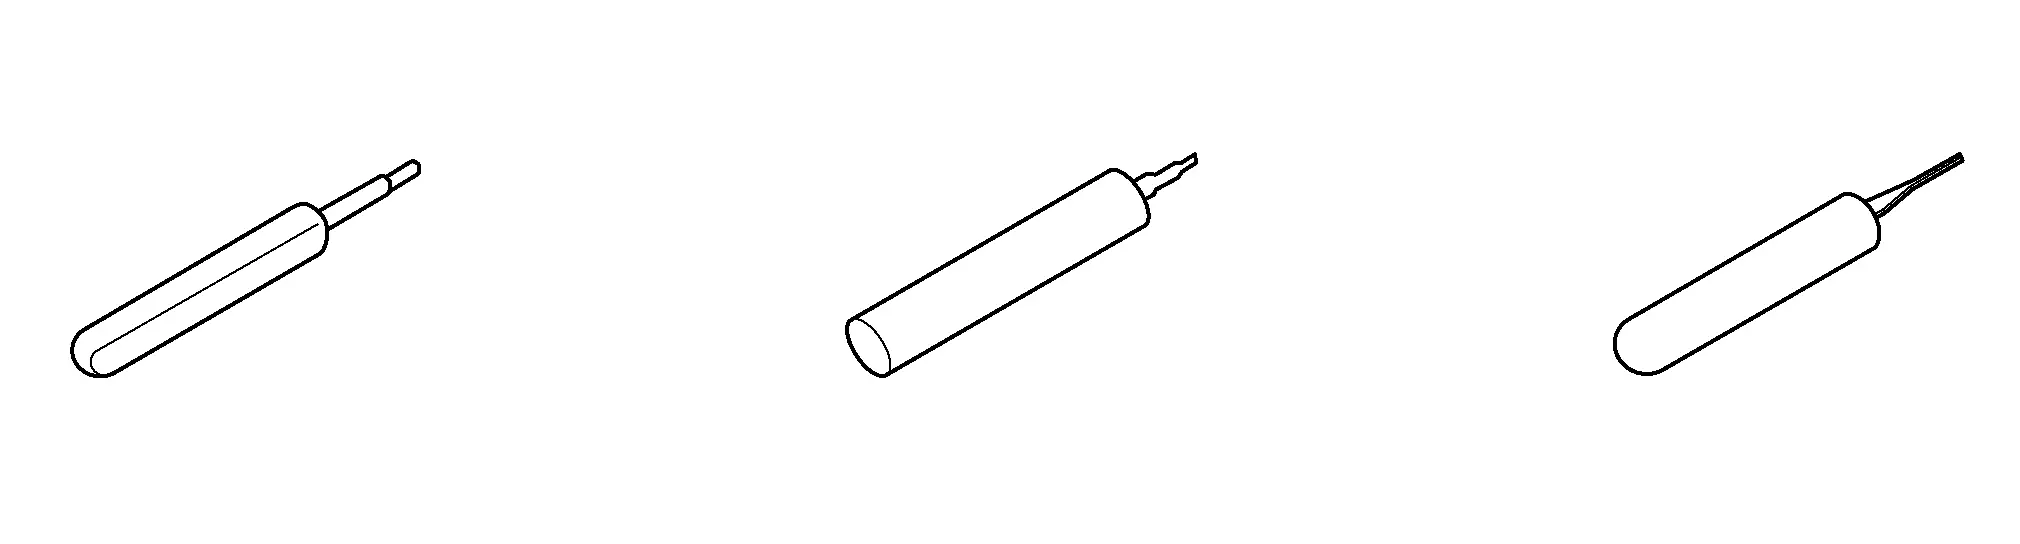
Retainer/Terminal Removal Tools

Retainer/Terminal Removal Tool
NI-48817-1 Retainer/Terminal Removal Tool
NI-47003-11 Retainer Removal Tool

NI-47003-14 through NI-47003-35 Terminal Only Removal Tools

(Use correct tool for the connector. Examples: NI-47003-14, NI-48817-25, NI-48817-29))

Using the Spread Terminal Gauge (STG)

  1. Select the correct STG for the terminal to be tested.

  2. Align the tip of the STG with the terminal.

  3. While moving the connector slightly, gently apply pressure to the STG.

  4. If the STG enters the terminal without compressing, replace the terminal.

    • If crimped terminal wire is not available, replace the connector assembly.

    • If neither part is available replace harness.

  5. To view the video on a STG pass/fail test got to the harness repair website or follow the link in ASIST or in the eWD.

Spread Terminal Gauges (STG)
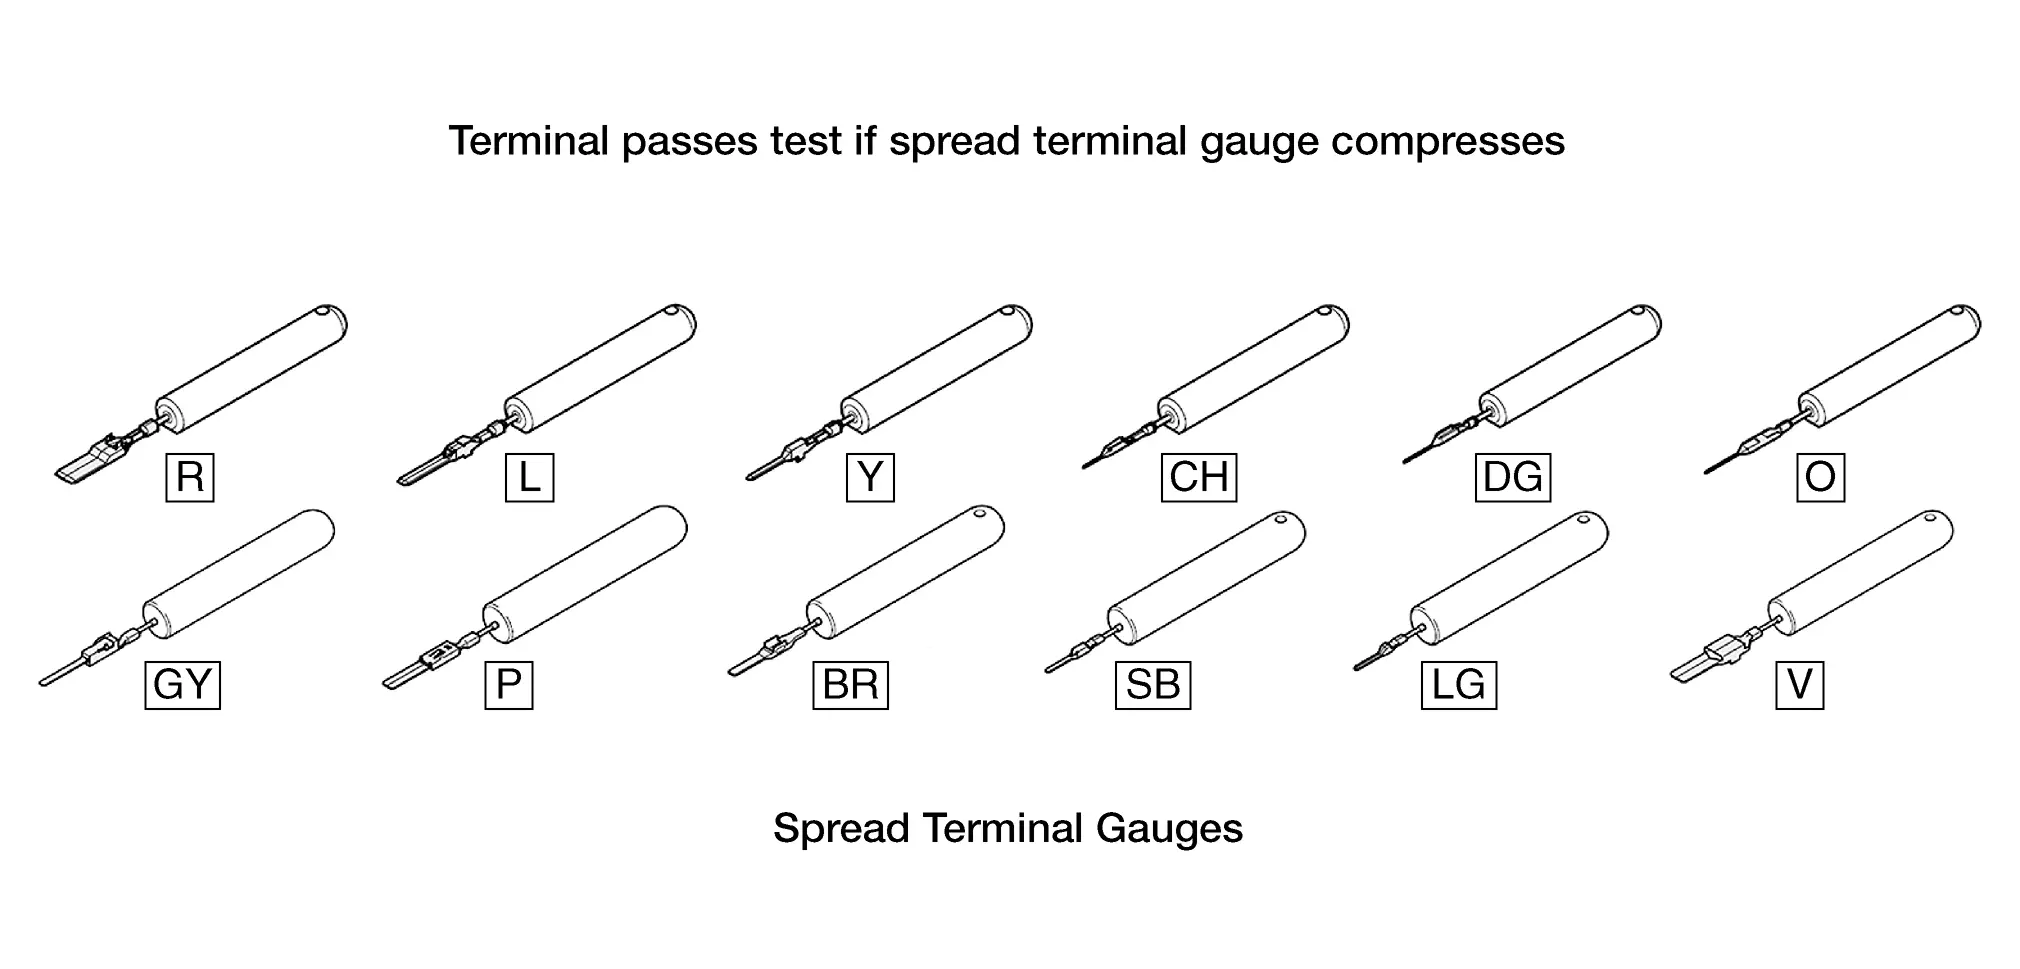
Bulk Wire

Bulk wire is available from Nissan in five sizes to make a correct repair. If the exact size is not available, go up one wire size. Nissan bulk wire is Hi-Temp and can be used in exterior or interior applications.

Use solder sleeve chart, as reference for proper wire/solder sleeve application.

  1. Automatic Wire Stripper

    • Always wear approved eye protection to prevent eye injury.

    • Do not use non-insulated, plastic-dipped or slip-on plastic handles that are NOT intended for protection against electrical shock without the proper PPE, to prevent electrocution.

    • Never repair live electrical circuits, to prevent electrocution.

    Automatic Wire Stripper

    Part # NI-35615
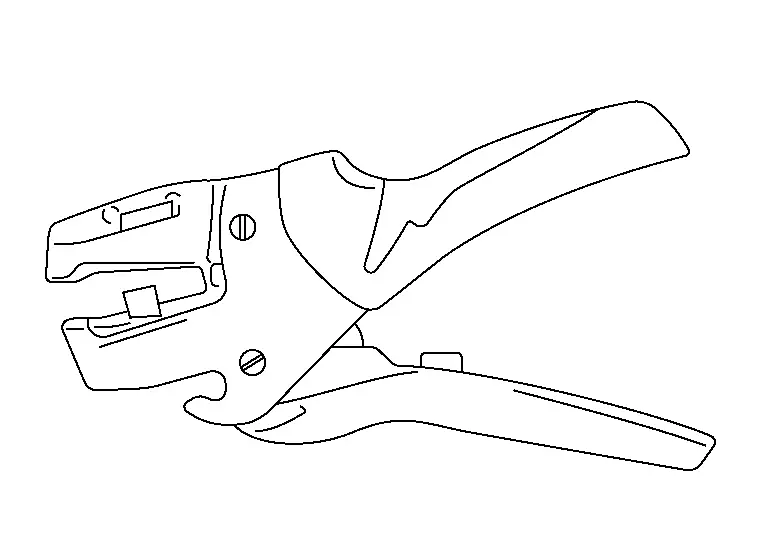
  2. Wire Stripper Repair Procedures

    The following procedure describes how to use the automatic wire stripper, to remove insulation from the wire without nicking or fraying.

    1. Choose and install the correct stripper die for the wire gauge you are repairing.

    2. Adjust the wire stop to the desired stripping length. The recommended length for Blue Solder Sleeves (12-16 AWG) is approximately 10 mm (0.4 in.).

    3. With the open side of the jaws toward you (wire stop to the right), place the wire in the appropriate size stripping hole with the end touching the wire stop. Refer to the blade for AWG and mm size markings.

    4. Squeeze the handles together to strip the wire. Release pressure from the handles and remove the wire.

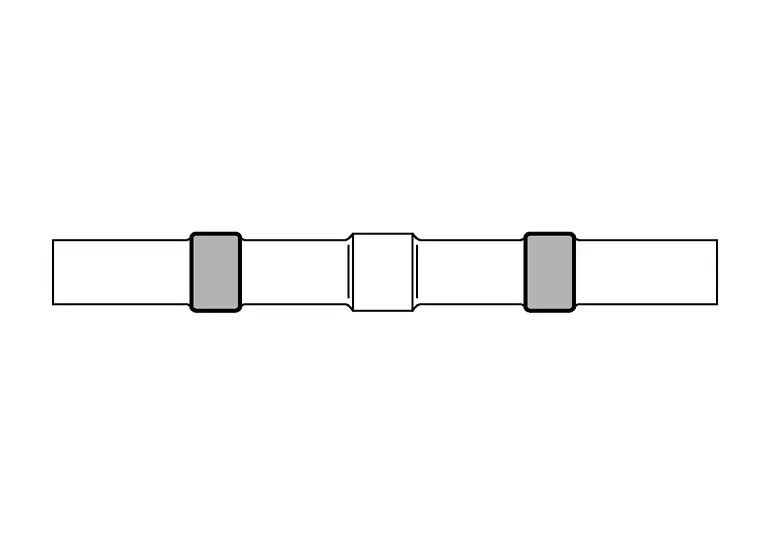
Solder Sleeves

CABLE SIZE

(GAUGE AWG)
SOLDER SLEEVE COLORSOLDER SLEEVE IMAGE
26-30 White
18-24 Red
16-12 Blue

Solder Sleeve Installation Steps

IMPORTANT: Jacketed and/or shielded wires cannot be repaired.

  1. Check the gauge of the wire that is to be spliced, to determine correct solder sleeve size.

  2. Strip approximately 10 mm (about 3/8 inch) of insulation from the wires that will be attached.
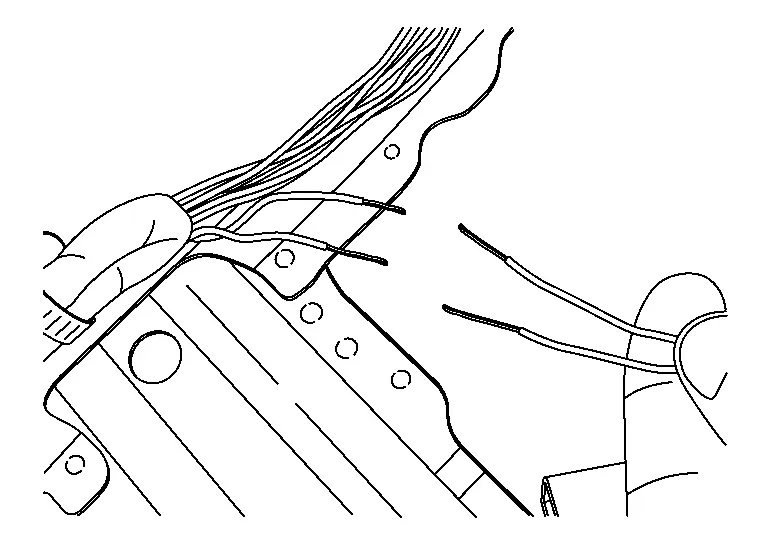
  3. Slide the Solder Sleeve over one of the wires that will be connected.

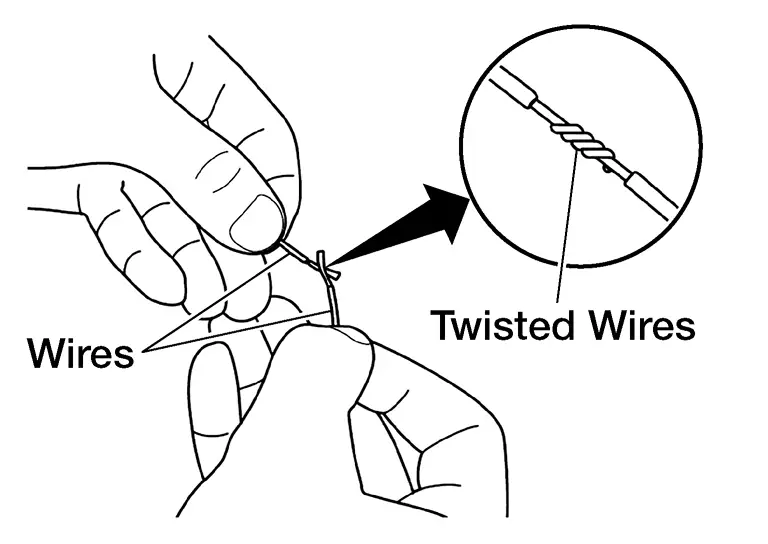
  4. Twist the two wires together

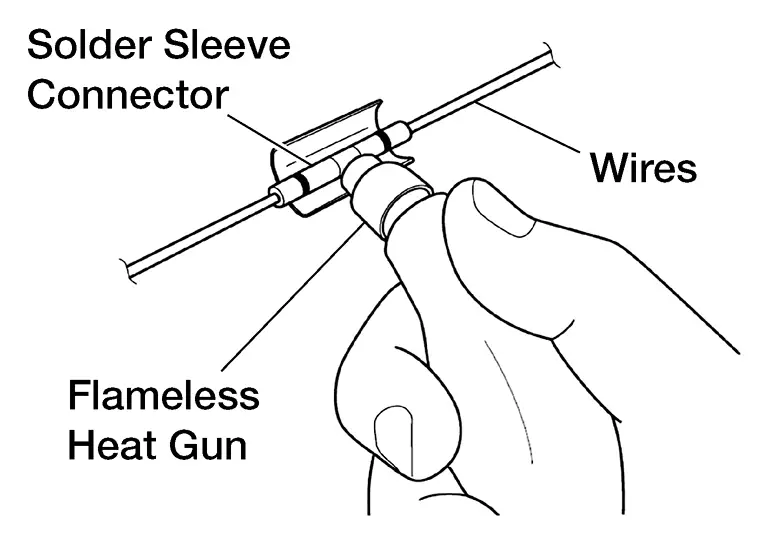
  5. Position the solder ring in relation to the twisted wires.
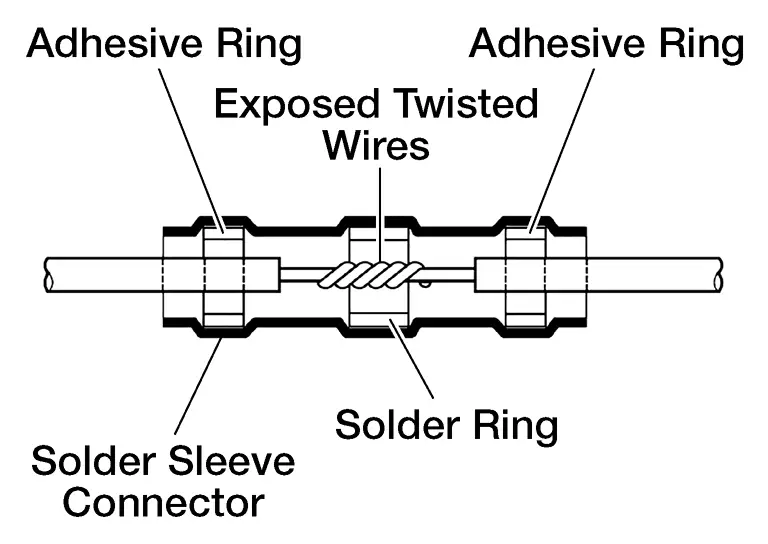
  6. "Install" the solder sleeve connector by shrinking it to the wire with essential tool Flameless Heat Gun NI-46538 or similar flameless heating tool.

    "Installing" the solder sleeve connector will:
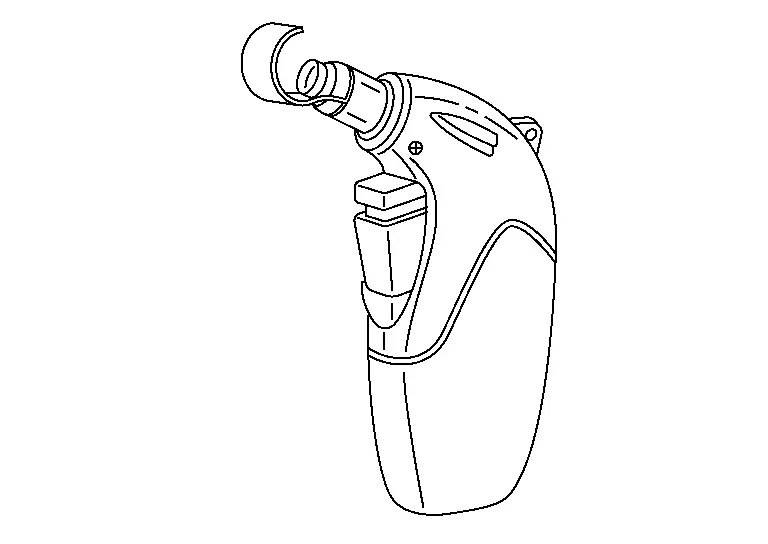
    • Melt the solder (silver ring inside the solder sleeve connector) into the exposed twisted wire area.

    • Melt the sealant (white, red or blue rings inside the solder sleeve connector) onto the wires.

    • Shrink the remainder of the solder sleeve connector to the wire.
Miscellaneous Supplemental Service Parts

OE replacement parts available: body clips, felt tape & corrugared tubing/loom.

PartApplicationNissan Parts AvailablePicture
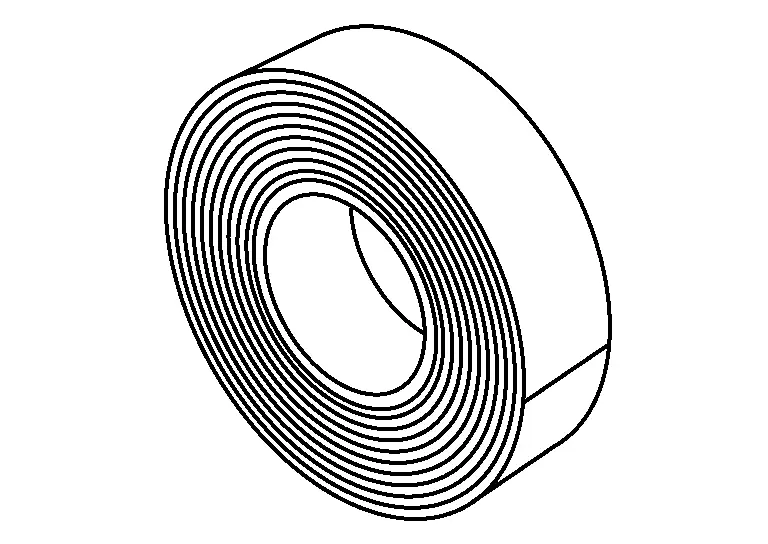
Electrical Tape Cover solder repairs, secure wire loom No –
Body Clips

Interior use to prevent squeaks, rattles, chafing

Several Size Available
Yes
Felt Tape Interior use to prevent squeaks, rattles, chafing Yes
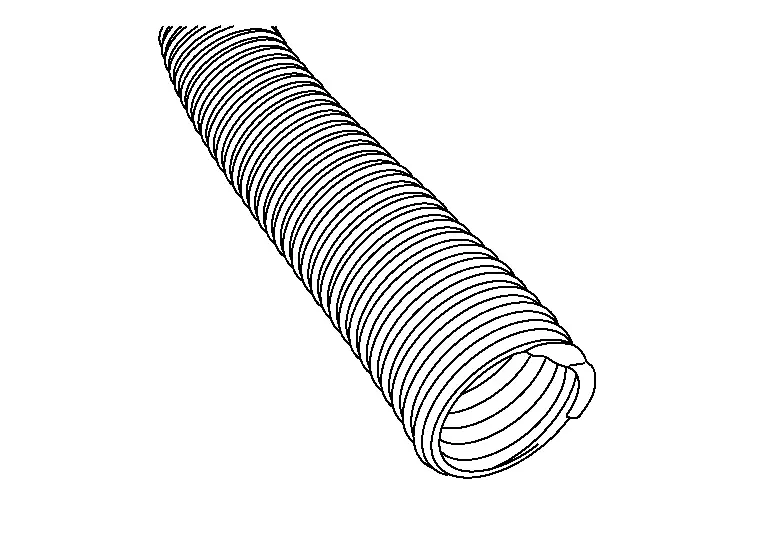
Wire Loom Protect exterior wires, available in 2 sizes: 3/8" and 5/8" Yes

There are 2 corrugated tubing tools that are used to aid in the installation of corrugated tubing:
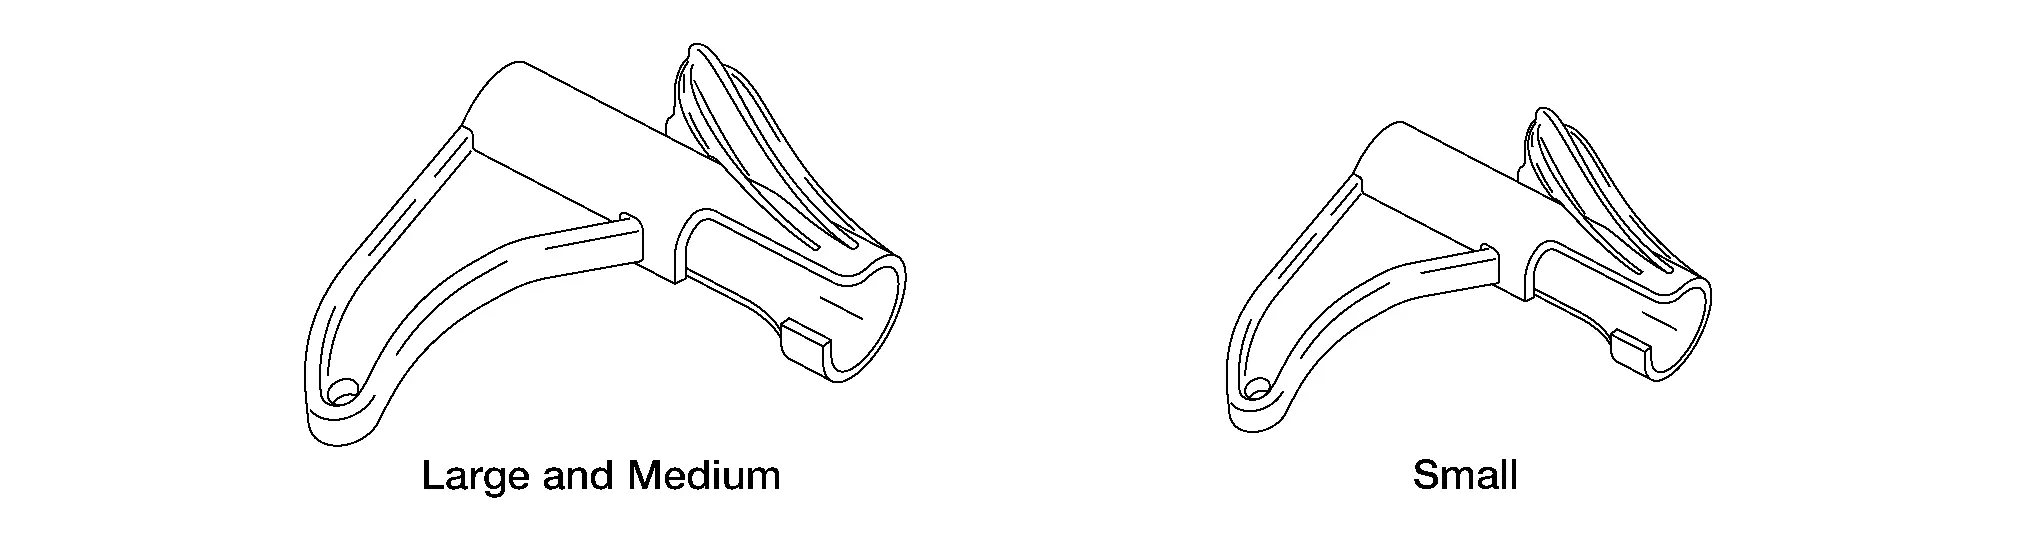
Tools are available through Nissan Tool & Equipment Website.

Harness Replacement Guidelines

IMPORTANT: Observe all applicable safety precautions described in the service manual for the electrical systems that are being repaired.

Replace the wiring harness ONLY when the vehicle concern involves any one of the following conditions:

  • The wiring harness circuits are related to HEV / EV High Voltage.

  • The estimated cost of the repair exceeds the cost of replacing the entire wiring harness.

  • The Nissan Pathfinder vehicle is damaged by flood or thermal incident.

  • The wiring harness was severely damaged due to a car accident.

  • The appropriate components are not available to order.

  • The wiring harness replacement is required from another TSB.

  • The wiring harness repair is in the shielded area of a circuit.

  • The wiring harness needing repair is USB, Coaxial, or Antenna Feeder wiring.

Connector Body Replacement

All Connector Body Replacement Except SRS

Replacement/Supplemental Repair

This type of repair is necessary when a connector body or locking lever is damaged causing it to not lock securely, hold terminals or pins in place, or is deformed allowing foreign material intrusion (example: water and/or corrosion).

  • Damaged Lever: Some larger connectors have a locking lever that secures them to the mating connector; ECM, TCM, SMJ (Super Multiple Junction), ABS etc. If you inspect these types of connectors and find that the issue is related to the locking lever, the lever may be replaced (if available).

    1. Identify the connector type, in the Harness Repair Web Page, and obtain the correct connector body and crimpled terminal/pin ends.

    2. Use the disassembly instructions/animation to remove and replace the locking lever.

  • Damaged Connector Body

    1. Identify the connector type, in the Harness Repair Web Page, and obtain the correct connector body and crimpled terminal/pin ends.

    2. Take the acquired connector body and plug it into the corresponding connection, to ensure you have the correct connector body.

    3. Remove any tape from around the wire and corrugated tubing, to allow for ample working space.

    4. De-pin the terminals from damaged connector body, using the steps provided in the terminal/pin repair section.

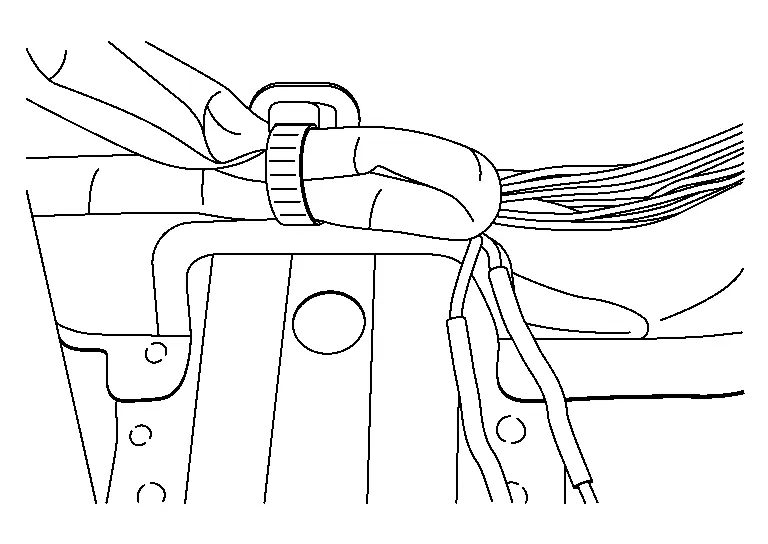
    5. Install the newly assembled connector body harness into the corrugated tubing. Use tape to secure the wires inside the tubing.

    6. Plug in the connector and confirm that it firmly locks into place by lightly pulling on the connector body.

  • Terminal/Pin Replacement:

    IMPORTANT: Jacketed and/or shielded wires cannot be repaired. This type of repair is necessary when you find either a pin (male) is bent, broken, corroded, etc., or a terminal (female) has damage, is spread, corroded, etc.

    1. Using the eWD find the connector type and then use that information to acquire the correct terminal/pin part number and terminal/pin removal tool information.

    2. Following instructions in harness guide on how to properly remove a Terminal/Pin from connector body making sure to not damage connector body or Terminal/Pin locking tab.

    3. Once Terminal/Pin is removed match up replacement Terminal/Pin to properly cut length not allowing excess wire.

    4. Strip one end of new crimped Terminal/Pin wire and of harness circuit.

    5. Follow Solder Sleeve Installation Steps to install solder sleeves.

    6. Install new crimped Terminal/Pin into Connector Body making sure to place in correct cavity.

SRS Related Connectors Pigtail Replacement

IMPORTANT: Jacketed and/or shielded wires cannot be repaired.

SRS Connector Body: This repair is used when the root cause is related to an SRS connector body or terminal issue. SRS connectors can only be repaired by replacing the connector body pigtail assembly. Terminal repair is not available for SRS. Do not attempt to dissemble SRS connectors and is not an approved repair method.

  1. Identify the connector body type in the Harness Repair Web Page and then obtain the appropriate part.

  2. Take the acquired connector body pigtail and plug it into the corresponding connection, to ensure you have the correct connector.

  3. Remove any tape from around the wire and corrugated tubing, to allow for ample working space.

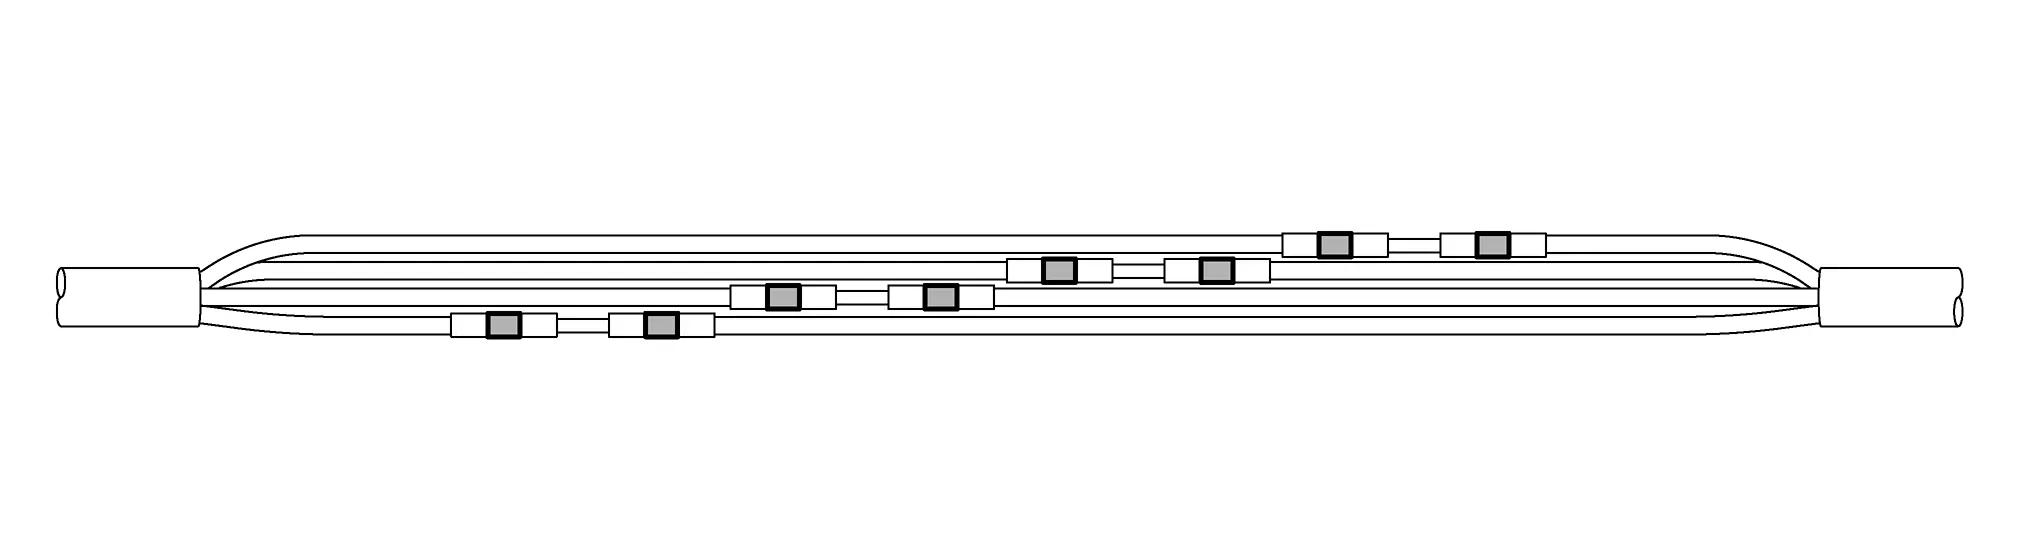
  4. Cut the wire to allow enough room to stagger the solder sleeves, and to position the new connector to approximately the original location.

  5. Strip the wire accordingly, and follow the Solder Sleeve Installation Steps to install solder sleeves correctly.

  6. Install the new connector body pigtail into the corrugated tubing of the harness, and then tape it to securely hold the corrugated tubing around the wires.

  7. Plug in the new connector body pigtail and confirm that it firmly locks into place by lightly pulling on the connector body.

Wire Overlay - All Systems including SRS

IMPORTANT: Jacketed and/or shielded wires cannot be repaired.

  • Wire Overlay Guidelines:

    This type of repair is necessary when it has been confirmed that a certain circuit in the harness is faulty.

    1. Open the harness on both ends, of where you plan to make the repair, allowing sufficient room to work.

    2. Cut the ends of the incident wire to isolate the circuit.

    3. Cut piece of the same gauge wire to length, from Nissan provided wire spools. If the exact gauge wire is not available, go up one size.

    4. Strip one end of the new wire, and of harness circuit, and then follow the Solder Sleeve Installation Steps to install solder sleeves.

    5. Next lay the wire on the outside of the harness, making sure to cover the exposed wire in the corrugated tubing along the whole length.

    6. Secure the corrugated tubing with tape to the harness to ensure the wire follows the harness path.

    7. Strip the end of the wire and of other end of the harness circuit and then follow the Solder Sleeve Installation Steps to install solder sleeves correctly.

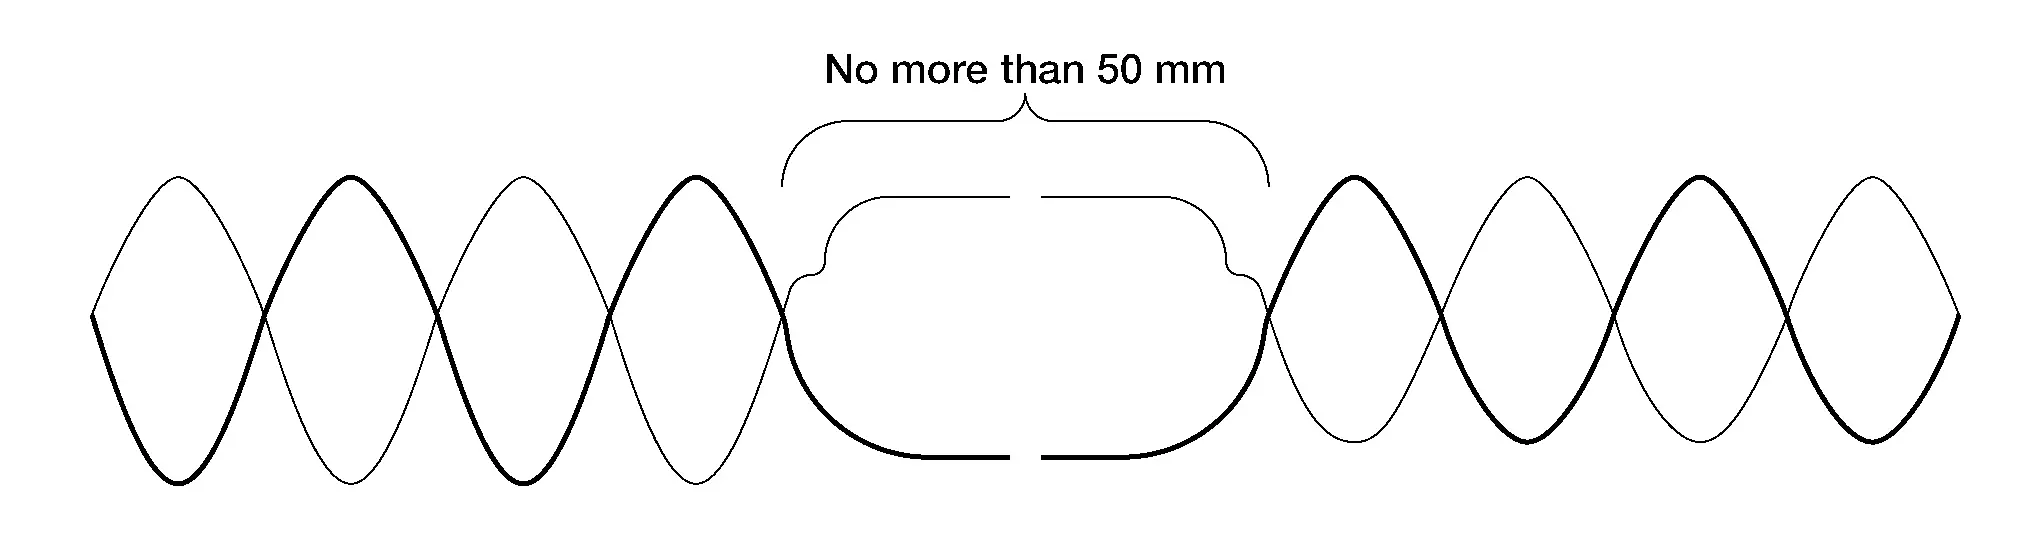
  • Twisted Pair Circuits

    Harness specification for a twisted wire circuits defines a twist pitch, or twists-per-length requirement, which is to improve signal quality & noise rejection of the circuit.

    When repairing a twisted pair circuit, do not un-twist the damaged circuit pair more than needed to repair the circuit, and never more than 50 mm.