Removal and Installation
- Electric Compressor
- Cooler Pipe and Hose
- Condenser
- A/c Unit Assembly Cover
- A/c Unit Assembly
- Intake & Distribution Box
Condenser Nissan Ariya SUV
Exploded View
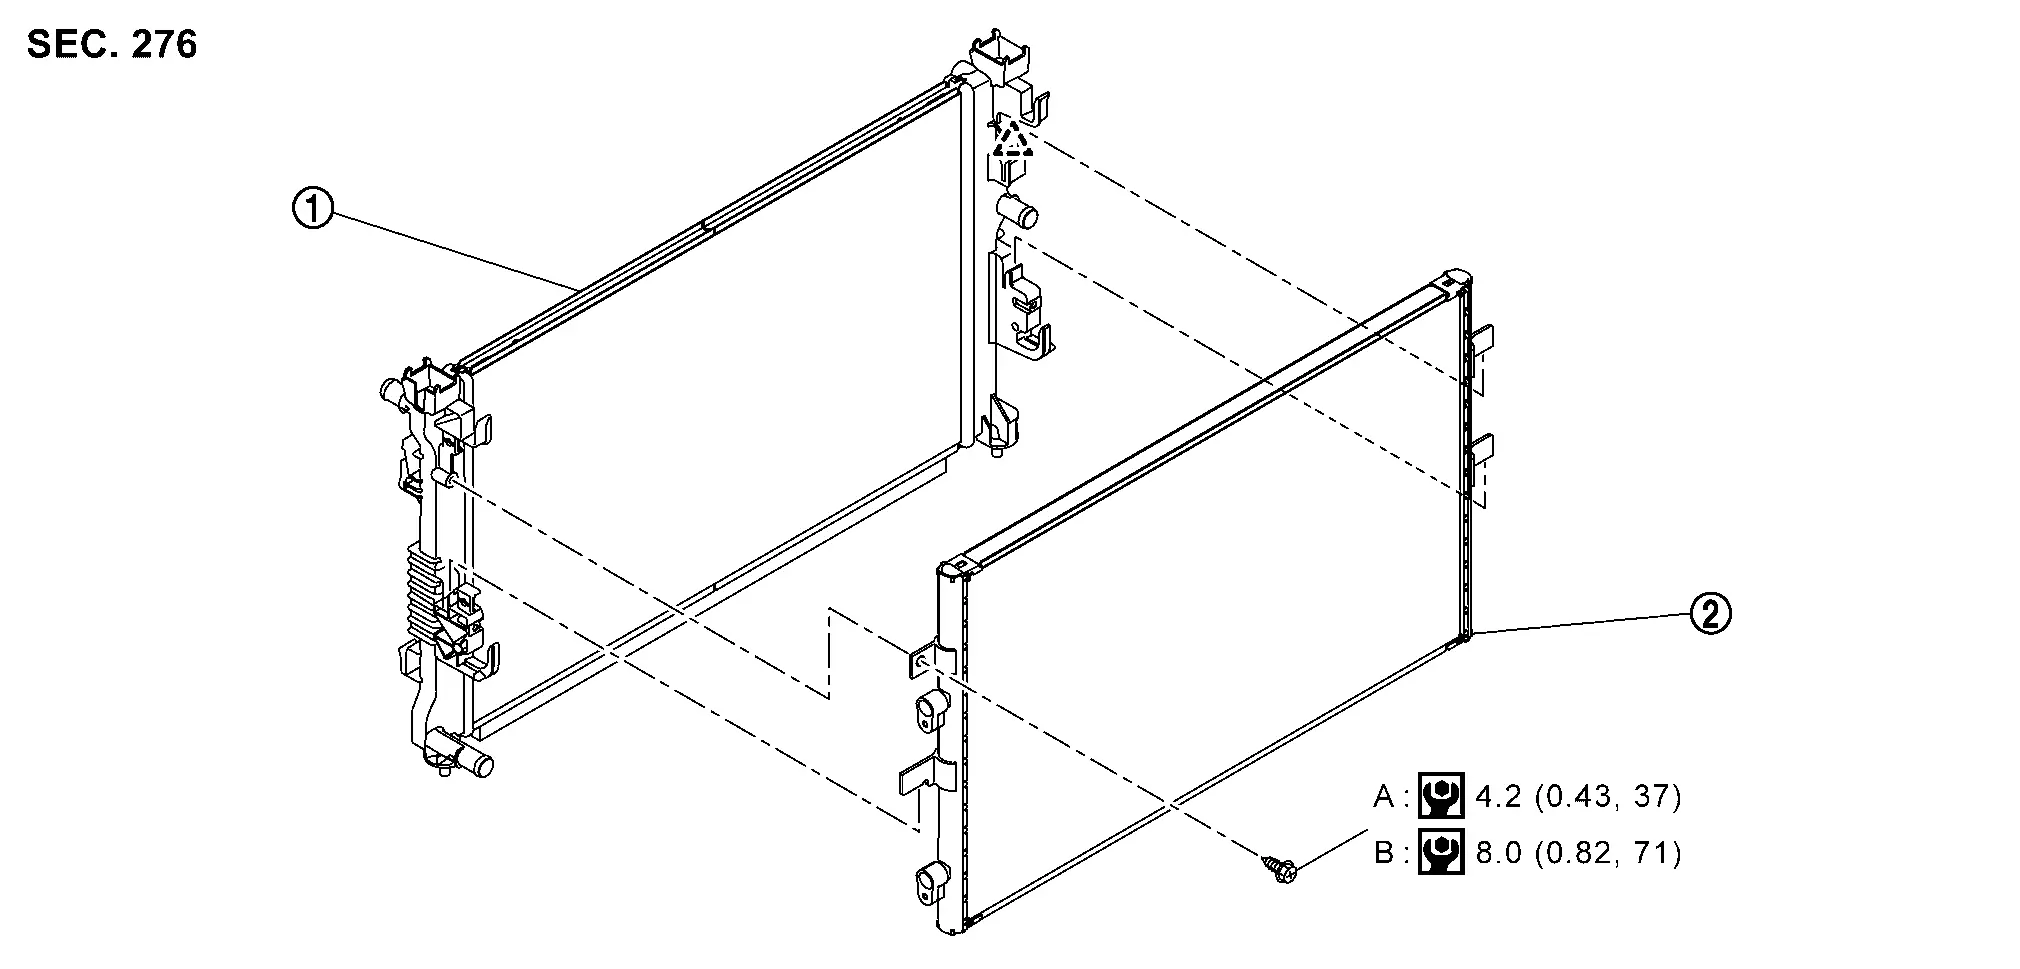
 |
Radiator |  |
Condenser | ||
 |
:Pawl | ||||
| A | :When not replaced the radiator | ||||
| B | :When replaced the radiator | ||||
 |
:N•m (kg-m, in-lb) | ||||
Removal & Installation
REMOVAL
Use a refrigerant collecting equipment (for HFO-1234yf) to discharge the refrigerant. Refer to Recycle Refrigerant.
Remove accumulator assembly. Refer to Removal & Installation.
Remove cooler pipe A. Refer to Removal & Installation.
Remove cooler pipe B. Refer to Removal & Installation.
Remove cooling fan. Refer to COOLING FAN : Removal & Installation.
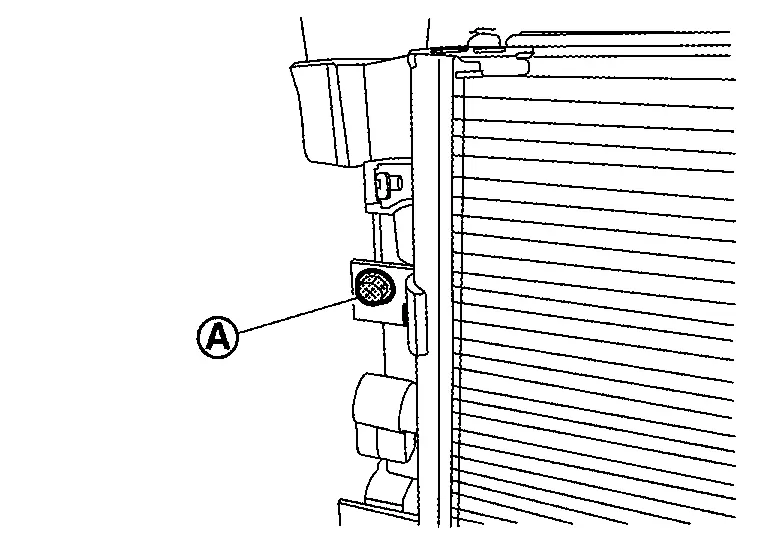
Remove condenser fixing screw  .
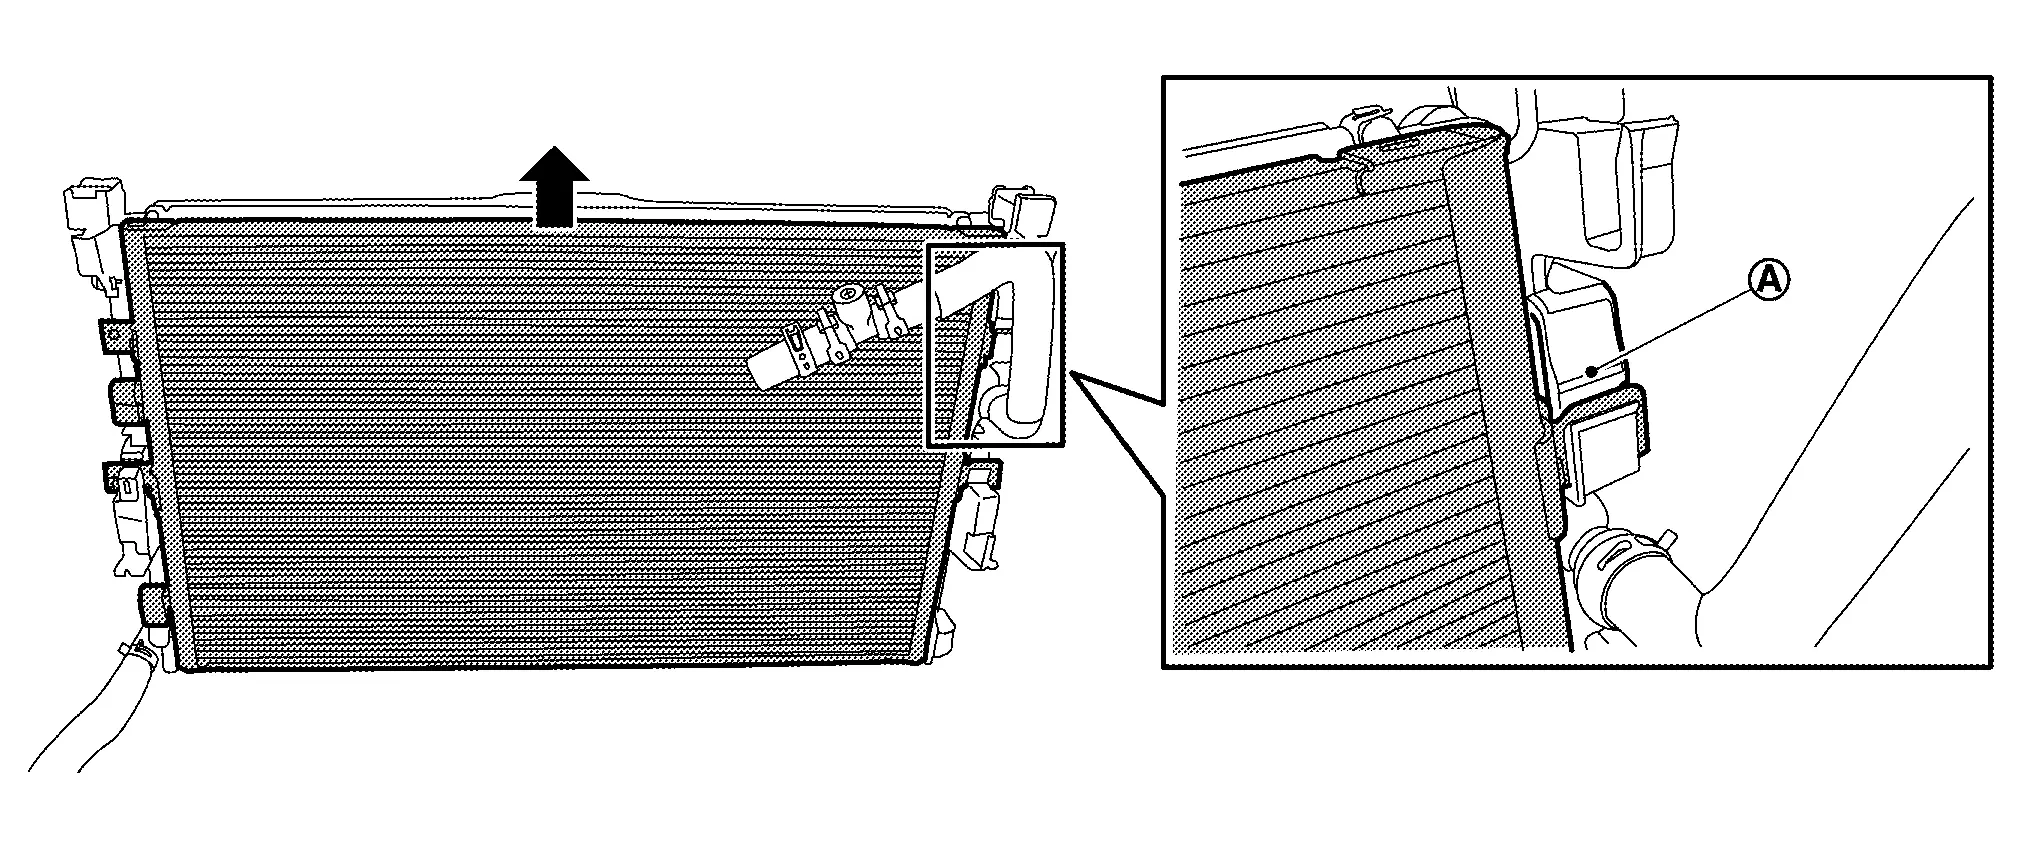
Disengage fixing pawl , and then remove condenser.
INSTALLATION
Note the following items, and then install in the reverse order of removal.
Intake & Distribution Box Nissan Ariya SUV
Exploded View
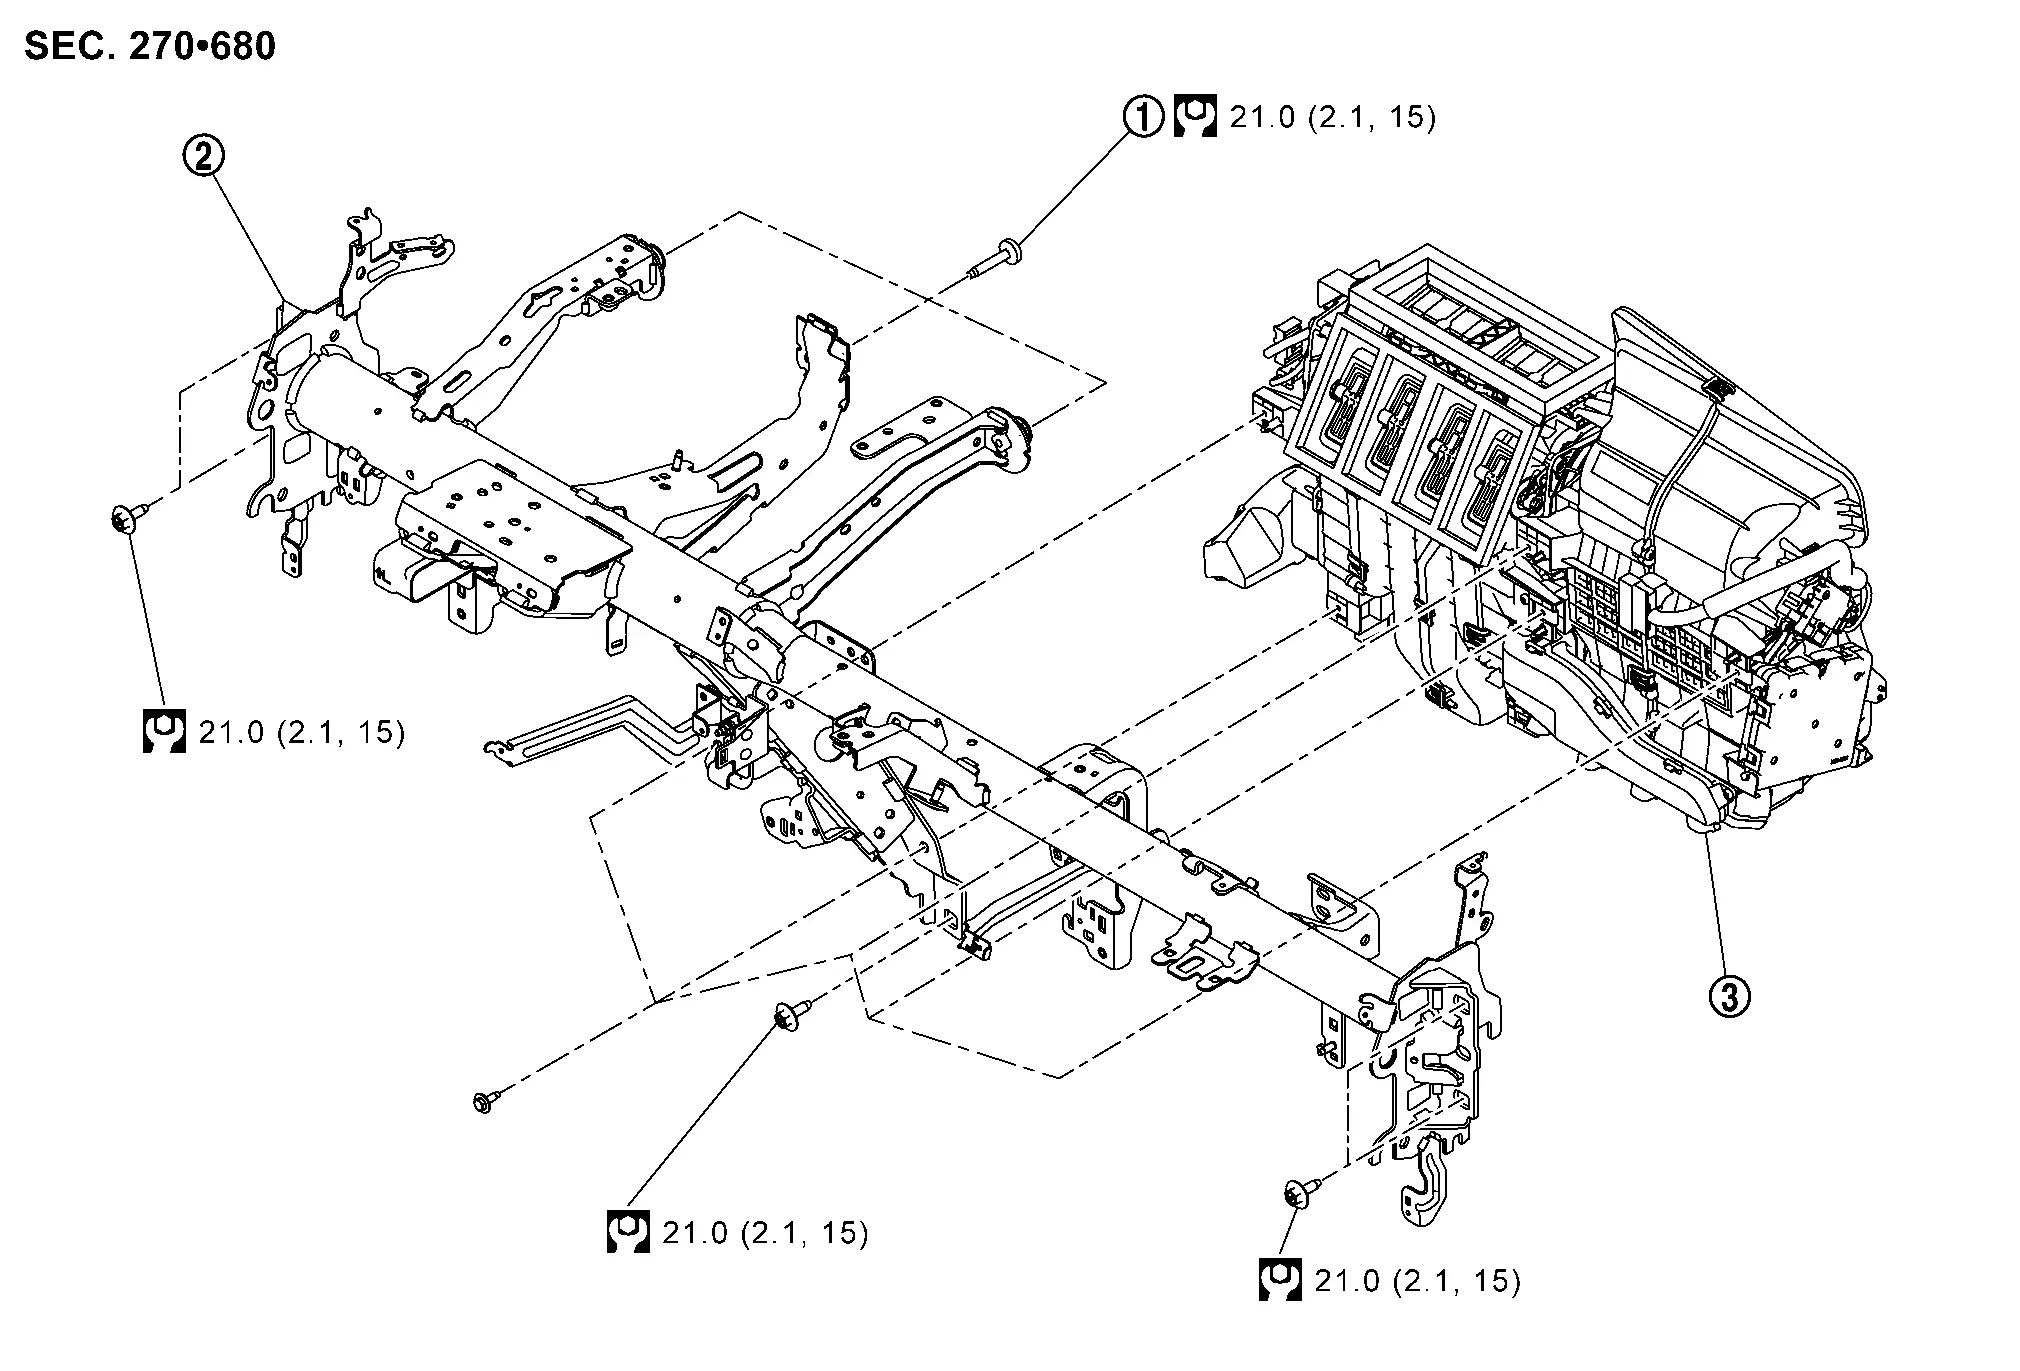
|
TORX bolt | |
Steering member |  |
Intake & distribution box |
 |
: N•m (kg-m, in-lb) | ||||
Removal & Installation
REMOVAL
Remove front wiper drive assembly. Refer to Removal & Installation.
Remove instrument panel assembly. Refer to Removal & Installation.
Remove side ventilator ducts. Refer to Removal & Installation.
Remove center ventilator duct. Refer to Removal & Installation.
Disengage main harness fixing metal clip .
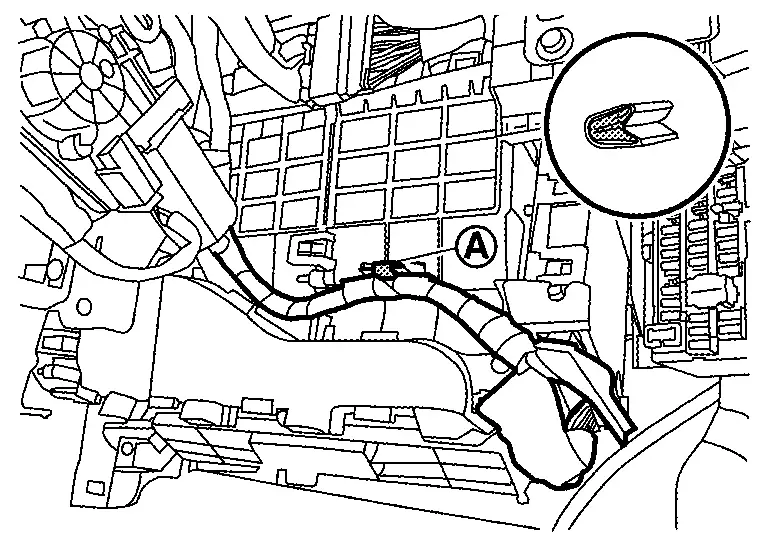
Disconnect A/C auto amp. harness connectors.
Disconnect main harness connector from sub harness connector.
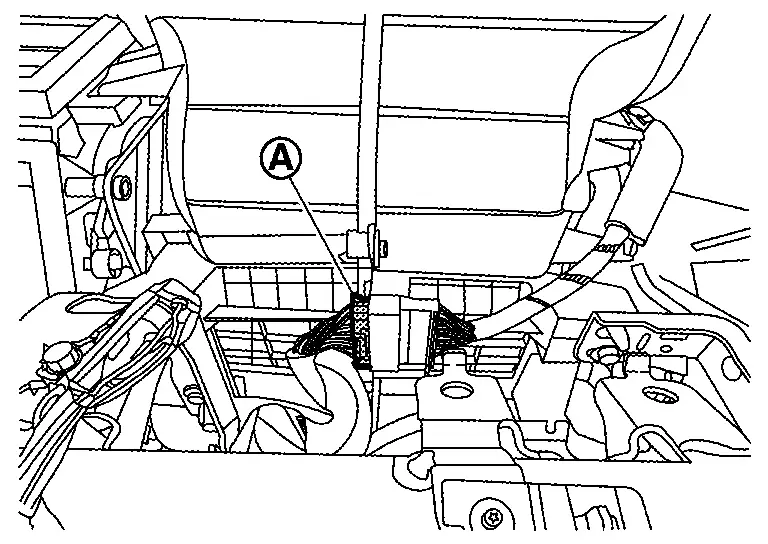
Remove harness connector, harness clips and bracket necessary to remove steering member. Move Nissan Ariya vehicle harness aside.
Remove steering column mounting bolts and nuts, and then move steering column assembly to secure work space. Refer to STEERING COLUMN : Removal & Installation.
Remove intake & distribution box mounting bolts .

Remove steering member mounting TOLX bolts and bolts  .
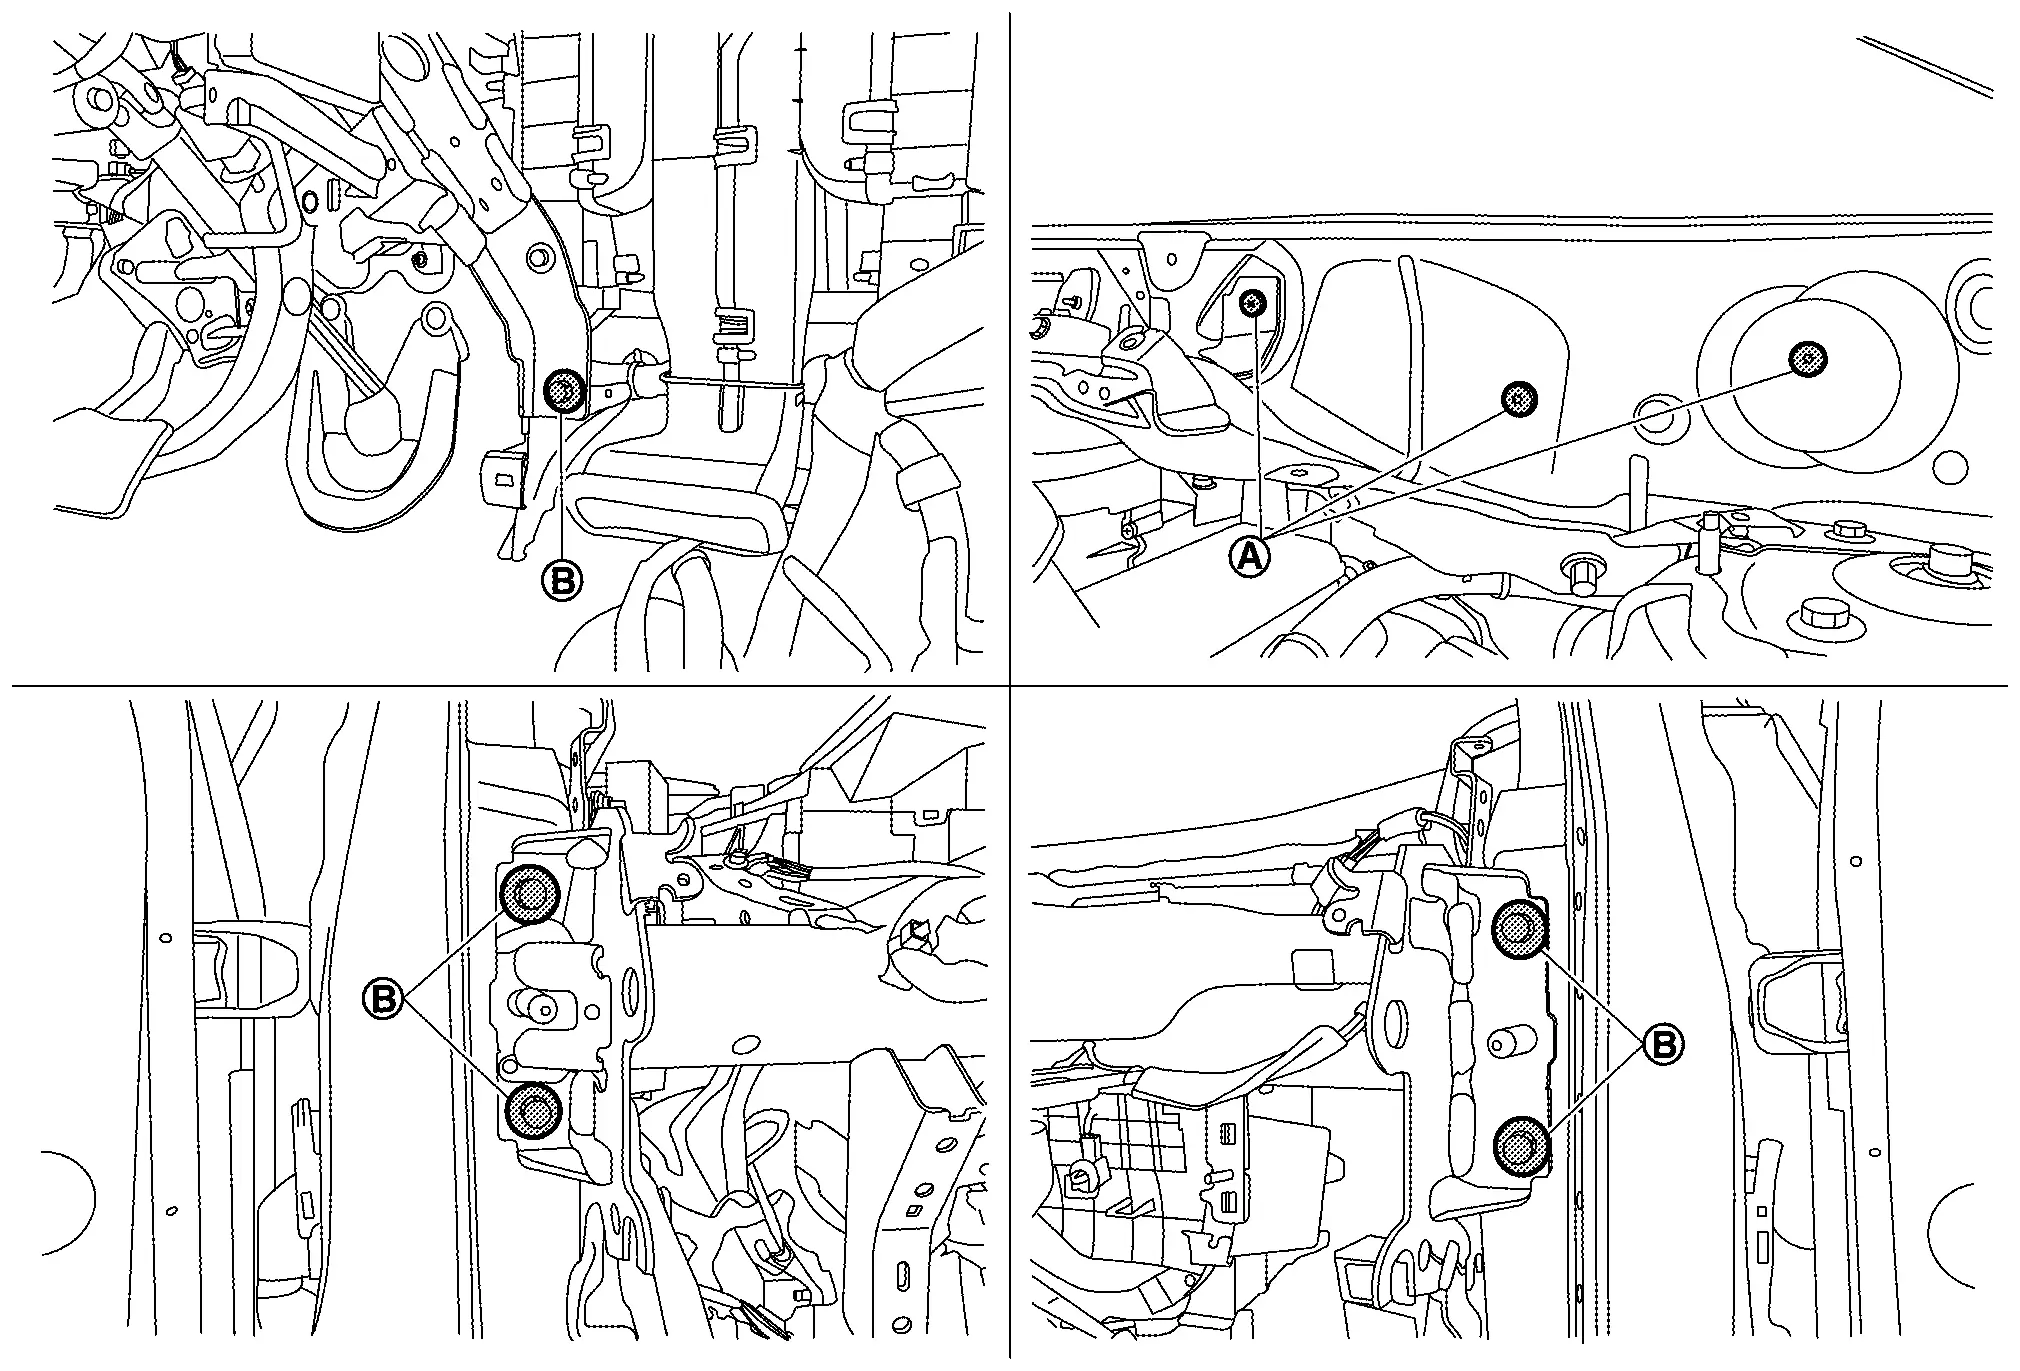
Remove steering member from Nissan Ariya vehicle.
Remove intake & distribution box from vehicle.
INSTALLATION
Note the following items, and then install in the reverse order of removal.