Hood
Exploded View
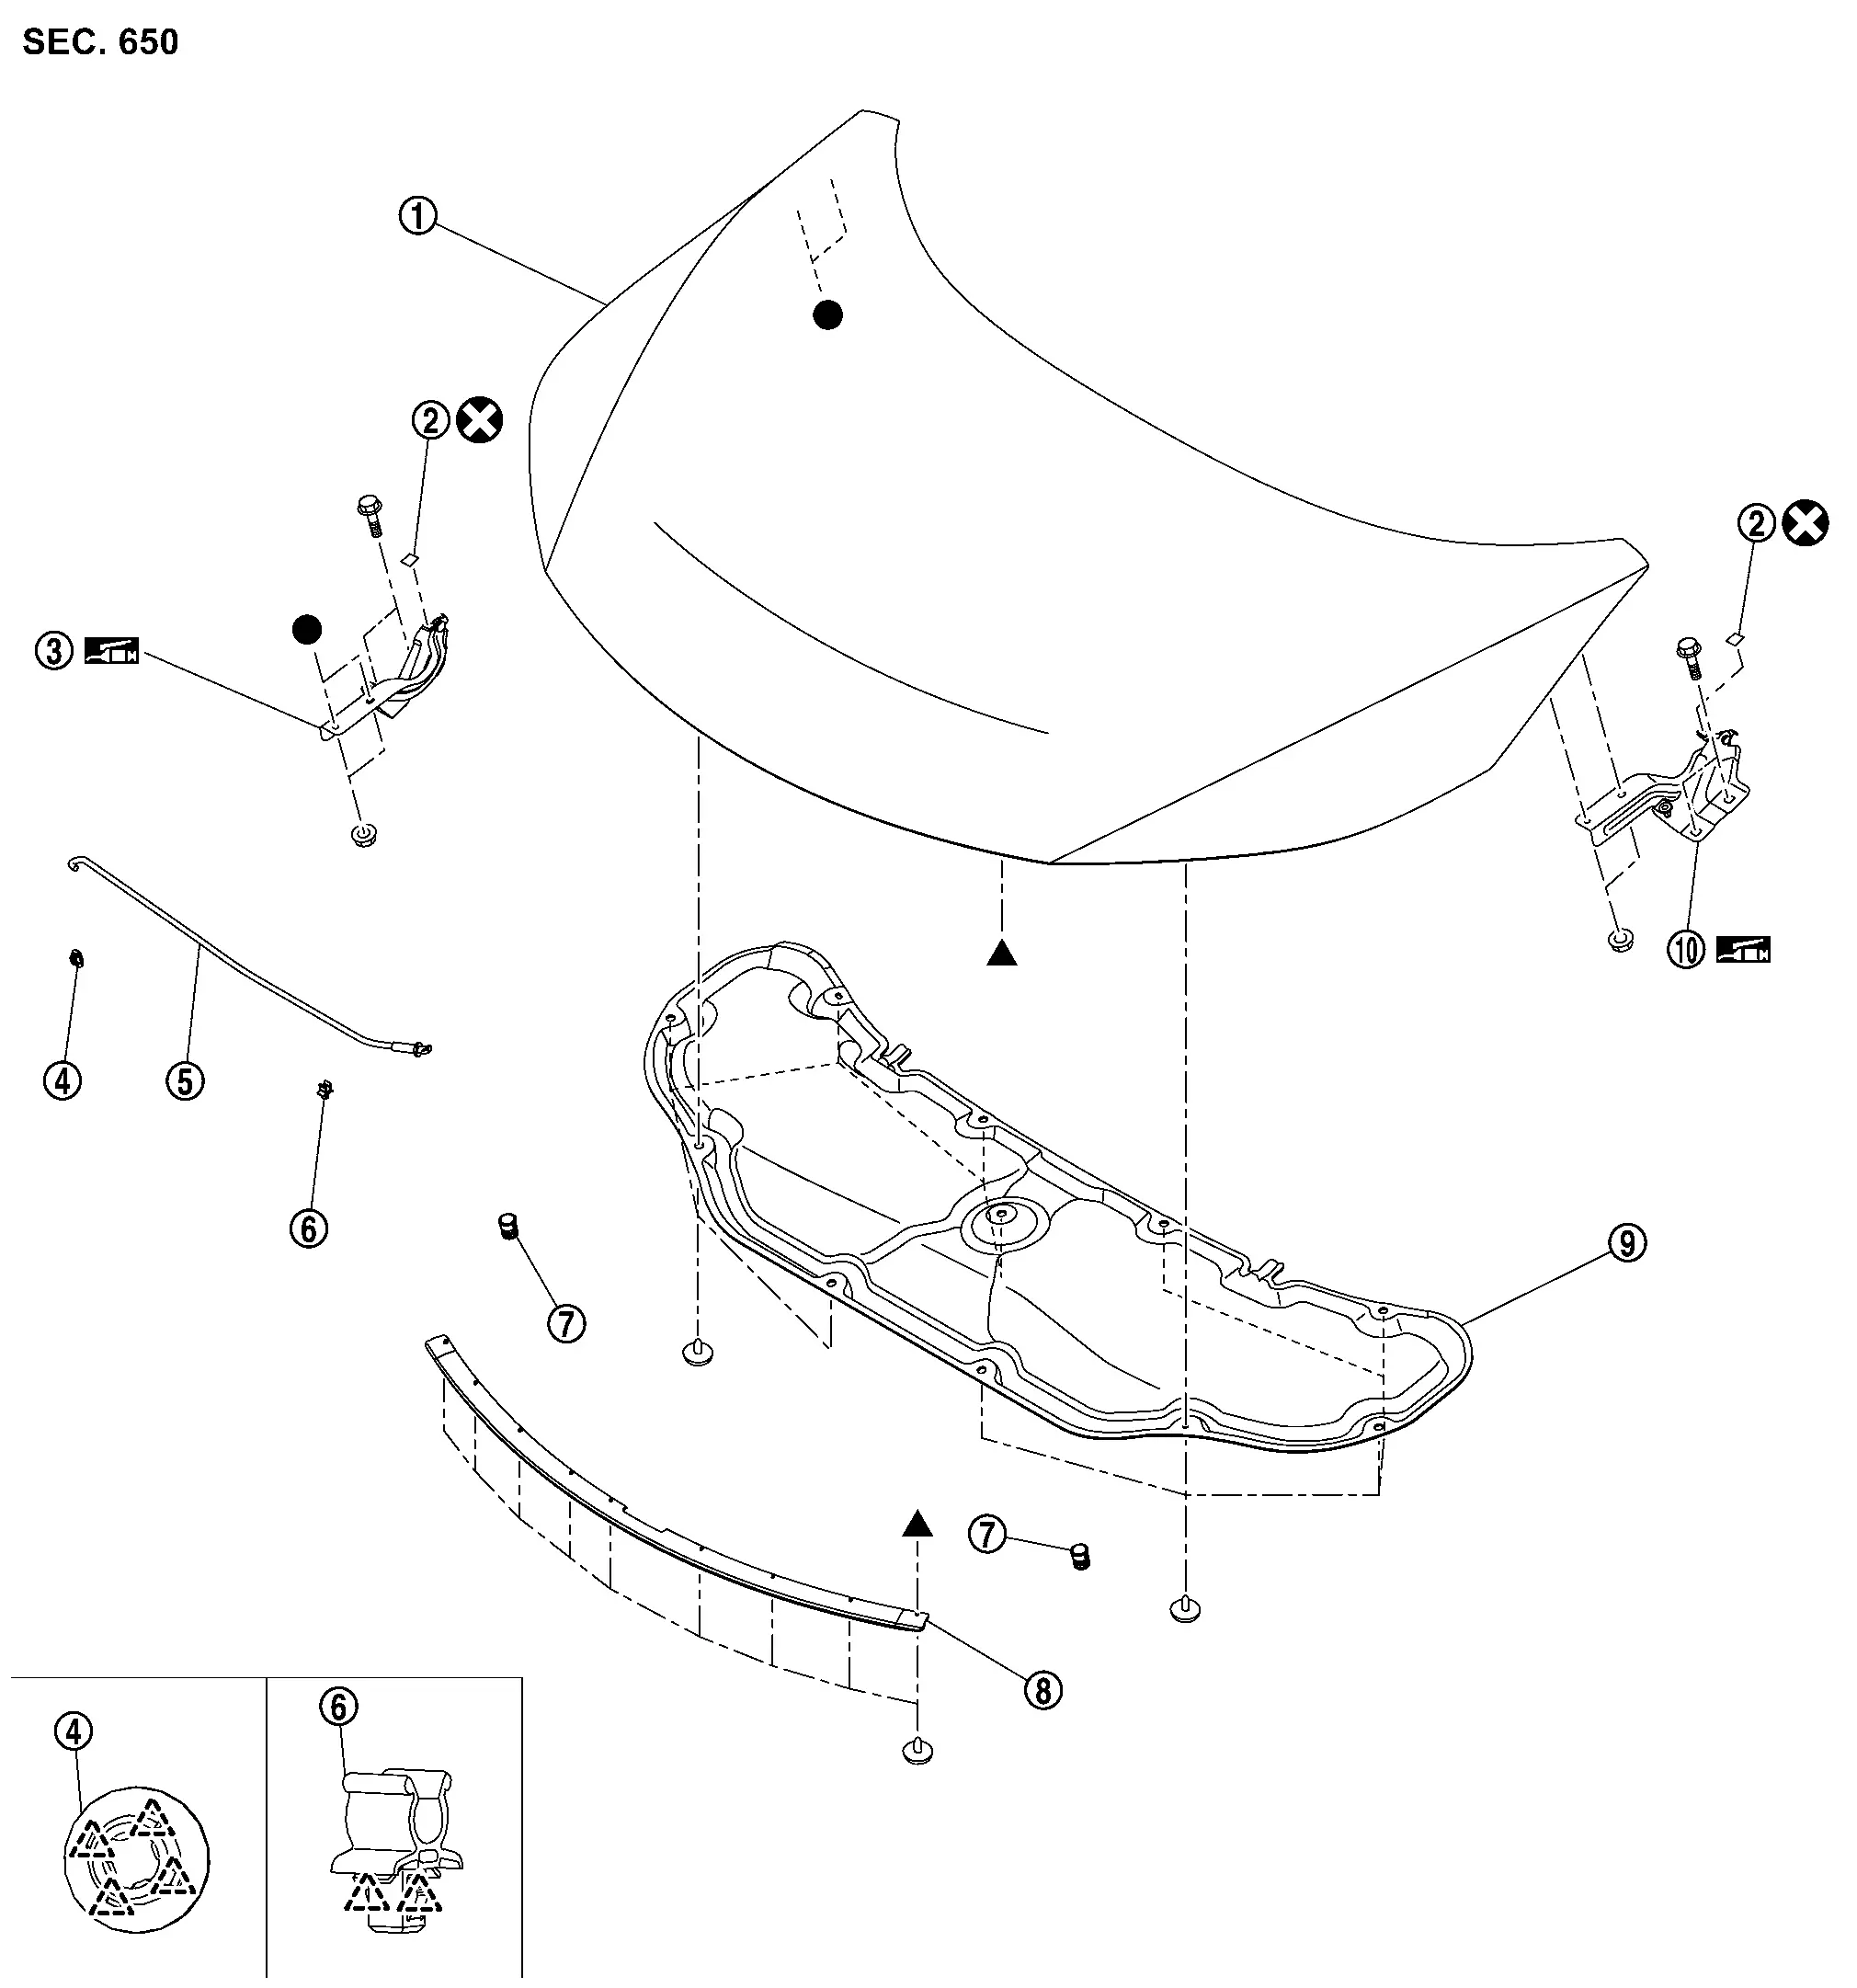
 |
Hood assembly |  |
Spacer |  |
Hood hinge RH |
 |
Hood support rod grommet |  |
Hood support rod |  |
Hood support rod clamp |
 |
Hood bumper rubber |  |
Hood seal |  |
Hood insulator |
 |
Hood hinge LH | ||||
 |
: Pawl | ||||
 |
: Always replace after every disassembly. | ||||
 |
: Body grease | ||||
 ,  : Indicates that the part is connected at points with same symbol in actual Nissan Ariya vehicle. |
|||||
- Hood Assembly
- Hood Hinge
- Hood Support Rod
- Hood Insulator
- Hood Seal
Hood Assembly Nissan Ariya: FE0
Removal & Installation
REMOVAL
Support hood assembly with a proper material to prevent it from falling.
Remove hood assembly mounting nuts, and then remove hood assembly.
INSTALLATION
Note the following items, and then install in the reverse order of removal.
Inspection
Open and close hood. Check that hood hinge rotation portion moves smoothly.
Check hood hinge rotating part for poor lubrication. If necessary, apply grease.
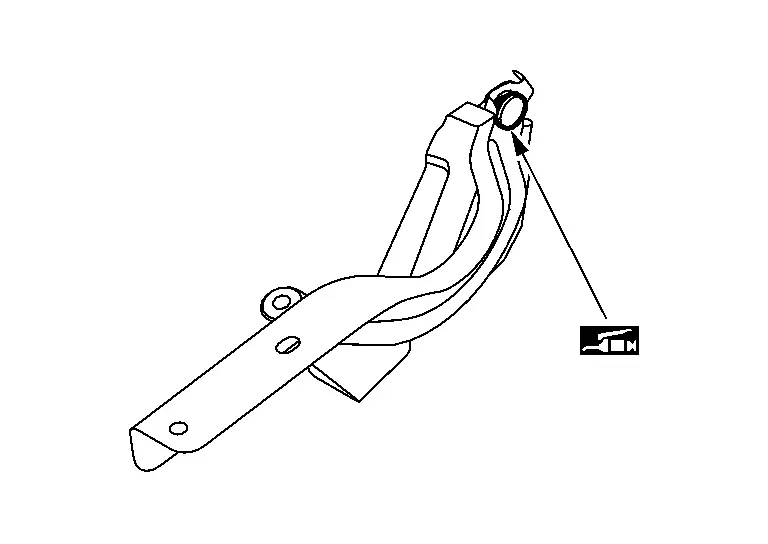
|
: Body grease |
Adjustment
FITTING ADJUSTMENT
Fitting Adjustment Standard Dimension
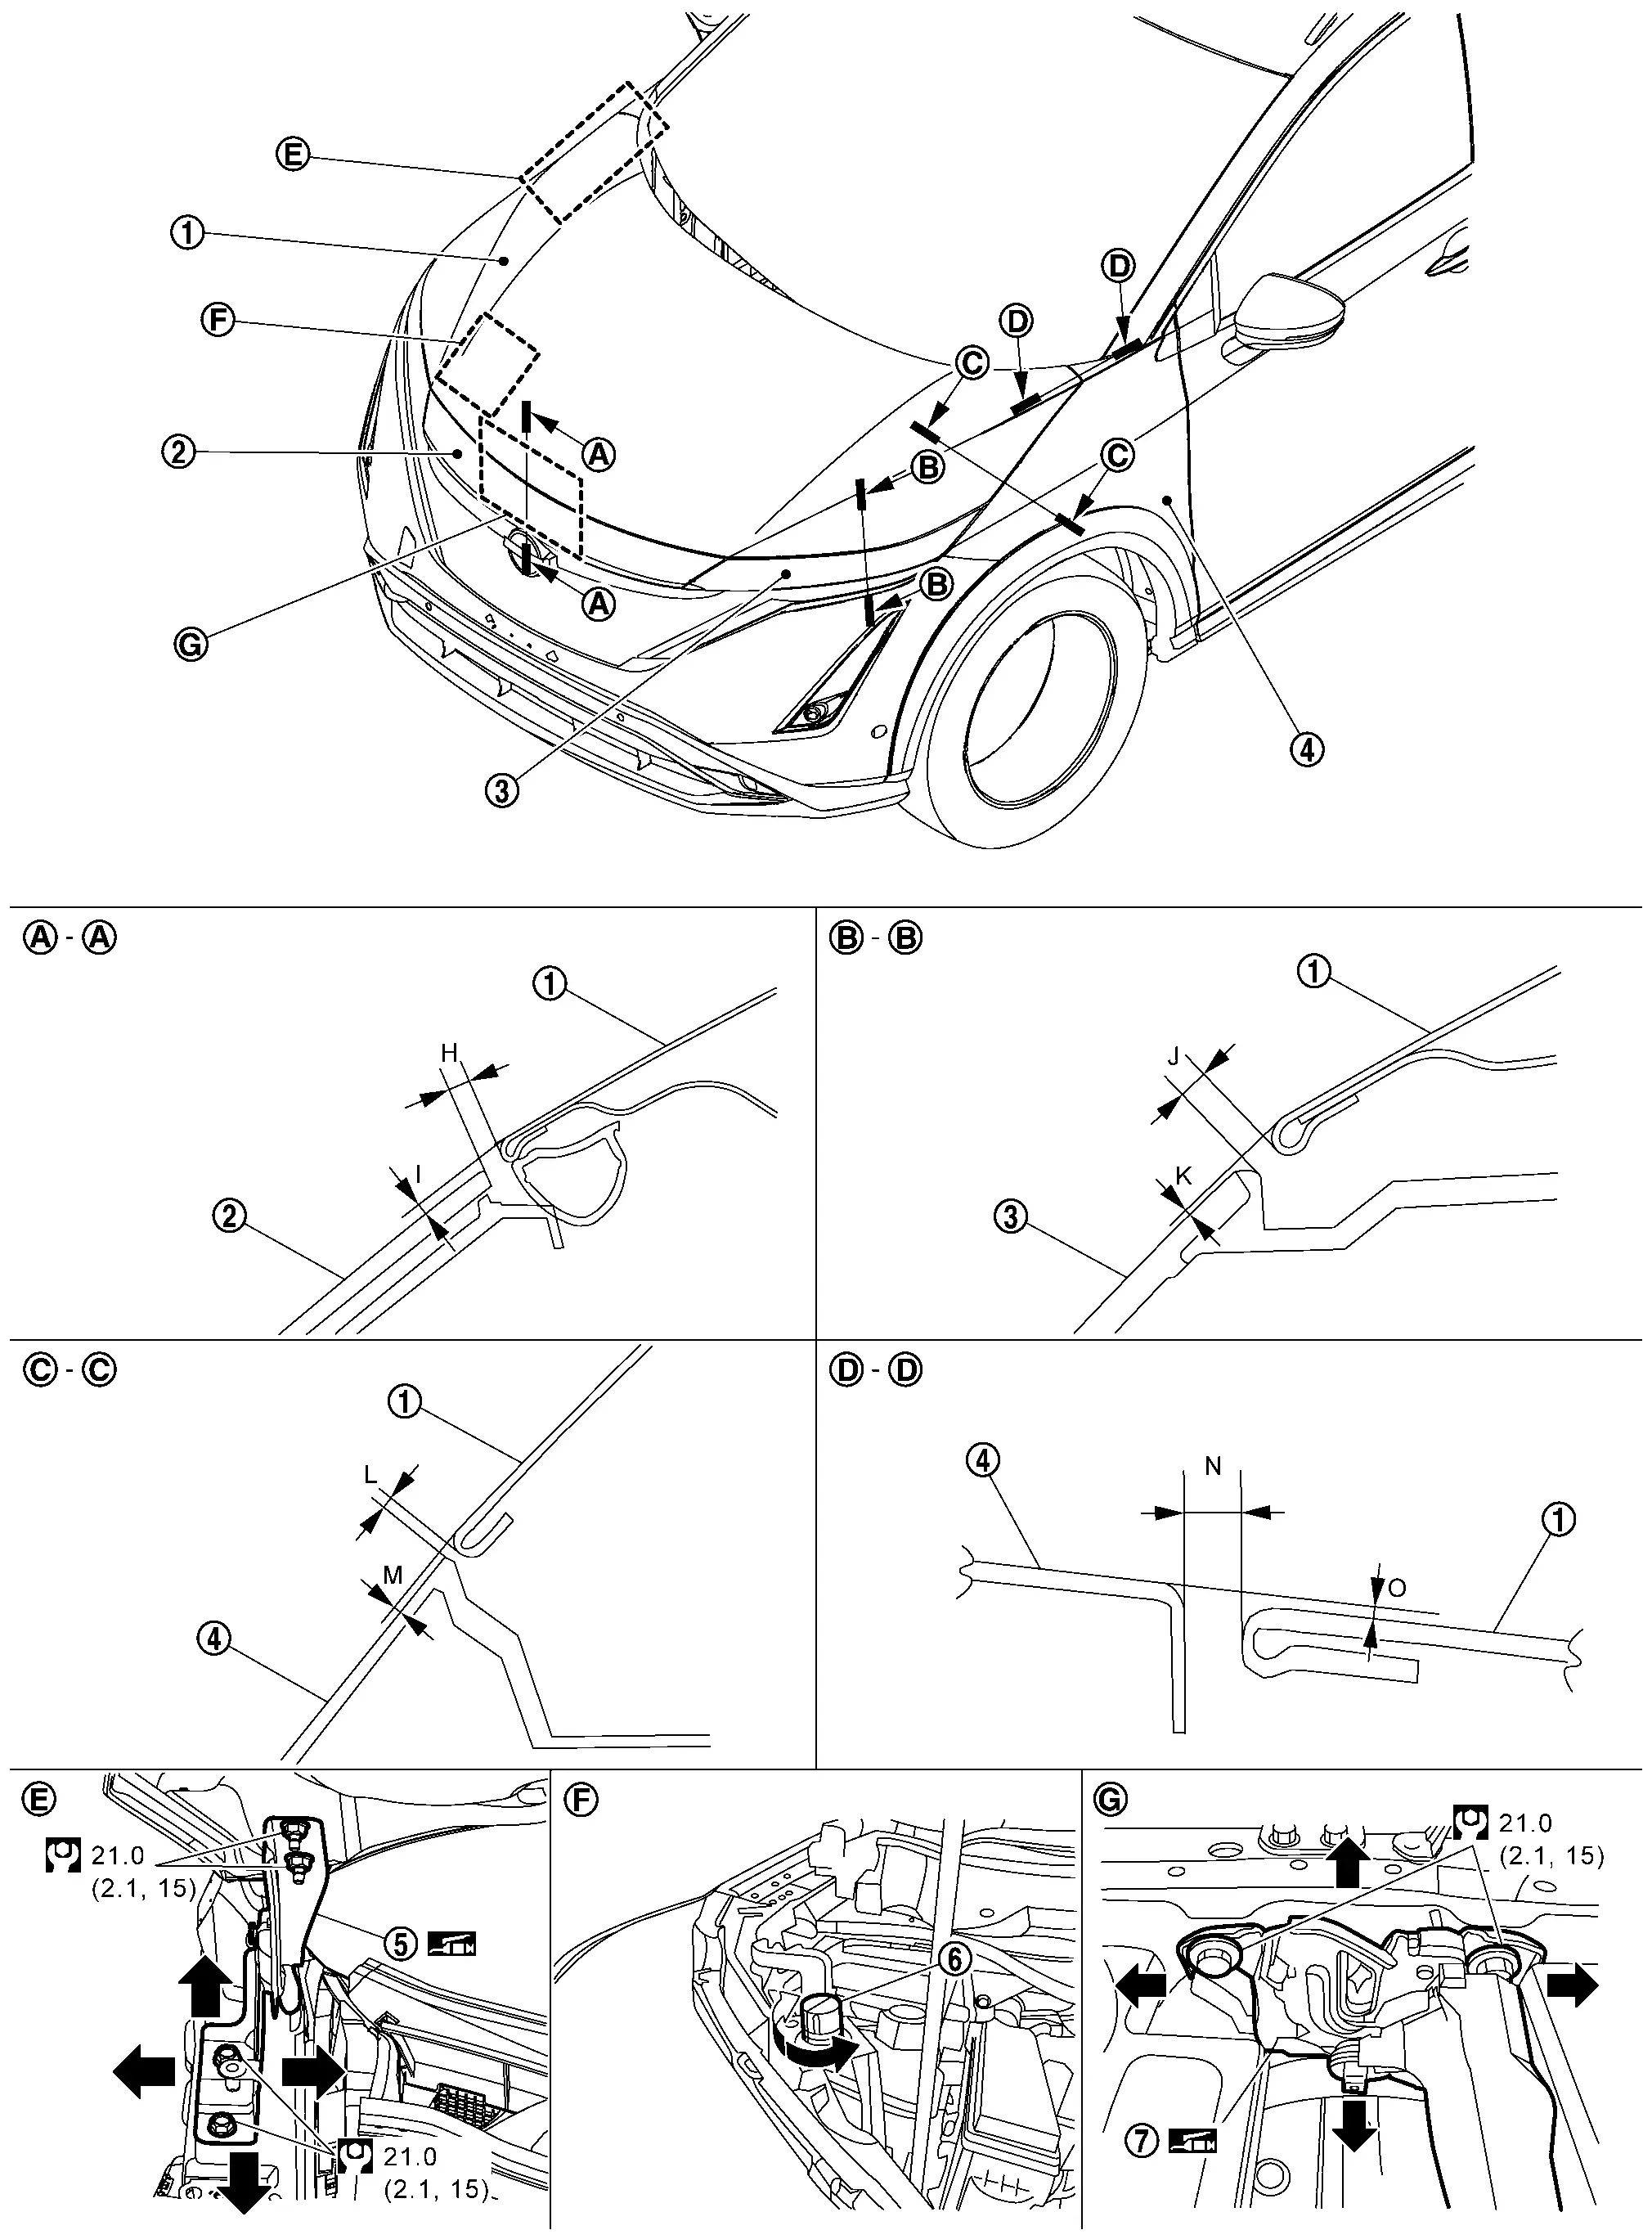
|
Hood assembly | |
Front grille | |
Front combination lamp |
|
Front fender assembly | |
Hood hinge | |
Hood bumper rubber |
|
Hood lock assembly | ||||
 |
: N·m (kg-m, ft-lb) | ||||
|
: Body grease | ||||
Unit: mm [in]
| Portion | Standard | Difference (RH/LH, MAX) | |||
|---|---|---|---|---|---|
| Hood assembly – Front grille |  – |
H | Clearance | 2.1 – 5.5 [0.083 – 0.217] |
— |
| I | Surface height | 1.0 – 5.0 [0.039 – 0.197] |
— | ||
| Hood assembly – Front combination lamp |  – |
J | Clearance | 2.1 – 5.5 [0.083 – 0.217] |
< 1.5 [0.059] |
| K | Surface height | (−2.0) – (+5.0) [(−0.079) – (+0.197)] |
< 2.0 [0.079] | ||
| Hood assembly – Front fender assembly |  – |
L | Clearance | 1.6 – 5.2 [0.063 – 0.205] |
< 1.5 [0.059] |
| M | Surface height | (−1.2) – (+1.2) [(−0.047) – (+0.047)] |
< 1.5 [0.059] | ||
 – |
N | Clearance | 1.6 – 5.2 [0.063 – 0.205] |
< 1.5 [0.059] | |
| O | Surface height | (−1.2) – (+1.2) [(−0.047) – (+0.047)] |
< 1.5 [0.059] | ||
Check the clearance and the surface height between hood assembly and each part by visually and touching.
If the clearance and the surface height are out of specification, adjust them according to the procedures shown below.
Fitting Adjustment Procedure
Remove hood lock assembly. Refer to Removal & Installation.
Adjust the surface height of hood assembly according to the fitting adjustment standard dimension by rotating hood bumper rubber.
Remove front fender assembly. Refer to Removal & Installation.
Loosen hood hinge mounting bolts.
Temporary install front fender assembly, front combination lamp and front bumper fascia, and then adjustment clearance of hood assembly according to the specified value by moving hood assembly.
Remove temporary installed parts, and then tighten hood hinge mounting bolts to the specified torque.
Install front fender assembly. Refer to Removal & Installation.
Install front combination lamp. Refer to Removal & Installation.
Install front bumper fascia. Refer to Removal & Installation.
Install hood lock and temporary tighten hood lock mounting bolts, and then position hood lock and engage hood striker. Check hood lock and hood striker for looseness. Refer to Removal & Installation.
Move hood lock laterally until the center of striker and hood lock are vertical when viewed from the front.
Tighten hood lock mounting bolts to the specified torque.
Check that hood closes normally.
Hood Hinge Nissan Ariya 2023
Removal & Installation
REMOVAL
Remove hood assembly. Refer to Removal & Installation.
Remove front fender assembly. Refer to Removal & Installation.
Remove hood hinge mounting bolts, and then remove hood hinge.
INSTALLATION
Note the following items, and then install in the reverse order of removal.
Hood Support Rod Nissan Ariya: FE0
Removal & Installation
REMOVAL
Support hood assembly with a suitable material to prevent it from falling.
Disengage hood support rod grommet fixing pawls, and then remove hood support rod grommet.
Remove hood support rod from hood support rod grommet.
INSTALLATION
Install in the reverse order of removal.
Hood Insulator Nissan Ariya: FE0
Removal & Installation
REMOVAL
Remove hood insulator fixing clips , and then remove hood insulator.
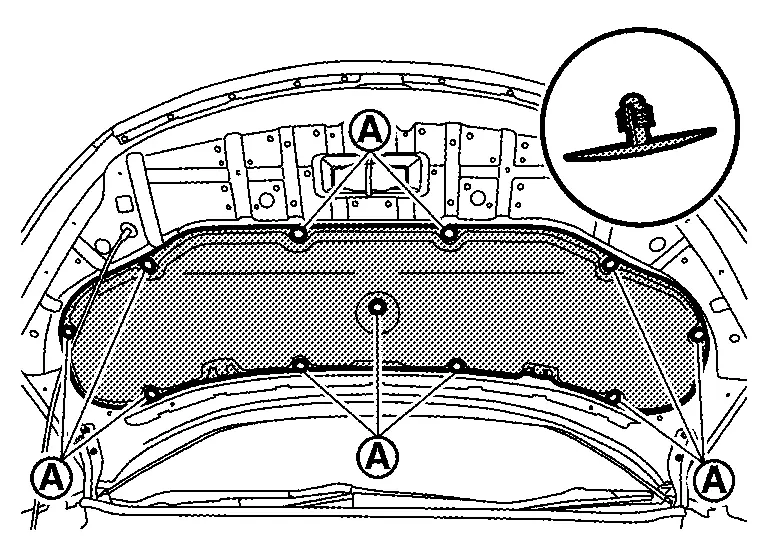
INSTALLATION
Install in the reverse order of removal.
Hood Seal Nissan Ariya first Gen
Removal & Installation
REMOVAL
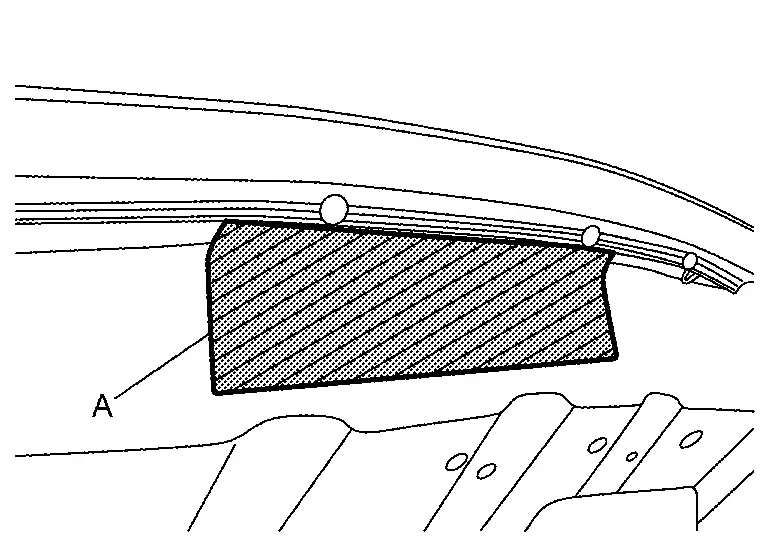
Apply protective tape (A) on the part to protect it from damage.
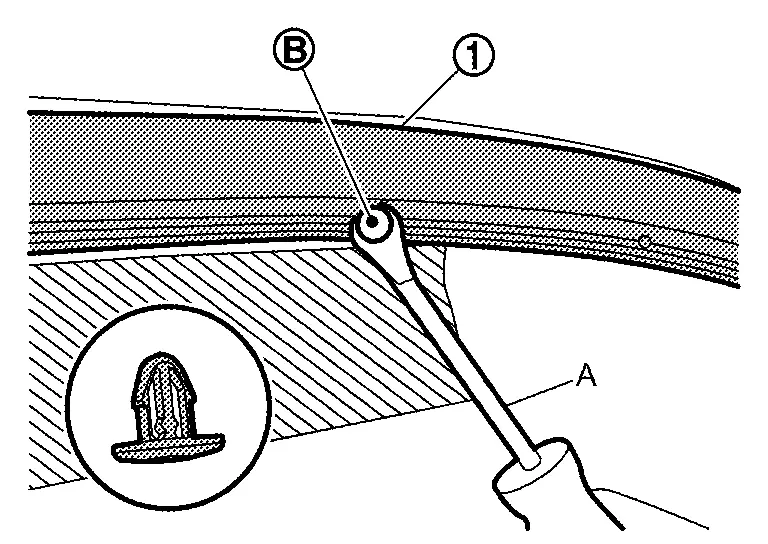
Disengage hood seal fixing clips using a remover tool (A), and then remove hood seal .
INSTALLATION
Install in the reverse order of removal.