Removal and Installation
- A/c Control
- A/c Auto Amp.
- Heat Pump Control Unit
- In-Vehicle Sensor
- Sunload Sensor
- Intake Sensor
- Humidity Sensor
- Refrigerant Pressure Sensor
- Condenser Discharge Refrigerant Temperature Sensor
- Evaporator Discharge Refrigerant Temperature Sensor
- Refrigerant Temperature Sensor (battery Chiller Inlet)
- Ptc Heater Outlet Air Temperature Sensor
- Ptc Heater
- Door Motor
A/c Control Nissan Ariya 1st generation
Exploded View
For exploded View of the A/C control. Refer to Removal & Installation.
Removal & Installation
Replacement of a single part of the A/C control is not possible. for replacement, replace instrument finisher B as a set. Refer to Removal & Installation.
A/c Auto Amp. Nissan Ariya first Gen
Exploded View
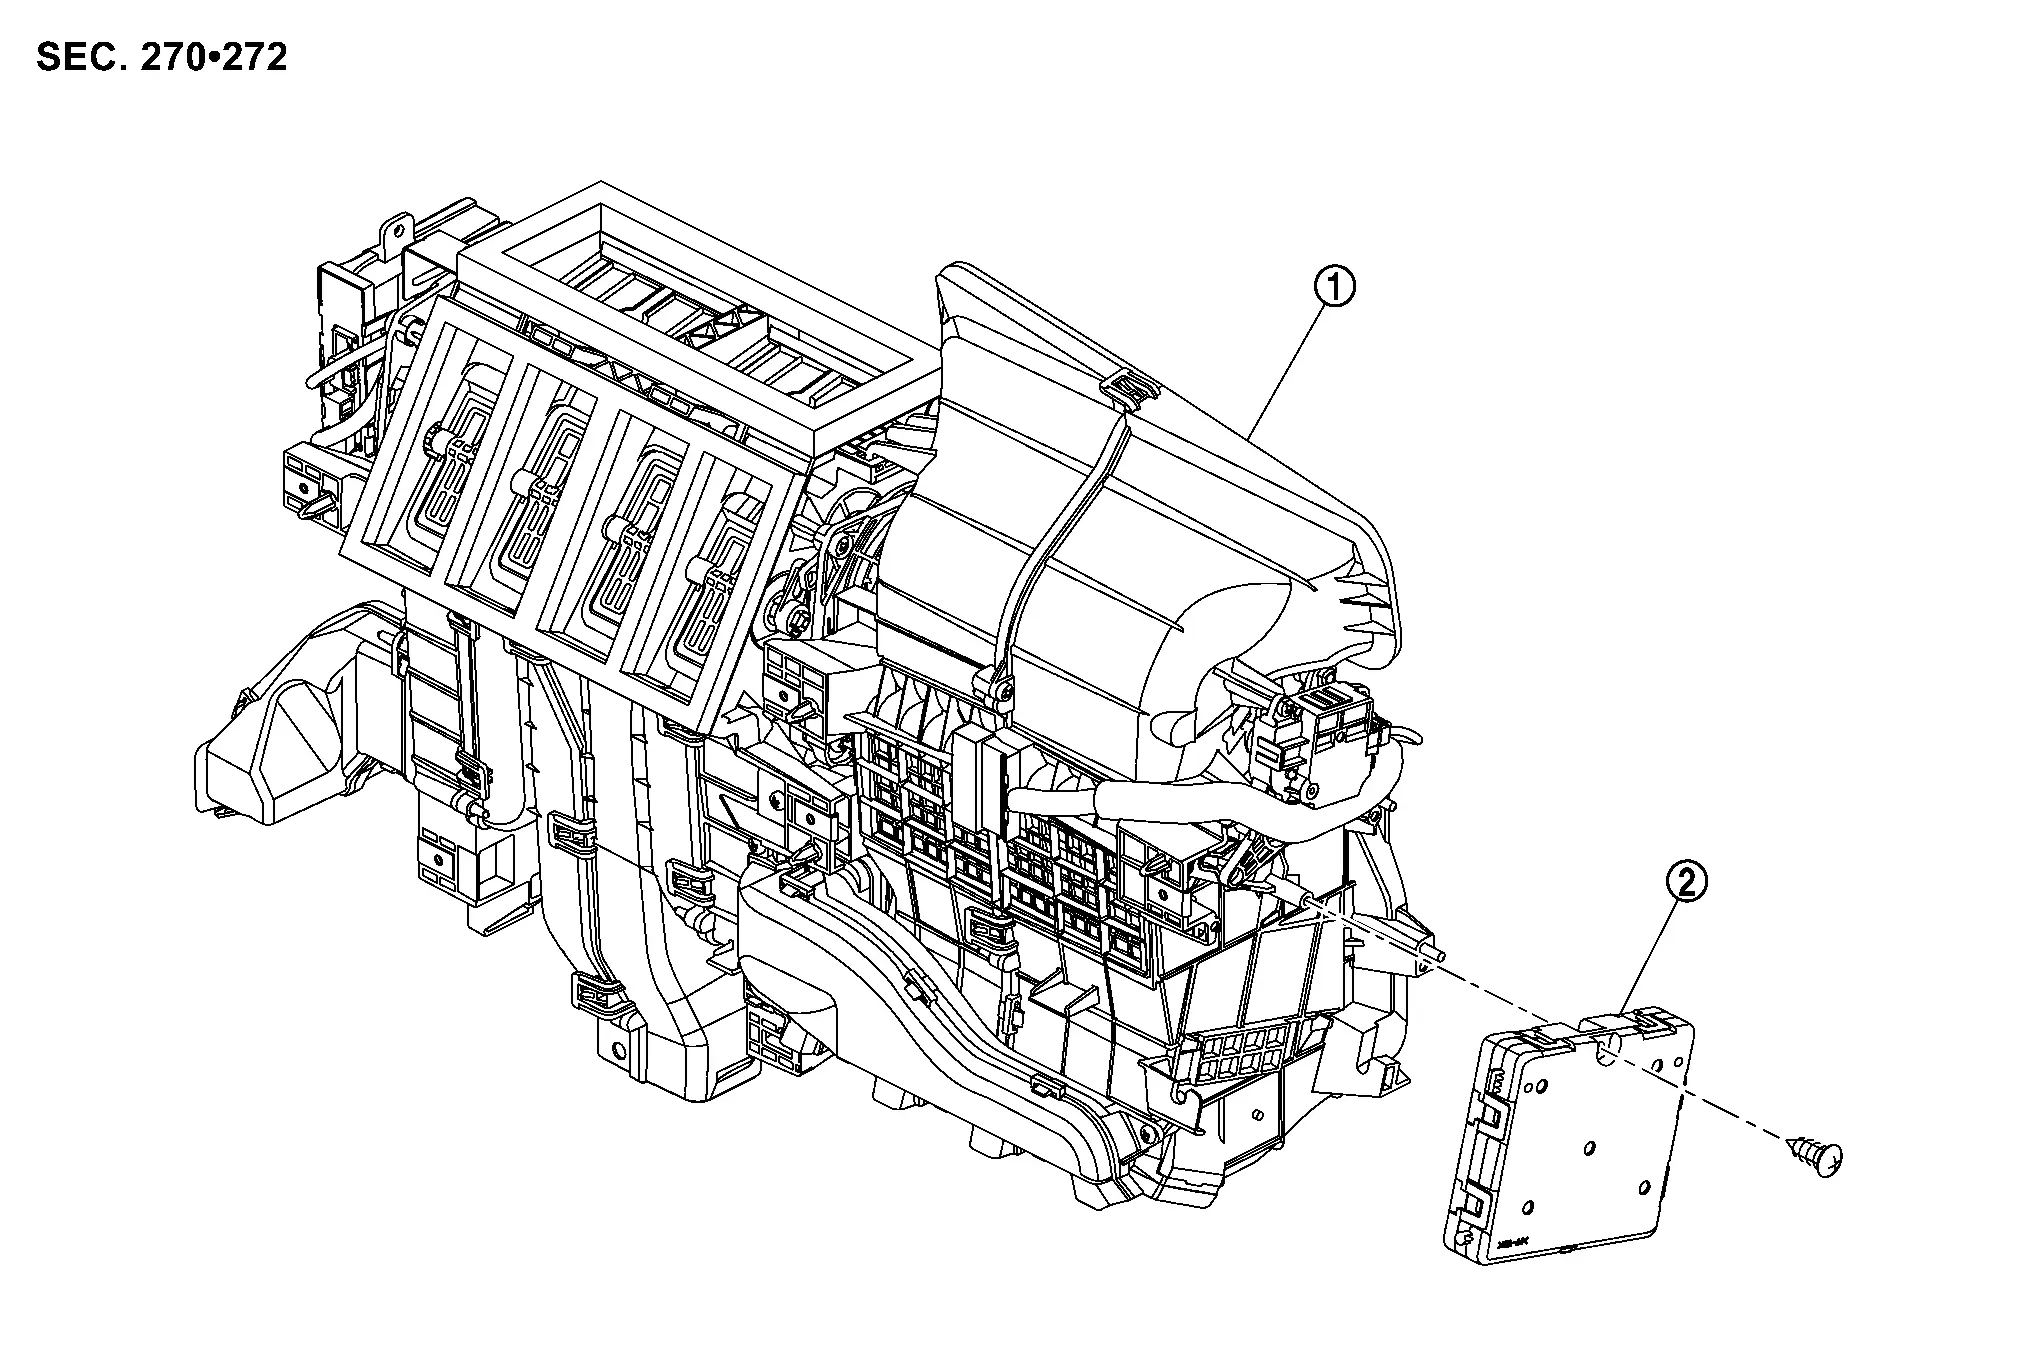
 |
Intake & distribution box |  |
A/C auto amp. |
Removal & Installation
REMOVAL
Remove intake & distribution box. Refer to Removal & Installation.
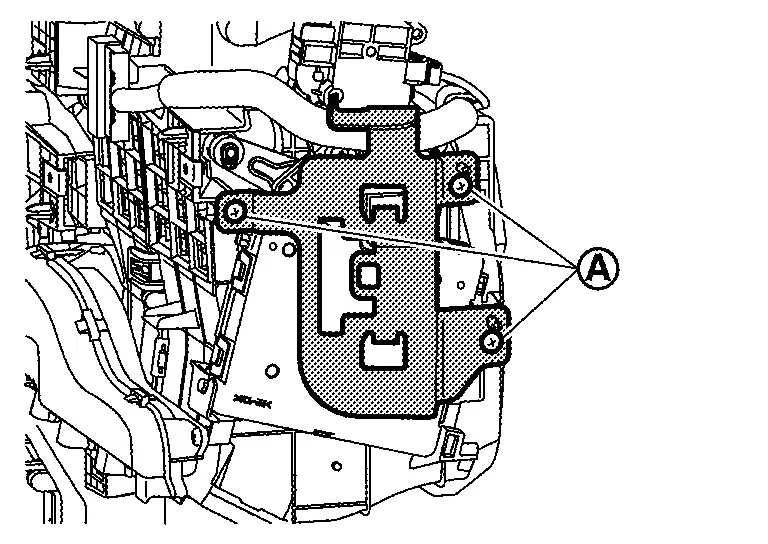
Remove fixing screws  , and then remove fuse bracket.
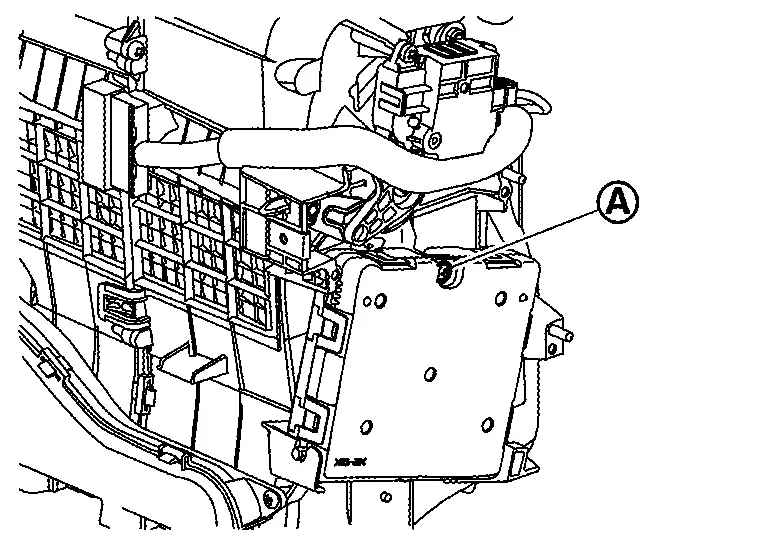
Remove A/C auto amp. fixing screw .
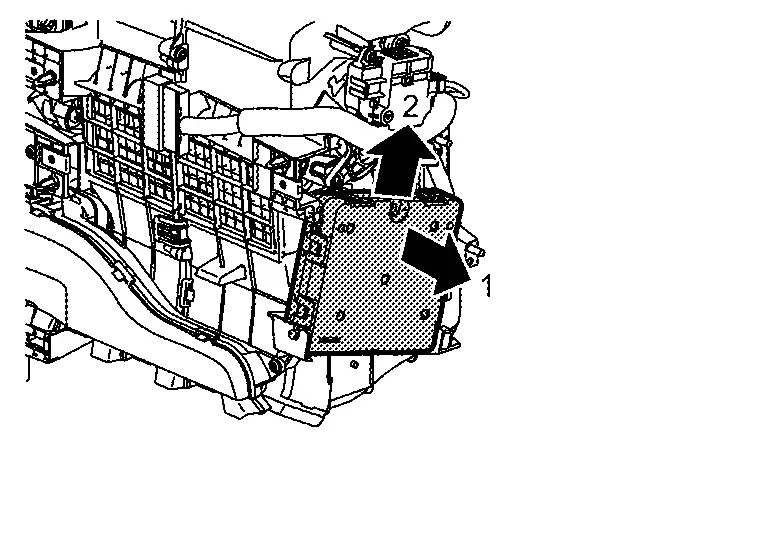
Remove A/C auto amp. according to the numerical order 1→2 indicated by arrows as shown in the figure.
INSTALLATION
Note the following item, and then install in the reverse order of removal.
Heat Pump Control Unit Nissan Ariya first Gen
Exploded View

|
Intake & distribution box | |
Heat pump C/U bracket |  |
Heat pump C/U |
Removal & Installation
REMOVAL
Remove driver knee air bag module. Refer to Removal and Installation.
Remove brake pedal assembly. Refer to BRAKE PEDAL : Removal & Installation.
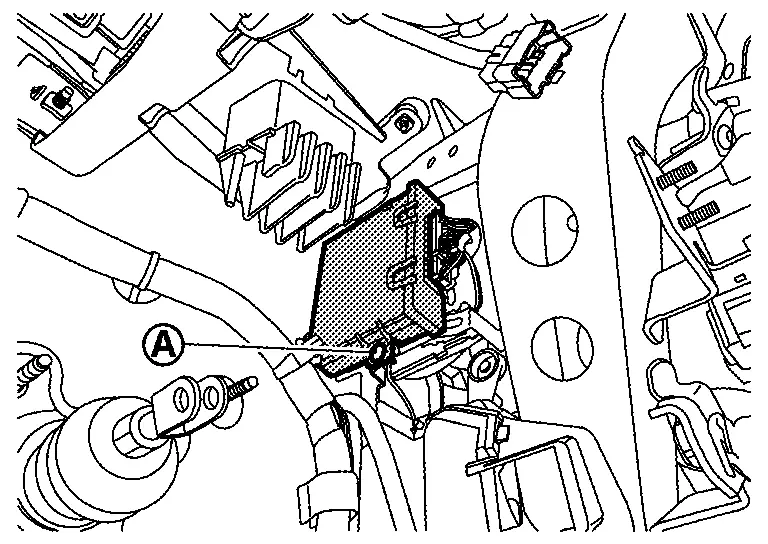
Remove heat pump C/U fixing screw .
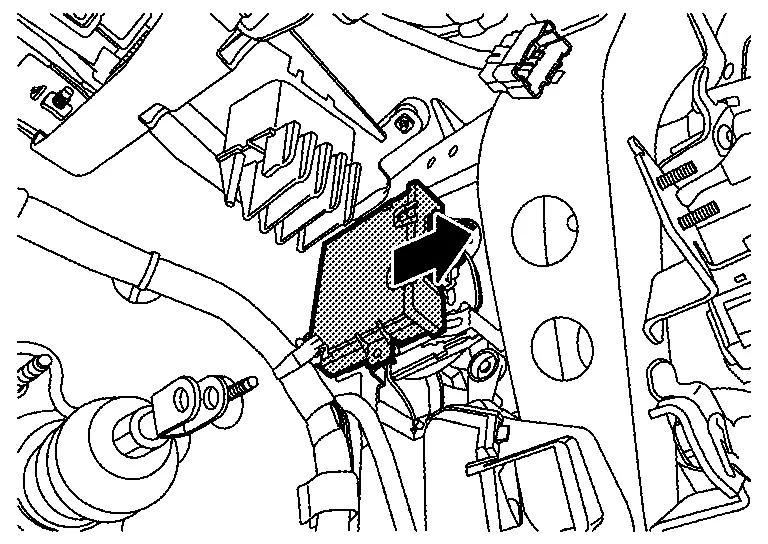
Slide Heat pump C/U in the direction indicated by arrow as shown in the figure and remove it from Heat pump C/U bracket.
Disconnect heat pump C/U harness connector, and then remove heat pump C/U.
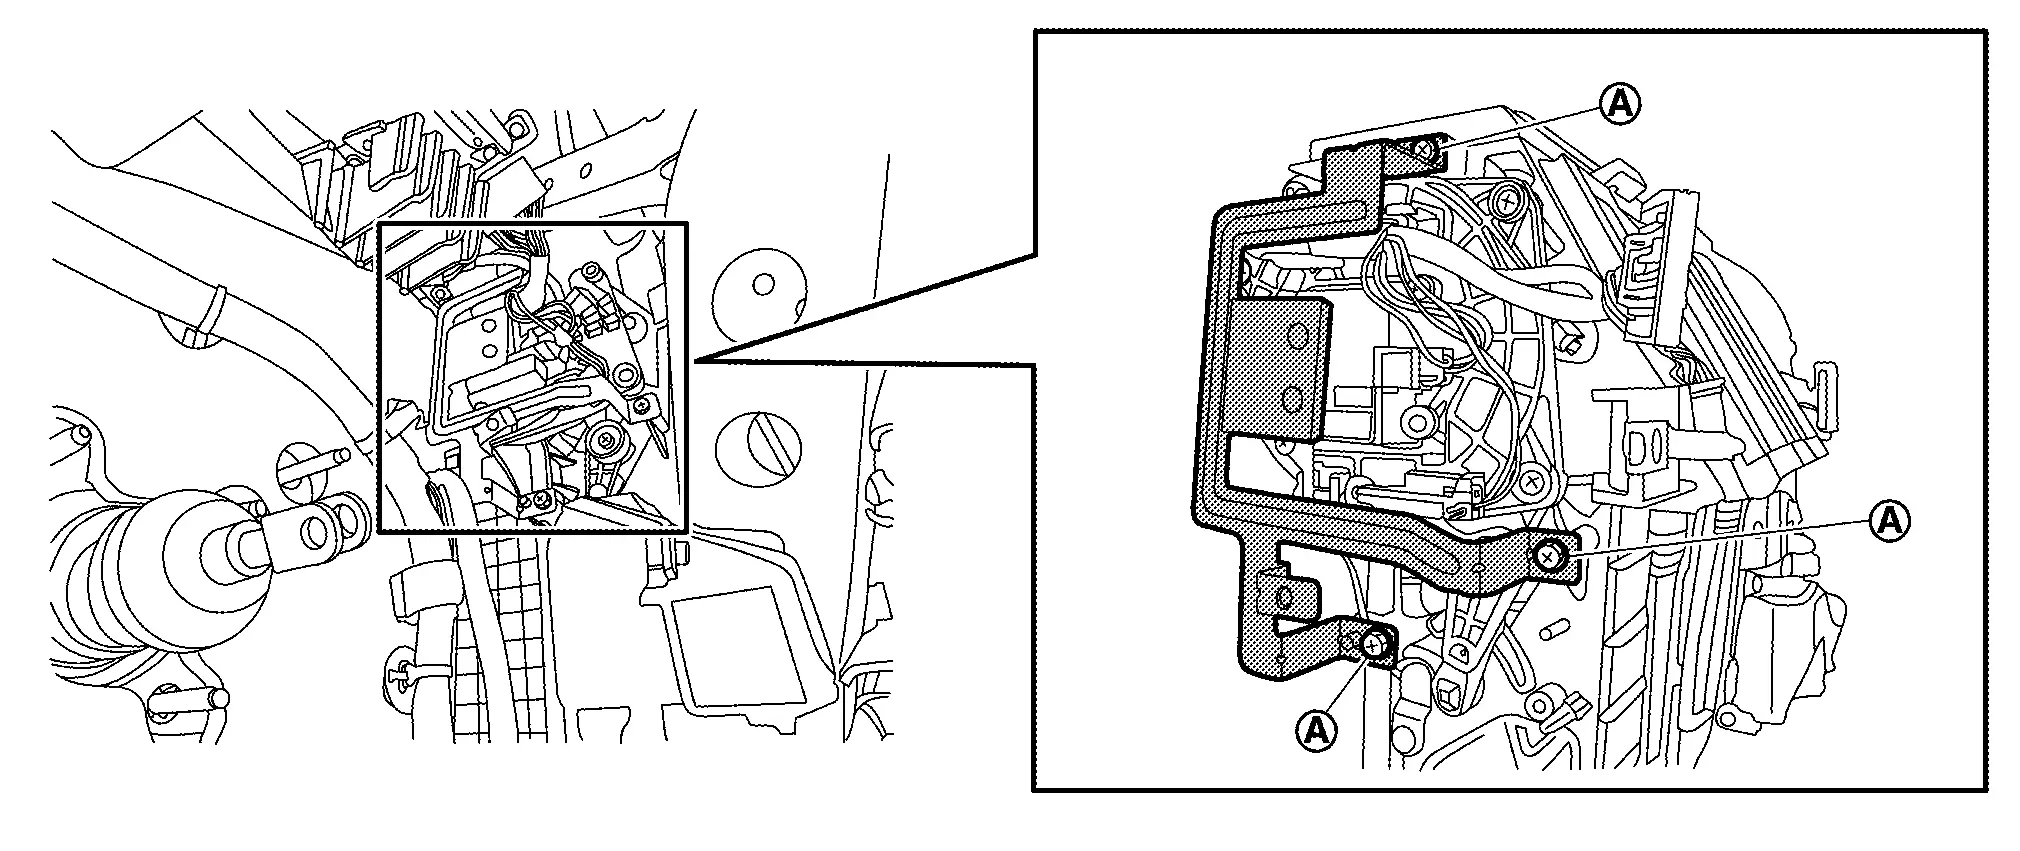
Remove fixing screws and then remove heat pump C/U bracket.
INSTALLATION
Install in the reverse order of removal.
In-Vehicle Sensor Nissan Ariya first Gen
Exploded View
|
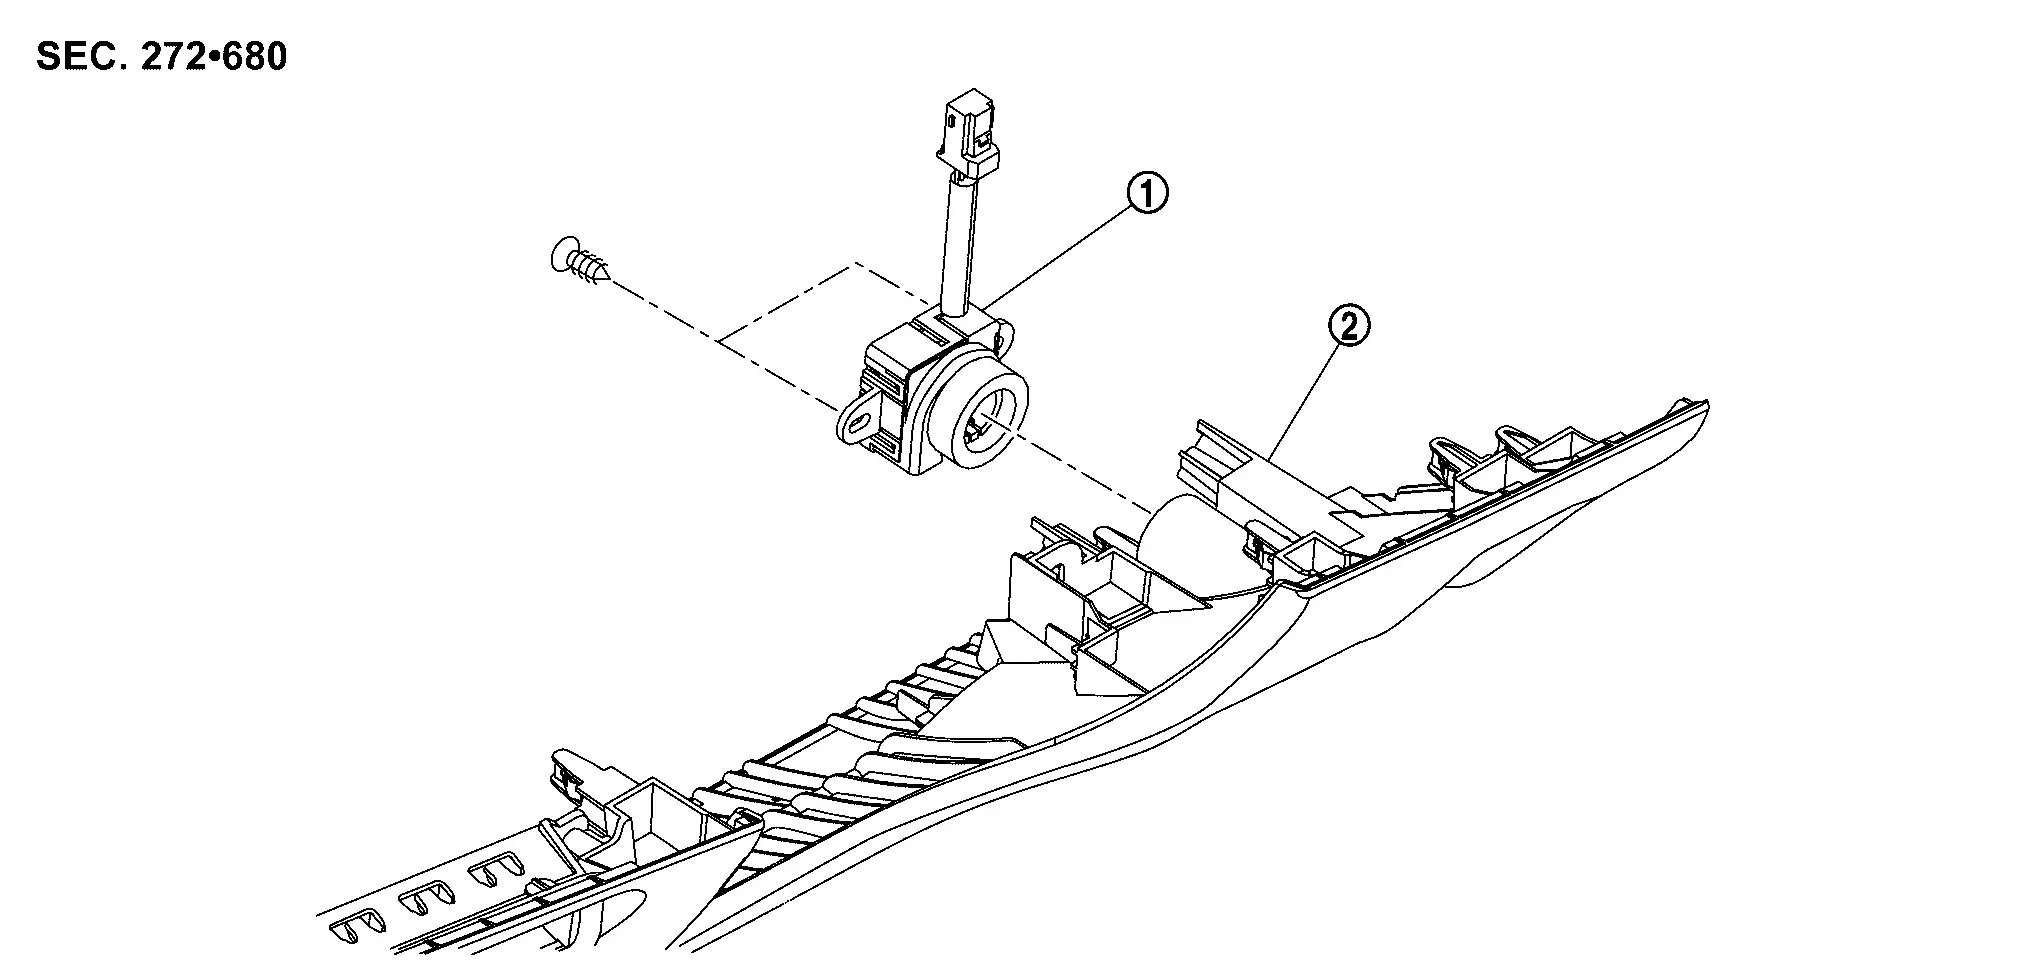
In-Nissan Ariya vehicle sensor | |
Instrument lower panel |
Removal & Installation
REMOVAL
Remove instrument lower panel. Refer to Removal & Installation.
Remove fixing screw, and then remove in-Nissan Ariya vehicle sensor from instrument lower panel.
INSTALLATION
Install in the reverse order of removal.
Sunload Sensor Nissan Ariya SUV
Exploded View
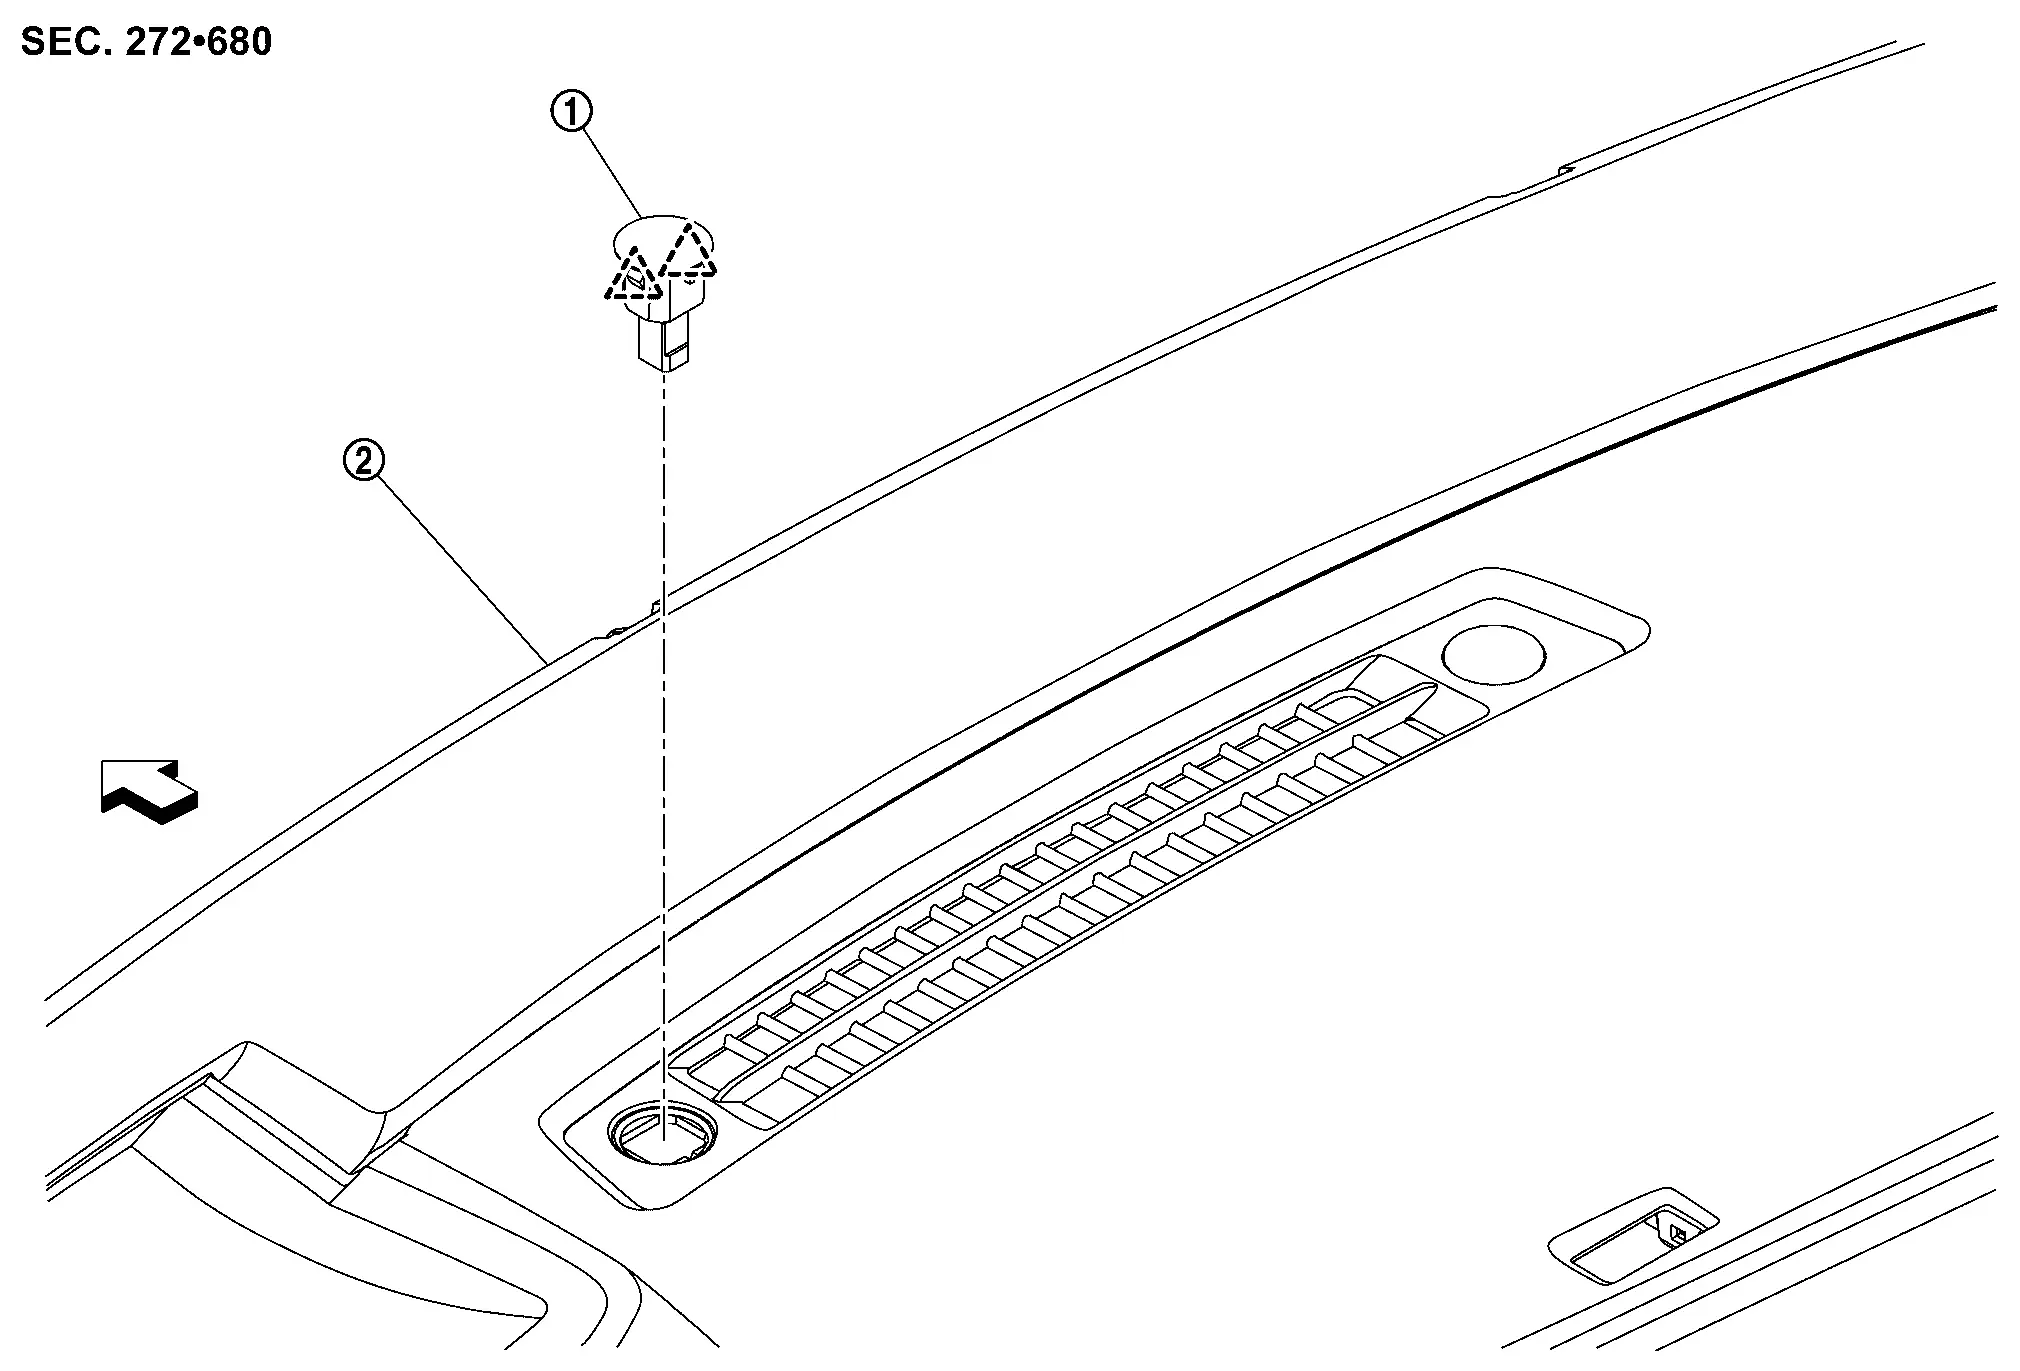
|
Sunload sensor | |
Instrument panel assembly | ||
 |
: Pawl | ||||
 |
:Nissan Ariya Vehicle front | ||||
Removal & Installation
REMOVAL
Apply protective tape (A) on instrument garnish to protect from damage.
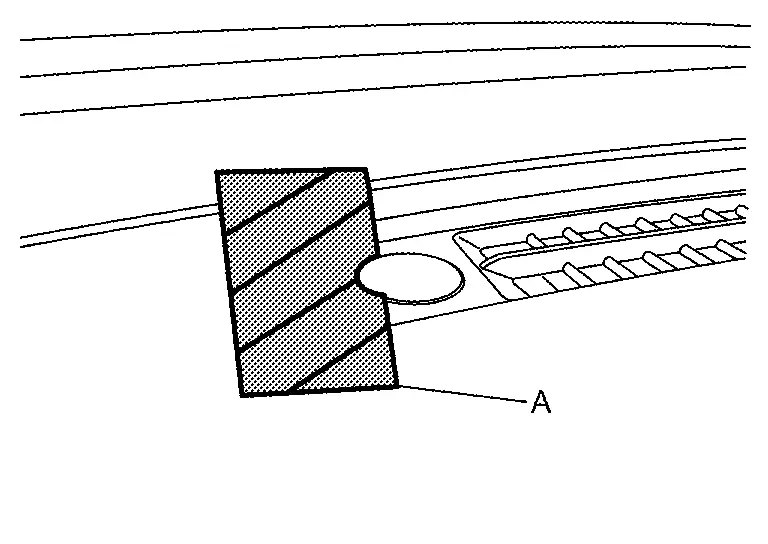
Disengage fixing pawls using a remover tool (A), and then pull up sunload sensor.

|
:Pawl | ||||
Disconnect harness connector, and then remove sunload sensor.
INSTALLATION
Install in the reverse order of removal.
Intake Sensor Nissan Ariya
Removal & Installation
Replacement of a single part of the intake sensor is not possible. for replacement, replace evaporator as a set. Refer to Removal & Installation.
Humidity Sensor Nissan Ariya
Exploded View
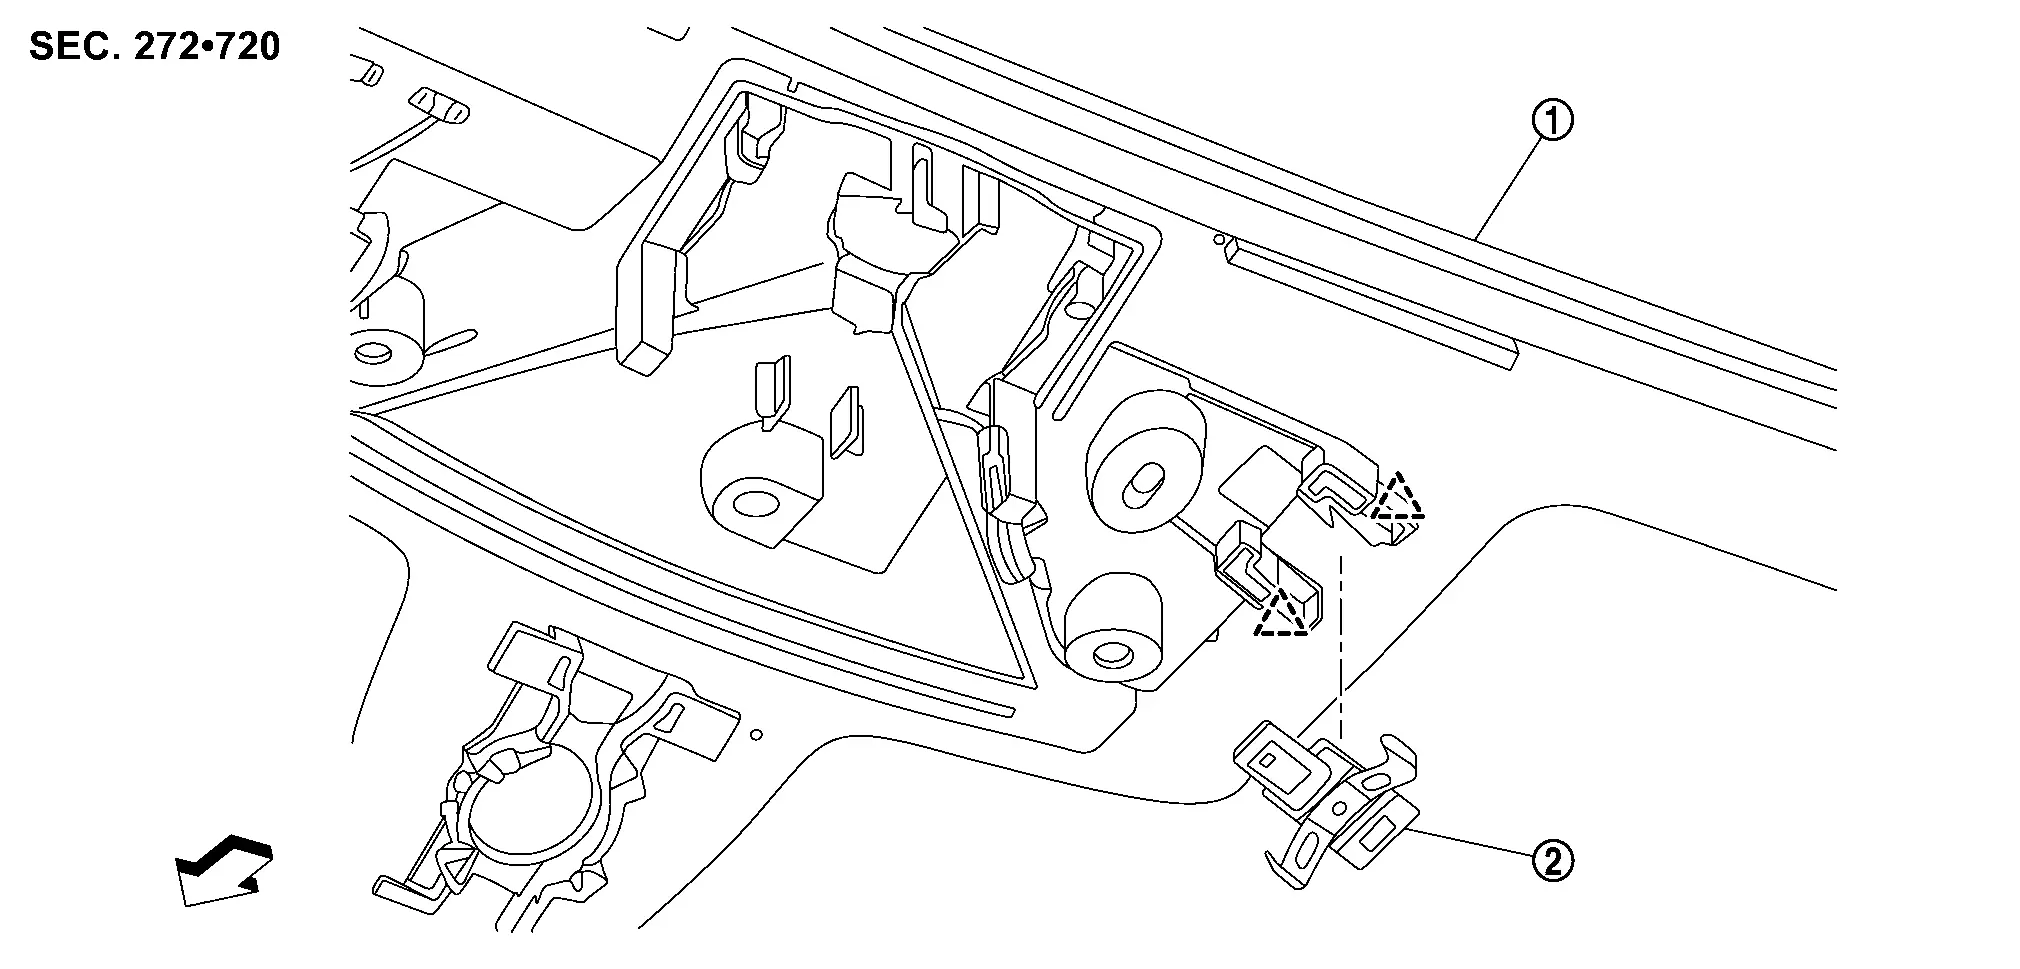
|
Windshield glass assembly | |
Humidity sensor | ||
|
:Pawl | ||||
|
:Nissan Ariya Vehicle front | ||||
Removal & Installation
REMOVAL
Remove front camera unit cover. Refer to Removal and Installation (WITHOUT ProPILOT ASSIST models) or Removal and Installation (WITH ProPILOT ASSIST models).
Disconnect humidity sensor harness connector .

Disengage fixing pawls, and then remove humidity sensor.
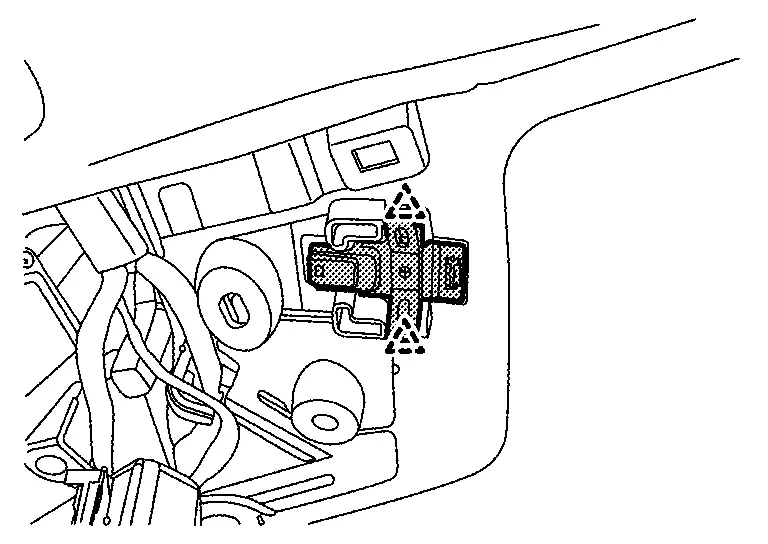
|
:Pawl | ||||
INSTALLATION
Install in the reverse order of removal.
Refrigerant Pressure Sensor Nissan Ariya
Exploded View
For exploded view of the refrigerant pressure sensor. Refer to Exploded View.
Removal & Installation
For removal and installation of the refrigerant pressure sensor. Refer to Removal & Installation.
Condenser Discharge Refrigerant Temperature Sensor Nissan Ariya 1st generation
Exploded View
For exploded view of the condenser discharge refrigerant temperature sensor. Refer to Exploded View.
Removal & Installation
REMOVAL
Remove high voltage power delivery assembly. Refer to HIGH VOLTAGE POWER DELIVERY ASSEMBLY : Removal & Installation.
Disconnect condenser discharge refrigerant temperature sensor harness connector .
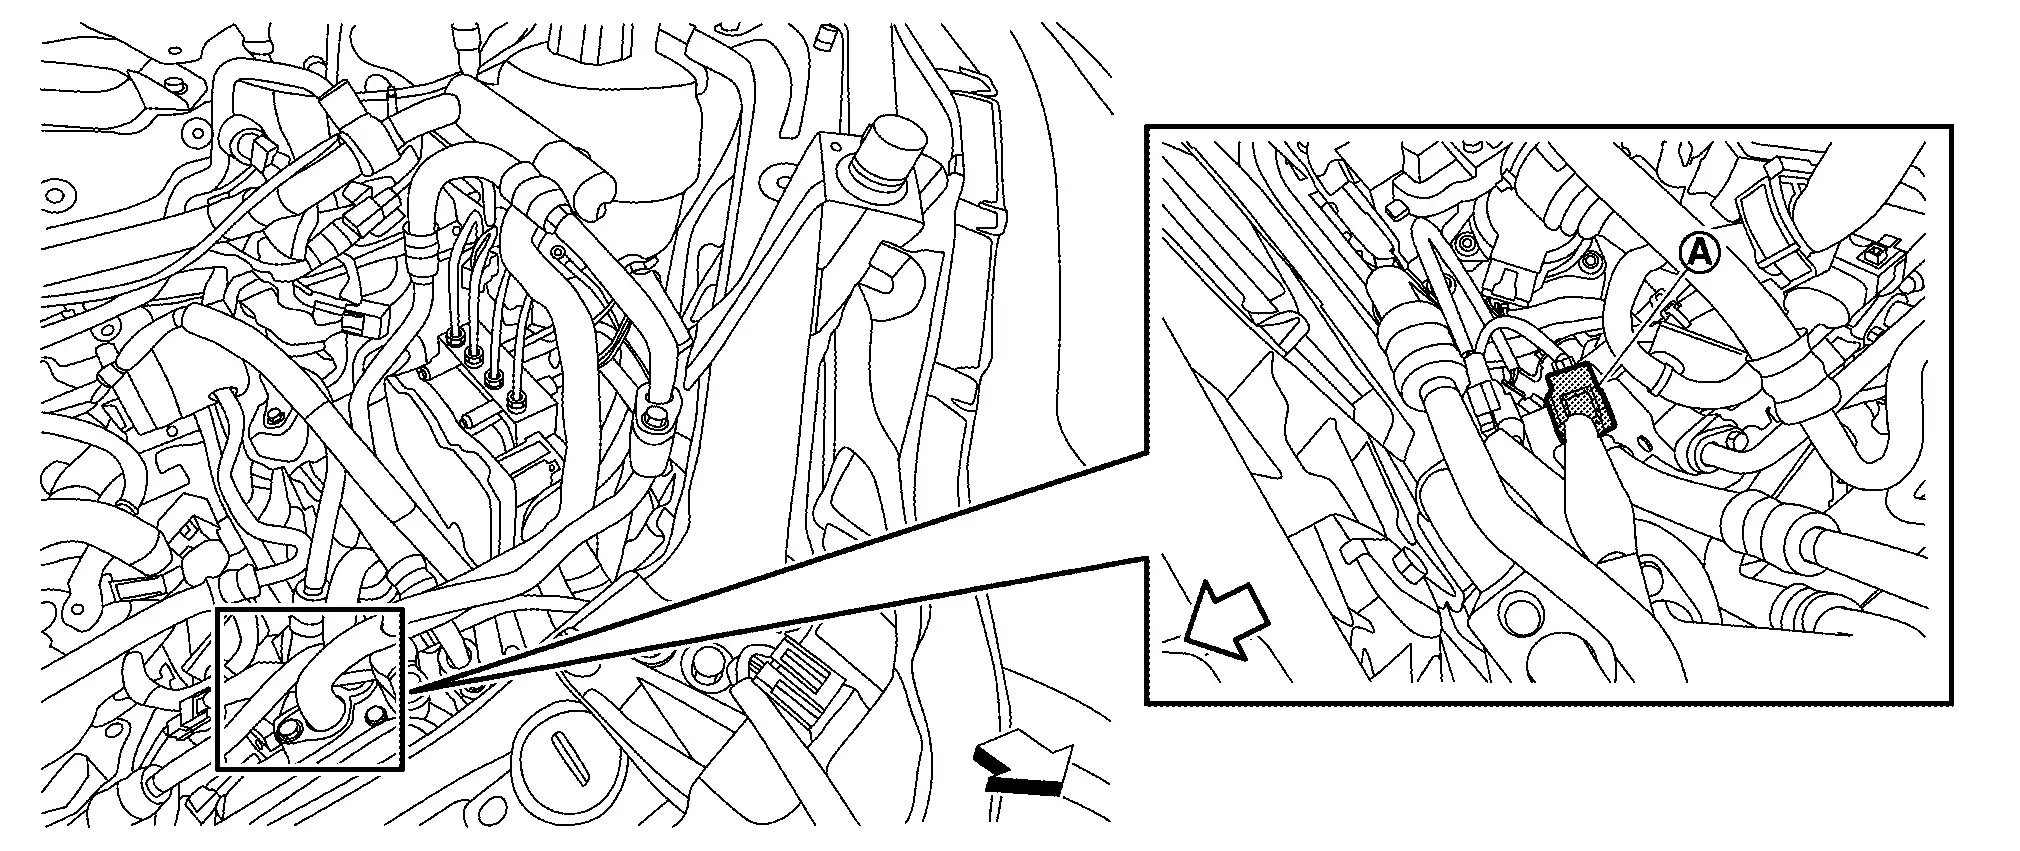
|
:Nissan Ariya Vehicle front | ||||
Disengage connector fixing clip of condenser discharge refrigerant temperature sensor from bracket of accumulator.
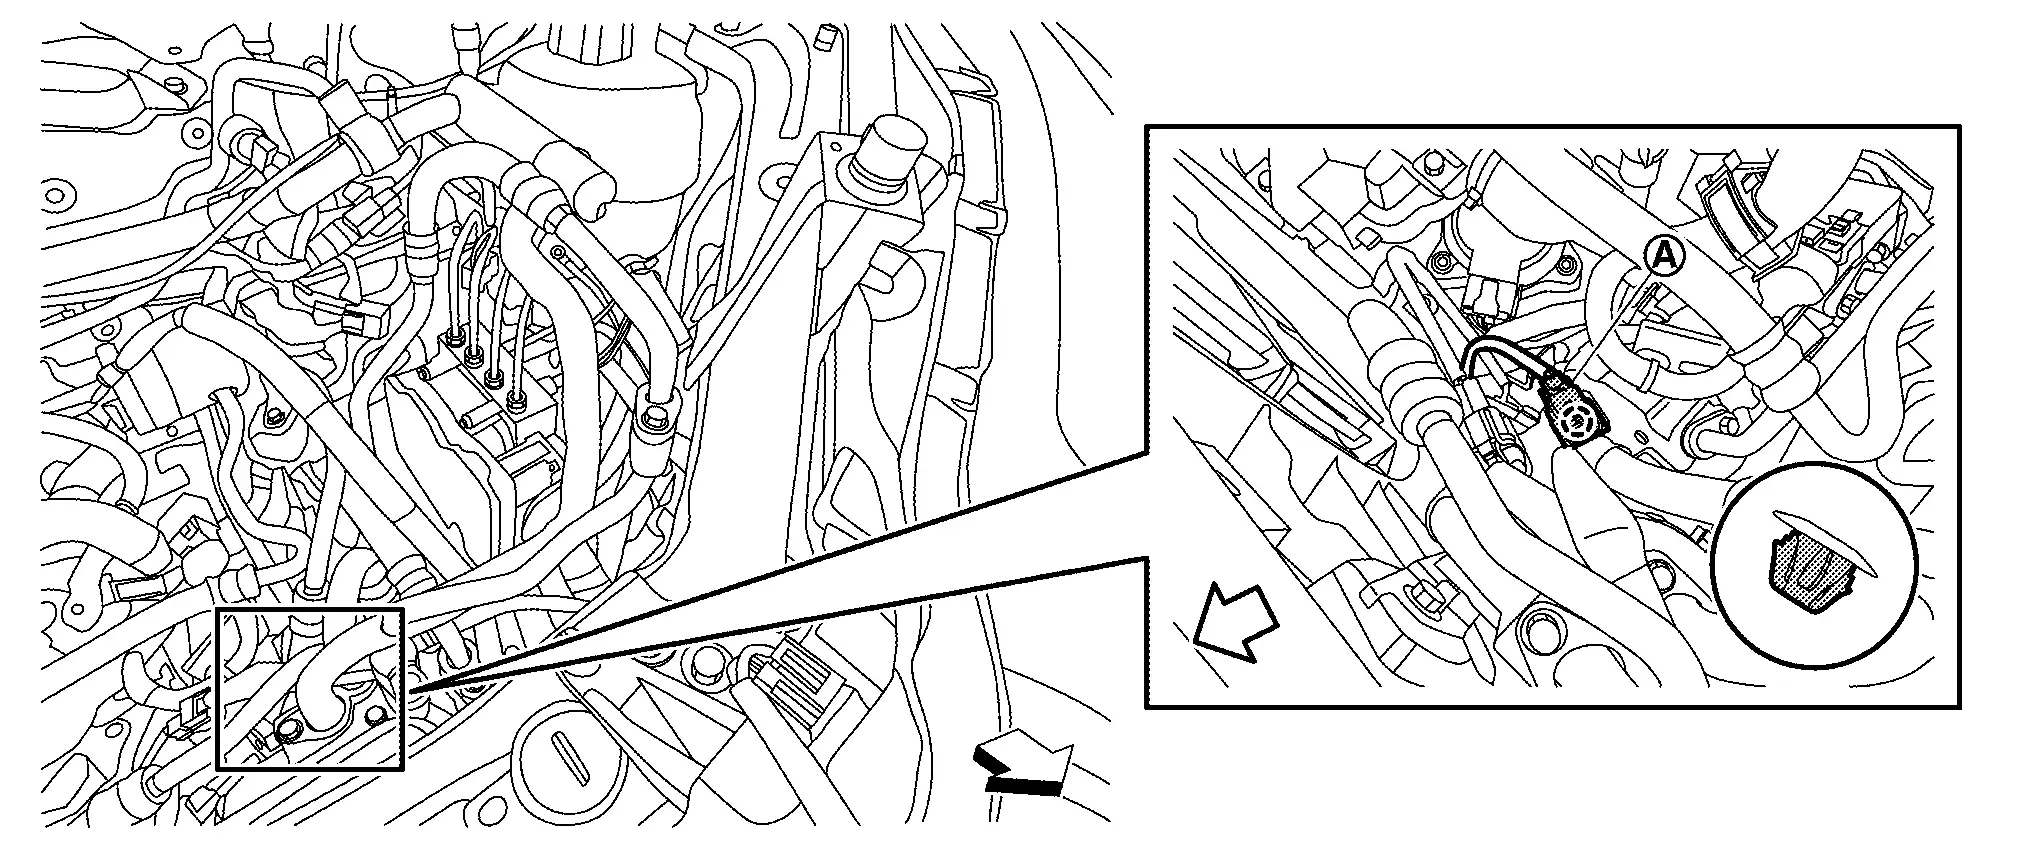
 |
:Clip | ||||
|
:Nissan Ariya Vehicle front | ||||
Remove condenser discharge refrigerant temperature sensor from high-pressure cooler pipe assembly. Refer to Disassembly & Assembly.
INSTALLATION
Install in the reverse order of removal.
Evaporator Discharge Refrigerant Temperature Sensor Nissan Ariya
Exploded View
For exploded view of the evaporator discharge refrigerant temperature sensor. Refer to Exploded View.
Removal & Installation
REMOVAL
Disconnect evaporator discharge refrigerant temperature sensor harness connector .

Remove evaporator discharge refrigerant temperature sensor from low-pressure refrigerator pipe 1. Refer to Disassembly & Assembly.
INSTALLATION
Install in the reverse order of removal.
Refrigerant Temperature Sensor (battery Chiller Inlet) Nissan Ariya first Gen
Exploded View
For exploded view of the refrigerant temperature sensor (battery chiller inlet). Refer to Exploded View.
Removal & Installation
REMOVAL
Remove high-pressure cooler pipe assembly from vehicle. Refer to Removal & Installation.
Remove refrigerant temperature sensor (battery chiller inlet) from high-pressure cooler pipe 7. Refer to Disassembly & Assembly.
INSTALLATION
Install in the reverse order of removal.
Ptc Heater Outlet Air Temperature Sensor Nissan Ariya 1st generation
Exploded View
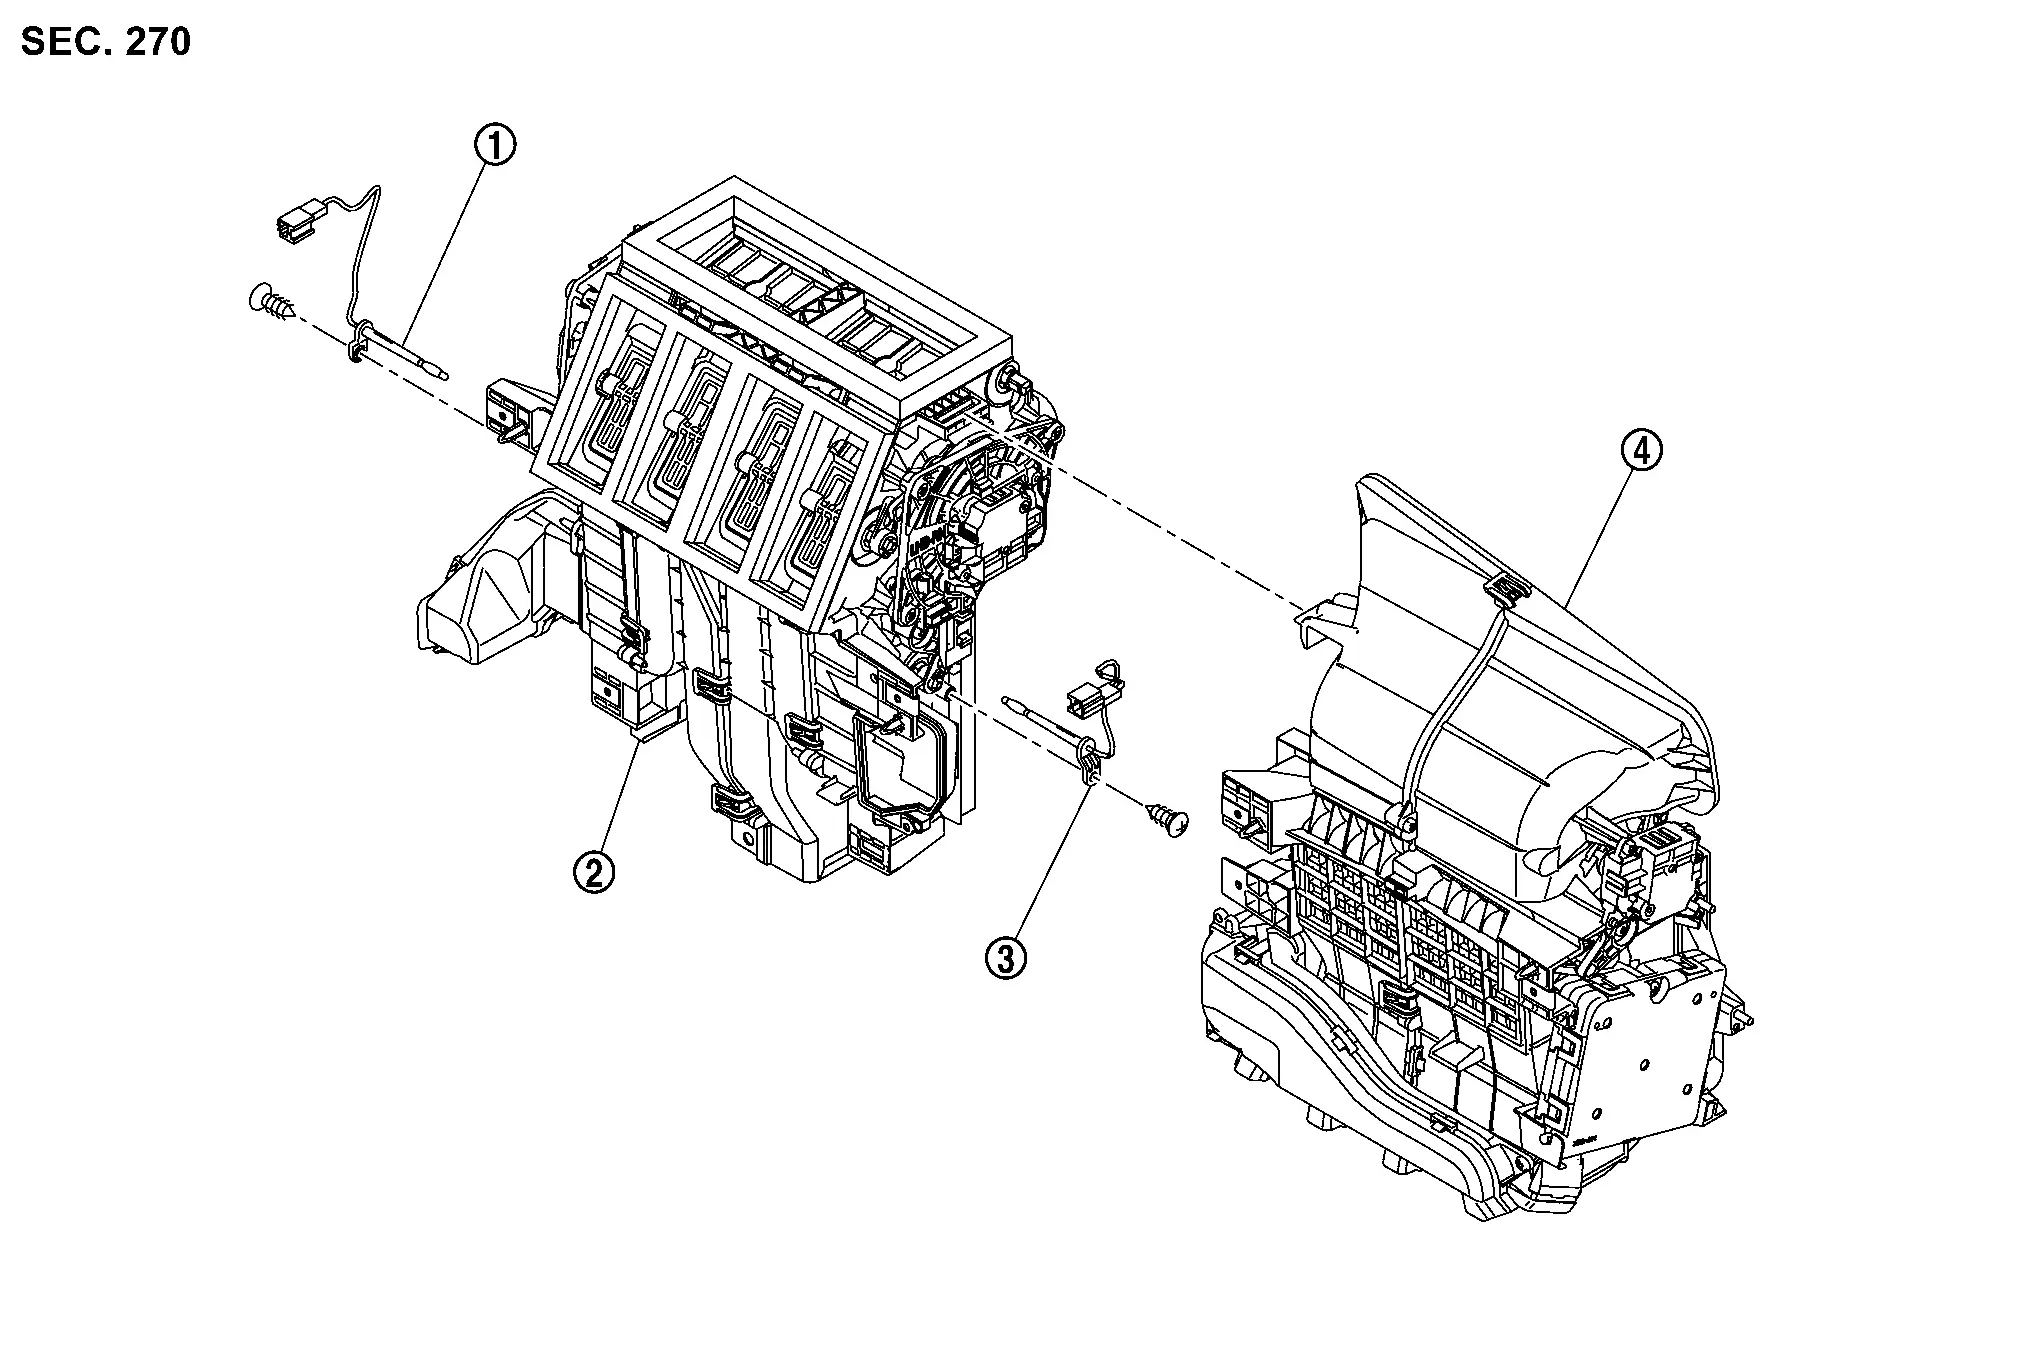
|
PTC heater outlet air temperature sensor (driver side) | |
Distribution box | |
PTC heater outlet air temperature sensor (passenger side) |
 |
Intake box |
Removal & Installation
REMOVAL
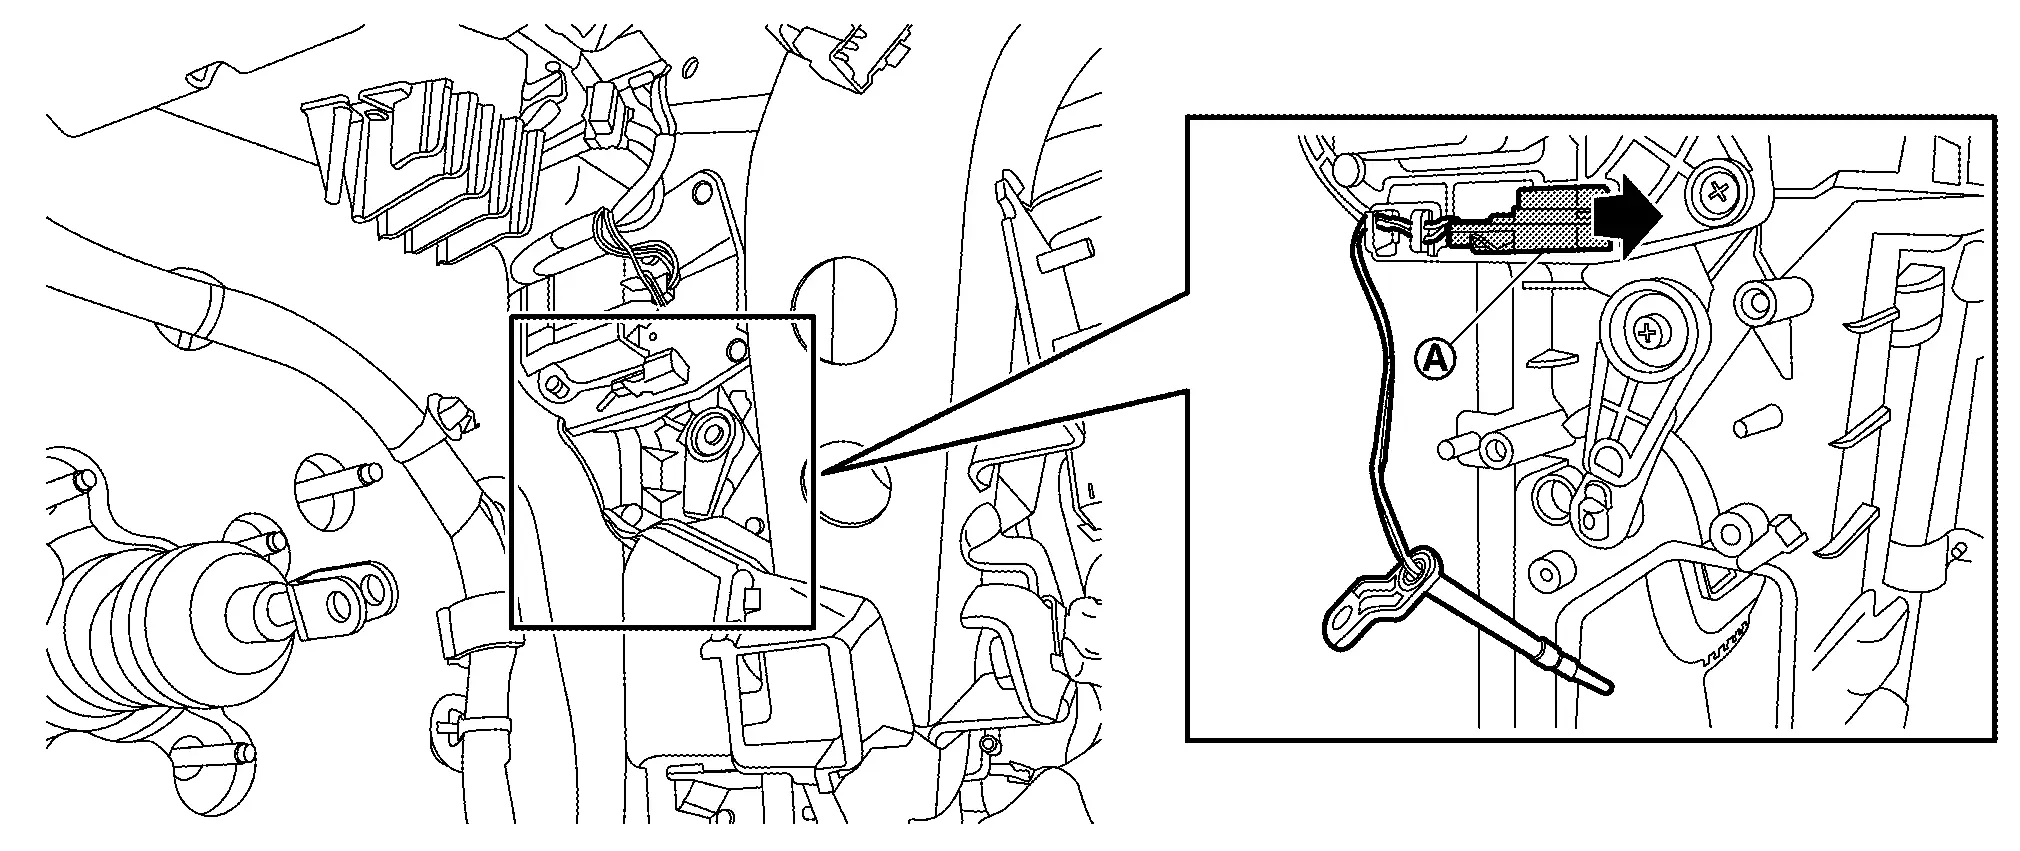
PTC Heater Outlet Air Temperature Sensor (Driver Side)
Remove heat pump C/U bracket. Refer to Removal & Installation.
Disconnect PTC heater outlet air temperature sensor (driver side) harness connector .

Remove fixing screw , and then remove sensor part of heater outlet air temperature sensor (driver side) from distribution box.
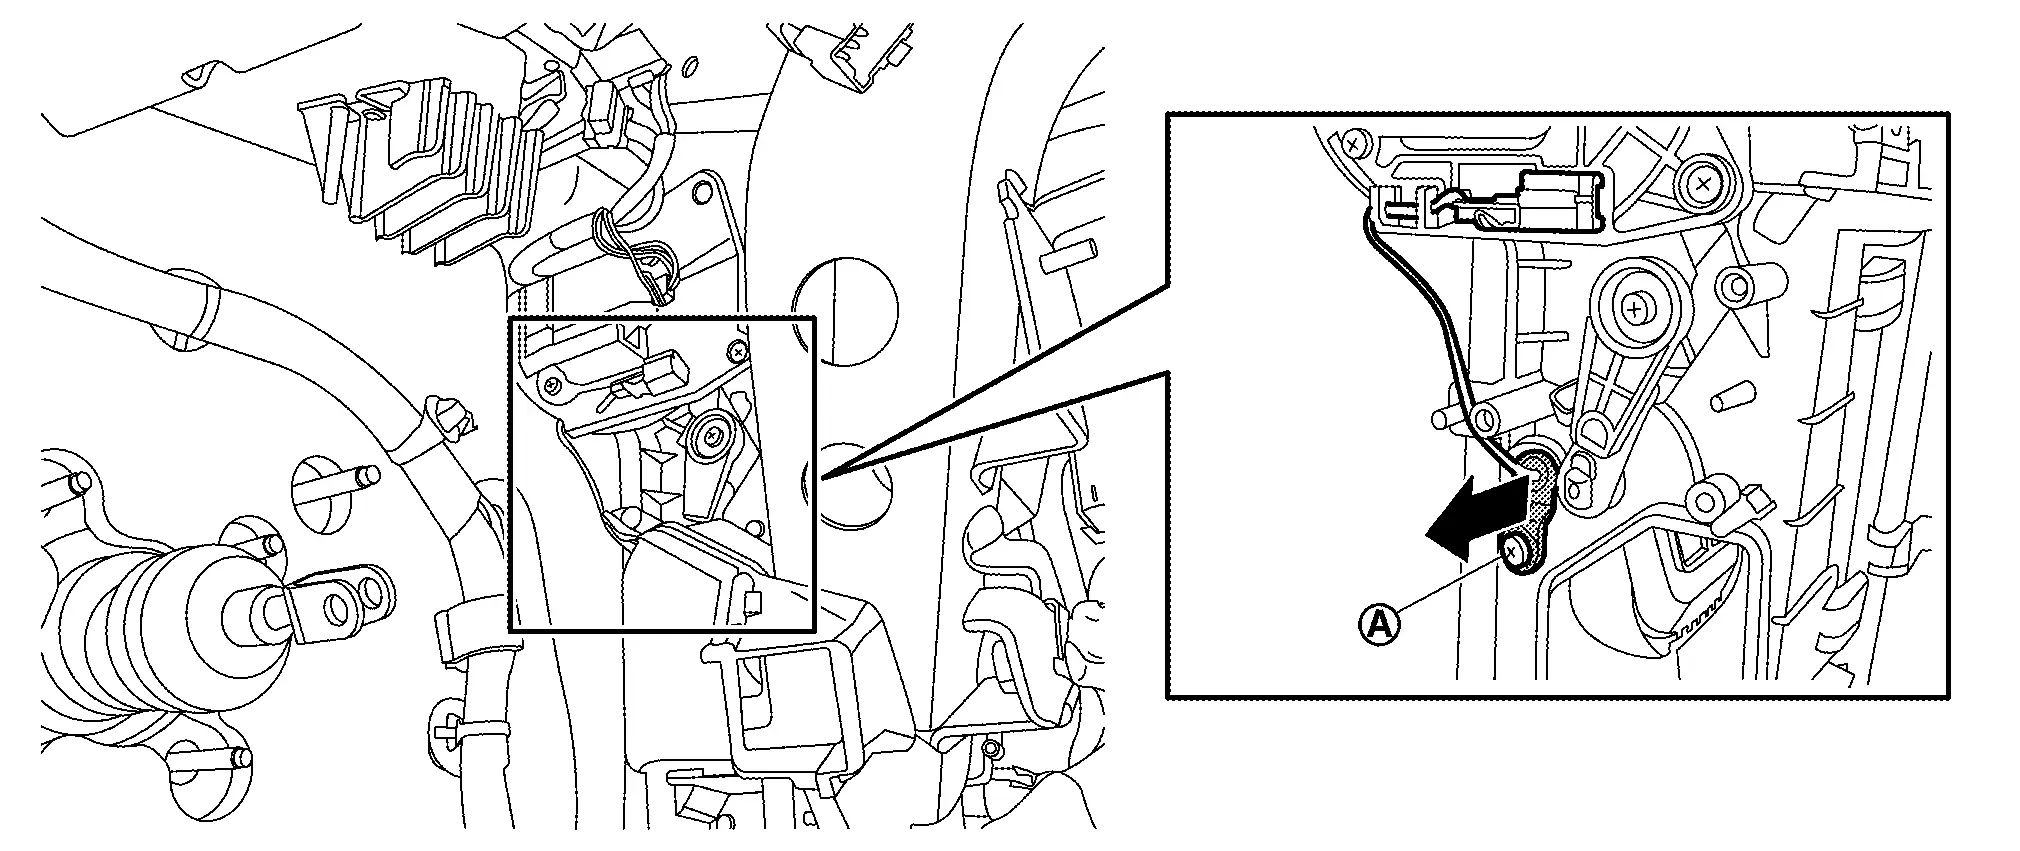
Remove harness connector of heater outlet air temperature sensor (driver side) from bracket.
PTC Heater Outlet Air Temperature Sensor (Passenger Side)
Remove intake box from distribution box referring to mode door motor (passenger side) removal procedure 1 to 2. Refer to Removal & Installation.
Disconnect PTC heater outlet air temperature sensor (passenger side) harness connector .
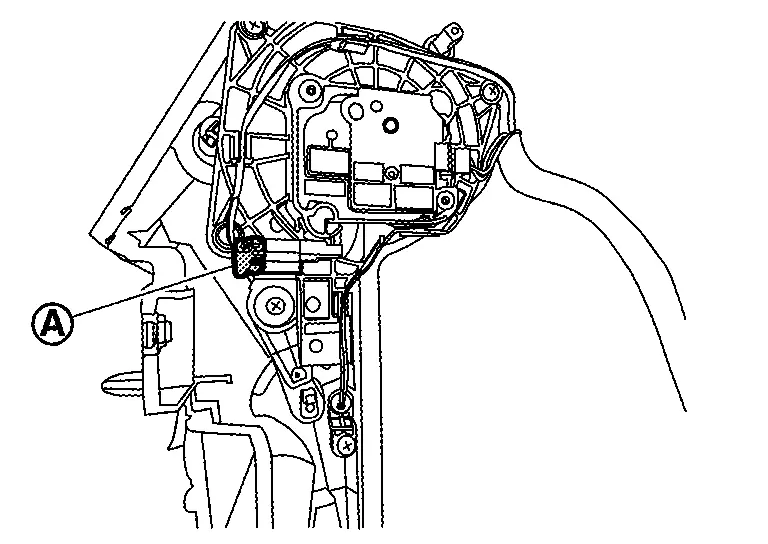
Remove fixing screw , and then remove sensor part of heater outlet air temperature sensor (passenger side) from distribution box.
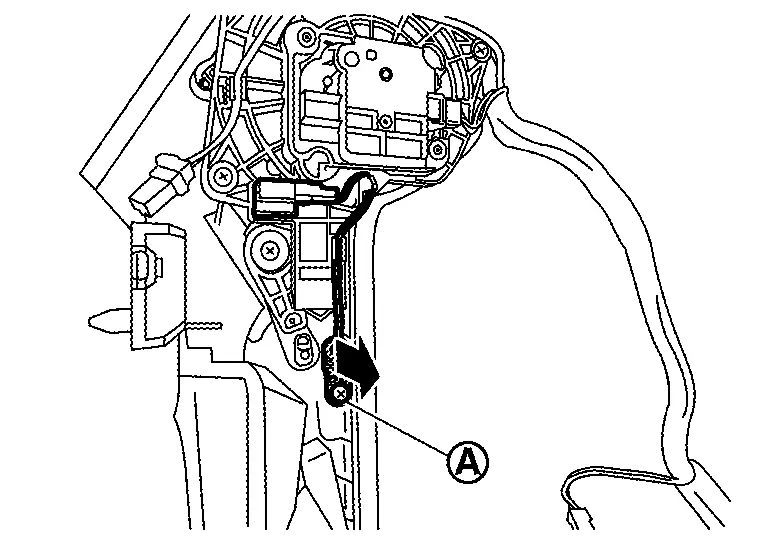
Remove harness connector of heater outlet air temperature sensor (passenger side) from bracket.
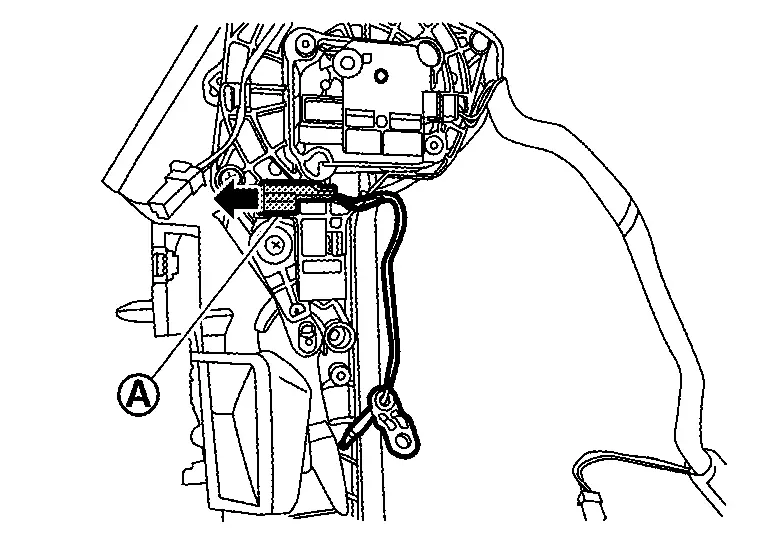
INSTALLATION
Install in the reverse order of removal.
Ptc Heater Nissan Ariya first Gen
Exploded View
For exploded view of the PTC heater. Refer to Exploded View.
Removal & Installation
DANGER: Since hybrid vehicles and electric vehicles contain a high voltage battery, there is the risk of electric shock, electric leakage, or similar accidents if the high voltage component and Nissan Ariya vehicle are handled incorrectly. Be sure to follow the correct work procedures when performing inspection and maintenance.
REMOVAL
Follow the instructions below before starting the procedure.
Remove A/C unit assembly. Refer to Removal & Installation.
Remove blower case assembly from A/C unit case assembly.Remove mounting nuts , PTC heater harness from sub harness bracket.
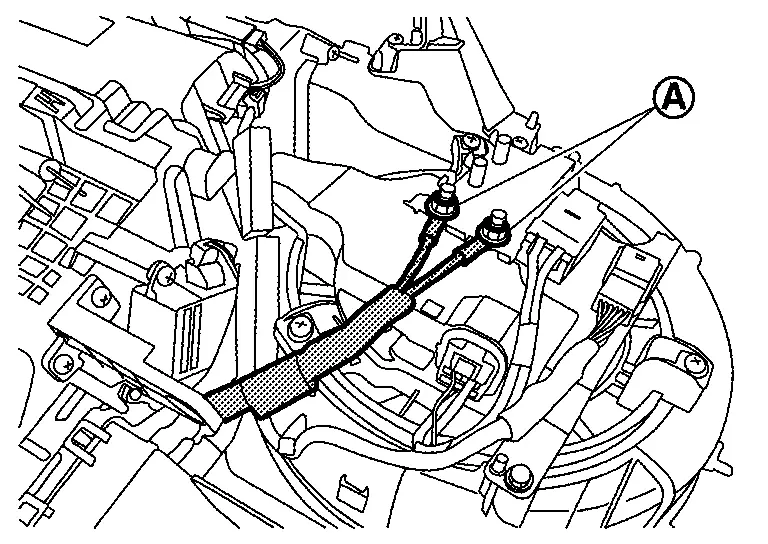 , and then move sub harness bracket and sub harness to secure work space.
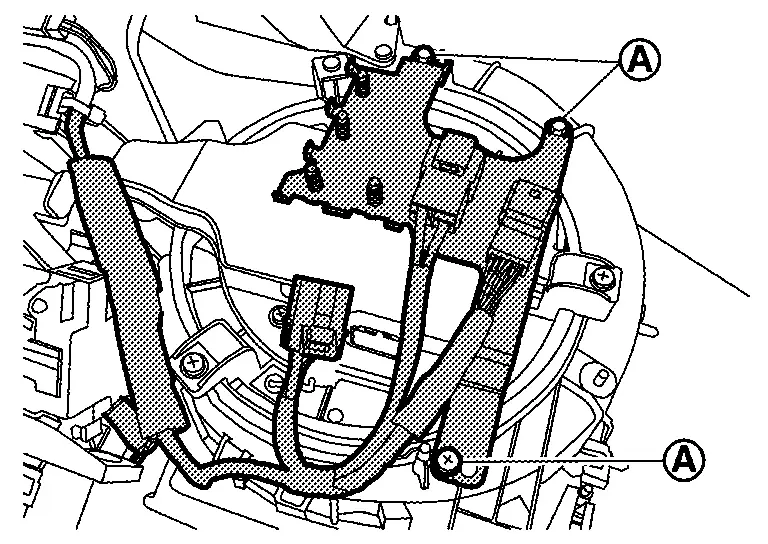 .

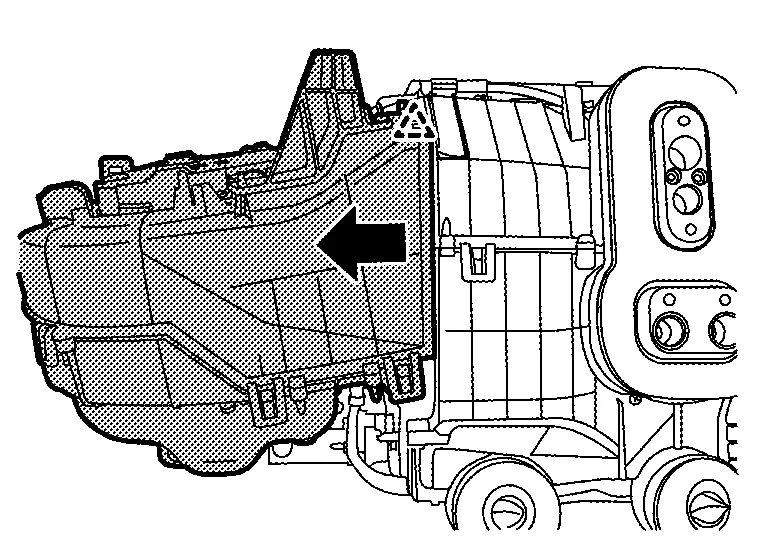
|
:Pawl | ||||
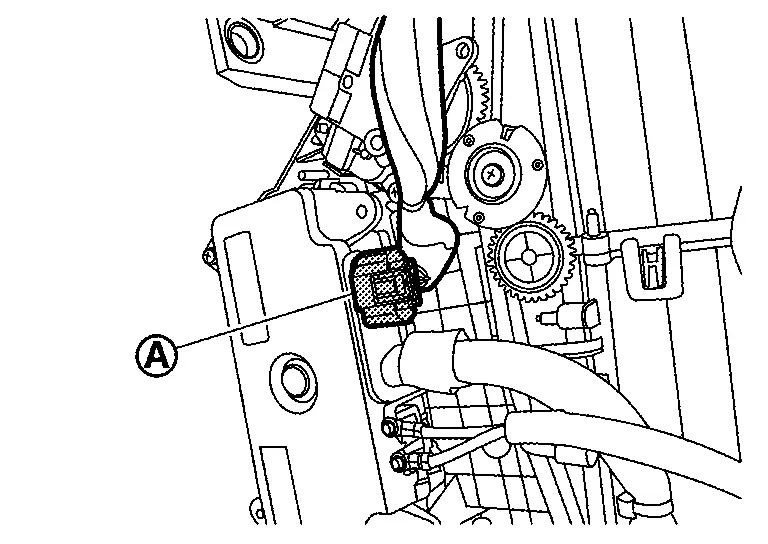
Remove PTC heater harness from A/C unit case assembly.Remove PTC seal.

 and then remove PTC heater harness connector.
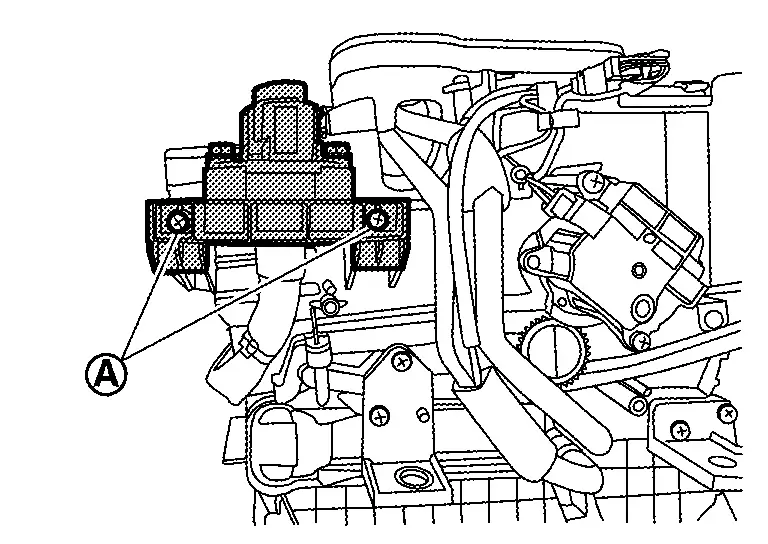 .
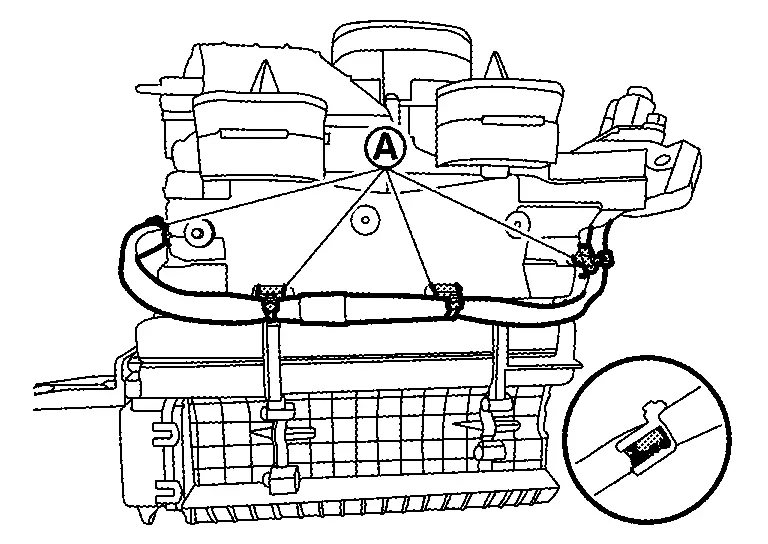
Remove sub harness from PTC heater.Disengage sub harness fixing clip .
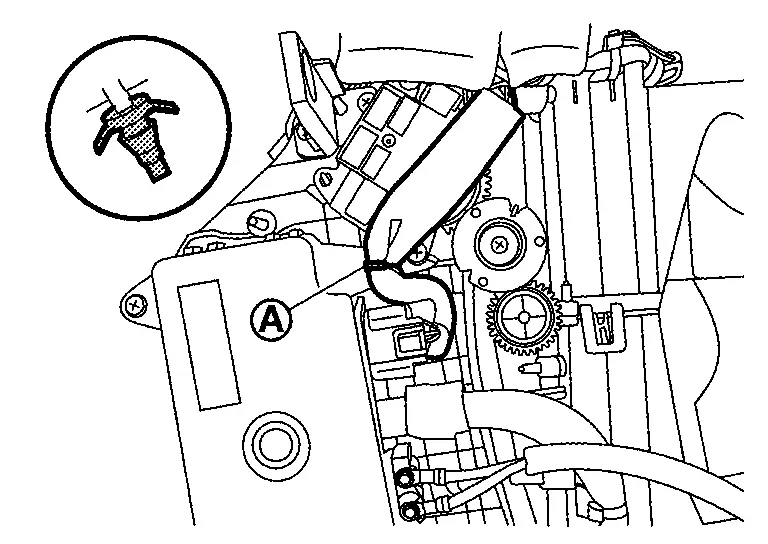 .
Remove fixing screws . and then pull out PTC heater from rear case remove it.
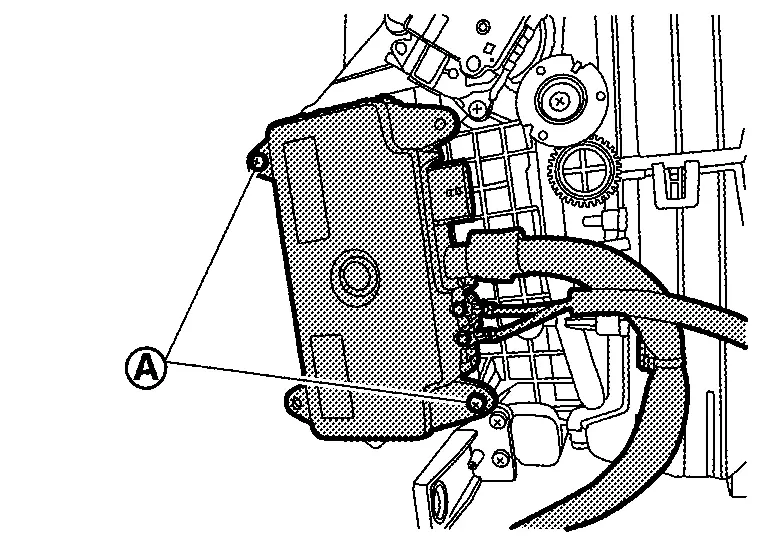
INSTALLATION
Note the following items, and then install in the reverse order of removal.