Coolant
Inspection
COOLANT AMOUNT INSPECTION
When coolant temperature is low (Approx. 50 °C or less), check that the coolant level of reservoir tank is in the range between MIN and MAX.


: MAX 
: MIN Refill to adjust level if it is out of the range.
Check that the reservoir tank cap is surely tightened.
LEAKAGE CHECK
Apply pressure to the cooling system using radiator cap tester (A) (commercial service tool). Check system for coolant leakage.
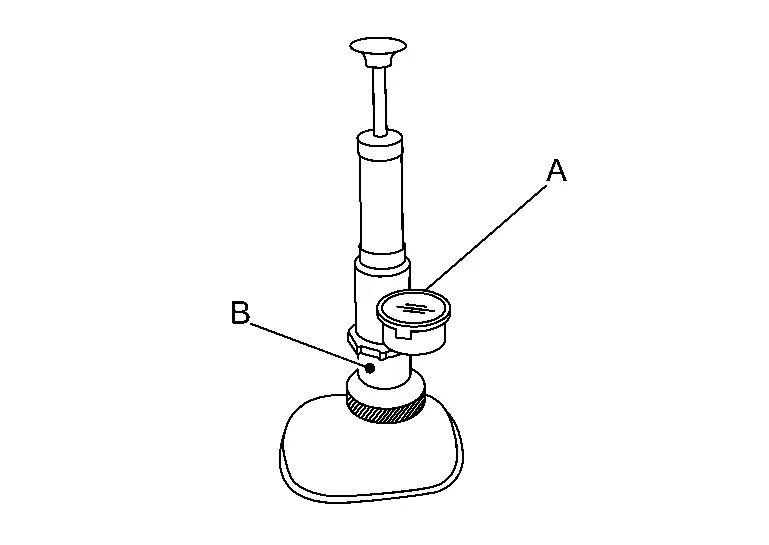
Maximum pressure : Refer to RADIATOR : Service Data. If there is a malfunction, repair and replace applicable parts.
Check visually that the cooling water hose is not twisted, broken or crushed for smooth water flow.
- Electric Power Train Cooling System for 2wd Models
- Electric Power Train Cooling System for Awd Models
- Li-Ion Battery Cooling System
Electric Power Train Cooling System for 2wd Models Nissan Ariya 2026
Draining
When draining from the drain plug
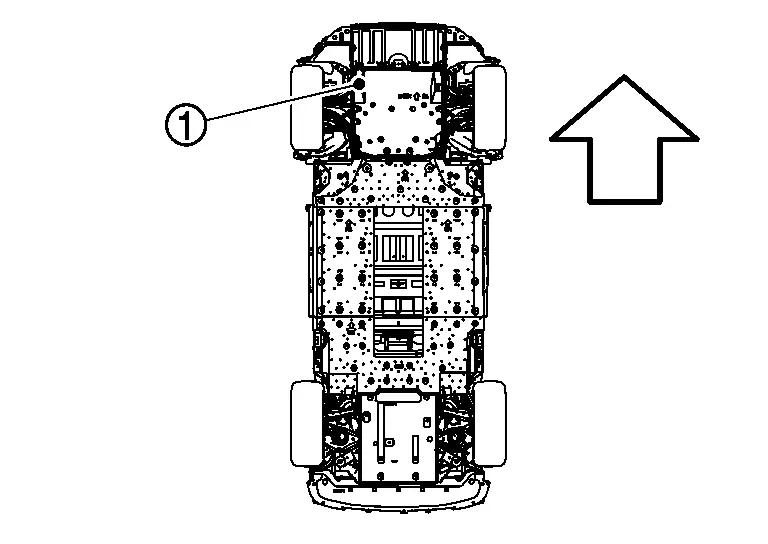
Remove front under cover rear  . Refer to Exploded View.
 |
: Nissan Ariya Vehicle front |
Install drain hose
Prepare A4 size clear file holder or soft plastic plate.Cut the clear file folder or plastic plate in half.
Roll half of clear file folder or plastic plate to create a temporary pipe.
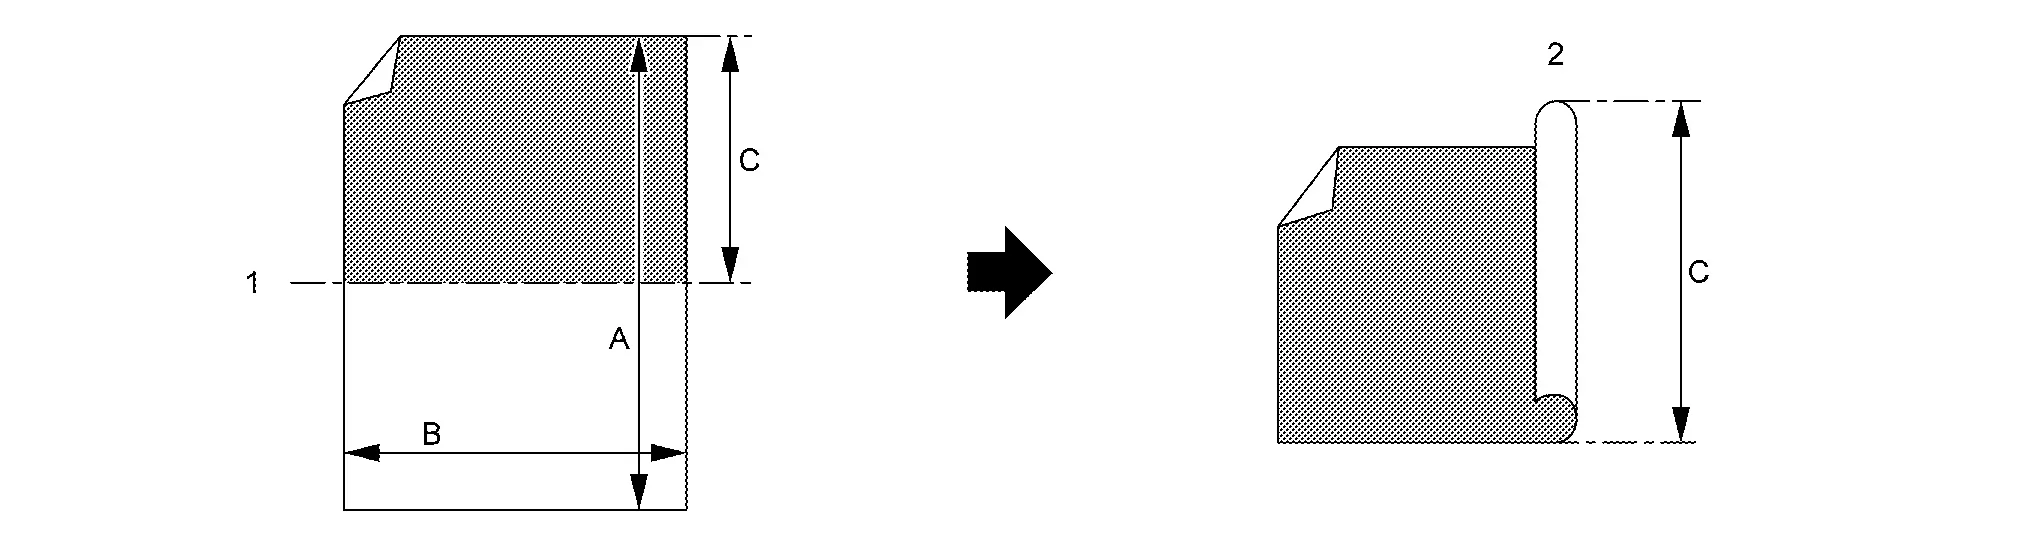
A 295 mm (11.61 in) approx. B 210 mm (8.27 in) approx. C 145 mm (5.71 in) approx. 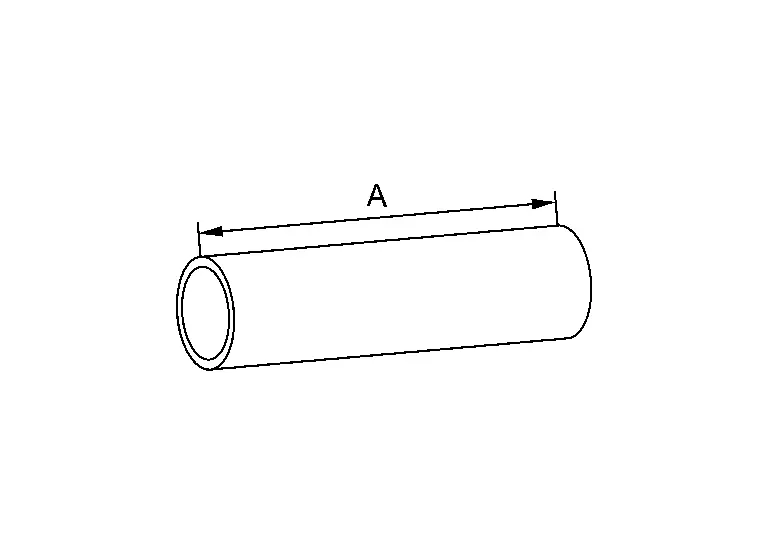
Open radiator drain plug and drain coolant.
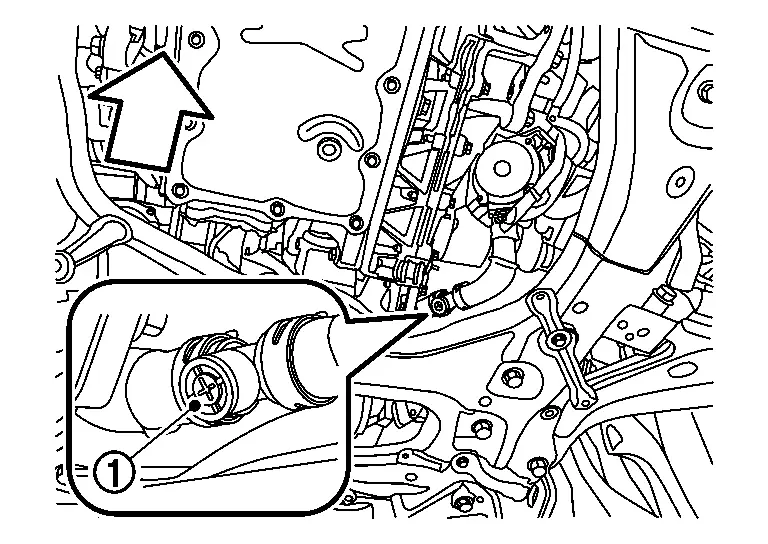
|
: Nissan Ariya Vehicle front |
Remove reservoir tank and drain coolant.
Remove the drain hose or temporary pipe.
When removing or installing parts
Remove front under cover rear . Refer to Exploded View.
|
: Nissan Ariya Vehicle front |
Install drain hose.
Prepare A4 size clear file holder or soft plastic plate.Cut the clear file folder or plastic plate in half.
Roll half of clear file folder or plastic plate to create a temporary pipe.
| A | 295 mm (11.61 in) approx. | B | 210 mm (8.27 in) approx. | C | 145 mm (5.71 in) approx. |
Remove drain plug and reservoir tank cap in order, then drain coolant.
|
: Nissan Ariya Vehicle front |
After confirming that the coolant has been drained from the drain, blow air from the reservoir tank to drain the coolant from the piping.
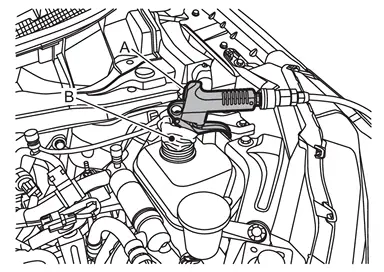
Clamp the radiator hose lower (between the traction motor inverter and electric water pump 1) with a hose clamp pliers or similar, and send air from the reservoir tank to drain the coolant in the piping.
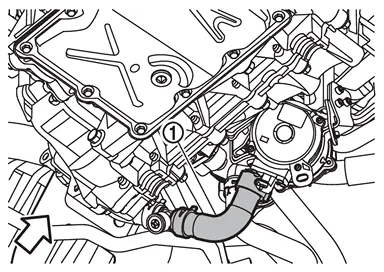
|
: Nissan Ariya Vehicle front |
Remove the hose clamp pliers attached to the hose and send air from the reservoir tank to drain the coolant in the piping.
Remove reservoir tank and drain coolant.
Remove the drain hose or temporary pipe.
Refilling
Other than vacuum coolant injection (after draining coolant only from the drain plug)
Install reservoir tank. Refer to LI-ION BATTERY COOLING SYSTEM : Exploded View.
Install drain plug. Refer to RADIATOR : Exploded View.
Check each hose clamp for tightening.
Refill coolant until reservoir tank MAX line level with coolant injection speed 3 liters/minute or less.
|
: MIN level |
Tighten reservoir tank cap, set Nissan Ariya vehicle READY, and then operate electric water pump.
When coolant level in the reservoir tank drops, power switch is turned OFF to stop electric water pump.
Repeat the above steps 4 to 6 until coolant level in reservoir tank does not drop.
When coolant level is stable, close and tighten reservoir tank cap.
Set Nissan Ariya vehicle READY, operate electric water pump for 10 minutes, circulate coolant sufficiently, and then check coolant level in the reservoir tank.
When coolant level drops, repeat the above steps 4 to 6.
When coolant level is stable, refilling is completed.
Other than vacuum coolant injection (after parts removal)
Install reservoir tank. Refer to LI-ION BATTERY COOLING SYSTEM : Exploded View.
Install drain plug. Refer to RADIATOR : Exploded View.
Check each hose clamp for tightening.
Remove the drain plug from the radiator outlet hose.
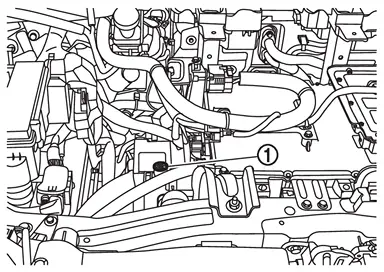
Refill coolant until reservoir tank MAX line level with coolant injection speed 3 liters/minute or less.
|
: MIN level |
When coolant comes out of the radiator outlet hose connector, tighten the drain plug.
Add coolant up to the “MAX” line in the reservoir tank and tighten the reservoir tank cap.
Remove the washer tank inlet. Refer to Exploded View.
Remove the fastening bolts of the reservoir tank and lift it 100 mm (3.94 in).
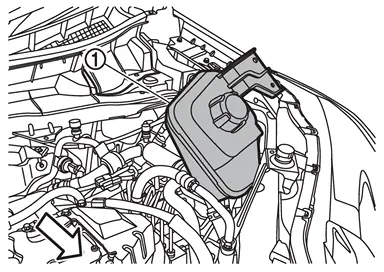
|
: Nissan Ariya Vehicle front |
Connect CONSULT, select "EV/HEV" > "Active Test" mode > "Electric Water Pump 1", and operate electric water pump 1 for 3 minutes with a duty rate of 20% according to the instructions on the CONSULT screen. Refer to Diagnosis Description.
Set the duty ratio to 10% and stop the water pump.
Return the reservoir tank to its original position, add coolant up to the “MAX” line, and then tighten the reservoir tank cap.
Lift the reservoir tank by 100 mm (3.94 in).
|
: Nissan Ariya Vehicle front |
The electric water pump 1 is operated for 2 minutes with a duty ratio of 30%.
Set the duty ratio to 10% and stop the water pump.
The electric water pump 1 is operated for 7 minutes with a duty ratio of 40%.
Set the duty ratio to 10% and stop the water pump.
The electric water pump 1 is operated for 10 minutes with a duty ratio of 80%.
End active testing.
Install the reservoir tank.
Remove the reservoir tank cap and add coolant up to the “MAX” line of the reservoir tank.
Tighten the reservoir tank cap, set the Nissan Ariya vehicle to READY state, and operate the electric water pump.
When the coolant level in the reservoir tank drops, power switch OFF position to stop the electric water pump.
Repeat steps 18 and 19 above until the coolant level in the reservoir tank stops dropping.
When the coolant level stops dropping, tighten the reservoir tank cap.
Refilling (for vacuum coolant injection)
Install reservoir tank. Refer to LI-ION BATTERY COOLING SYSTEM : Exploded View.
Install drain plug. Refer to RADIATOR : Exploded View.
Check each hose clamp for tightening.
Set vacuum coolant injection machine (commercial tool: capable negative pressure is 90 kpa or more) to the reservoir tank.
Perform water injection according to each instruction manual.
Refill coolant up to "MAX" line level of reservoir tank and tighten the cap.
Remove the washer tank inlet. Refer to Exploded View.
Remove the fastening bolts of the reservoir tank and lift it 100 mm (3.94 in).
|
: Nissan Ariya Vehicle front |
Connect CONSULT, select "EV/HEV" > "Active Test" mode > "Electric Water Pump 1", and operate electric water pump 1 for 10 minutes with a duty ratio of 60% according to the instructions on the CONSULT screen. Refer to Diagnosis Description.
Set the duty ratio to 10% and turn off the water pump.
Return the reservoir tank to its original position, add coolant up to the “MAX” line, and then tighten the reservoir tank cap.
Lift the reservoir tank by 100 mm (3.94 in).
|
: Nissan Ariya Vehicle front |
The electric water pump 1 is operated for 10 minutes with a duty ratio of 80%.
End active testing.
Install the reservoir tank.
Remove the reservoir tank cap and add coolant up to the “MAX” line of the reservoir tank.
Tighten the reservoir tank cap, set the Nissan Ariya vehicle to READY state, and operate the electric water pump.
When the coolant level in the reservoir tank drops, power switch OFF position to stop the electric water pump.
Repeat steps 8 to 17 above until the coolant level in the reservoir tank stops dropping.
When the coolant level stops dropping, tighten the reservoir tank cap.
CHECK WATER FLOW SOUND
Operate the electric water pump for 1 minute.
If water flow sound is heard, operate electric water pump until the sound cannot be heard.
When water flow sound cannot be heard, refill coolant up to "MAX" line level of reservoir tank.
Electric Power Train Cooling System for Awd Models Nissan Ariya 1st generation
Draining
When draining from the drain plug
Remove front under cover rear . Refer to Exploded View.
|
: Nissan Ariya Vehicle front |
Install drain hose
Prepare A4 size clear file holder or soft plastic plate.Cut the clear file folder or plastic plate in half.
Roll half of clear file folder or plastic plate to create a temporary pipe.
A 295 mm (11.61 in) approx. B 210 mm (8.27 in) approx. C 145 mm (5.71 in) approx.
Open radiator drain plug and drain coolant.
|
: Nissan Ariya Vehicle front |
Remove reservoir tank and drain coolant.
Remove the drain hose or temporary pipe.
When removing or installing parts
Remove front under cover rear . Refer to Exploded View.
|
: Nissan Ariya Vehicle front |
Install drain hose
Prepare A4 size clear file holder or soft plastic plate.Cut the clear file folder or plastic plate in half.
Roll half of clear file folder or plastic plate to create a temporary pipe.
| A | 295 mm (11.61 in) approx. | B | 210 mm (8.27 in) approx. | C | 145 mm (5.71 in) approx. |
Remove drain plug and reservoir tank cap in order, then drain coolant.
|
: Nissan Ariya Vehicle front |
After confirming that the coolant has been drained from the drain, blow air from the reservoir tank to drain the coolant from the piping.
Clamp the radiator hose lower (between the traction motor inverter and electric water pump 1) with a hose clamp pliers or similar, and send air from the reservoir tank to drain the coolant in the piping.
|
: Nissan Ariya Vehicle front |
Clamp the traction motor inlet hose (traction motor side) with hose clamp pliers (A) or similar, and send air from the reservoir tank to drain the coolant in the piping.
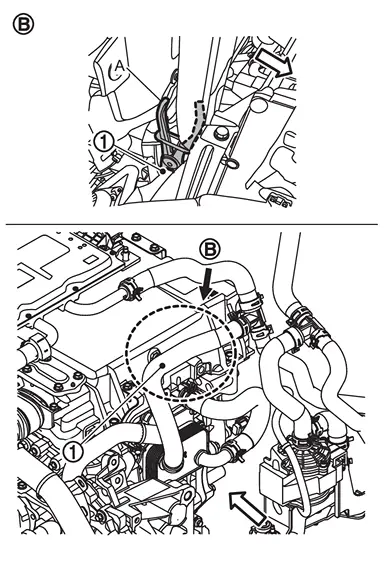
|
: Nissan Ariya Vehicle front |
|
: Arrow view |
Remove the hose clamp pliers attached to the hose and send air from the reservoir tank to drain the coolant in the piping.
Remove reservoir tank and drain coolant.
Remove the drain hose or temporary pipe.
Refilling
Other than vacuum coolant injection (after draining coolant only from the drain plug)
Install reservoir tank. Refer to LI-ION BATTERY COOLING SYSTEM : Exploded View.
Install drain plug. Refer to RADIATOR : Exploded View.
Check each hose clamp for tightening.
Remove the drain plug from the radiator outlet hose.
Refill coolant until reservoir tank MAX line level with coolant injection speed 3 liters/minute or less.
|
: MIN level |
When coolant comes out of the radiator outlet hose connector, tighten the drain plug.
Add coolant up to the “MAX” line in the reservoir tank and tighten the reservoir tank cap.
Remove the washer tank inlet. Refer to Exploded View.
Remove the fastening bolts of the reservoir tank and lift it 100 mm (3.94 in).
|
: Nissan Ariya Vehicle front |
Clamp the traction motor inlet hose (traction motor side) with hose clamp pliers (A) or similar.
|
: Nissan Ariya Vehicle front |
|
: Arrow view |
Connect CONSULT, select "EV/HEV" > "Active Test" mode > "Electric Water Pump 1", and operate Electric Water Pump 1 for 3 minutes at a duty rate of 20% according to the CONSULT display screen. Refer to Diagnosis Description.
Set the duty ratio to 10% and turn off the water pump.
Return the reservoir tank to its original position, add coolant up to the “MAX” line, and then tighten the reservoir tank cap.
Lift the reservoir tank by 100 mm (3.94 in).
|
: Nissan Ariya Vehicle front |
Remove the hose clamp pliers installed in step 10.
Clamp water hose 2 and water hose 4  with hose clamp pliers or similar.
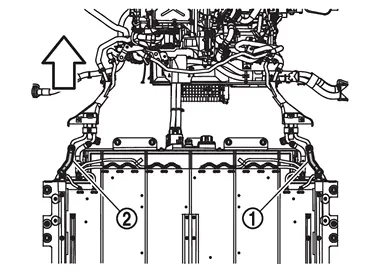
|
: Nissan Ariya Vehicle front |
Run electric water pump 1 at a duty ratio of 80% for 10 minutes.
Set the duty ratio to 10% and turn off the water pump.
Remove the hose clamp pliers installed in step 16.
Run electric water pump 1 at a duty ratio of 80% for 10 minutes.
End active testing.
Install the reservoir tank.
Remove the reservoir tank cap and add coolant up to the “MAX” line of the reservoir tank.
Tighten the reservoir tank cap, put the Nissan Ariya vehicle into READY mode, and operate the electric water pump.
When the coolant level in the reservoir tank drops, power switch OFF to stop the electric water pump.
Repeat steps 20 to 21 above until the coolant level in the reservoir tank stops dropping.
When the coolant level stops dropping, tighten the reservoir tank cap.
Other than vacuum coolant injection (after parts removal)
Install reservoir tank. Refer to LI-ION BATTERY COOLING SYSTEM : Exploded View.
Install drain plug. Refer to RADIATOR : Exploded View.
Check each hose clamp for tightening.
Remove the drain plug from the radiator outlet hose.
Refill coolant until reservoir tank MAX line level with coolant injection speed 3 liters/minute or less.
|
: MIN level |
When coolant comes out of the radiator outlet hose connector, tighten the drain plug.
Add coolant up to the “MAX” line in the reservoir tank and tighten the reservoir tank cap.
Remove the washer tank inlet. Refer to Exploded View.
Remove the fastening bolts of the reservoir tank and lift it 100 mm (3.94 in).
|
: Nissan Ariya Vehicle front |
Connect CONSULT, select "EV/HEV" > "Active Test" mode > "Electric Water Pump 1", and operate electric water pump 1 for 3 minutes with a duty rate of 20% according to the instructions on the CONSULT screen. Refer to Diagnosis Description.
Set the duty ratio to 10% and stop the water pump.
Return the reservoir tank to its original position, add coolant up to the “MAX” line, and then tighten the reservoir tank cap.
Lift the reservoir tank by 100 mm (3.94 in).
|
: Nissan Ariya Vehicle front |
The electric water pump 1 is operated for 2 minutes with a duty ratio of 30%.
Set the duty ratio to 10% and stop the water pump.
The electric water pump 1 is operated for 7 minutes with a duty ratio of 40%.
Set the duty ratio to 10% and stop the water pump.
The electric water pump 1 is operated for 10 minutes with a duty ratio of 80%.
End active testing.
Install the reservoir tank.
Remove the reservoir tank cap and add coolant up to the “MAX” line of the reservoir tank.
Tighten the reservoir tank cap, set the Nissan Ariya vehicle to READY state, and operate the electric water pump.
When the coolant level in the reservoir tank drops, power switch OFF position to stop the electric water pump.
Repeat steps 18 and 19 above until the coolant level in the reservoir tank stops dropping.
When the coolant level stops dropping, tighten the reservoir tank cap.
Refilling (for vacuum coolant injection)
Install reservoir tank. Refer to LI-ION BATTERY COOLING SYSTEM : Exploded View.
Install drain plug. Refer to RADIATOR : Exploded View.
Check each hose clamp for tightening.
Set vacuum coolant injection machine (commercial tool: capable negative pressure is 90 kpa or more) to the reservoir tank.
Perform water injection according to each instruction manual.
Refill coolant up to "MAX" line level of reservoir tank and tighten the cap.
Remove the washer tank inlet. Refer to Exploded View.
Remove the fastening bolts of the reservoir tank and lift it 100 mm (3.94 in).
|
: Nissan Ariya Vehicle front |
Clamp water hose 2 and water hose 4  with hose clamp pliers or similar.
|
: Nissan Ariya Vehicle front |
Connect CONSULT, select "EV/HEV" > "Active Test" mode > "Electric Water Pump 1", and operate electric water pump 1 for 10 minutes with a duty ratio of 60% according to the instructions on the CONSULT screen. Refer to Diagnosis Description.
Set the duty ratio to 10% and turn off the water pump.
Return the reservoir tank to its original position, add coolant up to the “MAX” line, and then tighten the reservoir tank cap.
Lift the reservoir tank by 100 mm (3.94 in).
|
: Nissan Ariya Vehicle front |
Remove the water hose 2 and water hose 4 with hose clamp pliers or similar.
Clamp the traction motor inlet hose (traction motor side) with hose clamp pliers or similar.
|
: Nissan Ariya Vehicle front |
|
: Arrow view |
Set the duty ratio to 60% again and run electric water pump 1 for 5 minutes.
Set the duty ratio to 10% and turn off the water pump.
Remove the hose clamp from the traction motor inlet hose (traction motor side).
The electric water pump 1 is operated for 10 minutes with a duty ratio of 80%.
End active testing.
Install the reservoir tank.
Remove the reservoir tank cap and add coolant up to the “MAX” line of the reservoir tank.
Tighten the reservoir tank cap, set the Nissan Ariya vehicle to READY state, and operate the electric water pump.
When the coolant level in the reservoir tank drops, power switch OFF position to stop the electric water pump.
Repeat steps 8 to 23 above until the coolant level in the reservoir tank stops dropping.
When the coolant level stops dropping, tighten the reservoir tank cap.
CHECK WATER FLOW SOUND
Operate the electric water pump for 1 minute.
If water flow sound is heard, operate electric water pump until the sound cannot be heard.
When water flow sound cannot be heard, refill coolant up to "MAX" line level of reservoir tank.
Li-Ion Battery Cooling System Nissan Ariya: FE0
Draining
Remove front under cover rear and Li-ion battery under cover (front) . Refer to Exploded View, Exploded View (66kWh 2WD), Exploded View (66kWh AWD), Exploded View (91kWh 2WD), or Exploded View (91kWh AWD).
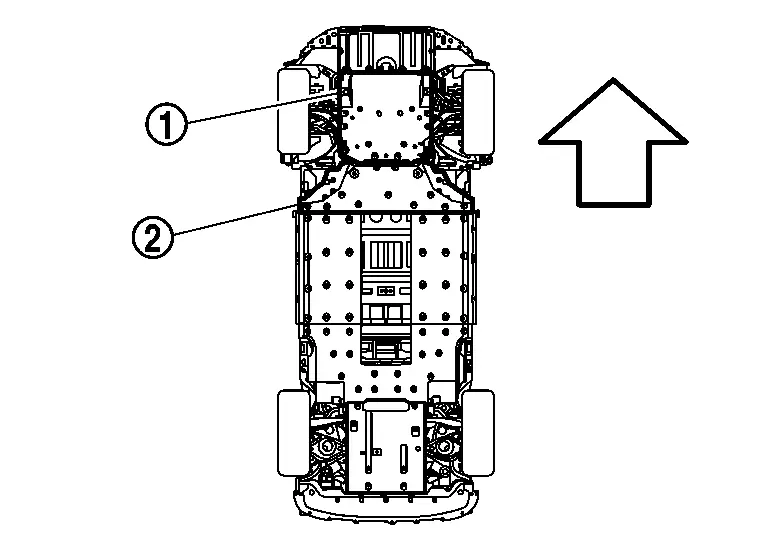
|
: Nissan Ariya Vehicle front |
Disconnect water hose of Li-ion battery side , remove reservoir tank cap, and then drain coolant.
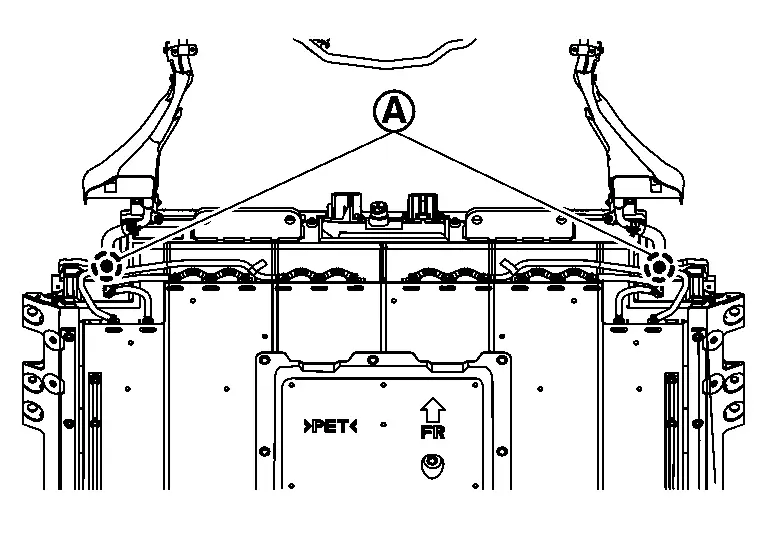
Drain coolant completely by blowing air from ports shown by arrow mark  .
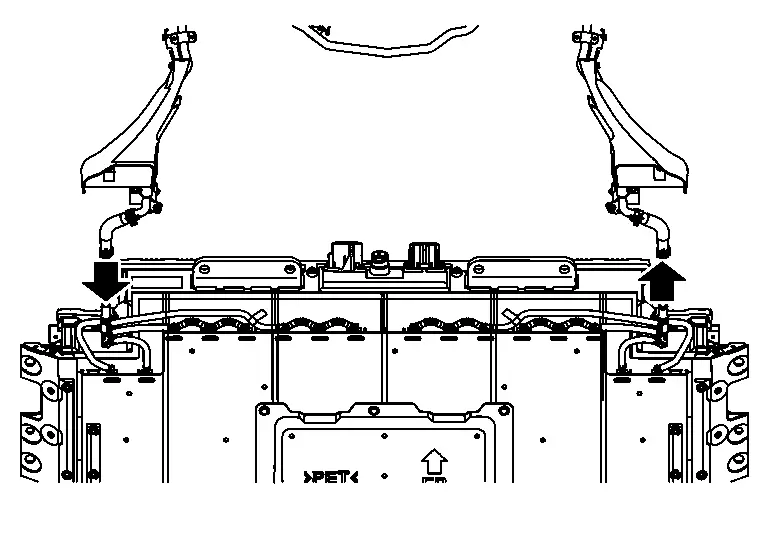
Remove reservoir tank and drain coolant.
Refilling
Install reservoir tank. Refer to LI-ION BATTERY COOLING SYSTEM : Exploded View (2WD) or LI-ION BATTERY COOLING SYSTEM : Exploded View (AWD).
Install removed hose.
Check each hose clamp for tightening.
Set vacuum coolant injection machine (commercial tool: capable negative pressure is 90 kpa or more) to the reservoir tank.
Perform water injection according to each instruction manual.
Refill coolant up to "MAX" line level of reservoir tank and tighten the cap.
Water pump for cooling battery is operated under the active test by WORK SUPPORT of CONSULT at READY state. After sufficiently circulating coolant (about 30 minutes recommended), if coolant level in the reservoir tank is low, refill coolant to "MAX" line level.
CHECK WATER FLOW SOUND
Operate the electric water pump for 1 minute.
If water flow sound is heard, operate electric water pump until the sound cannot be heard.
When water flow sound cannot be heard, refill coolant up to "MAX" line level of reservoir tank.