Camshaft Position Sensor
Removal
REMOVAL
COMPONENTS (REMOVAL)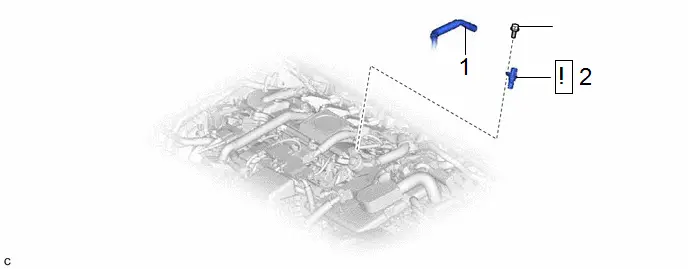
Procedure | Part Name Code |  |  |  |
|
|---|---|---|---|---|---|
1 |
NO. 1 FUEL VAPOR FEED HOSE |
23826 |
- |
- |
- |
2 |
CAMSHAFT POSITION SENSOR |
11101E |
 |
- |
- |
● |
Non-reusable part |
★ |
Precoated part |
PROCEDURE
1. DISCONNECT NO. 1 FUEL VAPOR FEED HOSE

2. REMOVE CAMSHAFT POSITION SENSOR
 |
NOTICE: If a camshaft position sensor has been struck or dropped, replace it. |

Installation
INSTALLATION
COMPONENTS (INSTALLATION)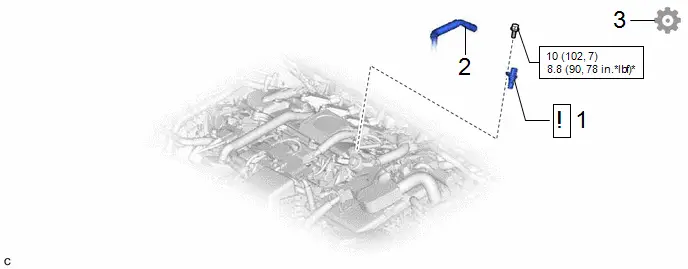
Procedure | Part Name Code |  |  |  |
|
|---|---|---|---|---|---|
1 |
CAMSHAFT POSITION SENSOR |
11101E |
 |
- |
- |
2 |
NO. 1 FUEL VAPOR FEED HOSE |
23826 |
- |
- |
- |
3 |
INSPECT FOR ENGINE OIL LEAK |
- |
- |
- |
 |
 |
N*m (kgf*cm, ft.*lbf): Specified torque |
* |
For use with a union nut wrench |
● |
Non-reusable part |
★ |
Precoated part |
PROCEDURE
1. INSTALL CAMSHAFT POSITION SENSOR
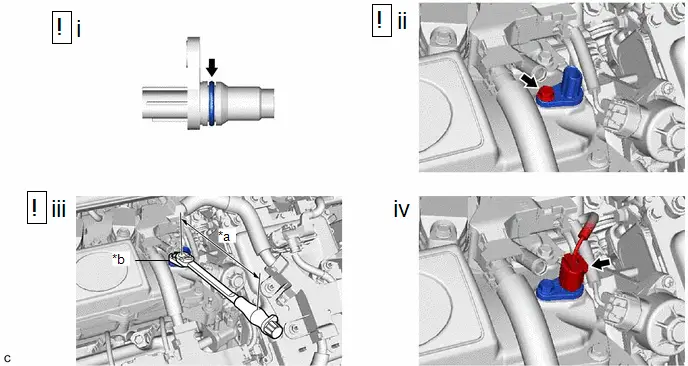
*a |
Torque Wrench Fulcrum Length |
*b |
10 mm Union Nut Wrench |
(1) Apply a light coat of engine oil to the O-ring of the camshaft position sensor.
NOTICE:
If reusing a camshaft position sensor, check the O-ring.
(2) Temporarily install the camshaft position sensor to the cylinder head cover sub-assembly with a new bolt.
NOTICE:
- Make sure that the O-ring is not cracked or moved out of place when installing the camshaft position sensor.
- If a camshaft position sensor has been struck or dropped, replace it.
(3) Using a 10 mm union nut wrench, tighten the bolt.
Torque:
Specified tightening torque :
10 N·m {102 kgf·cm, 7 ft·lbf}
HINT:
- Calculate the torque wrench reading when changing the fulcrum length of the torque wrench.
Click here


- When using a 10 mm union nut wrench (fulcrum length of 22 mm (0.866 in.)) torque wrench (fulcrum length of 162 mm (6.38 in.)):
8.8 N*m (90 kgf*cm, 78 in.*lbf)
(4) Connect the camshaft position sensor connector.
2. CONNECT NO. 1 FUEL VAPOR FEED HOSE
3. INSPECT FOR ENGINE OIL LEAK
Click here 