Steering Pad Switch
Removal
REMOVAL
The necessary procedures (adjustment, calibration, initialization or registration) that must be performed after parts are removed and installed, or replaced during steering pad switch assembly removal/installation are shown below.
HINT:
When the cable is disconnected / reconnected to the auxiliary battery terminal, systems temporarily stop operating. However, each system has a function that completes learning the first time the system is used.
Learning completes when Toyota Prius vehicle is drivenEffect/Inoperative Function when Necessary Procedure not Performed | Necessary Procedure | Link |
|---|---|---|
Front Camera System |
Drive the Toyota Prius vehicle straight ahead at 35 km/h or more for 5 seconds or more. |
 |
Effect/Inoperative Function when Necessary Procedure not Performed | Necessary Procedure | Link |
|---|---|---|
| *1: w/o Power Back Door System *2: w/ Power Back Door System |
||
Power Door Lock Control System*1
|
Perform door unlock operation with door control switch or electrical key transmitter sub-assembly switch. |
 |
Power Back Door System*2 |
Reset back door close position |
 |
Air Conditioning System |
for HEV Model:
|
- |
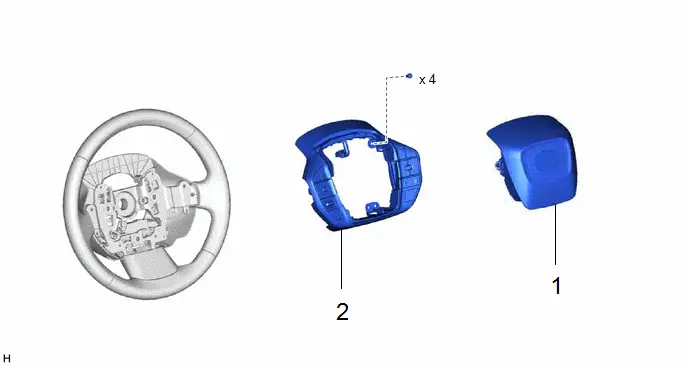
Procedure | Part Name Code |  |  |  |
|
|---|---|---|---|---|---|
1 |
HORN BUTTON ASSEMBLY |
45130 |
- |
- |
- |
2 |
STEERING PAD SWITCH ASSEMBLY |
84250A |
- |
- |
- |
PROCEDURE
1. REMOVE HORN BUTTON ASSEMBLY
Click here 
2. REMOVE STEERING PAD SWITCH ASSEMBLY

Installation
INSTALLATION
COMPONENTS (INSTALLATION)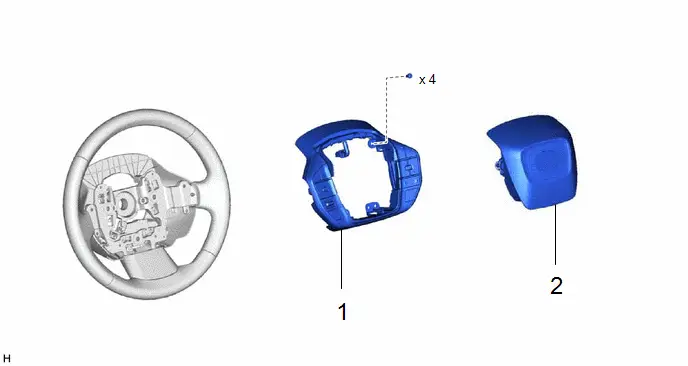
Procedure | Part Name Code |  |  |  |
|
|---|---|---|---|---|---|
1 |
STEERING PAD SWITCH ASSEMBLY |
84250A |
- |
- |
- |
2 |
HORN BUTTON ASSEMBLY |
45130 |
- |
- |
- |
PROCEDURE
1. INSTALL STEERING PAD SWITCH ASSEMBLY
2. INSTALL HORN BUTTON ASSEMBLY
Click here 