Front Door Opening Trim Weatherstrip
- Removal
- Installation
Removal
REMOVAL
HINT:
- Use the same procedure for the RH side and LH side.
- The following procedure is for the LH side.
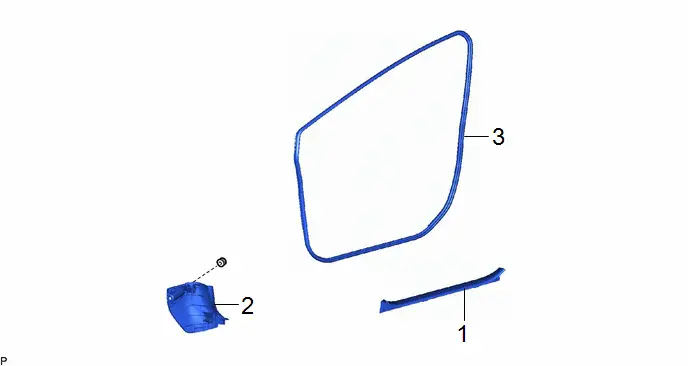
Procedure | Part Name Code |  |  |  |
|
|---|---|---|---|---|---|
1 |
FRONT DOOR SCUFF PLATE |
67914 |
- |
- |
- |
2 |
COWL SIDE TRIM BOARD |
62112 |
- |
- |
- |
3 |
FRONT DOOR OPENING TRIM WEATHERSTRIP |
62312B |
- |
- |
- |
PROCEDURE
1. REMOVE FRONT DOOR SCUFF PLATE
Click here 

2. REMOVE COWL SIDE TRIM BOARD
Click here 

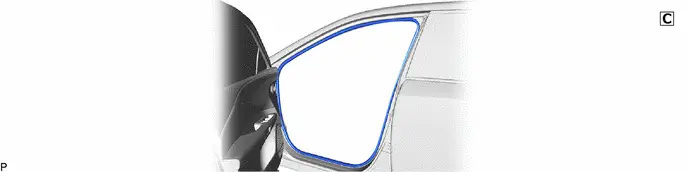
3. REMOVE FRONT DOOR OPENING TRIM WEATHERSTRIP
Installation
INSTALLATION
HINT:
- Use the same procedure for the RH side and LH side.
- The following procedure is for the LH side.
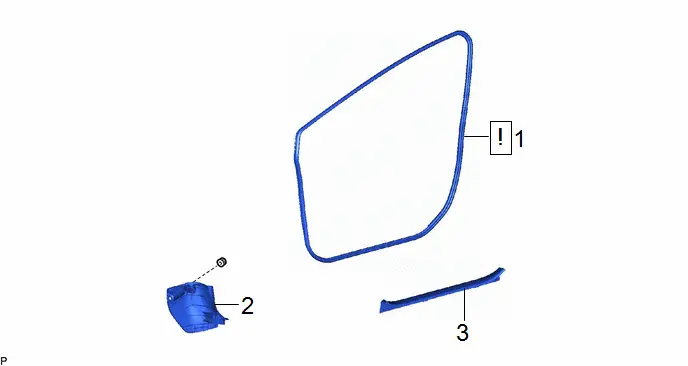
Procedure | Part Name Code |  |  |  |
|
|---|---|---|---|---|---|
1 |
FRONT DOOR OPENING TRIM WEATHERSTRIP |
62312B |
 |
- |
- |
2 |
COWL SIDE TRIM BOARD |
62112 |
- |
- |
- |
3 |
FRONT DOOR SCUFF PLATE |
67914 |
- |
- |
- |
PROCEDURE
1. INSTALL FRONT DOOR OPENING TRIM WEATHERSTRIP
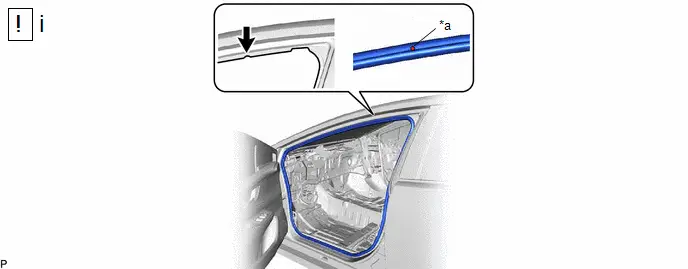
*a |
Paint Mark |
- |
- |
 |
Spot Weld |
- |
- |
(1) Align the paint mark on the front door opening trim weatherstrip with the spot weld on the Toyota Prius vehicle body indicated by the arrow in the illustration, and install the front door opening trim weatherstrip.
NOTICE:
- Make sure that the paint mark is aligned with the spot weld when installing the front door opening trim weatherstrip, otherwise water ingress may occur.
- After installation, check that the corners fit correctly.
HINT:
- Make sure to install the part of the front door opening trim weatherstrip near the paint mark first.
- The color of the paint marks on the front door opening trim weatherstrip LH and front door opening trim weatherstrip RH are different.
Paint Mark:
Location
Color
for LH Side
Yellow
for RH Side
White
2. INSTALL COWL SIDE TRIM BOARD
3. INSTALL FRONT DOOR SCUFF PLATE