Rear Power Window Switch
Removal
REMOVAL
HINT:
- Use the same procedure for the RH side and LH side.
- The following procedure is for the LH side.
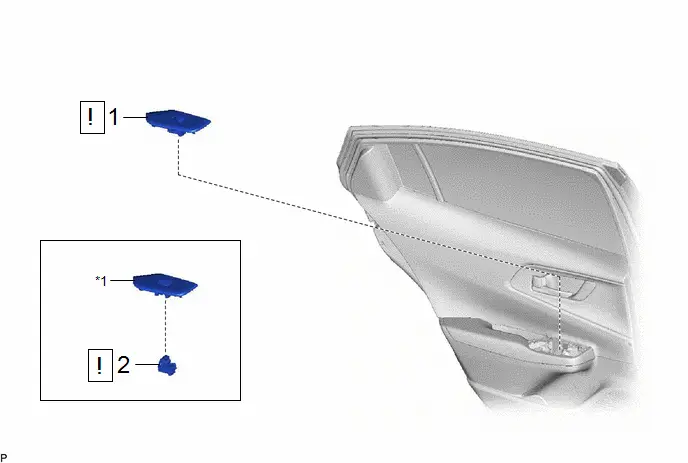
Procedure | Part Name Code |  |  |  |
|
|---|---|---|---|---|---|
1 |
REAR POWER WINDOW REGULATOR SWITCH ASSEMBLY WITH REAR DOOR ARMREST BASE PANEL |
- |
 |
- |
- |
2 |
REAR POWER WINDOW REGULATOR SWITCH ASSEMBLY |
84810D |
 |
- |
- |
*1 |
REAR DOOR ARMREST BASE PANEL |
- |
- |
PROCEDURE
1. REMOVE REAR POWER WINDOW REGULATOR SWITCH ASSEMBLY WITH REAR DOOR ARMREST BASE PANEL
 |
Click here |


2. REMOVE REAR POWER WINDOW REGULATOR SWITCH ASSEMBLY
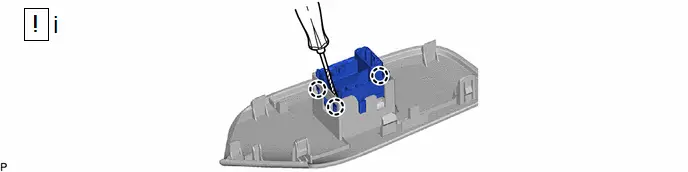
(1) Using a screwdriver with its tip wrapped with protective tape, disengage the 3 claws to remove the rear power window regulator switch assembly.
Inspection
INSPECTION
PROCEDURE
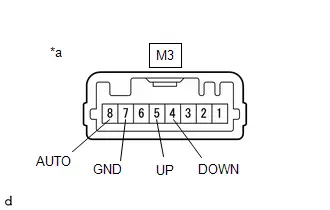
1. INSPECT REAR POWER WINDOW REGULATOR SWITCH ASSEMBLY (for LH/RH DOOR)
(a) Check the switch function.
(1) Measure the resistance according to the value(s) in the table below. Standard Resistance:  Click Location & Routing(M3) Click Connector(M3)
If the result is not as specified, replace the rear power window regulator switch assembly (for LH/RH door). |
|
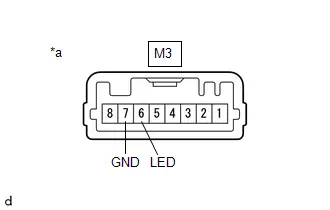
(b) Check that the LED illuminates.
(1) Apply auxiliary battery voltage to the power window regulator switch assembly and check that the LED illuminates. OK:
If the result is not as specified, replace the rear power window regulator switch assembly (for LH/RH door). |
|
Installation
INSTALLATION
HINT:
- Use the same procedure for the RH side and LH side.
- The following procedure is for the LH side.
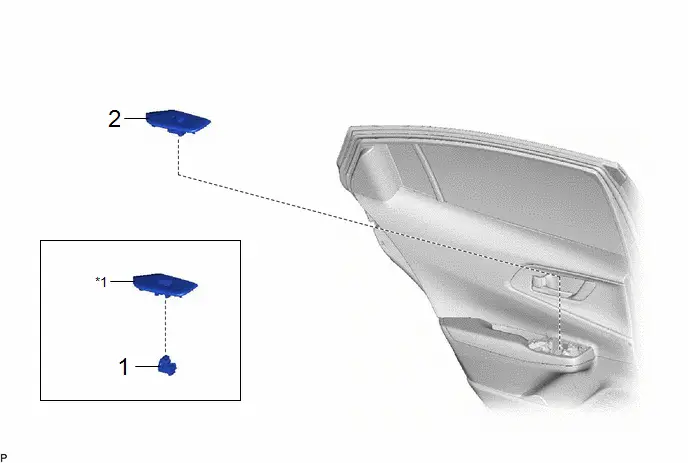
Procedure | Part Name Code |  |  |  |
|
|---|---|---|---|---|---|
1 |
REAR POWER WINDOW REGULATOR SWITCH ASSEMBLY |
84810D |
- |
- |
- |
2 |
REAR POWER WINDOW REGULATOR SWITCH ASSEMBLY WITH REAR DOOR ARMREST BASE PANEL |
- |
- |
- |
- |
*1 |
REAR DOOR ARMREST BASE PANEL |
- |
- |
PROCEDURE
1. INSTALL REAR POWER WINDOW REGULATOR SWITCH ASSEMBLY
2. INSTALL REAR POWER WINDOW REGULATOR SWITCH ASSEMBLY WITH REAR DOOR ARMREST BASE PANEL