Panoramic View Monitor Switch
Removal
REMOVAL
COMPONENTS (REMOVAL)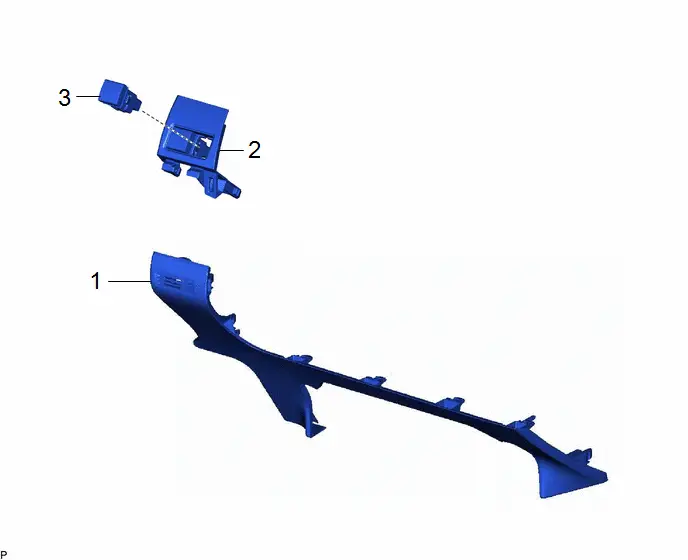
Procedure | Part Name Code |  |  |  |
|
|---|---|---|---|---|---|
1 |
LOWER CENTER INSTRUMENT PANEL FINISH PANEL |
55434B |
- |
- |
- |
2 |
LOWER CENTER INSTRUMENT CLUSTER FINISH PANEL SUB-ASSEMBLY |
55406B |
- |
- |
- |
3 |
PANORAMIC VIEW MONITOR SWITCH |
84721B |
- |
- |
- |
PROCEDURE
1. REMOVE LOWER CENTER INSTRUMENT PANEL FINISH PANEL
Click here 

2. REMOVE LOWER CENTER INSTRUMENT CLUSTER FINISH PANEL SUB-ASSEMBLY
Click here 

3. REMOVE PANORAMIC VIEW MONITOR SWITCH

 |
Remove in this Direction |
- |
- |
Inspection
INSPECTION
PROCEDURE
1. INSPECT PANORAMIC VIEW MONITOR SWITCH
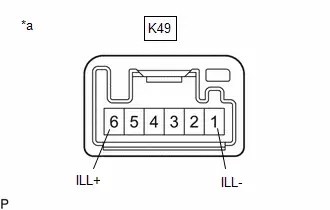
(a) Measure the resistance according to the value(s) in the table below. Standard Resistance:  Click Location & Routing(K49) Click Connector(K49)
If the result is not as specified, replace the panoramic view monitor switch. |
|

(b) Check that the switch illumination illuminates.
(1) Apply auxiliary battery voltage to the panoramic view monitor switch and check that the switch illumination illuminates. OK:  Click Location & Routing(K49) Click Connector(K49)
If the result is not as specified, replace the panoramic view monitor switch. |
|
Installation
INSTALLATION
COMPONENTS (INSTALLATION)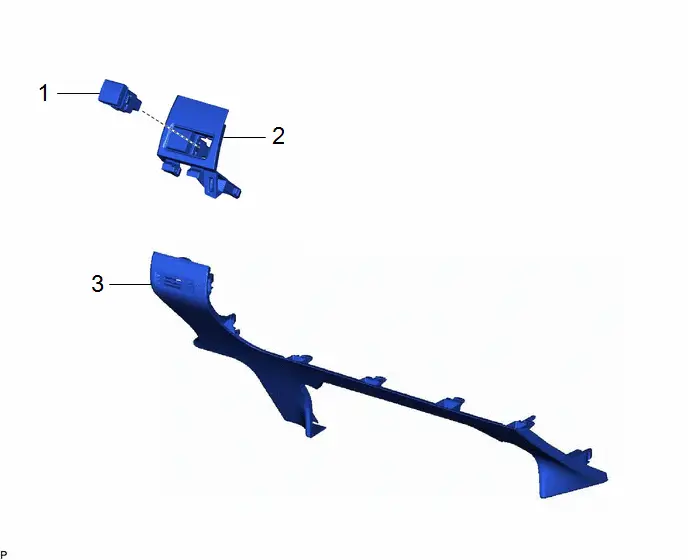
Procedure | Part Name Code |  |  |  |
|
|---|---|---|---|---|---|
1 |
PANORAMIC VIEW MONITOR SWITCH |
84721B |
- |
- |
- |
2 |
LOWER CENTER INSTRUMENT CLUSTER FINISH PANEL SUB-ASSEMBLY |
55406B |
- |
- |
- |
3 |
LOWER CENTER INSTRUMENT PANEL FINISH PANEL |
55434B |
- |
- |
- |
PROCEDURE
1. INSTALL PANORAMIC VIEW MONITOR SWITCH
2. INSTALL LOWER CENTER INSTRUMENT CLUSTER FINISH PANEL SUB-ASSEMBLY
3. INSTALL LOWER CENTER INSTRUMENT PANEL FINISH PANEL