Heat Exchanger Temperature Sensor
- Removal
- Inspection
- Installation
Removal
REMOVAL
The necessary procedures (adjustment, calibration, initialization or registration) that must be performed after parts are removed and installed, or replaced during thermostat assembly removal/installation are shown below.
Necessary Procedures After Parts Removed/Installed/ReplacedReplaced Part or Performed Procedure | Necessary Procedures | Effect/Inoperative Function When Necessary Procedures are not Performed | Link |
|---|---|---|---|
| *: Even when not replacing the part, it is necessary to perform the specified necessary procedures after installation. | |||
Front bumper assembly* |
Front television camera view adjustment |
Panoramic View Monitor System |
 |
Advanced Park |
 |
||
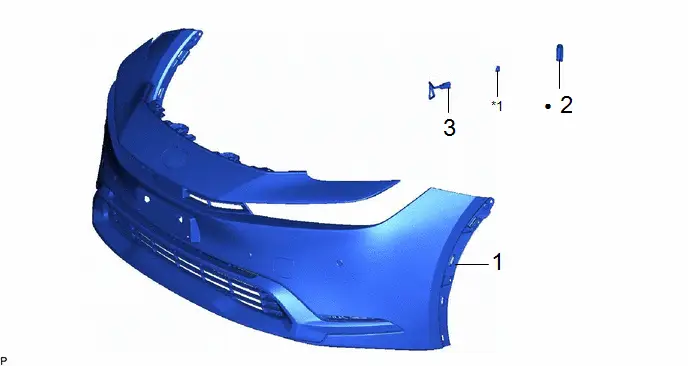
Procedure | Part Name Code |  |  |  |
|
|---|---|---|---|---|---|
1 |
FRONT BUMPER ASSEMBLY |
- |
- |
- |
- |
2 |
NO. 1 COOLER PACKING |
88578Z |
- |
- |
- |
3 |
NO. 1 AIR CONDITIONING THERMISTOR ASSEMBLY |
88620Q |
- |
- |
- |
*1 |
NO. 1 PIPING CLAMP |
- |
- |
● |
Non-reusable part |
- |
- |
PROCEDURE
1. REMOVE FRONT BUMPER ASSEMBLY
Click here 
2. REMOVE NO. 1 COOLER PACKING

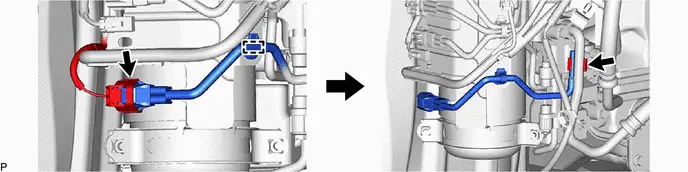
3. REMOVE NO. 1 AIR CONDITIONING THERMISTOR ASSEMBLY
Inspection
INSPECTION
PROCEDURE
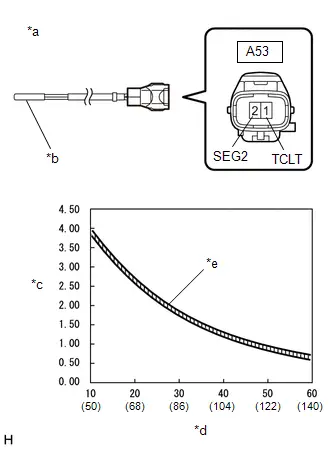
1. INSPECT NO. 1 AIR CONDITIONINGTHERMISTOR ASSEMBLY
(a) Measure the resistance according to the value(s) in the table below. Standard Resistance:  Click Location & Routing(A53) Click Connector(A53)
NOTICE:
HINT: As the temperature increases, the resistance decreases (see the graph). If the result is not as specified, replace the No. 1 air conditioning thermistor assembly. |
|
Installation
INSTALLATION
COMPONENTS (INSTALLATION)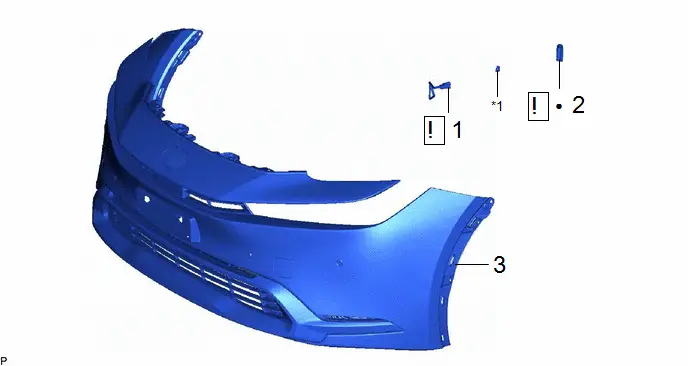
Procedure | Part Name Code |  |  |  |
|
|---|---|---|---|---|---|
1 |
NO. 1 AIR CONDITIONING THERMISTOR ASSEMBLY |
88620Q |
 |
- |
- |
2 |
NO. 1 COOLER PACKING |
88578Z |
 |
- |
- |
3 |
FRONT BUMPER ASSEMBLY |
- |
- |
- |
- |
*1 |
NO. 1 PIPING CLAMP |
- |
- |
● |
Non-reusable part |
- |
- |
PROCEDURE
1. INSTALL NO. 1 AIR CONDITIONING THERMISTOR ASSEMBLY
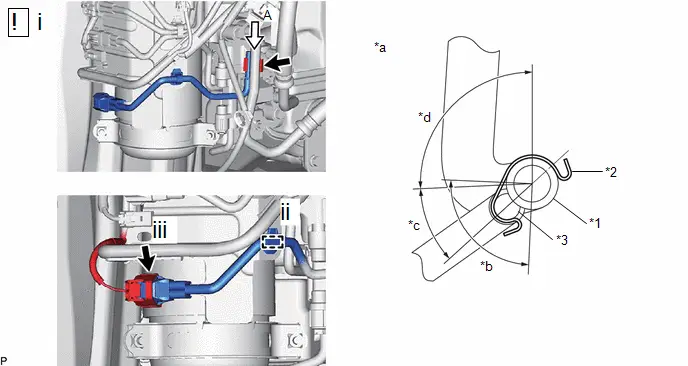
*1 |
No. 1 Discharge Hose Sub-assembly |
*2 |
No. 1 Piping Clamp |
*3 |
No. 1 Air Conditioning Thermistor Assembly |
- |
- |
*a |
View A |
*b |
Installation Angle (90°) |
*c |
Installation Angle (39.7°) |
*d |
Installation Angle (92.6°) |
(1) Install the No. 1 air conditioning thermistor assembly with the No. 1 piping clamp as shown in the illustration.
(2) Engage the clamp.
(3) Connect the connector.
2. INSTALL NO. 1 COOLER PACKING
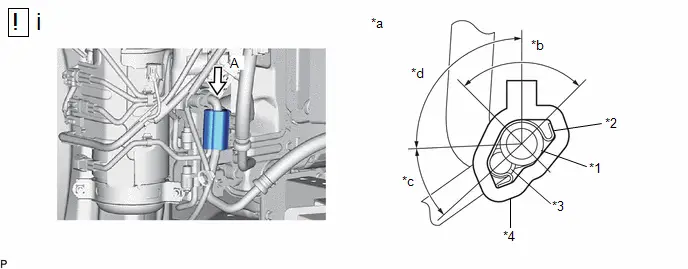
*1 |
No. 1 Discharge Hose Sub-assembly |
*2 |
No. 1 Piping Clamp |
*3 |
No. 1 Air Conditioning Thermistor Assembly |
*4 |
No. 1 Cooler Packing |
*a |
View A |
*b |
Installation Angle (90°) |
*c |
Installation Angle (39.7°) |
*d |
Installation Angle (92.6°) |
(1) Perform the following procedure to install the No. 1 cooler packing.
1. Remove any remaining No. 1 cooler packing from the No. 1 air conditioning thermostat assembly and No. 1 discharge hose sub-assembly.
2. Remove the release paper from a new No. 1 cooler packing.
3. Install the No. 1 cooler packing as shown in the illustration.
3. INSTALL FRONT BUMPER ASSEMBLY
Click here 