Refrigerant (for Hfc-134a(r134a))
- On-vehicle Inspection
- Replacement
On-vehicle Inspection
ON-VEHICLE INSPECTION
HINT:
- Steps 2 to 9 specify the procedure to determine the cause of a refrigerant leak.
- Step 10 specifies the procedure to check if there is a clog in the expansion valve.
PROCEDURE
1. INSPECT REFRIGERANT PRESSURE WITH MANIFOLD GAUGE SET
HINT:
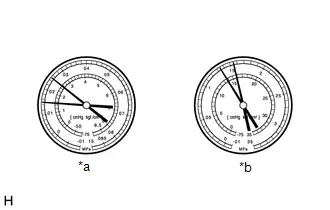
The following examples show the readings of a manifold gauge set and the corresponding air conditioning system problems.
(a) Read the manifold gauge pressure when the following conditions are met:
- The doors are fully open.
- The ignition switch is ON (READY).
- The A/C switch is on.
- The temperature is set to max cold.
- The blower speed is set to high.
- The temperature at the air inlet with recirculate selected is 30 to 35 °C.
(1) Normal functioning air conditioning system Gauge Reading
|
|
(2) Abnormally functioning air conditioning system
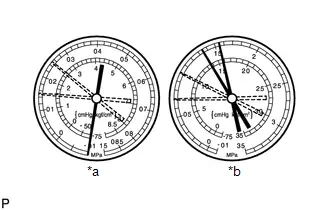
*a |
LO |
*b |
HI |
- During operation, pressure on low pressure side cycles between normal and vacuum
Symptom
Air conditioning system periodically cools and then fails to cool
Probable Cause
Moisture in air conditioning system freezes at expansion valve orifice, causing refrigerant to temporarily stop circulating
After system stops and warms up again, ice melts and normal operation is temporarily restored
Diagnosis
Cooler dryer (integrated into condenser tank) saturated with moisture
Moisture in air conditioning system is freezing at expansion valve orifice and blocking circulation of refrigerant
Corrective Actions
Replace cooler dryer
Remove moisture by repeatedly evacuating air from air conditioning system
Recharge air conditioning system with proper amount of new or purified refrigerant
HINT:
For the example above, moisture is present in the air conditioning system.
- Pressure is low on both low and high pressure sides
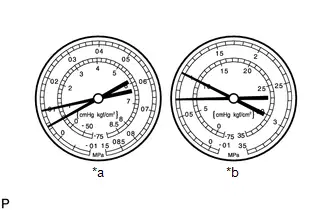
*a
LO
*b
HI
Symptom
Air conditioning system does not cool effectively
Insufficient cooling performance
Probable Cause
Refrigerant leaks from air conditioning system
Diagnosis
Insufficient refrigerant
Refrigerant leaking
Corrective Actions
Check for refrigerant leaks and repair if necessary
Recharge air conditioning system with proper amount of new or purified refrigerant
If gauges indicate pressure of close to 0, then it is necessary to evacuate air conditioning system after repairing leaks
HINT:
For the example above, there is insufficient refrigerant.
- Pressure is low on both low and high pressure sides
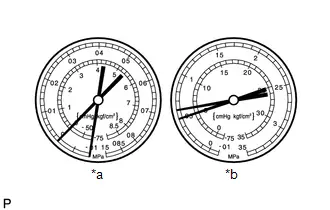
*a
LO
*b
HI
Symptom
Air conditioning system does not cool effectively
Frost exists on pipe from condenser to evaporator unit
Probable Cause
Refrigerant flow is obstructed by dirt inside pipes of condenser core
Diagnosis
Condenser is clogged
Corrective Actions
Replace condenser
HINT:
For the example above, there is poor circulation of refrigerant.
- Vacuum is indicated on low pressure side and very low pressure is indicated on high pressure side
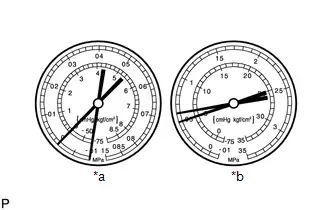
*a
LO
*b
HI
Symptom
Air conditioning system does not cool effectively (System may cool occasionally)
Frost or condensation is seen on piping on both sides of receiver/dryer or expansion valve
Probable Cause
Refrigerant flow is obstructed by moisture or dirt in air conditioning system
Expansion valve is stuck closed
Diagnosis
Refrigerant does not circulate
Corrective Actions
Replace expansion valve
Replace condenser
Evacuate air conditioning system and recharge with proper amount of new or purified refrigerant
HINT:
For the example above, the refrigerant does not circulate.
- Pressure is too high on both low and high pressure sides
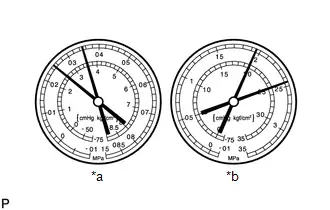
*a
LO
*b
HI
Symptom
Air conditioning system does not cool effectively
Probable Cause
Unable to provide sufficient performance due to excessive amount of refrigerant
Cooling effectiveness of condenser is insufficient
Diagnosis
Excessive amount of refrigerant in air conditioning system because excessive refrigerant was added during recharging
Cooling effectiveness of condenser is insufficient because condenser fins are clogged or cooling fan is faulty
Corrective Actions
Clean condenser
Check operation of condenser cooling fan
If condenser is clean and fan operation is normal, check amount of refrigerant and recharge air conditioning system with proper amount of new or purified refrigerant
HINT:
For the example above, the air conditioning system is overcharged or cooling effectiveness of condenser is insufficient.
- Pressure is too high on both low and high pressure sides
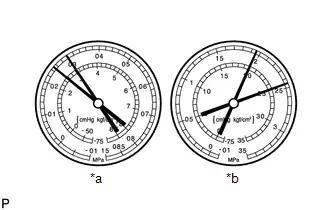
*a
LO
*b
HI
Symptom
Air conditioning system does not cool
The low pressure piping is too hot to touch
Probable Cause
Air in air conditioning system
Diagnosis
Air present in air conditioning system
Insufficient vacuum purging when evacuating air conditioning system
Corrective Actions
Replace cooler dryer
Check compressor oil to see if it is dirty or insufficient
Evacuate air conditioning system and recharge it with new or purified refrigerant
NOTICE:
These gauge indications occur when the air conditioning system has been left open and then recharged without evacuating the system.
HINT:
For the example above, air is present in the air conditioning system.
- Pressure is too high on both low and high pressure sides
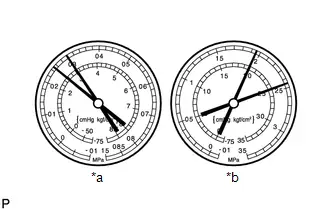
*a
LO
*b
HI
Symptom
Air conditioning system does not cool effectively
Frost or large amount of condensation on piping on low pressure side
Probable Cause
Expansion valve may be stuck open or metering refrigerant incorrectly
Diagnosis
Excessive refrigerant in low pressure piping
Expansion valve open too wide
Corrective Actions
Replace expansion valve
HINT:
For the example above, there is an expansion valve malfunction.
- Pressure is too high on both low and high pressure sides or pressure is too low on high pressure side
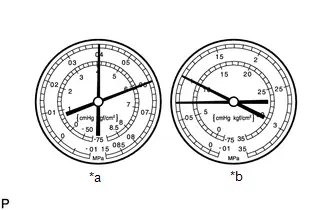
*a
LO
*b
HI
Symptom
Air conditioning system does not cool effectively
Probable Cause
Internal leak in compressor
Diagnosis
Low compression
Leak from damaged valve or other compressor component
Corrective Actions
Replace compressor
HINT:
For the example above, there is insufficient compressor compression.
(3) Gauge readings (Reference)
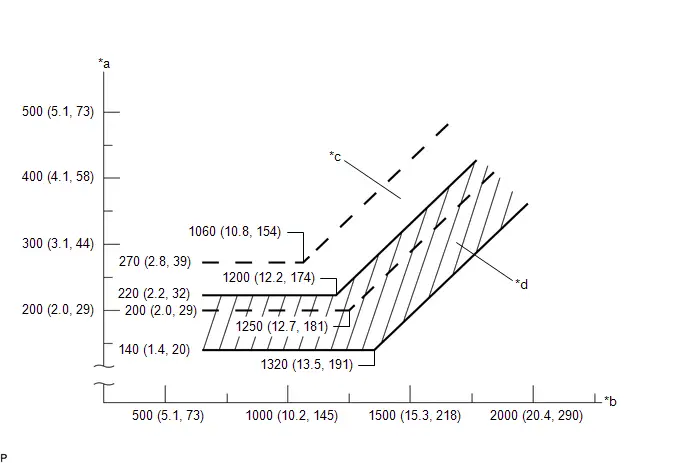
*a |
Pressure on Low Pressure Side kPa (kgf/cm2, psi) |
*b |
Pressure on High Pressure Side kPa (kgf/cm2, psi) |
*c |
Blower High Zone |
*d |
Blower Low Zone |
2. REFRIGERANT LINE
HINT:
The following inspection specifies how to determine the cause of a refrigerant leak after determining the location of the leak using a gas leak detector. Use this procedure to determine where to clean and what to be replaced. Illustrations, specifications and part names are for reference only and may differ from the actual Toyota Prius vehicle.
(a) Use a gas leak detector to inspect for refrigerant gas leaks.
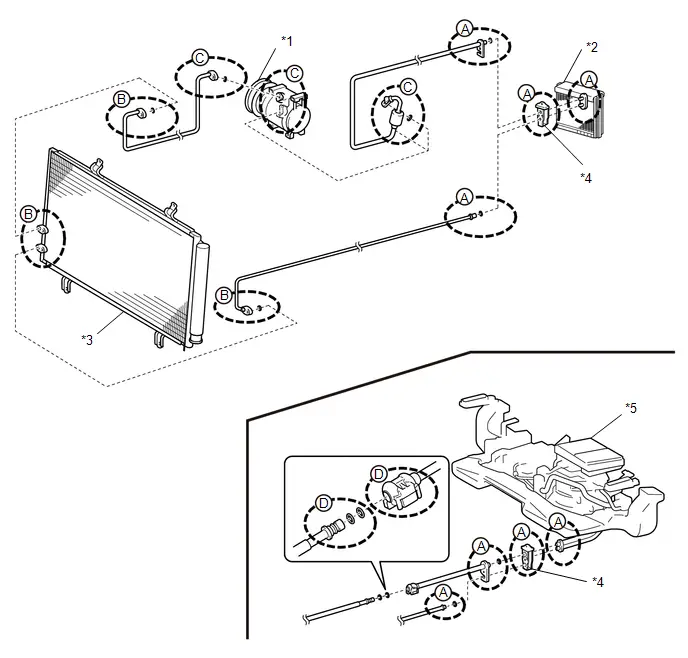
*1 |
Compressor |
*2 |
Evaporator |
*3 |
Condenser |
*4 |
Expansion Valve |
*5 |
Rear Air Conditioning Unit |
- |
- |
- When leaking is occurring around the parts (A) in the illustration:
Click here

- When leaking is occurring around the parts (B) in the illustration:
Click here

- When leaking is occurring around the parts (C) in the illustration:
Click here

- When leaking is occurring around the parts (D) in the illustration:
Click here

3. INSPECT FOR REFRIGERANT LEAK (EXPANSION VALVE)
NOTICE:
- Do not reuse an O-ring that has been removed.
- As there may be a malfunction in multiple components, make sure to perform the entire procedure.
- If no malfunction is found in any related parts, a temporary leak may have occurred due to foreign matter on an O-ring, deformation, etc.
(a) Remove the pipe: NOTICE:
(1) Remove the pipe from the expansion valve. |
|
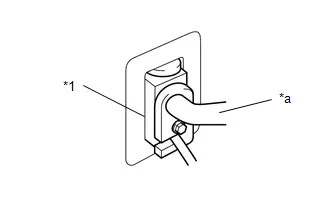
(b) Check the surface of the O-ring: NOTICE:
(1) Check the entire surface of the O-ring and make sure that it is free from defects such as damage (cuts, crushing, indents, etc.), foreign matter or twisting. Remove all foreign matter or replace the part if there is any damage. Click here |
|

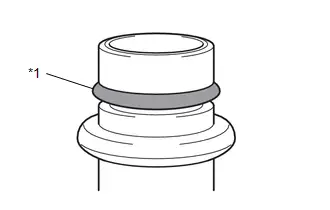
(c) Check the sealing surface of the pipe: NOTICE: When removing the O-ring, be careful not to damage the O-ring or sealing surface. (1) Remove the O-ring. (2) Check the sealing surface of the pipe. Remove all foreign matter or replace the part if there is any damage or corrosion. Click here |
|

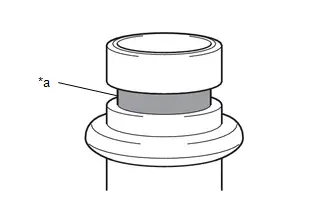
(d) Check the sealing surface of the expansion valve (pipe side): NOTICE: Degrease the surface if it is difficult to see due to oil, etc. Make sure not to lose any foreign matter that may indicate the source of a leak. (1) Check the entire sealing surface of the expansion valve (pipe side). Remove all foreign matter or replace the part if there is any damage or corrosion. Click here |
|

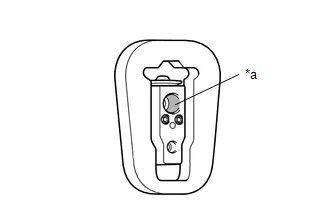
(e) Remove the expansion valve: NOTICE:
(1) Remove the expansion valve from the evaporator. HINT: If necessary, remove the air conditioning unit assembly. Click here |
|


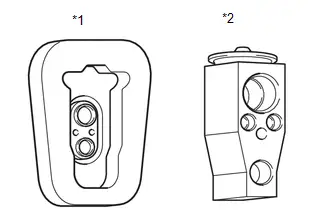
(f) Check the sealing surface of the expansion valve (evaporator side): NOTICE: Degrease the surface if it is difficult to see due to oil, etc. Make sure not to lose any foreign matter that may indicate the source of a leak. (1) Check the entire sealing surface of the expansion valve (evaporator side). Remove all foreign matter or replace the part if there is any damage or corrosion. Click here |
|

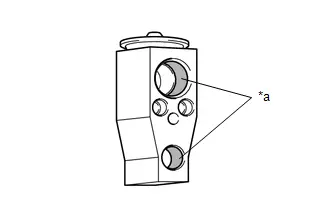
(g) Check the surface of the evaporator O-ring: NOTICE:
(1) Check the entire surface of the O-ring and make sure that it is free from defects such as damage (cuts, crushing, indents, etc.), foreign matter or twisting. Remove all foreign matter or replace the part if there is any damage. Click here |
|

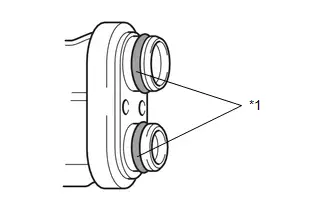
(h) Check the sealing surface of the evaporator: NOTICE: When removing the O-ring, be careful not to damage the O-ring or sealing surface. (1) Remove the O-ring. (2) Check the entire sealing surface of the evaporator. Remove all foreign matter or replace the part if there is any damage or corrosion. Click here |
|

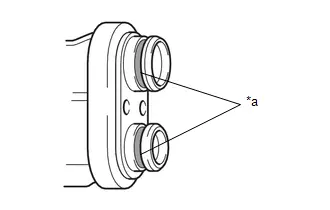
4. INSPECT FOR REFRIGERANT LEAK (CONDENSER)
NOTICE:
- Do not reuse an O-ring that has been removed.
- As there may be a malfunction in multiple components, make sure to perform the entire procedure.
- If no malfunction is found in any related parts, a temporary leak may have occurred due to foreign matter on an O-ring, deformation, etc.
(a) Remove the pipe: NOTICE:
(1) Remove the pipe from the condenser. |
|
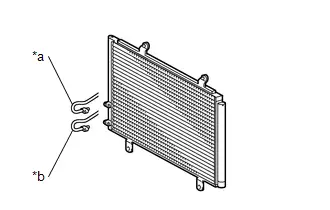
(b) Check the surface of the O-ring: NOTICE:
(1) Check the entire surface of the O-ring and make sure that it is free from defects such as damage (cuts, crushing, indents, etc.), foreign matter or twisting. Remove all foreign matter or replace the part if there is any damage. Click here |
|

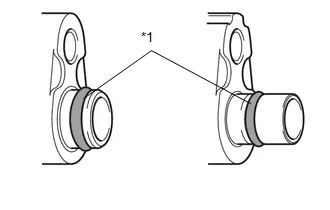
(c) Check the sealing surface of the pipe: NOTICE: When removing the O-ring, be careful not to damage the O-ring or sealing surface. (1) Remove the O-ring. (2) Check the sealing surface of the pipe. Remove all foreign matter or replace the part if there is any damage or corrosion. Click here |
|

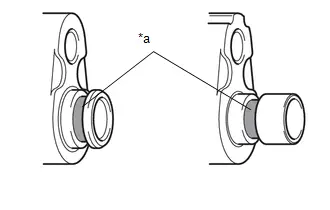
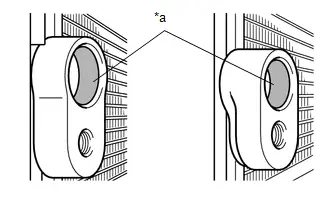
(d) Check the sealing surface of the condenser: NOTICE: Degrease the surface if it is difficult to see due to oil, etc. Make sure not to lose any foreign matter that may indicate the source of a leak. (1) Check the entire sealing surface of the condenser. Remove all foreign matter or replace the part if there is any damage or corrosion. Click here |
|

5. INSPECT FOR REFRIGERANT LEAK (COMPRESSOR)
NOTICE:
- Do not reuse an O-ring that has been removed.
- As there may be a malfunction in multiple components, make sure to perform the entire procedure.
- If no malfunction is found in any related parts, a temporary leak may have occurred due to foreign matter on an O-ring, deformation, etc.
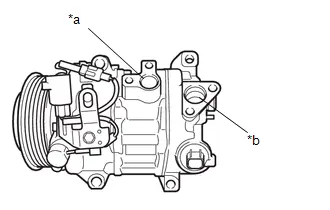
(a) Remove the pipe: NOTICE:
(1) Remove the pipe from the compressor. |
|
(b) Check the surface of the O-ring: NOTICE:
(1) Check the entire surface of the O-ring and make sure that it is free from defects such as damage (cuts, crushing, indents, etc.), foreign matter or twisting. Remove all foreign matter or replace the part if there is any damage. Click here |
|

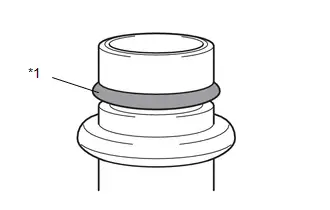
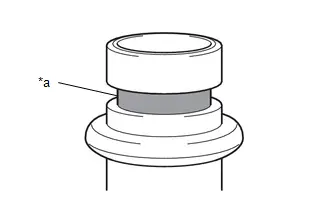
(c) Check the sealing surface of the pipe: NOTICE: When removing the O-ring, be careful not to damage the O-ring or sealing surface. (1) Remove the O-ring. (2) Check the sealing surface of the pipe. Remove all foreign matter or replace the part if there is any damage or corrosion. Click here |
|

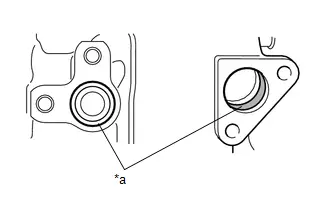
(d) Check the sealing surface of the compressor: NOTICE: Degrease the surface if it is difficult to see due to oil, etc. Make sure not to lose any foreign matter that may indicate the source of a leak. (1) Check the entire sealing surface of the compressor. Remove all foreign matter or replace the part if there is any damage or corrosion. Click here |
|

6. INSPECT FOR REFRIGERANT LEAK (OTHER PARTS)
NOTICE:
- Do not reuse an O-ring that has been removed.
- As there may be a malfunction in multiple components, make sure to perform the entire procedure.
- If no malfunction is found in any related parts, a temporary leak may have occurred due to foreign matter on an O-ring, deformation, etc.
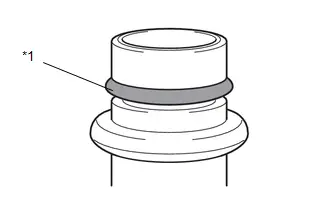
(a) Check the surface of the pipe O-ring or component O-ring: NOTICE:
(1) Check the entire surface of the O-ring and make sure that it is free from defects such as damage (cuts, crushing, indents, etc.), foreign matter or twisting. Remove all foreign matter or replace the part if there is any damage. Click here |
|

(b) Check the sealing surface of the pipe: NOTICE: When removing the O-ring, be careful not to damage the O-ring or sealing surface. (1) Remove the O-ring. (2) Check the sealing surface of the pipe. Remove all foreign matter or replace the part if there is any damage or corrosion. Click here |
|

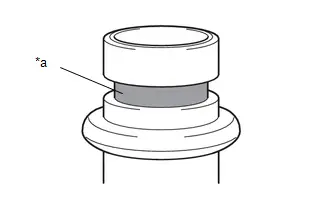
(c) Inspect the sealing surface of the parts: NOTICE: Degrease the surface if it is difficult to see due to oil, etc. Make sure not to lose any foreign matter that may indicate the source of a leak. (1) Check the entire sealing surface of the parts. Remove all foreign matter or replace the part if there is any damage or corrosion. Click here |
|

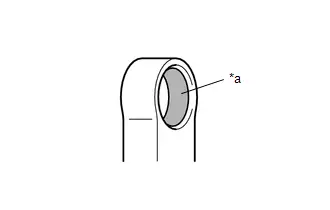
7. INSPECT O-RING
NOTICE:
Do not reuse an O-ring that has been removed.
(a) Check the O-ring for abnormalities.
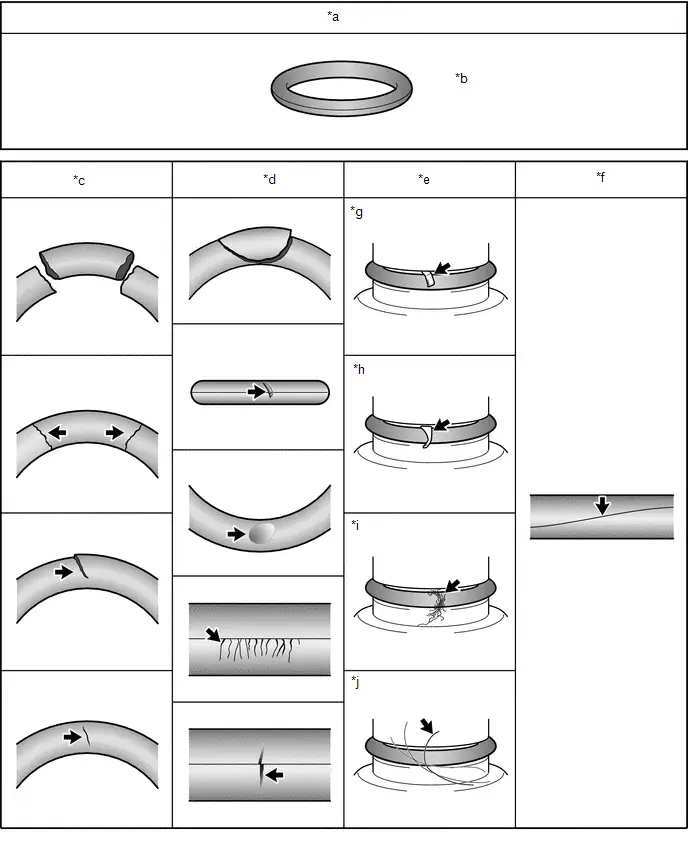
*a |
OK Condition |
*b |
Free of cuts, crushing, indents, foreign matter and twisting. |
*c |
Cuts |
*d |
Crushing/Indents |
*e |
Foreign Matter |
*f |
Twisting |
*g |
Metal Fragments |
*h |
Resin Fragments |
*i |
Lint |
*j |
Hair |
8. INSPECT SEALING SURFACE (O-RING INSTALLATION AREA)
NOTICE:
Do not reuse an O-ring that has been removed.
(a) Check the O-ring sealing surface for abnormalities.
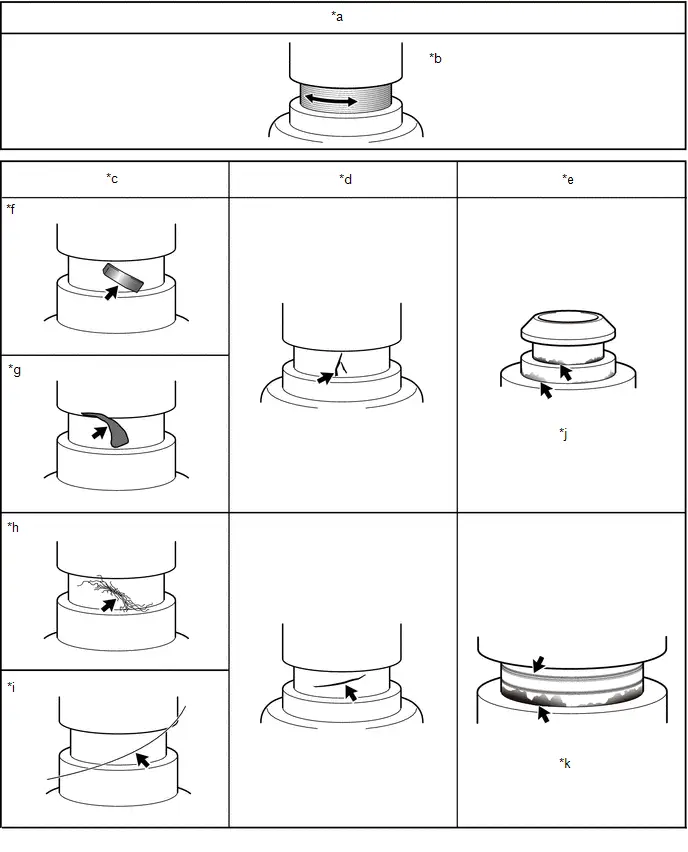
*a |
OK Condition |
*b |
No damage, foreign matter or corrosion. (Manufacturing marks around the circumference are not the cause of leakage.) |
*c |
Foreign Matter |
*d |
Damage |
*e |
Corrosion |
*f |
Metal Fragments |
*g |
Resin Fragments |
*h |
Lint |
*i |
Hair |
*j |
White and yellow discoloration (caused by corrosion) |
*k |
Damage (scratches) in axial direction and discoloration (black) |
- |
- |
9. INSPECT SEALING SURFACE (JOINT AREA)
(a) Check the joint areas of the components for abnormalities.
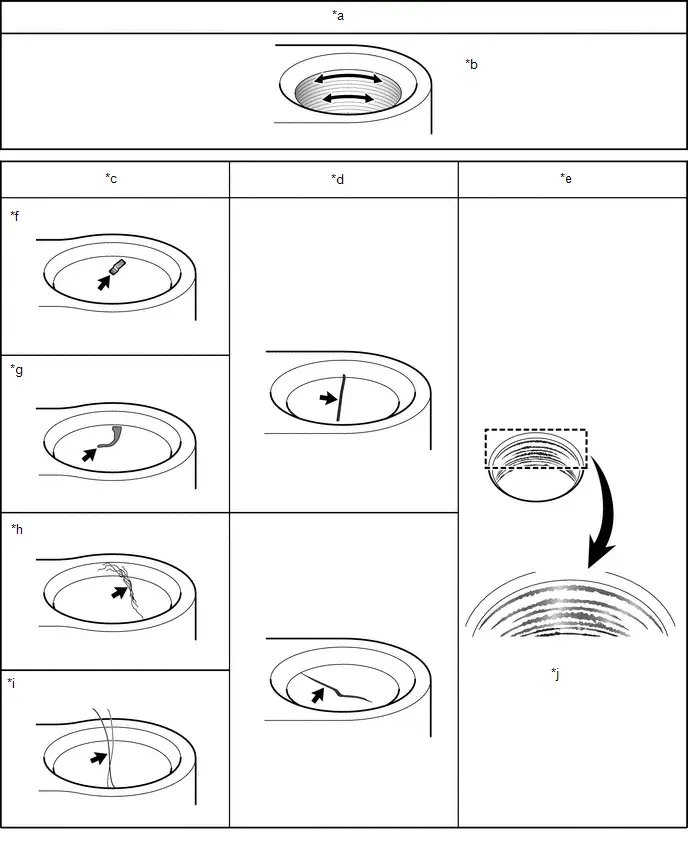
*a |
OK Condition |
*b |
No damage, foreign matter or corrosion. (Manufacturing marks around the circumference are not the cause of leakage.) |
*c |
Foreign Matter |
*d |
Damage |
*e |
Corrosion |
*f |
Metal Fragments |
*g |
Resin Fragments |
*h |
Lint |
*i |
Hair |
*j |
Uneven discoloration (black) on sealing face |
10. INSPECT FOR FAULTY EXPANSION VALVE
(a) Recover refrigerant
(1) Connect the refrigerant recovery valve and recover the refrigerant.
NOTICE:
- Perform this procedure in accordance with the repair manual for each Toyota Prius vehicle.
- Use the refrigerant recovery unit in accordance with the manufacturer's instruction manual.
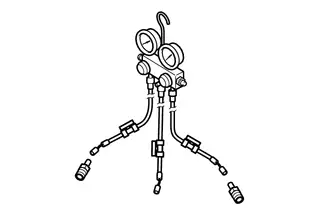
(b) Install air conditioner service tool set
(1) Install the air conditioner service tool set to the vehicle (high pressure side). SST: 09985-20010 |
 |
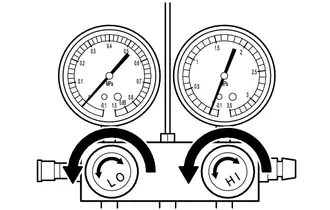
(2) Open all the valves of the air conditioner service tool set. |
 |
(3) Install the refrigerant recovery unit or vacuum pump to the Toyota Prius vehicle (low pressure side).
Connection Conditions:Tool | Connected to |
|---|---|
Air conditioner service tool set (High pressure hose) |
Toyota Prius Vehicle (High pressure side) |
Air conditioner service tool set (Center hose) |
- |
Air conditioner service tool set (Low pressure hose) |
- |
Refrigerant recovery unit or vacuum pump |
Toyota Prius Vehicle (Low pressure side) |
(c) Inspect expansion valve
(1) Depending on the type of low pressure side hose of the air conditioner service tool set, prevent air from being drawn in as shown in the illustration.
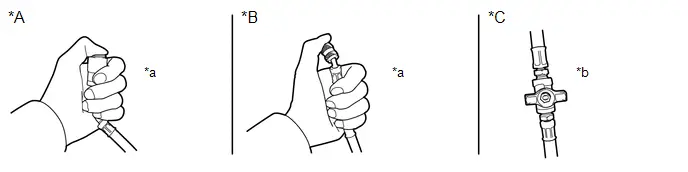
*A |
With Attachment |
*B |
Without Attachment |
*C |
With Intermediate Valve |
- |
- |
*a |
Block the end of the hose with your thumb. |
*b |
Close the intermediate valve. |
(2) While maintaining the above state, check that the gauge on the low pressure side changes when the center hose is closed and opened as shown in the illustration.
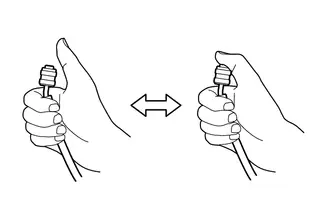 Result:
Result | Judgement |
|---|---|
The gauge indicates a negative pressure (approximately -50 kPa (-0.5 kgf/cm2, -7.3 psi)). 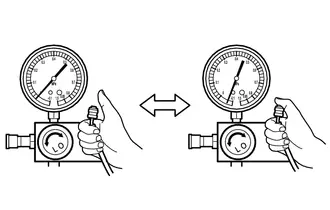 |
Expansion valve is normal. |
The indicated gauge pressure does not change. 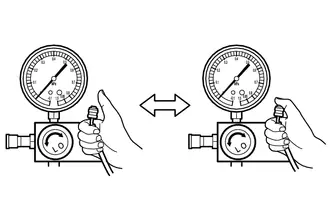 |
Expansion valve is abnormal. |
Replacement
REPLACEMENT
PROCEDURE
1. RECOVER REFRIGERANT FROM REFRIGERATION SYSTEM
(a) Turn the ignition switch ON (READY).
(b) Operate the compressor under the following conditions:
Item | Condition |
|---|---|
Operating time |
3 minutes or more |
Temperature setting |
Max cold |
Blower speed |
High |
Ignition switch |
On (READY) |
A/C switch |
On |
This causes most of the compressor oil from the various components of the A/C system to collect in the compressor.
HINT:
It is not necessary to operate the compressor if the A/C does not operate because of compressor lock, etc.
(c) Turn the ignition switch off.
(d) Recover the refrigerant from the A/C system using a refrigerant recovery unit.
HINT:
Use the refrigerant recovery unit in accordance with the manufacturer's instruction manual.
2. CHARGE AIR CONDITIONING SYSTEM WITH REFRIGERANT
(a) Perform vacuum purging using a vacuum pump or appropriate equipment.
(b) Charge the air conditioning system with refrigerant.
Refrigerant Type:
HFC-134a (R134a)
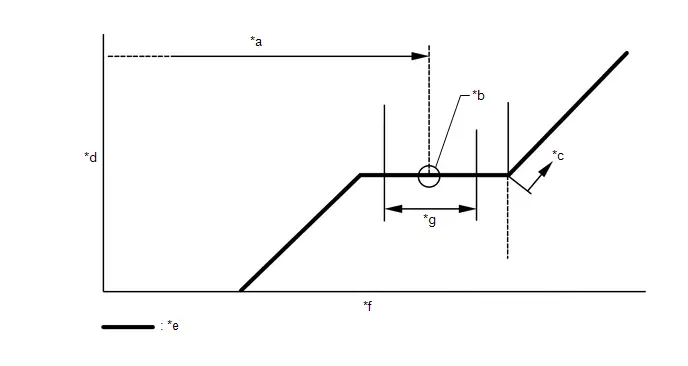
*a |
Standard Charge Amount |
*b |
Mean Value in Proper Range |
*c |
Overcharged |
*d |
High Pressure |
*e |
Sub-cool System |
*f |
Refrigerant Amount |
*g |
/-30 g ( /-1.05 oz) |
- |
- |
Standard Charge Amount:
440 to 500 g (15.6 to 17.6 oz)
SST: 09985-20010
09985-02010
09985-02050
09985-02060
09985-02070
09985-02080
09985-02090
09985-02110
09985-02130
09985-02140
09985-02150
NOTICE:
- Do not turn the A/C switch on before charging the air conditioning system with refrigerant. Doing so may cause the compressor to operate without refrigerant, resulting in overheating of the compressor.
- The refrigerant amount should be checked by quantity (weight).
- The graph above is shown for reference only.
HINT:
Ensure that sufficient refrigerant is available to recharge the system when using a refrigerant recovery unit. Refrigerant recovery units are not always able to recover 100% of the refrigerant from an air conditioning system.
3. WARM UP COMPRESSOR
(a) Keep the A/C switch on, set the temperature to MAX COOL and wait for at least 2 minutes to warm up the compressor.
NOTICE:
To prevent damage to the compressor, be sure to warm up the compressor when turning the air conditioning on after removing and installing any air conditioning system lines (including the compressor).
4. INSPECT FOR REFRIGERANT LEAK
(a) After recharging the air conditioning system with refrigerant, inspect for refrigerant leaks using a gas leak detector.
(b) Carry out the test under the following conditions:
- Turn the ignition switch off.
- Ensure good ventilation (the gas leak detector may react to volatile gases which are not refrigerant, such as gasoline vapor and exhaust gas).
- Repeat the inspection 2 or 3 times.
- Measure the pressure to make sure that there is some refrigerant remaining in the air conditioning system.
Pressure when the compressor is off: approximately 392 to 588 kPa (3.9 to 5.9 kgf/cm2, 57 to 85 psi)
(c) Using a gas leak detector, inspect for refrigerant leaks from the air conditioning system. |
|
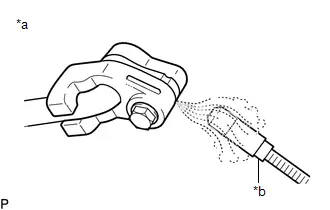
(d) Bring the gas leak detector close to the drain cooler hose with the detector power off, and then turn the detector on. HINT:
|
|
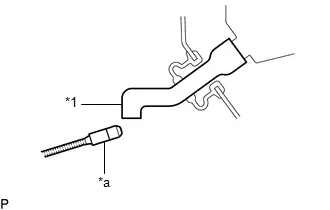
(e) If a refrigerant leak is not detected from the drain cooler hose, remove the blower motor control from the cooling unit. Insert the gas leak detector sensor into the unit and check for leaks.
(f) Disconnect the pressure sensor connector and leave it for approximately 20 minutes. Bring the gas leak detector close to the pressure sensor and check for leaks.
HINT:
When checking for leaks, the presence of oily dirt at a joint can indicate a leak.