Telephone And Gps Antenna Cords
- Removal
- Installation
Removal
REMOVAL
The necessary procedures (adjustment, calibration, initialization or registration) that must be performed after parts are removed and installed, or replaced during antenna cord sub-assembly removal/installation are shown below.
Necessary Procedures After Parts Removed/Installed/ReplacedReplaced Part or Performed Procedure | Necessary Procedure | Effect/Inoperative Function when Necessary Procedure not Performed | Link |
|---|---|---|---|
| *: Even when not replacing the part, it is necessary to perform the specified necessary procedures after installation. | |||
w/ Occupant Classification System:
|
Zero point calibration (Occupant classification system) |
|
 |
CAUTION:
Be sure to read Precaution thoroughly before servicing.
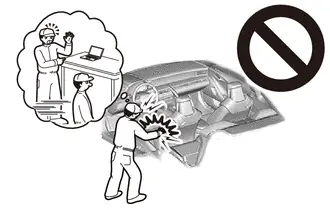
Click here 
NOTICE:
After the ignition switch is turned off, there may be a waiting time before disconnecting the negative (-) auxiliary battery terminal.
Click here 
HINT:
When the cable is disconnected / reconnected to the auxiliary battery terminal, systems temporarily stop operating. However, each system has a function that completes learning the first time the system is used.
Learning completes when Toyota Prius vehicle is drivenEffect/Inoperative Function when Necessary Procedure not Performed | Necessary Procedure | Link |
|---|---|---|
Front Camera System |
Drive the Toyota Prius vehicle straight ahead at 35 km/h or more for 5 seconds or more. |
 |
Effect/Inoperative Function when Necessary Procedure not Performed | Necessary Procedure | Link |
|---|---|---|
| *1: w/o Power Back Door System *2: w/ Power Back Door System |
||
Power Door Lock Control System*1
|
Perform door unlock operation with door control switch or electrical key transmitter sub-assembly switch. |
 |
Power Back Door System*2 |
Reset back door close position |
 |
Air Conditioning System |
After the ignition switch is turned to ON, the servo motor standard position is recognized. |
- |
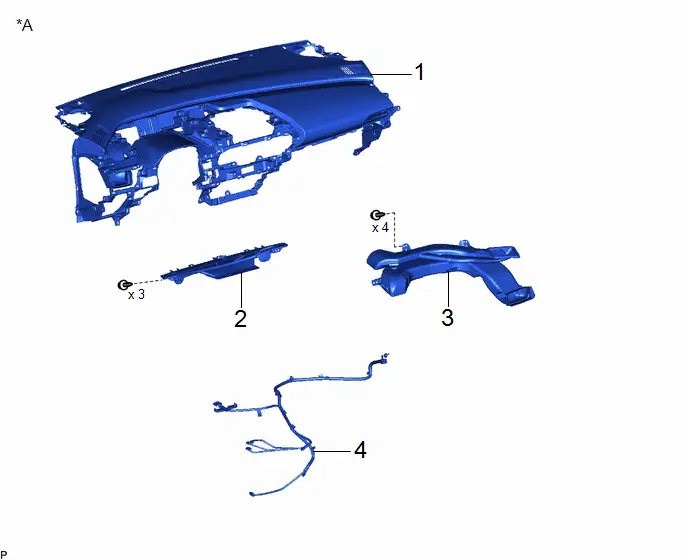
Procedure | Part Name Code |  |  |  |
|
|---|---|---|---|---|---|
1 |
INSTRUMENT PANEL SAFETY PAD SUB-ASSEMBLY |
- |
- |
- |
- |
2 |
DEFROSTER NOZZLE ASSEMBLY |
55950G |
- |
- |
- |
3 |
NO. 2 HEATER TO REGISTER DUCT SUB-ASSEMBLY |
55085 |
- |
- |
- |
4 |
ANTENNA CORD SUB-ASSEMBLY |
86101T |
- |
- |
- |
*A |
for Instrument Panel |
- |
- |
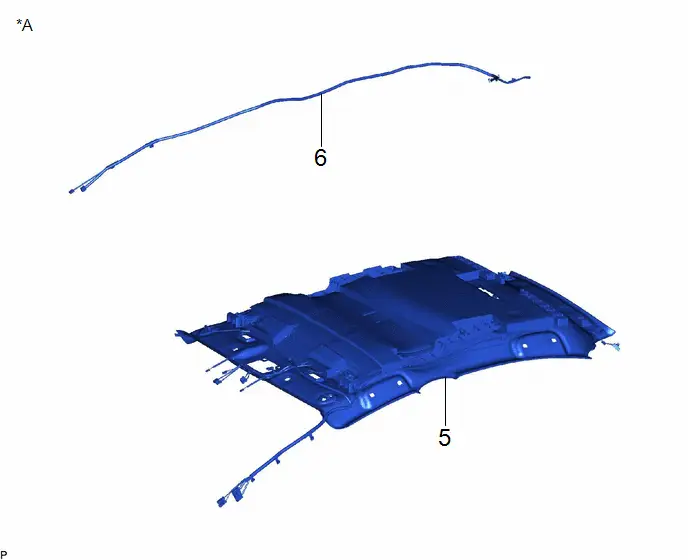
Procedure | Part Name Code |  |  |  |
|
|---|---|---|---|---|---|
5 |
ROOF HEADLINING ASSEMBLY |
- |
- |
- |
- |
6 |
NO. 3 ANTENNA CORD SUB-ASSEMBLY |
86101D |
- |
- |
- |
*A |
for Roof |
- |
- |
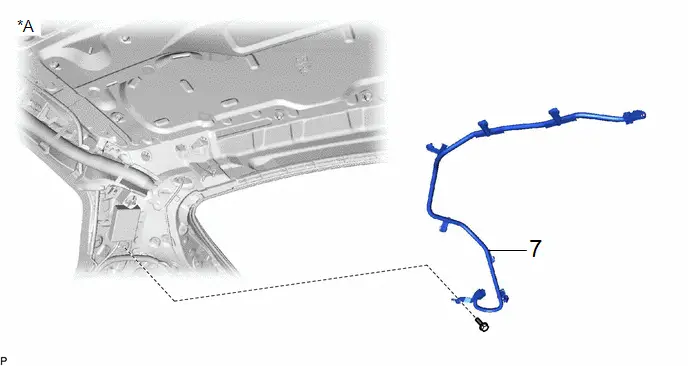
Procedure | Part Name Code |  |  |  |
|
|---|---|---|---|---|---|
7 |
ANTENNA CORD SUB-ASSEMBLY |
86101 |
- |
- |
- |
*A |
for Roof |
- |
- |
PROCEDURE
1. REMOVE INSTRUMENT PANEL SAFETY PAD SUB-ASSEMBLY (for Instrument Panel)
Click here 
2. REMOVE DEFROSTER NOZZLE ASSEMBLY (for Instrument Panel)
Click here 
3. REMOVE NO. 2 HEATER TO REGISTER DUCT SUB-ASSEMBLY (for Instrument Panel)
Click here 
4. REMOVE ANTENNA CORD SUB-ASSEMBLY (for Instrument Panel)
Click here 
5. REMOVE ROOF HEADLINING ASSEMBLY (for Roof)
Click here 
6. REMOVE NO. 3 ANTENNA CORD SUB-ASSEMBLY (for Roof)
Click here 
7. REMOVE ANTENNA CORD SUB-ASSEMBLY (for Roof)
Click here 
Installation
INSTALLATION
COMPONENTS (INSTALLATION)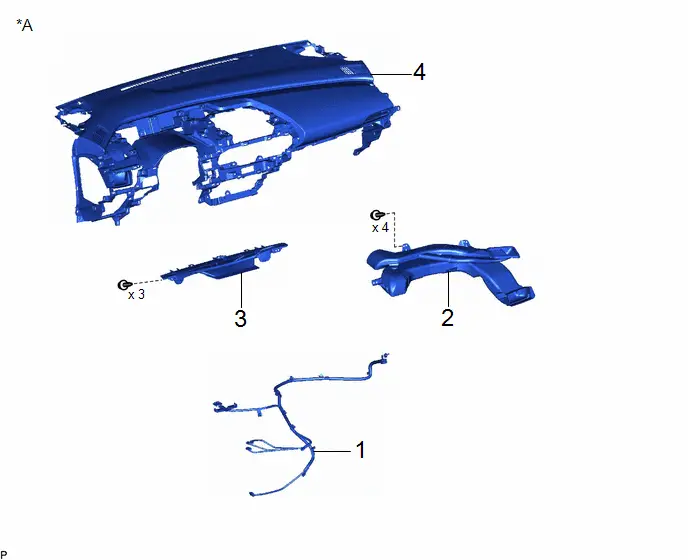
Procedure | Part Name Code |  |  |  |
|
|---|---|---|---|---|---|
1 |
ANTENNA CORD SUB-ASSEMBLY |
86101T |
- |
- |
- |
2 |
NO. 2 HEATER TO REGISTER DUCT SUB-ASSEMBLY |
55085 |
- |
- |
- |
3 |
DEFROSTER NOZZLE ASSEMBLY |
55950G |
- |
- |
- |
4 |
INSTRUMENT PANEL SAFETY PAD SUB-ASSEMBLY |
- |
- |
- |
- |
*A |
for Instrument Panel |
- |
- |
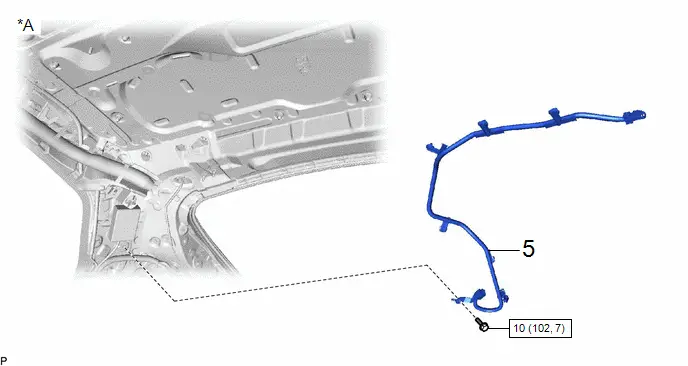
Procedure | Part Name Code |  |  |  |
|
|---|---|---|---|---|---|
5 |
ANTENNA CORD SUB-ASSEMBLY |
86101 |
- |
- |
- |
*A |
for Roof |
- |
- |
 |
N*m (kgf*cm, ft.*lbf): Specified torque |
- |
- |
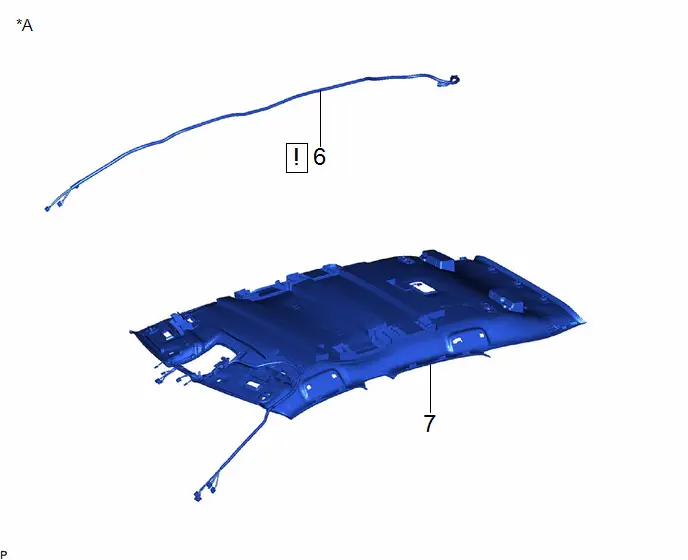
Procedure | Part Name Code |  |  |  |
|
|---|---|---|---|---|---|
6 |
NO. 3 ANTENNA CORD SUB-ASSEMBLY |
86101D |
 |
- |
- |
7 |
ROOF HEADLINING ASSEMBLY |
- |
- |
- |
- |
*A |
for Roof |
- |
- |
PROCEDURE
1. INSTALL ANTENNA CORD SUB-ASSEMBLY (for Instrument Panel)
2. INSTALL NO. 2 HEATER TO REGISTER DUCT SUB-ASSEMBLY (for Instrument Panel)
3. INSTALL DEFROSTER NOZZLE ASSEMBLY (for Instrument Panel)
4. INSTALL INSTRUMENT PANEL SAFETY PAD SUB-ASSEMBLY (for Instrument Panel)
Click here 
5. INSTALL ANTENNA CORD SUB-ASSEMBLY (for Roof)
Click here 
6. INSTALL NO. 3 ANTENNA CORD SUB-ASSEMBLY (for Roof)
 |
Click here |

7. INSTALL ROOF HEADLINING ASSEMBLY (for Roof)
Click here 
