High Pressure Magnetic Valve
Removal
REMOVAL
The necessary procedures (adjustment, calibration, initialization or registration) that must be performed after parts are removed and installed, or replaced during No. 2 magnet valve assembly removal/installation are shown below.
Necessary Procedures After Parts Removed/Installed/ReplacedReplaced Part or Performed Procedure | Necessary Procedures | Effect/Inoperative Function When Necessary Procedures are not Performed | Link |
|---|---|---|---|
| *: Even when not replacing the part, it is necessary to perform the specified necessary procedures after installation. | |||
Front bumper assembly* |
Front television camera view adjustment |
Panoramic View Monitor System |
 |
Advanced Park |
 |
||
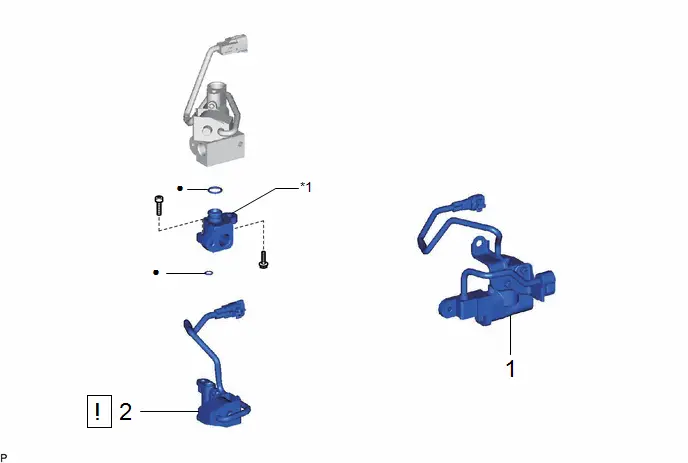
Procedure | Part Name Code |  |  |  |
|
|---|---|---|---|---|---|
1 |
NO. 1 MAGNET VALVE ASSEMBLY |
88690M |
- |
- |
- |
2 |
NO. 2 MAGNET VALVE ASSEMBLY |
88690N |
 |
- |
- |
*1 |
VALVE TO CONNECTOR TUBE |
- |
- |
● |
Non-reusable part |
- |
- |
PROCEDURE
1. REMOVE NO. 1 MAGNET VALVE ASSEMBLY
Click here 
2. REMOVE NO. 2 MAGNET VALVE ASSEMBLY
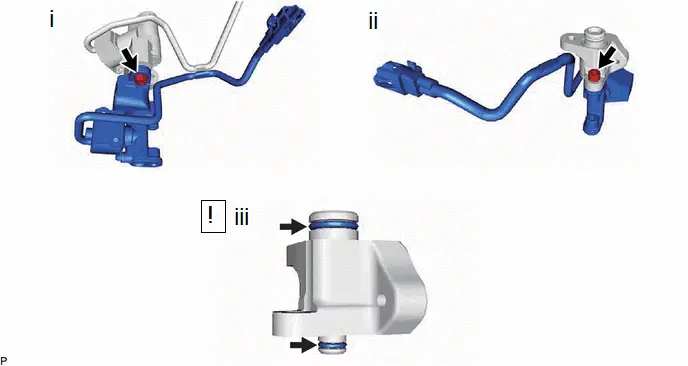
(1) Remove the bolt and No. 2 magnet valve assembly with valve to connector tube.
(2) Using a 5 mm hexagon socket wrench, remove the hexagon bolt and No. 2 magnet valve assembly from the valve to connector tube.
NOTICE:
Do not apply excessive force to the valve to connector tube.
(3) Remove the 2 O-rings from the valve to connector tube.
NOTICE:
Seal the openings of the disconnected parts using vinyl tape to prevent entry of moisture and foreign matter.
Inspection
INSPECTION
PROCEDURE
1. INSPECT NO. 2 MAGNET VALVE ASSEMBLY
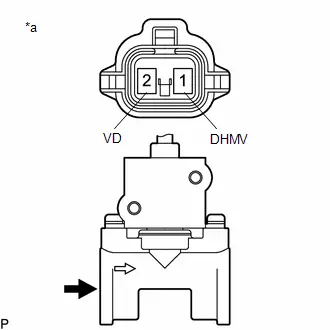
(a) Apply auxiliary battery voltage to the terminals of the connector, and check the No. 2 magnet valve assembly operates. OK:
If the result is not as specified, replace the No. 2 magnet valve assembly. |
|
Installation
INSTALLATION
COMPONENTS (INSTALLATION)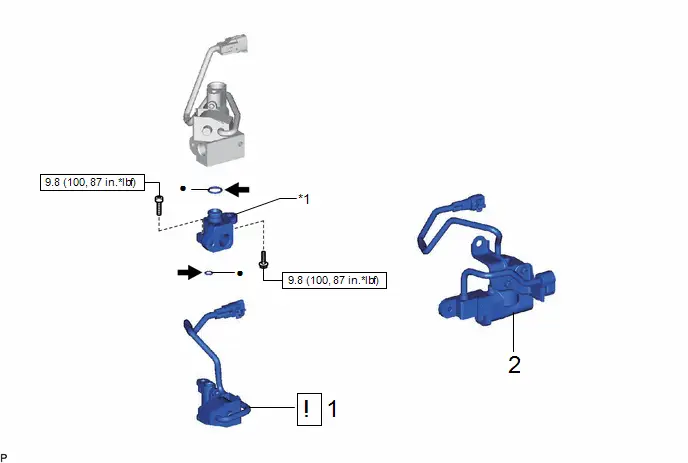
Procedure | Part Name Code |  |  |  |
|
|---|---|---|---|---|---|
1 |
NO. 2 MAGNET VALVE ASSEMBLY |
88690N |
 |
- |
- |
2 |
NO. 1 MAGNET VALVE ASSEMBLY |
88690M |
- |
- |
- |
*1 |
VALVE TO CONNECTOR TUBE |
- |
- |
 |
N*m (kgf*cm, ft.*lbf): Specified torque |
● |
Non-reusable part |
 |
Compressor oil ND-OIL 11 or equivalent |
- |
- |
PROCEDURE
1. INSTALL NO. 2 MAGNET VALVE ASSEMBLY
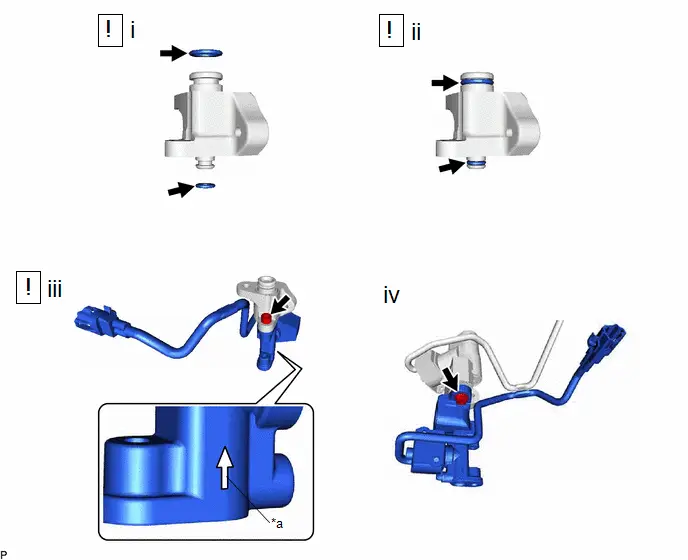
*a |
Reference Point |
- |
- |
(1) Remove the vinyl tape from the connector tube and No. 2 magnet valve assembly, and sufficiently apply compressor oil to 2 new O-rings and the fitting surface of the valve to connector tube.
Compressor Oil:
ND-OIL 11 or equivalent
(2) Install the 2 O-rings to the valve to connector tube.
NOTICE:
Keep the O-ring and O-ring fitting surface free from foreign matter.
(3) Using a 5 mm hexagon socket wrench, install the No. 2 magnet valve assembly to the valve to connector tube with the hexagon bolt.
NOTICE:
Make sure to install the No. 2 magnet valve assembly with the arrow facing the direction shown in the illustration.
Torque:
9,8 N·m {100 kgf·cm, 87 in·lbf}
(4) Install the No. 2 magnet valve assembly with valve to connector tube with the bolt.
Torque:
9,8 N·m {100 kgf·cm, 87 in·lbf}
2. INSTALL NO. 1 MAGNET VALVE ASSEMBLY
Click here 