Rear Combination Light Assembly
- Removal
- Disassembly
- Inspection
- Reassembly
- Installation
Removal
REMOVAL
HINT:
- Use the same procedure for the RH side and LH side.
- The following procedure is for the LH side.
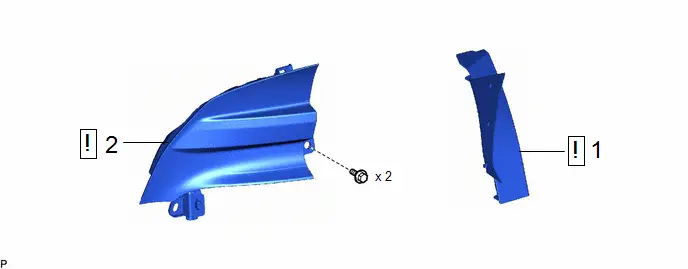
Procedure | Part Name Code |  |  |  |
|
|---|---|---|---|---|---|
1 |
REAR COMBINATION LIGHT COVER |
81498 |
 |
- |
- |
2 |
REAR COMBINATION LIGHT SUB-ASSEMBLY |
- |
 |
- |
- |
PROCEDURE
1. REMOVE REAR COMBINATION LIGHT COVER
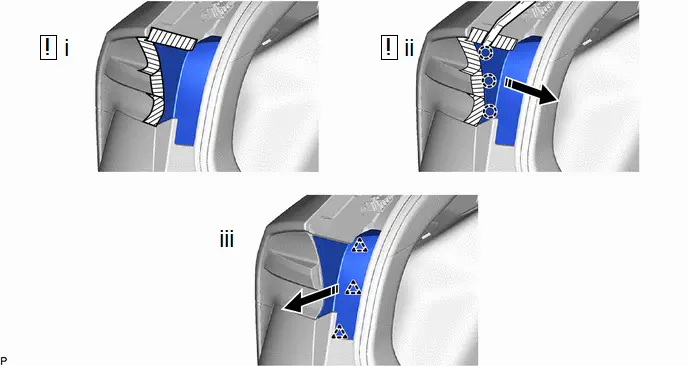
 |
Protective Tape |
 |
Remove in this Direction |
(1) Apply protective tape around the rear combination light cover as shown in the illustration.
(2) Using a moulding remover, disengage the 3 claws as shown in the illustration.
(3) Disengage the 3 clips as shown in the illustration to remove the rear combination light cover.
2. REMOVE REAR COMBINATION LIGHT SUB-ASSEMBLY
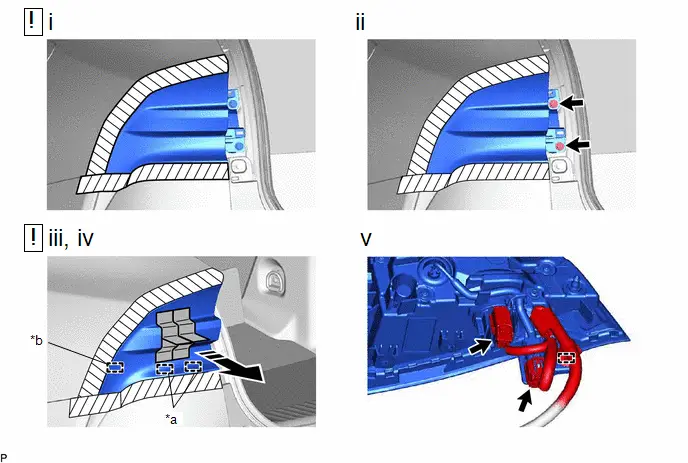
*a |
Guide |
*b |
Pin |
 |
Protective Tape |
 |
Tape |
 |
Remove in this Direction |
- |
- |
(1) Apply protective tape around the rear combination light sub-assembly as shown in the illustration.
(2) Remove the 2 screws.
(3) As shown in the illustration, arrange and attach tape to the rear combination light sub-assembly to make a handle for pulling.
NOTICE:
Make sure to attach the tape firmly to the top and bottom surfaces of the protrusion.
(4) Pull the rear combination light sub-assembly toward the rear of the Toyota Prius vehicle as shown in the illustration to disengage the pin and 2 guides and separate the rear combination light sub-assembly.
NOTICE:
To prevent the rear combination light sub-assembly from falling when disengaging the pin and 2 guides, make sure to hold the rear combination light sub-assembly.
(5) Disengage the clamp and disconnect the 2 connectors to remove the rear combination light sub-assembly.
Disassembly
DISASSEMBLY
HINT:
- Use the same procedure for the RH side and LH side.
- The following procedure is for the LH side.
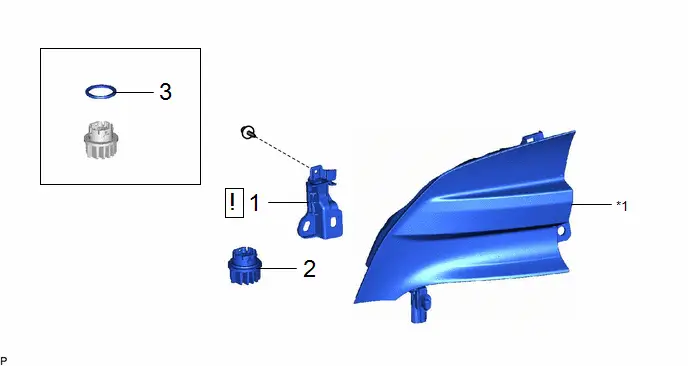
Procedure | Part Name Code |  |  |  |
|
|---|---|---|---|---|---|
1 |
REAR COMBINATION LIGHT BRACKET |
81568K |
 |
- |
- |
2 |
REAR TURN SIGNAL LIGHT LED |
81536B |
- |
- |
- |
3 |
REAR COMBINATION LIGHT BODY GASKET |
81564 |
- |
- |
- |
*1 |
REAR COMBINATION LIGHT LENS AND BODY |
- |
- |
PROCEDURE
1. REMOVE REAR COMBINATION LIGHT BRACKET
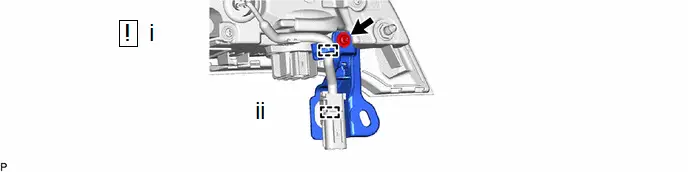
(1) Using a T20H "TORX" driver, remove the "TORX" screw.
(2) Disengage the 2 clamps tp remove the rear combination light bracket.
2. REMOVE REAR TURN SIGNAL LIGHT LED

 |
Remove in this Direction |
- |
- |
3. REMOVE REAR COMBINATION LIGHT BODY GASKET

Inspection
INSPECTION
PROCEDURE
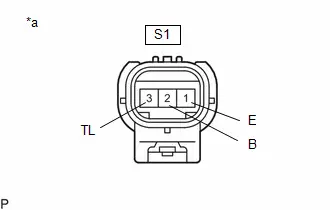
1. INSPECT REAR COMBINATION LIGHT LENS AND BODY LH
(a) Illumination Inspection
(1) Apply auxiliary battery voltage to the rear combination light assembly LH and check that the lights illuminate. OK: Taillight light Click Location & Routing(S1) Click Connector(S1)
OK: Stop light Click Location & Routing(S1) Click Connector(S1)
If the result is not as specified, replace the rear combination light lens and body LH. |
|
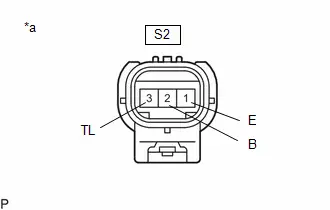
2. INSPECT REAR COMBINATION LIGHT LENS AND BODY RH
(a) Illumination Inspection
(1) Apply auxiliary battery voltage to the rear combination light assembly RH and check that the lights illuminate. OK: Taillight light Click Location & Routing(S2) Click Connector(S2)
OK: Stop light Click Location & Routing(S2) Click Connector(S2)
If the result is not as specified, replace the rear combination light lens and body RH. |
|
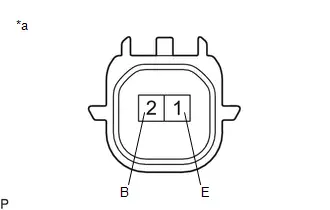
3. INSPECT REAR TURN SIGNAL LIGHT LED
(a) Illumination Inspection
(1) Apply auxiliary battery voltage to the rear turn signal light LED and check that the lights illuminate. OK: Turn signal light
If the result is not as specified, replace the rear turn signal light LED. |
|
Reassembly
REASSEMBLY
HINT:
- Use the same procedure for the RH side and LH side.
- The following procedure is for the LH side.
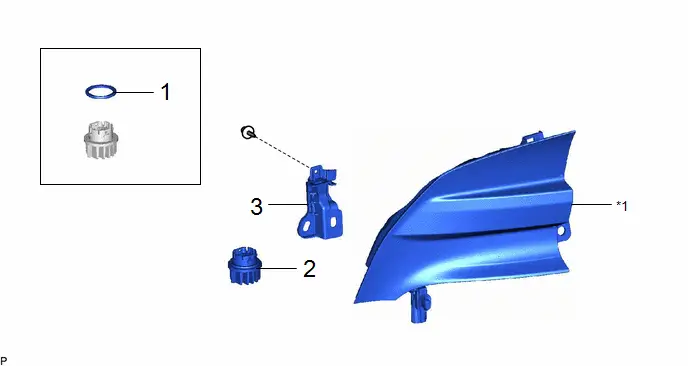
Procedure | Part Name Code |  |  |  |
|
|---|---|---|---|---|---|
1 |
REAR COMBINATION LIGHT BODY GASKET LH |
81564 |
- |
- |
- |
2 |
REAR TURN SIGNAL LIGHT LED |
81536B |
- |
- |
- |
3 |
REAR COMBINATION LIGHT BRACKET |
81568K |
- |
- |
- |
*1 |
REAR COMBINATION LIGHT LENS AND BODY |
- |
- |
PROCEDURE
1. INSTALL REAR COMBINATION LIGHT BODY GASKET LH
2. INSTALL REAR TURN SIGNAL LIGHT LED
3. INSTALL REAR COMBINATION LIGHT BRACKET
Installation
INSTALLATION
HINT:
- Use the same procedure for the RH side and LH side.
- The following procedure is for the LH side.
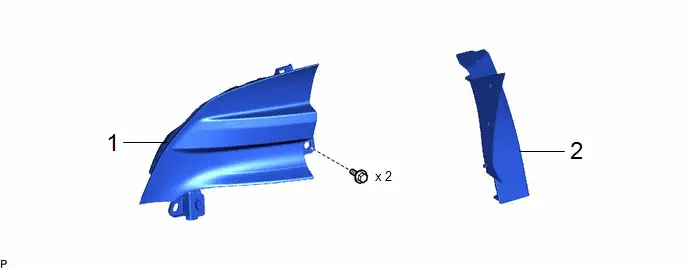
Procedure | Part Name Code |  |  |  |
|
|---|---|---|---|---|---|
1 |
REAR COMBINATION LIGHT SUB-ASSEMBLY |
- |
- |
- |
- |
2 |
REAR COMBINATION LIGHT COVER |
81498 |
- |
- |
- |
PROCEDURE
1. INSTALL REAR COMBINATION LIGHT SUB-ASSEMBLY
2. INSTALL REAR COMBINATION LIGHT COVER