Rear Speed Sensor (for Awd)
Removal
REMOVAL
HINT:
- Use the same procedure for the RH side and LH side.
- The following procedure is for the LH side.
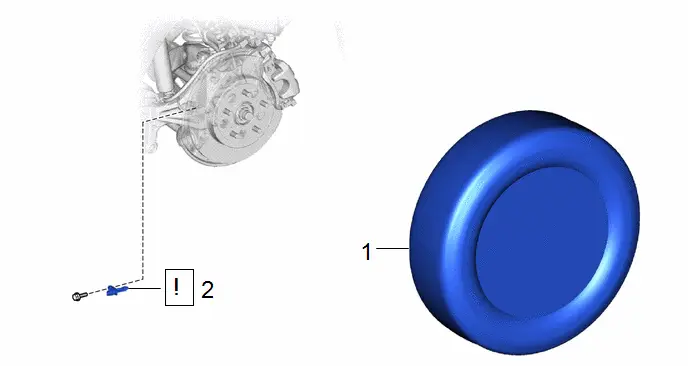
Procedure | Part Name Code |  |  |  |
|
|---|---|---|---|---|---|
1 |
REAR WHEEL |
- |
- |
- |
- |
2 |
REAR SKID CONTROL SENSOR |
89544E |
 |
- |
- |
PROCEDURE
1. REMOVE REAR WHEEL
Click here 
2. REMOVE REAR SKID CONTROL SENSOR
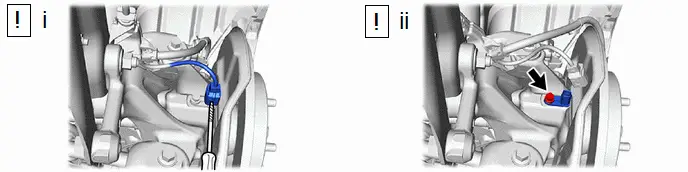
(1) Using a screwdriver with its tip wrapped with protective tape, Disconnect the rear skid control sensor connector from the rear skid control sensor.
NOTICE:
- Remove any dirt or foreign matter on and around the rear speed sensor connector before performing this step.
- Be careful not to damage the rear speed sensor or connector cover.
(2) Remove the bolt and rear skid control sensor from the rear axle carrier sub-assembly.
NOTICE:
- Keep the tip of the rear skid control sensor and installation hole free of foreign matter.
- Do not rotate or apply excessive force to the rear skid control sensor when removing it from the rear axle carrier sub-assembly. Rotating or applying excessive force may result in damage to the rear speed sensor.
Installation
INSTALLATION
COMPONENTS (INSTALLATION)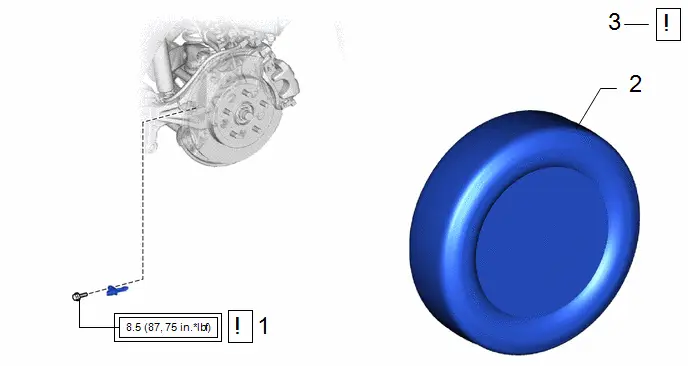
Procedure | Part Name Code |  |  |  |
|
|---|---|---|---|---|---|
1 |
REAR SKID CONTROL SENSOR |
89544E |
 |
- |
- |
2 |
REAR WHEEL |
- |
- |
- |
- |
3 |
CHECK FOR SPEED SENSOR SIGNAL |
- |
 |
- |
- |
 |
Tightening torque for "Major areas involving basic Toyota Prius vehicle performance such as moving/turning/stopping" : N*m (kgf*cm, ft.*lbf) |
- |
- |
HINT:
- Use the same procedure for the RH side and LH side.
- The following procedure is for the LH side.
PROCEDURE
1. INSTALL REAR SKID CONTROL SENSOR
 |
NOTICE:
|
Torque:
:
8,5 N·m {87 kgf·cm, 75 in·lbf}
2. INSTALL REAR WHEEL
Click here 
3. CHECK FOR SPEED SENSOR SIGNAL
Click here 