Heated Oxygen Sensor
Removal
REMOVAL
The necessary procedures (adjustment, calibration, initialization or registration) that must be performed after parts are removed and installed, or replaced during heated oxygen sensor removal/installation are shown below.
Necessary Procedures After Parts Removed/Installed/ReplacedReplaced Part or Performed Procedure | Necessary Procedure | Effect/Inoperative Function when Necessary Procedure not Performed | Link |
|---|---|---|---|
Gas leak from exhaust system is repaired |
Inspection after repair |
|
 |
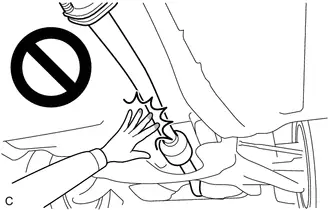
CAUTION:
To prevent burns, do not touch the engine, exhaust pipe or other high temperature components while the engine is hot.
 COMPONENTS (REMOVAL)
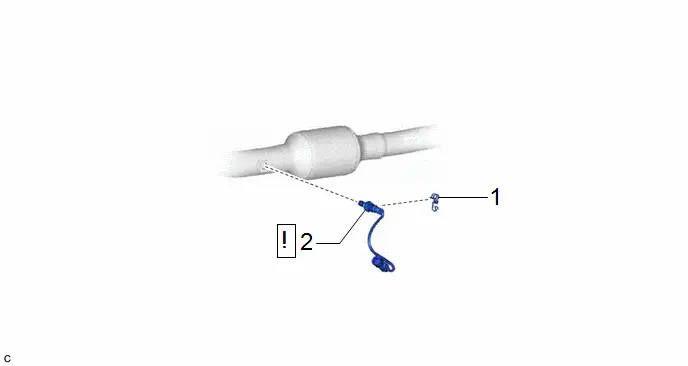
Procedure | Part Name Code |  |  |  |
|
|---|---|---|---|---|---|
1 |
WIRING HARNESS CLAMP BRACKET |
82715W |
- |
- |
- |
2 |
HEATED OXYGEN SENSOR |
89465 |
 |
- |
- |
PROCEDURE
1. REMOVE WIRING HARNESS CLAMP BRACKET

2. REMOVE HEATED OXYGEN SENSOR
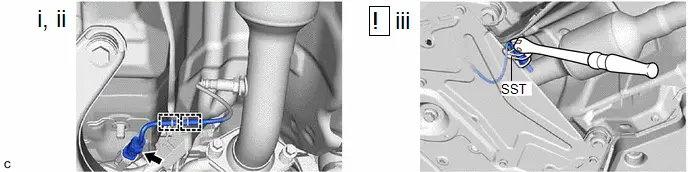
(1) Disconnect the heated oxygen sensor connector.
(2) Disengage the 2 wire harness clamps.
(3) Using SST, remove the heated oxygen sensor from the front exhaust pipe assembly.
SST: 09224-00012
NOTICE:
If the heated oxygen sensor has been struck or dropped, replace it.
Inspection
INSPECTION
PROCEDURE
1. INSPECT HEATED OXYGEN SENSOR
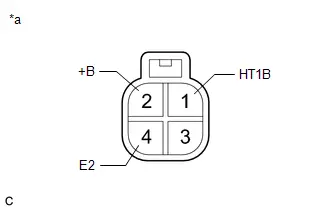
*a |
Component without harness connected (Heated Oxygen Sensor) |
(a) Measure the resistance according to the value(s) in the table below.
Standard Resistance:
Tester Connection | Condition | Specified Condition | Result |
|---|---|---|---|
1 (HT1B) - 2 ( B) |
20 °C |
5 to 10 Ω |
Ω |
1 (HT1B) - 4 (E2) |
Always |
10 kΩ or higher |
kΩ |
If the result is not as specified, replace the heated oxygen sensor.
Installation
INSTALLATION
COMPONENTS (INSTALLATION)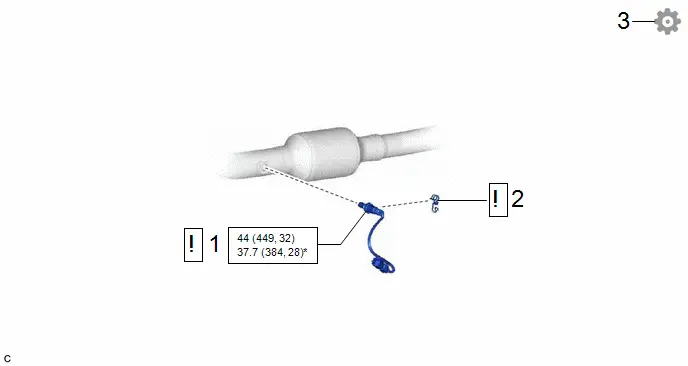
Procedure | Part Name Code |  |  |  |
|
|---|---|---|---|---|---|
1 |
HEATED OXYGEN SENSOR |
89465 |
 |
- |
- |
2 |
WIRING HARNESS CLAMP BRACKET |
82715W |
 |
- |
- |
3 |
INSPECT FOR EXHAUST GAS LEAK |
- |
- |
- |
 |
 |
N*m (kgf*cm, ft.*lbf): Specified torque |
* |
For use with SST |
PROCEDURE
1. INSTALL HEATED OXYGEN SENSOR
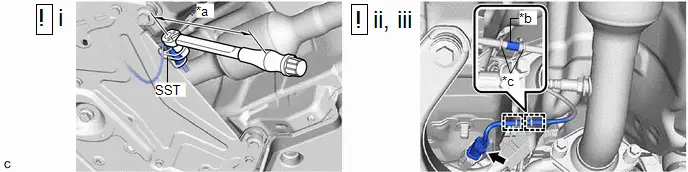
*a |
Torque Wrench Fulcrum Length |
*b |
Tube |
*c |
Wire Harness Clamp |
- |
- |
(1) Using SST, install the heated oxygen sensor to the front exhaust pipe assembly.
SST: 09224-00012
Torque:
Specified tightening torque :
44 N·m {449 kgf·cm, 32 ft·lbf}
NOTICE:
If the heated oxygen sensor has been struck or dropped, replace it.
HINT:
- Calculate the torque wrench reading when changing the fulcrum length of the torque wrench.
Click here


- When using SST (fulcrum length of 30 mm (1.18 in.)) torque wrench (fulcrum length of 180 mm (7.09 in.)):
37.7 N*m (384 kgf*cm, 28 ft.*lbf)
(2) Engage the 2 wire harness clamps so that the tube is positioned as shown in the illustration.
(3) Connect the heated oxygen sensor connector.
2. INSTALL WIRING HARNESS CLAMP BRACKET
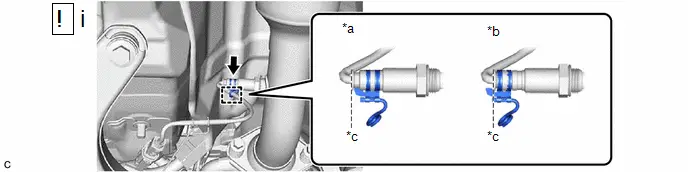
*a |
Correct |
*b |
Incorrect |
*c |
Standard Position |
- |
- |
(1) Install the wiring harness clamp bracket to the heated oxygen sensor.
NOTICE:
Align the edge of the wiring harness clamp bracket and heated oxygen sensor as shown in the illustration.
3. INSPECT FOR EXHAUST GAS LEAK
Click here 