Control cable
In this manual: Control cable
8steps
~48min
2/5difficulty
Done 0 of 8
Exploded View
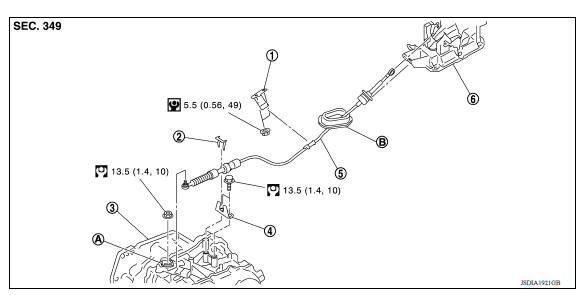
1. Bracket B 2. Lock plate 3. Transaxle assembly 4. Bracket A 5. Control cable 6. CVT shift selector assembly A: Manual lever B: Grommet
Removal and Installation
CAUTION: Always apply the parking brake before performing removal and installation.
REMOVAL
- Remove the battery. Refer to PG "Removal and Installation".
- Remove the TCM and bracket. Refer to TM "Removal and Installation".
- Remove the IPDM E/R. Refer to PCS "Removal and Installation".
- Remove the battery tray and bracket.
- Remove the center console. Refer to IP "Removal and Installation".
- Remove the control cable from the CVT shift selector assembly.
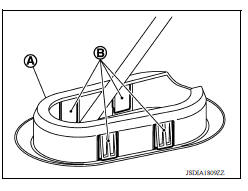
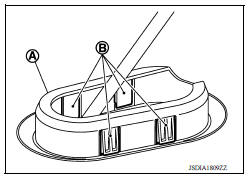
- Disengage the pawls (B) of the grommet (A), and pull downward to remove.
- Remove the control cable nut from the manual lever.
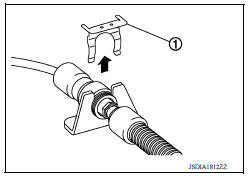
9. Remove the lock plate (1).
10. Lift up the heat plate.
11. Remove the control cable (1) from the bracket (2).
 Front
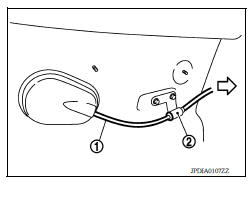
12. Remove the control cable from the vehicle.
13. Remove bracket.
INSTALLATION
Installation is in the reverse order of removal.
- From below the vehicle, press the grommet (A) into place until the pawls (B) make a click sound.
CAUTION: Check that pulling down on the grommet does not disconnect it.
- Pay attention to the following when connecting the control cable to the CVT shift selector.
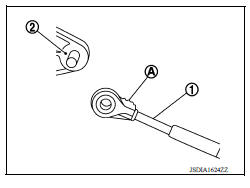
- When connecting the control cable (1) to the CVT shift selector assembly (2), face the grooved surface of the rib (A) up and insert the control cable until it stops.
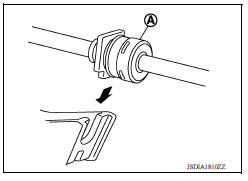
2. Install the socket (A) onto the CVT shift selector assembly.
CAUTION:
- Insert the socket into the CVT shift selector assembly, then push it firmly in place.
- Check that pulling on the socket does not disconnect it.
Inspection
INSPECTION AFTER INSTALLATION
Check the CVT position. If a malfunction is found, adjust the CVT position. Refer to TM "Inspection and Adjustment".
Was this page helpful?