Trunk rear plate
In this manual: Trunk rear plate
9steps
~54min
2/5difficulty
Done 0 of 9
TRUNK REAR PLATE : Removal and Installation
REMOVAL
- Fully open trunk lid.
- Remove trunk floor carpet.
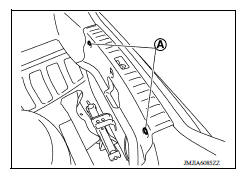
- Remove trunk rear plate clips (A).
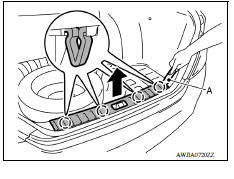
4. Release trunk rear plate pawls using a suitable tool (A) and remove trunk rear plate as shown.
INSTALLATION
Installation is in the reverse order of removal.
CAUTION: When installing trunk rear plate, make sure that clips are securely pressed into body holes.
TRUNK FRONT FINISHER
TRUNK FRONT FINISHER : Removal and Installation
REMOVAL
- Fully open trunk lid.
- Remove trunk floor carpet.
- Remove trunk front finisher clips (A) and trunk front finisher.

INSTALLATION
Installation is in the reverse order of removal.
CAUTION: When installing trunk front finisher, make sure that clips are securely pressed into body holes.
TRUNK SIDE FINISHER
TRUNK SIDE FINISHER : Removal and Installation
REMOVAL
- Remove trunk rear plate. Refer to INT "TRUNK REAR PLATE : Removal and Installation".
- Remove trunk front finisher. Refer to INT "TRUNK FRONT FINISHER : Removal and Installation".
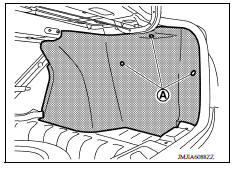
- Remove trunk side finisher clips (A) and trunk side finisher.
INSTALLATION
Installation is in the reverse order of removal.
CAUTION: Make sure the rear end of trunk side finisher is positioned behind the trunk weatherstrip.
Was this page helpful?