Alternator Removal and Installation
In this manual: Alternator Removal and Installation
2steps
~12min
1/5difficulty
Done 0 of 2
Removal/Installation
1. 12 Volt Battery Terminal - Disconnect
2. Drive Belt - Remove
3. Drive Belt Auto-Tensioner - Remove
4. A/C Condenser Fan Shroud Assembly - Remove
5. Connector and Positive Cable (Alternator) - Disconnect
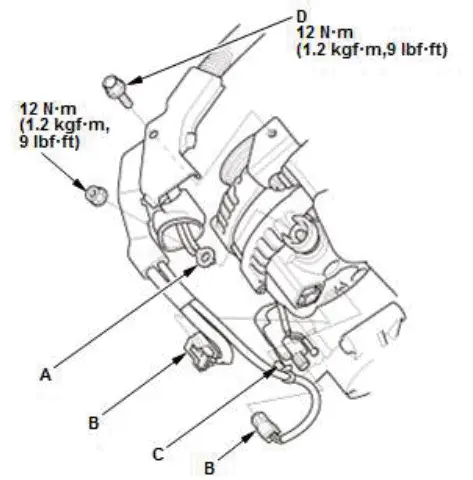
- Disconnect the positive cable (A) and the connectors (B).
- Remove the harness clip (C) and the bolt (D).
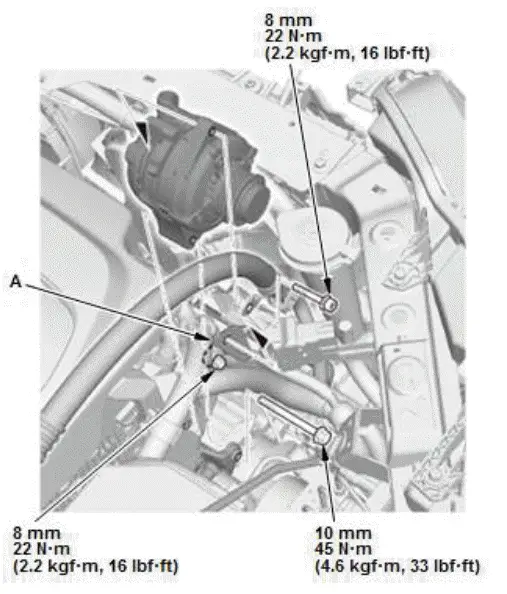
6. Alternator - Remove
NOTE: Remove the alternator bracket (A) as needed.
7. All Removed Parts - Install
- Install the parts in the reverse order of removal.
NOTE:
- If the alternator bracket is removed, install the alternator bracket.
- Make sure the crimped side of the ring terminal faces away from the alternator when you connect the positive cable.
Was this page helpful?