Front Damper/Spring Disassembly, Reassembly, and Inspection
In this manual: Front Damper/Spring Disassembly, Reassembly, and Inspection
14steps
~84min
3/5difficulty
Done 0 of 14
Disassembly
NOTE:
 Where icon is shown, click for further information.
- When compressing the damper spring, use a commercially available strut spring compressor according to the manufacturer's instructions.
- Check for deterioration and damage to each part during removal.
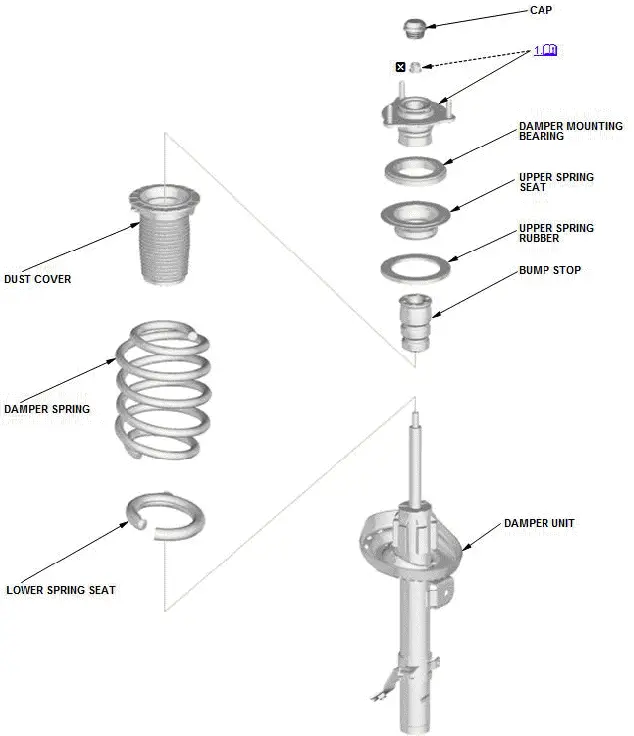
 Detailed information, notes, and precautions
 Torque: N-m (kgf-m, lbf-ft)
 Replace
1. Damper Mounting Base - Remove
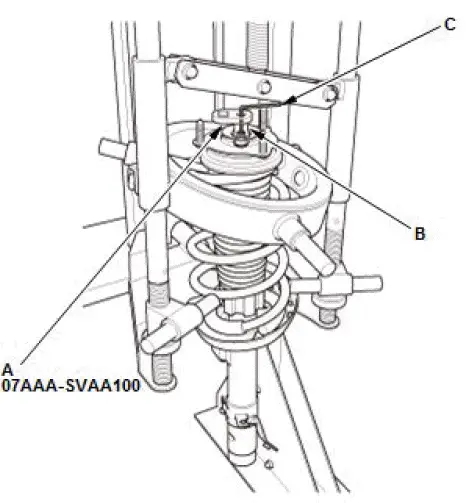
- Compress the damper spring.
NOTE: Do not compress the spring more than necessary to remove the nut.
- Remove the self-locking nut with the strut nut adapter (A) and 17 mm deep socket (B), while holding the damper shaft with a hex wrench (C).
- Release the pressure from the strut spring compressor.
Inspection
1. Damper/Spring - Inspect
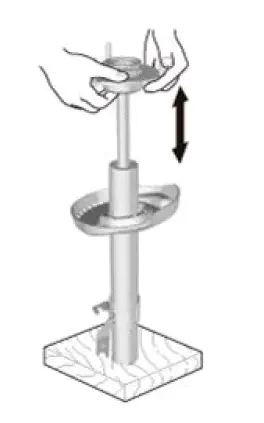
- Reassemble the damper mounting base and the self-locking nut.
- Compress the damper assembly by hand, and check for smooth operation through a full stroke, both compression and extension. The damper should extend smoothly and constantly when compression is released. If it does not, the gas is leaking and the damper should be replaced.
- Check for oil leaks, abnormal noises, or binding during these tests.
Reassembly
NOTE:
 Where icon is shown, click for further information.
- When compressing the damper spring, use a commercially available strut spring compressor according to the manufacturer's instructions.
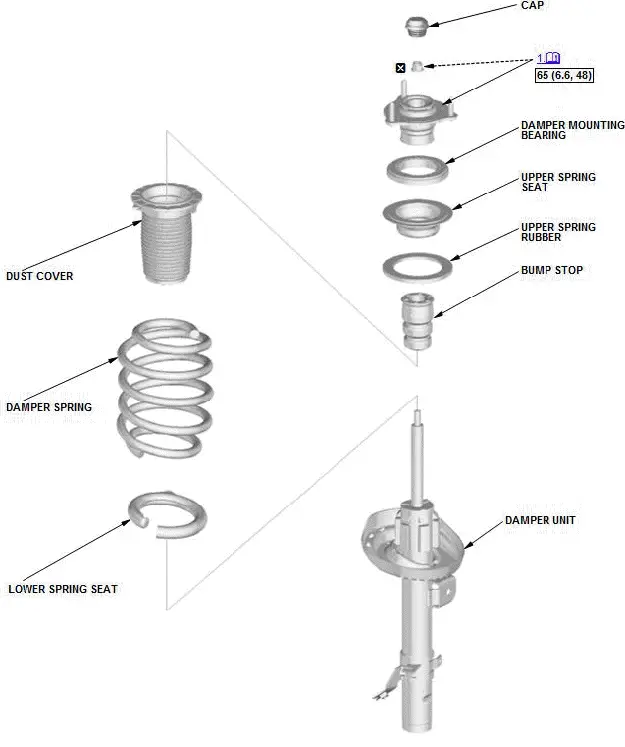
 Detailed information, notes, and precautions
 Torque: N-m (kgf-m, lbf-ft)
 Replace
1. Damper Mounting Base - Install
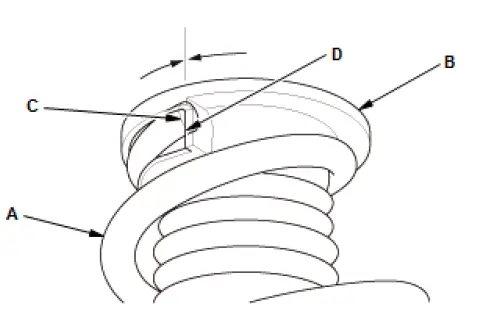
- Install the damper spring (A) on the dust cover (B) by aligning the upper end (C) of the damper spring with the ledge portion (D) of the dust cover.
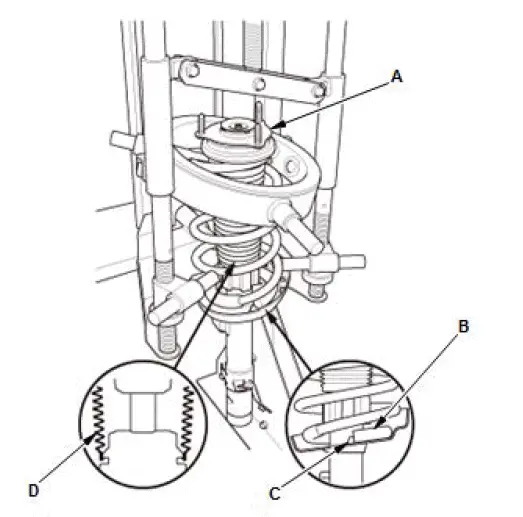
- Install all the parts except the self-locking nut and the cap onto the damper unit (A) by referring to the Exploded View.
- Align the bottom of the damper spring (B) and the stepped part of the lower spring seat (C) on the damper unit.
NOTE: After reassembling the damper/spring, install the dust cover (D) into the damper unit as shown.
- Compress the damper spring.
NOTE: Do not compress the spring excessively.
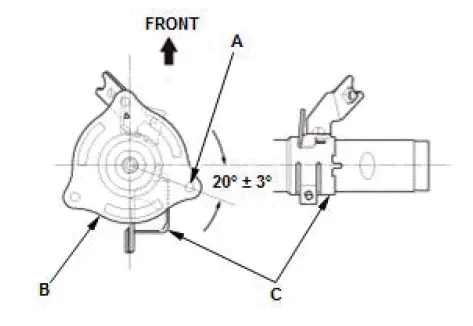
Left
Right
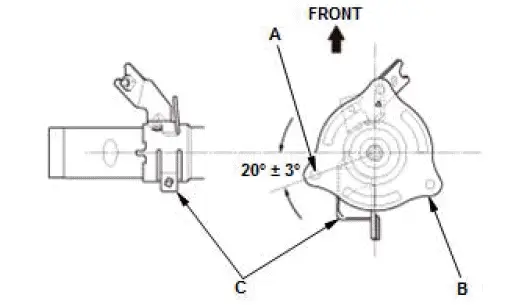
- Align the angle of the stud (A) on the damper mounting top (B) and the damper bracket (C) as shown.
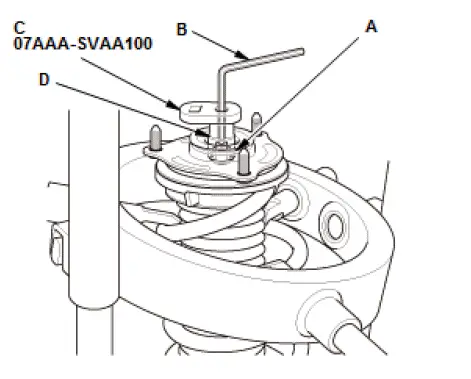
- Install the new self-locking nut (A).
- Hold the damper shaft using a hex wrench (B), and tighten the self-locking nut using the strut nut adapter (C) and a 17 mm deep socket (D) to the specified torque.
- Remove the damper/spring from the strut spring compressor.
Special Tool Required
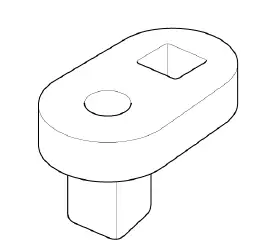
- Strut Nut Adapter 07AAA-SVAA100
Was this page helpful?