Front Power Window Motor Removal and Installation
In this manual: Front Power Window Motor Removal and Installation
2steps
~12min
1/5difficulty
Done 0 of 2
Removal/Installation
1. Front Door Regulator - Remove
2. Front Power Window Motor - Remove

- Remove the screws (A), using a TORX T25 bit.
- Remove the power window motor (B).
3. All Removed Parts - Install
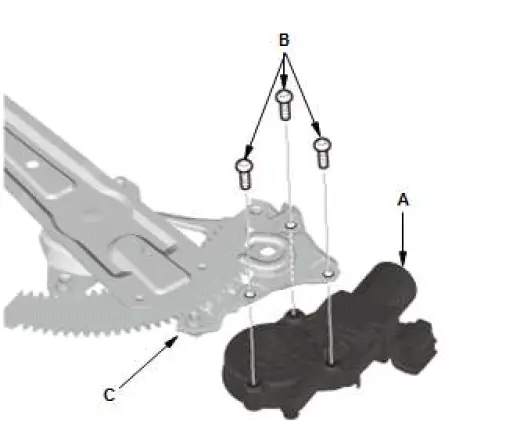
- Install the parts in the reverse order of removal, and note these items:
- Screw threads are not tapped into the new power window motor (A). Install the new motor as follows, using the self- tapping screws (B) provided.
- Install the power window motor onto the regulator (C) as shown, and tighten the screws until the screw head contacts with the linkage.
- Screw in the self-tapping screws, keeping them vertical.
- Do not use an air tool or impact wrench to install the screws.
- Use only the self-tapping screws provided with the motor.
Was this page helpful?