Starter Solenoid Test
In this manual: Starter Solenoid Test
3steps
~18min
2/5difficulty
Done 0 of 3
Test
1. 12 Volt Battery Terminal - Disconnect
2. Starter Solenoid - Test
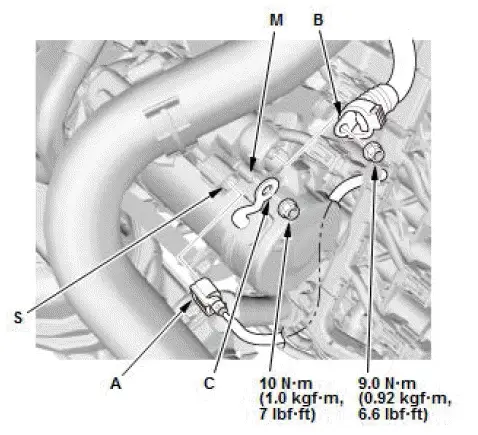
- Disconnect the connector (A), the positive cable (B), and the motor cable (C).
- Check the hold-in coil for continuity between the S terminal and the armature housing (ground). There should be continuity:
- If there is continuity, go to step 3.
- If there is no continuity, replace the solenoid.
- Check the pull-in coil for continuity between the S terminal and the M terminal. There should be continuity:
- If there is continuity, the solenoid is OK.
- If there is no continuity, replace the solenoid.
3. All Removed Parts - Install
- Install the parts in the reverse order of removal.
NOTE: Make sure the crimped side of the ring terminal faces away from the starter when you connect the positive cable.
Was this page helpful?