Wiper/Washer Switch Removal, Installation, and Test
In this manual: Wiper/Washer Switch Removal, Installation, and Test
5steps
~30min
2/5difficulty
Done 0 of 5
Removal/Installation
SRS components are located in this area. Review the SRS component locations and the precautions and procedures before doing repairs or service.
1. Column Cover - Remove
2. Wiper/Washer Switch - Remove
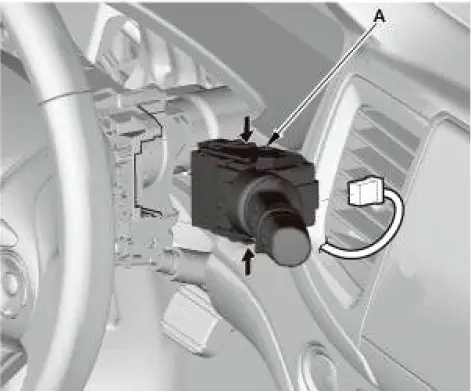
- Disconnect the connector.
- Remove the wiper/washer switch (A) by pushing the tabs.
3. All Removed Parts - Install
- Install the parts in the reverse order of removal.
Test
1. Wiper/Washer Switch - Test
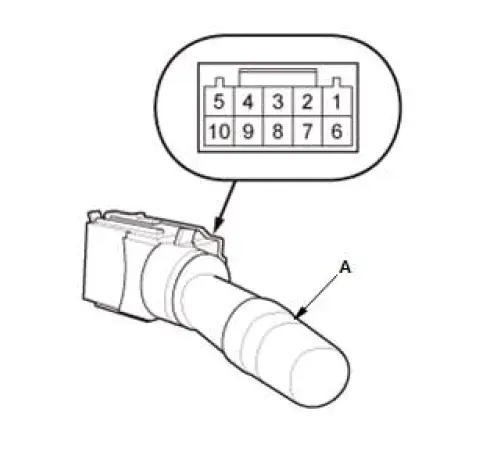
- Inspect the connector terminals to be sure they are all making good contact.
- If the terminals are bent, loose or corroded, repair them as necessary, and recheck the system.
- If the terminals are OK, go to step 2.
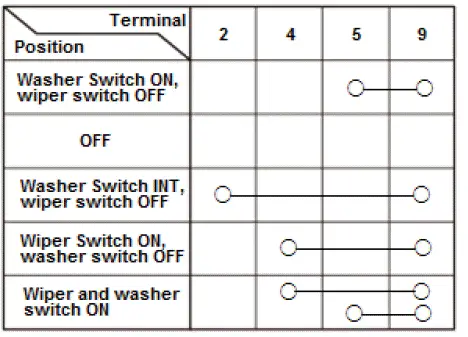
- Check for continuity between the terminals in each switch position according to the table.
- If the continuity is not as specified, replace the wiper/washer switch (A).
Windshield

Rear window
Wireless Headphone Battery Replacement
Replacement
1. Wireless Headphone Battery - Remove
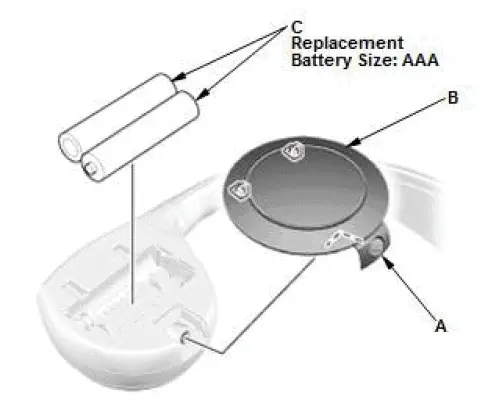
- Loosen the screw (A), then remove the battery cover (B) and the batteries (C).
2. Wireless Headphone Battery - Install
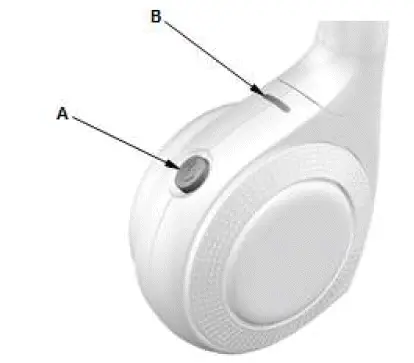
- Install a new batteries in the reverse order of removal.
NOTE:
- Press the power button (
 ) (A) to ON and confirm that the indicator (B) comes on after the battery is replaced.
- Install the new batteries as a set. Do not mix old batteries with the new ones.
- Press the power button (
Wireless Remote Control Battery Replacement
Replacement
1. Wireless Remote Control Battery - Remove

- Use a small coin to remove the cover and the batteries (A).
2. Wireless Remote Control Battery - Install
- Install a new batteries, then close the battery cover.
NOTE:
- Install the new batteries as a set. Do not mix old batteries with the new ones.
- Confirm that each operation works normally after replacing the batteries.
Was this page helpful?