Fuel Tank Guard Removal and Installation
In this manual: Fuel Tank Guard Removal and Installation
7steps
~42min
2/5difficulty
Done 0 of 7
Removal/Installation
1. Middle Floor Undercover - Remove
Remove the middle floor undercover as needed.
2. Fuel Tank Guard - Remove

3. All Removed Parts - Install
- Install the parts in the reverse order of removal.
Fuel Tank Removal and Installation
Removal/Installation
1. Fuel Pressure - Relieve
2. Fuel Tank - Drain
- Drain the fuel tank, then reinstall the fuel tank unit without connecting the fuel tank unit connector and the quick-connect fitting.
3. Middle Floor Undercover - Remove
4. Fuel Tank Guard - Remove
5. Exhaust Pipe and Muffler - Remove
6. Propeller Shaft - Remove (AWD model)
7. Rear Inner Fender (Left Side) - Remove
8. Center Crossmember - Remove
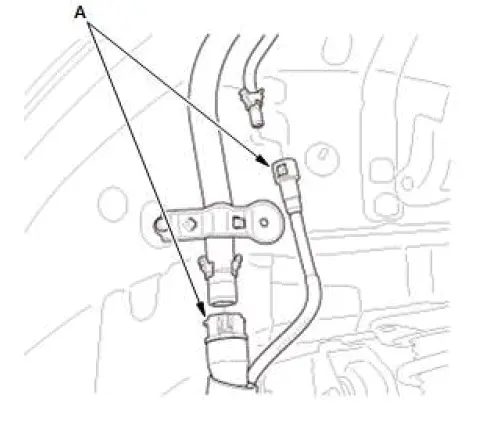
9. Fuel Fill Pipe - Disconnect
USA and Canada models
Mexico models

- USA and Canada models: Disconnect the quick-connect fitting (A).
- Mexico models: Disconnect the hose (B). When you disconnecting the hose, slide back the clamp, then twist the hose as you pull to avoid damaging it.
10.Fuel Tank Assembly - Remove
USA and Canada models
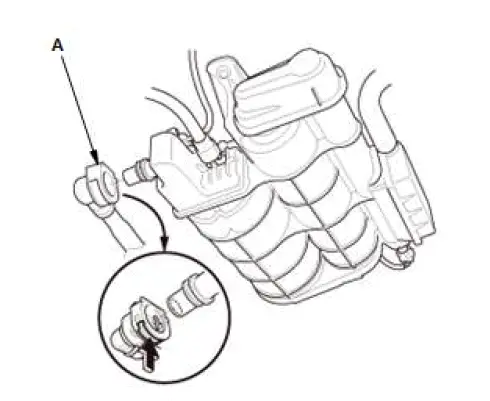
USA and Canada models
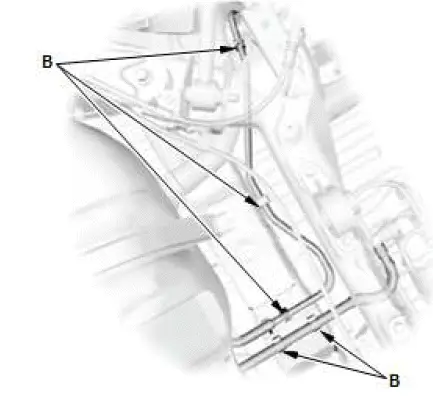
Mexico models

Mexico models

- Disconnect the fuel vapor hoses (A).
- Remove the clamps (B) from the frame.
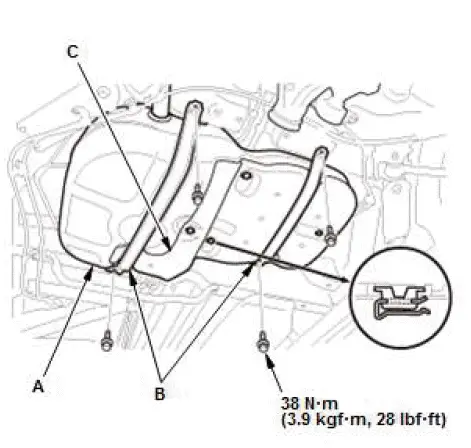
- Place a jack or other support under the fuel tank (A).
- Remove the straps (B) and the fuel tank carefully.
- Remove the fuel tank protector (C) from the fuel tank.
11.All Removed Parts - Install

- Install the parts in the reverse order of removal.
Was this page helpful?