Timing Belt Adjuster Removal and Installation
Removal/Installation
1. Timing Belt Auto-Tensioner - Remove
2. Timing Belt Adjuster and Collar - Remove
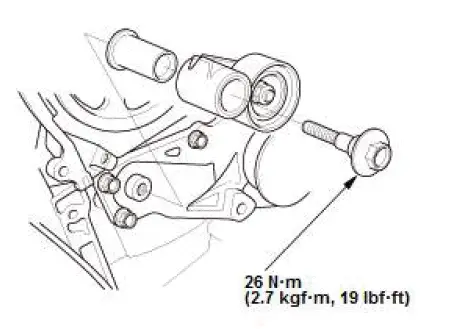
3. All Removed Parts - Install
- Install the parts in the reverse order of removal.
Timing Belt Auto-Tensioner Removal and Installation
Removal
1. Timing Belt - Remove
2. Battery Clamp Bolt - Remove
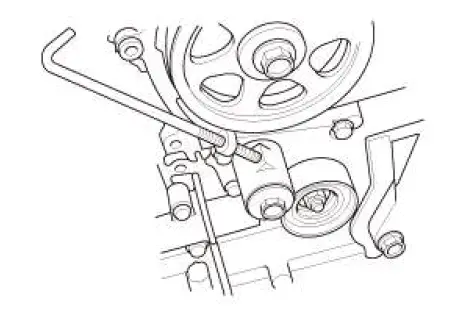
3. Timing Belt Auto-Tensioner - Remove

Installation
NOTE: Clean the timing belt pulleys, the timing belt guide plate, and the upper and lower covers.
1. Timing Belt Auto-Tensioner - Install

- Align the holes on the rod and the housing of the timing belt auto-tensioner.
- Use a hydraulic press to slowly compress the timing belt auto-tensioner. Insert a 2.0 mm (5/64 in) pin through the housing and the rod.
NOTE: The compression pressure should not exceed 980 N (99.9 kgf, 220.3 lbf).
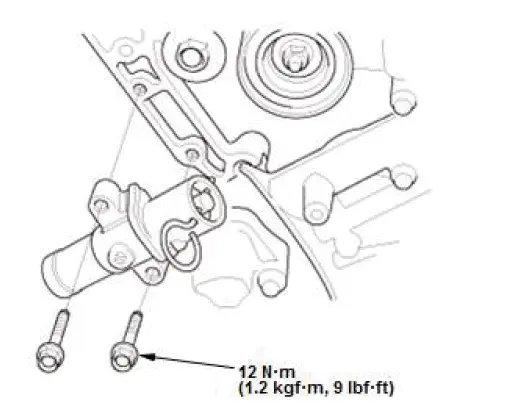
- Install the timing belt auto-tensioner.
NOTE: Make sure the pin stays in place.
2. Timing Belt Adjuster - Hold
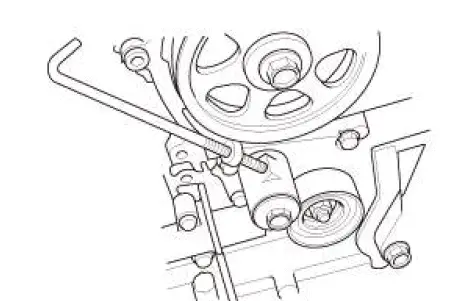
- Thread the battery clamp bolt in as shown to hold the timing belt adjuster in its current position. Tighten it by hand, do not use a wrench.
3. Timing Belt - Install
NOTE: Just before removing the battery clamp bolt, remove the pin from the timing belt auto-tensioner.
Timing Belt Drive Pulley Removal and Installation
Removal/Installation
1. Timing Belt - Remove
2. Timing Belt Drive Pulley and Key - Remove
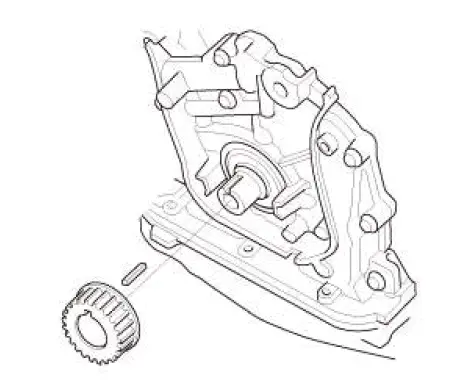
3. All Removed Parts - Install
- Install the parts in the reverse order of removal.
NOTE: Inspect the timing belt drive pulley and the key for damage. If it is cracked or damaged, replace the timing belt drive pulley and the key.