Front Lower Arm Compliance Bush Removal and Installation
In this manual: Front Lower Arm Compliance Bush Removal and Installation
8steps
~48min
2/5difficulty
Done 0 of 8
Removal
1. Vehicle - Lift
2. Front Wheel - Remove
3. Lower Arm - Remove
4. Lower Arm Bushing - Remove
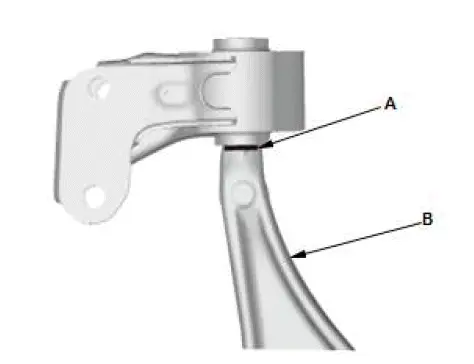
- Make reference mark (A) on the lower arm (B) using paint marker.
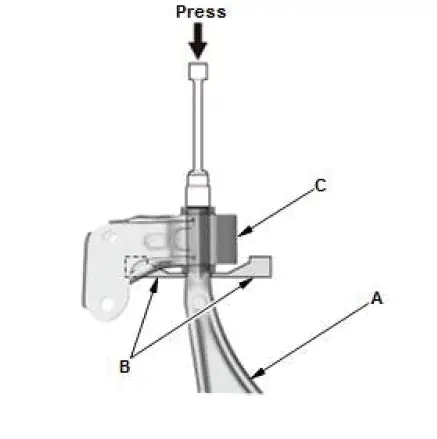
- Support the lower arm (A) on commercially available bearing separator (B) as shown.
- Press out the lower arm with a suitable socket and a hydraulic press, and remove the lower arm from the bushing (C).
NOTE: Be careful not to damage the inside of the bushing hole when pressing on the bushing.
Installation
1. Front Lower Arm Bushing - Install
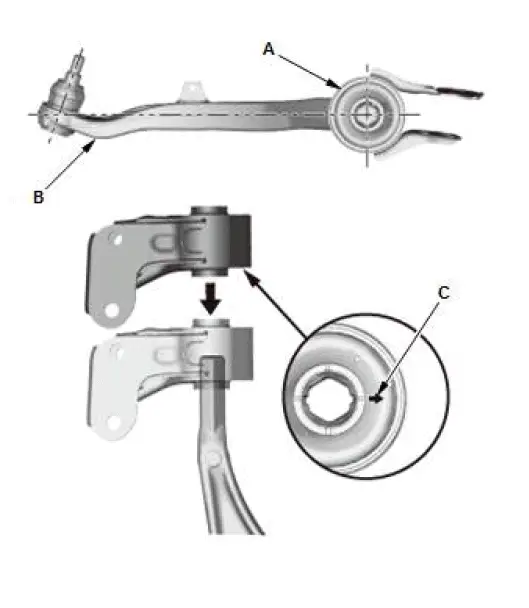
- Clean the mating surfaces of a new bushing (A) and the lower arm (B).
- Align the arrow mark (C) as shown.
NOTE: Make sure the up/down direction of the bushing.
- Press in the bushing by hand first.
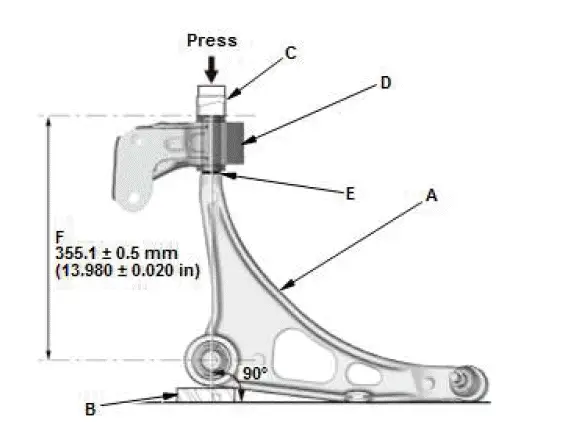
- Support the lower arm (A) with a appropriate wood block (B) as shown.
- Using a suitably sized socket (C) and a hydraulic press, press in the bushing (D) to the reference mark (E) on the lower arm you made during the removal procedure.
NOTE: If the reference mark is gone, align the length (F) between the lower arm and the bushing as shown.
2. Lower Arm - Install
3. Front Wheel - Install
Was this page helpful?