Front Door Lower Trim Removal and Installation
In this manual: Front Door Lower Trim Removal and Installation
7steps
~42min
2/5difficulty
Done 0 of 7
Removal
1. Front Door Lower Trim - Remove
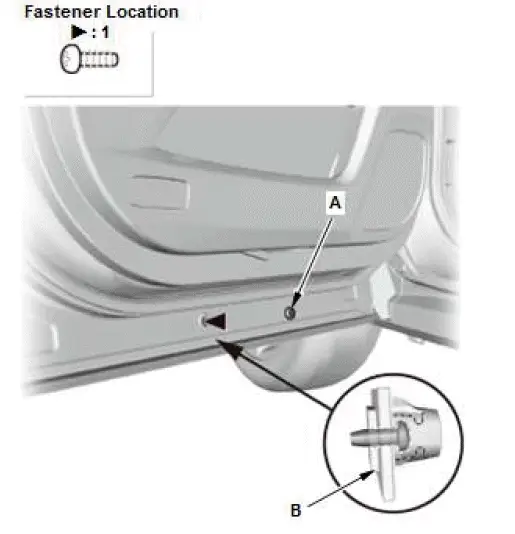
- Remove the cap (A), and then loosen the screw.
NOTE: The screw will stay in the clip (B).
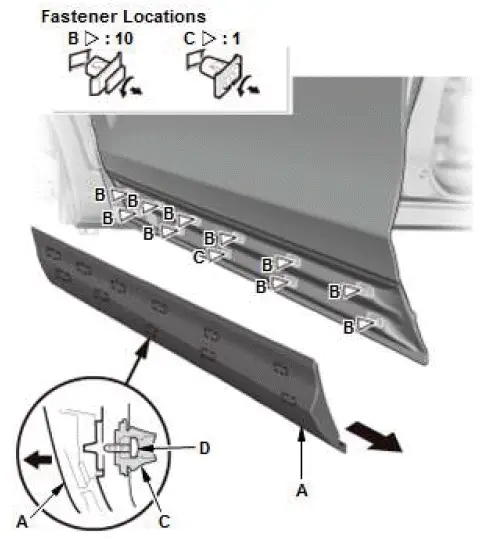
- Slide the door lower trim (A) backward and remove it.
NOTE:
- The clips (B, C) will stay in the door.
- Be careful not to break the clip (C) and the screw (D) when removing the door lower trim as shown.
- Remove the clips by turning them 45º.
Installation
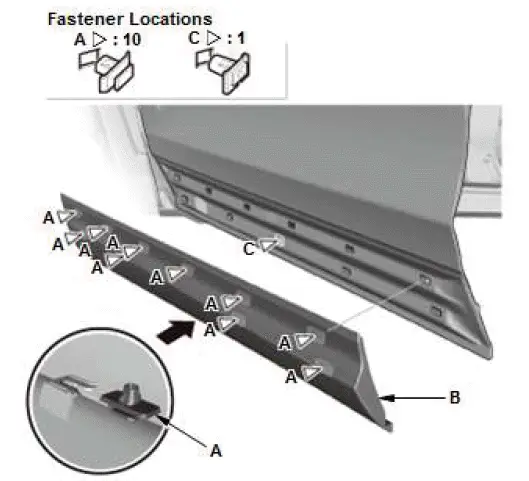
- Install the clips (A) on the door lower trim (B).
- Install the clip (C) on the door panel.
- Hold the trim up, and fit all the clips into the holes in the door panel. Push on the trim until the clips snap into place.
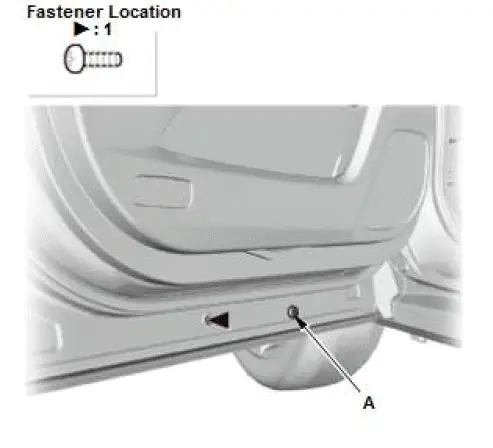
- Tighten the screw, and then install the cap (A).
Was this page helpful?