Humidity/In-Car Temperature Sensor Removal, Installation, and Test
In this manual: Humidity/In-Car Temperature Sensor Removal, Installation, and Test
6steps
~36min
2/5difficulty
Done 0 of 6
Removal/Installation
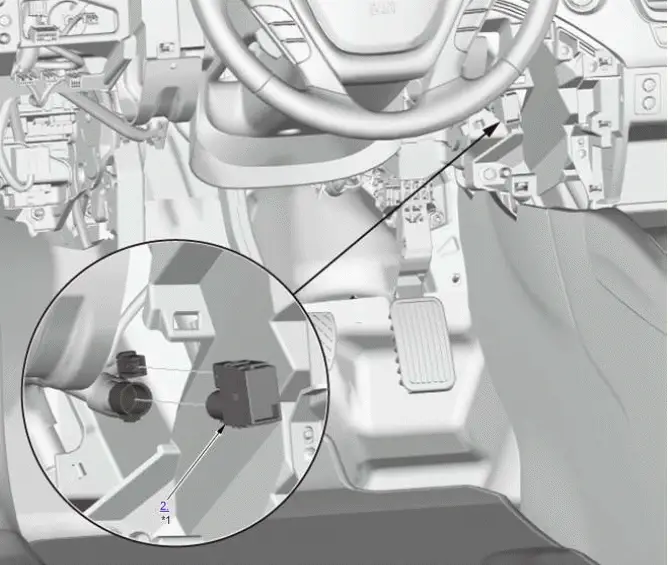
*1: Test item
1. Driver's Dashboard Lower Cover - Remove
2. Humidity/In-Car Temperature Sensor - Remove
3. All Removed Parts - Install
- Install the parts in the reverse order of removal.
Test
NOTE: Before testing the sensor, check for climate control DTCs.
Humidity Sensor
1. Humidity Sensor - Test
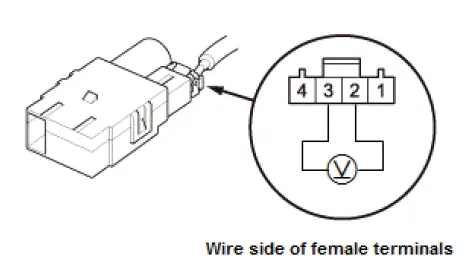
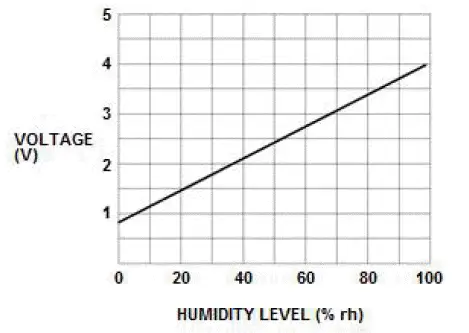
- Connect the humidity/in-car temperature sensor connector.
- Turn the vehicle to the ON mode.
- Measure the voltage between terminals with the (+) probe on terminal No. 3 and the (-) probe on terminal No. 2 with the connector connected.
- If the voltage is not as specified, replace the humidity/in-car temperature sensor.
In-Car Temperature Sensor
1. In-Car Temperature Sensor - Test
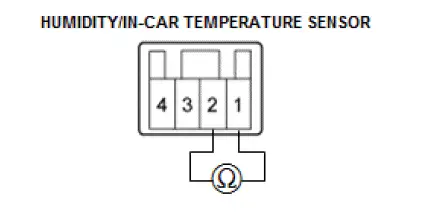

- Test the in-car temperature sensor while holding it in front of the dashboard center vent.
- Measure the resistance with the system set to MAX COOL.
- Measure the resistance with the system set to MAX HOT.
- Compare the resistance readings with the specifications shown in the graph, the resistance should be within the specifications.
- If the resistance is not as specified, replace the humidity/in- car temperature sensor.
Was this page helpful?