Front Passenger's Airbag Cutoff Indicator Removal and Installation
Removal/Installation
SRS components are located in this area. Review the SRS component locations and the precautions and procedures before doing repairs or service.
1. 12 Volt Battery Terminal - Disconnect
NOTE: Wait at least 3 minutes before starting work.
2. Front Passenger's Airbag Cutoff Indicator - Remove
3. All Removed Parts - Install
- Install the all removed parts in the reverse order of removal.
4. SRS Operation - Confirm
- Do the 12 volt battery terminal reconnection procedure, turn the vehicle to the ON mode, and check that the SRS indicator comes on for about 6 seconds and then goes off.
Front Passenger's Airbag Removal and Installation
Removal
SRS components are located in this area. Review the SRS component locations and the precautions and procedures before doing repairs or service.
NOTE: If replacing the front passenger's airbag after deployment, refer to Component Replacement/Inspection After Deployment for a complete list of other parts that must also be replaced.
Removal Before the Front Passenger's Airbag Deployment
1. 12 Volt Battery Terminal - Disconnect
NOTE: Wait at least 3 minutes before starting work.
2. Glove Box - Remove
3. Keyless Access/TPMS Control Unit - Remove
4. ANC/Active Sound Control Unit - Remove
5. Blower Unit - Remove
6. Front Passenger's Airbag - Remove
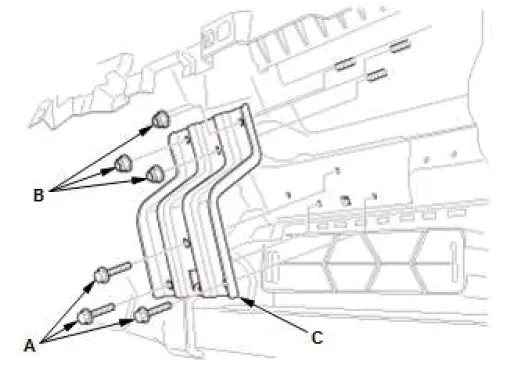
- Remove the bolts (A) and the nuts (B), then remove the bracket (C).
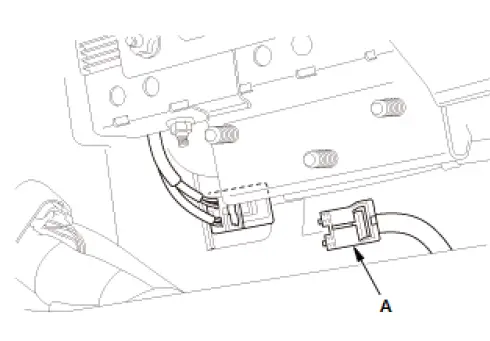
- Disconnect the connector (A).

- Remove the nuts (A).
- Release the hooks (B) of the hook plate (C), then remove the hook plate.
- Release the hooks (D) of the front passenger's airbag (E), then remove front passenger's airbag.
NOTE:
- Take care not to damage the front passenger's airbag housing holes of the dashboard.
- Take care not to damage the front passenger's airbag.
Removal After the Front Passenger's Airbag Deployment
1. 12 Volt Battery Terminal - Disconnect
NOTE: Wait at least 3 minutes before starting work.
2. Glove Box - Remove
3. ANC/Active Sound Control Unit - Remove
4. Front Passenger's Airbag Inflator Connector - Disconnect
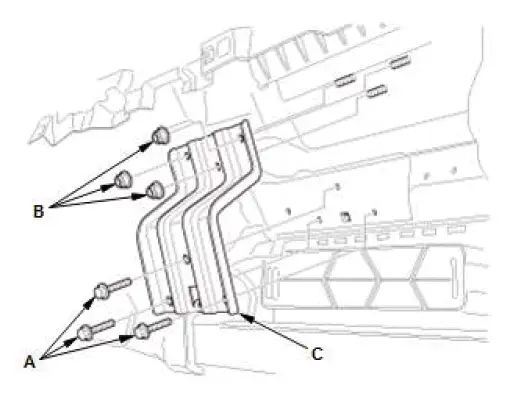
- Remove the bolts (A) and the nuts (B), then remove the bracket (C).
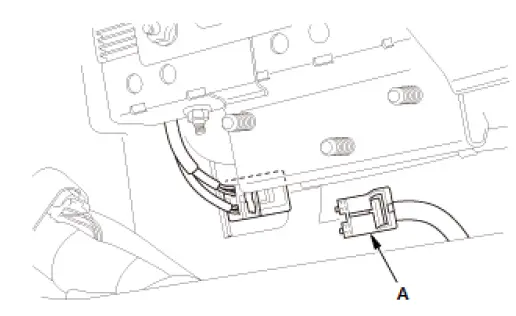
- Disconnect the connector (A).
5. Front Passenger's Airbag/Dashboard - Remove
Installation
SRS components are located in this area. Review the SRS component locations and the precautions and procedures before doing repairs or service.
Installation Before the Front Passenger's Airbag Deployment
1. Front Passenger's Airbag - Install
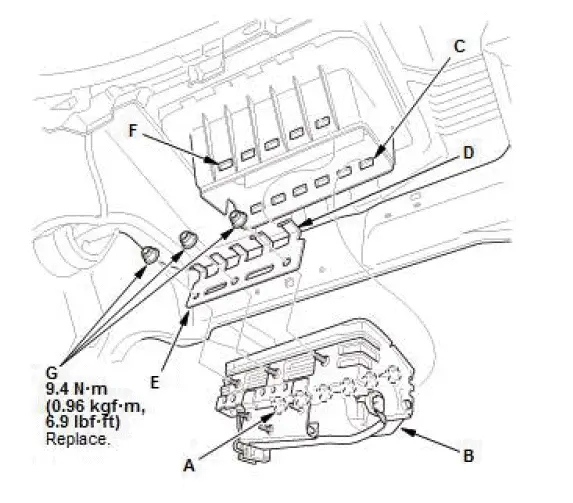
- Insert the hooks (A) of the front passenger's airbag (B) into the housing holes (C).
NOTE:
- Make sure there are no objects between the airbag and the dashboard.
- Make sure the airbag is fully seated, and make sure the dashboard is not deformed or damaged after the airbag is in place.
- Make sure the hooks are set properly.
- Insert the hooks (D) of the hook plate (E) into the housing holes (F), then tighten the new nuts (G).
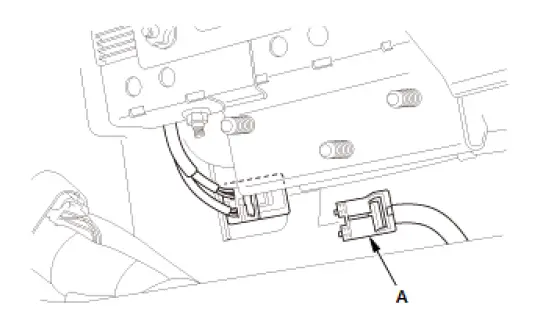
- Connect the connector (A).
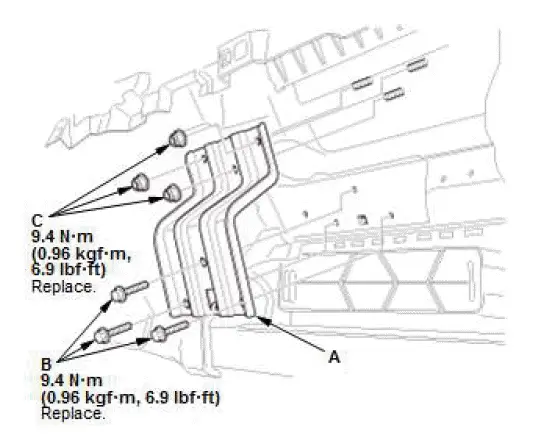
- Insert the bracket (A), then tighten the bolts (B) and the nuts (C).
- Do the 12 volt battery terminal reconnection procedure, turn the vehicle to the ON mode, and check that the SRS indicator comes on for about 6 seconds and then goes off.
2. Blower Unit - Install
3. ANC/Active Sound Control Unit - Install
4. Keyless Access/TPMS Control Unit - Install
5. Glove Box - Install
Installation After the Front Passenger's Airbag Deployment
1. Front Passenger's Airbag - Install

NOTE: If the hook plate (A) is secured to the front passenger's airbag (B), remove the hook plate from the front passenger's airbag.
- Insert the hooks (C) of the front passenger's airbag into the housing holes (D), then insert the hooks (E) of the hook plate into the housing holes (F).
NOTE:
- Make sure there are no objects between the airbag and the dashboard.
- Make sure the airbag is fully seated, and make sure the dashboard is not deformed or damaged after the airbag is in place.
- Make sure the hooks are set properly.
- Tighten the new nuts (G).
2. Front Passenger's Airbag/Dashboard - Install
3. Front Passenger's Airbag Inflator Connector - Connect
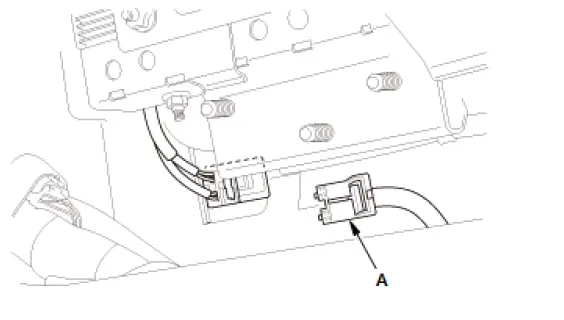
- Connect the connector (A).
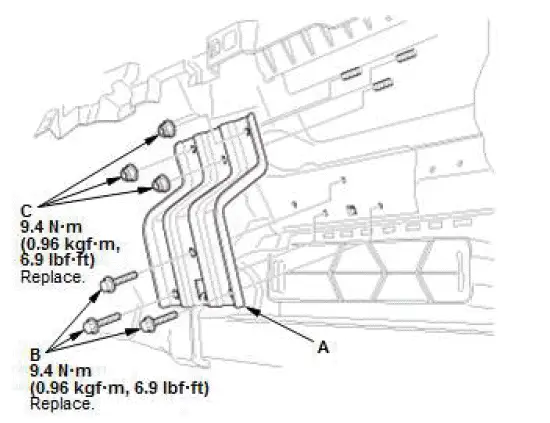
- Insert the bracket (A), then tighten the bolts (B) and the nuts (C).
4. SRS Operation - Confirm
- Do the 12 volt battery terminal reconnection procedure, turn the vehicle to the ON mode, and check that the SRS indicator comes on for about 6 seconds and then goes off.
5. ANC/Active Sound Control Unit - Install
6. Glove Box - Install