i-VTM Control Unit Removal and Installation
In this manual: i-VTM Control Unit Removal and Installation
5steps
~30min
2/5difficulty
Done 0 of 5
Removal
1. Rear Left Side Trim Panel - Remove
2. i-VTM Control Unit - Remove
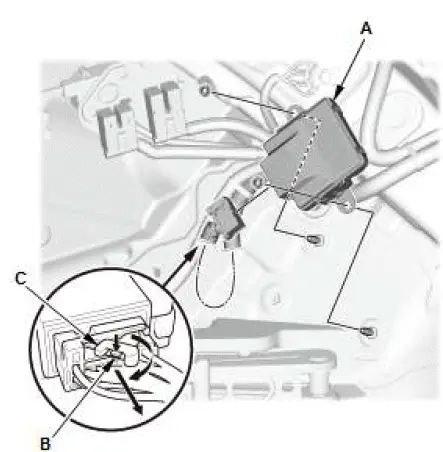
- Remove the i-VTM control unit (A).
- Disconnect the connector by pushing the lock (B) and pulling up the lever (C); the connector disconnects itself.
Installation
1. i-VTM Control Unit - Install

- Align the connecting surface of the connector (A).
- Pull down the lever (B) of the connector, then confirm the connector is fully seated.
- Install the i-VTM control unit (C).
2. Rear Left Side Trim Panel - Install
Procedure After Replacing i-VTM Control Unit
3. i-VTM Control Unit - Initialize
NOTE: The i-VTM control unit must be initialized after replacement, otherwise the i-VTM system will not function.
4. Yaw Rate-Lateral/Longitudinal Acceleration Sensor - Learn
i-VTM Relay Removal and Installation
Removal/Installation
1. Tailgate maintenance lid - Remove
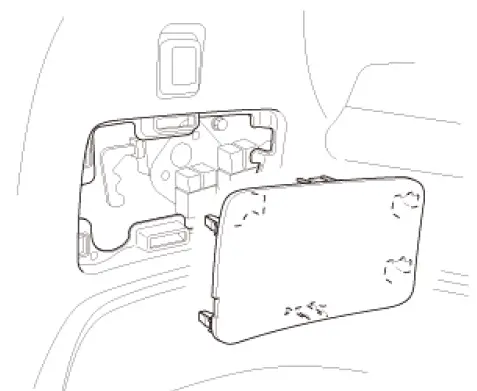
2. i-VTM Relay - Remove
Without Second Row Seat One-Touch Access
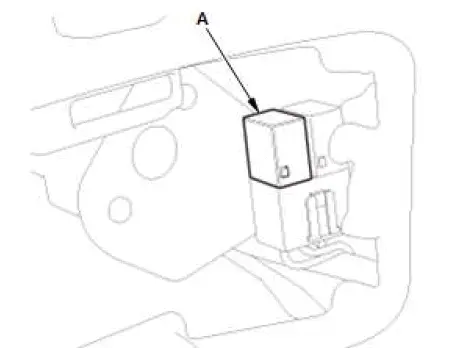
With Second Row Seat One-Touch Access

- Remove the i-VTM relay (A).
3. All Removed Parts - Install
- Install the parts in the reverse order of removal.
Was this page helpful?